
A Comprehensive Guide to Gain Staging, Recording, Mixing, and Mastering Levels for Classical Guitarists, Part II
Part II - Mixing & Mastering Levels
Embarking on the musical voyage of recording classical guitar involves numerous steps, each with its own significance. We've previously explored gain staging and setting recording levels - fundamental processes that lay the groundwork for a pristine, high-quality recording. Our focus now turns to two intricate yet essential aspects: setting the mixing and mastering levels correctly.
The mixing phase is where we ensure each microphone used in capturing the performance is balanced and clear, contributing to a rich and harmonious soundstage. Following this, we dive into mastering - the final step that optimizes the recording's levels and tonal balance for various playback systems and streaming platforms.
In Part II of this series, we'll delve deep into the processes of mixing and mastering levels, providing insights to help you polish your classical guitar recordings to their fullest potential.
Mixing Levels
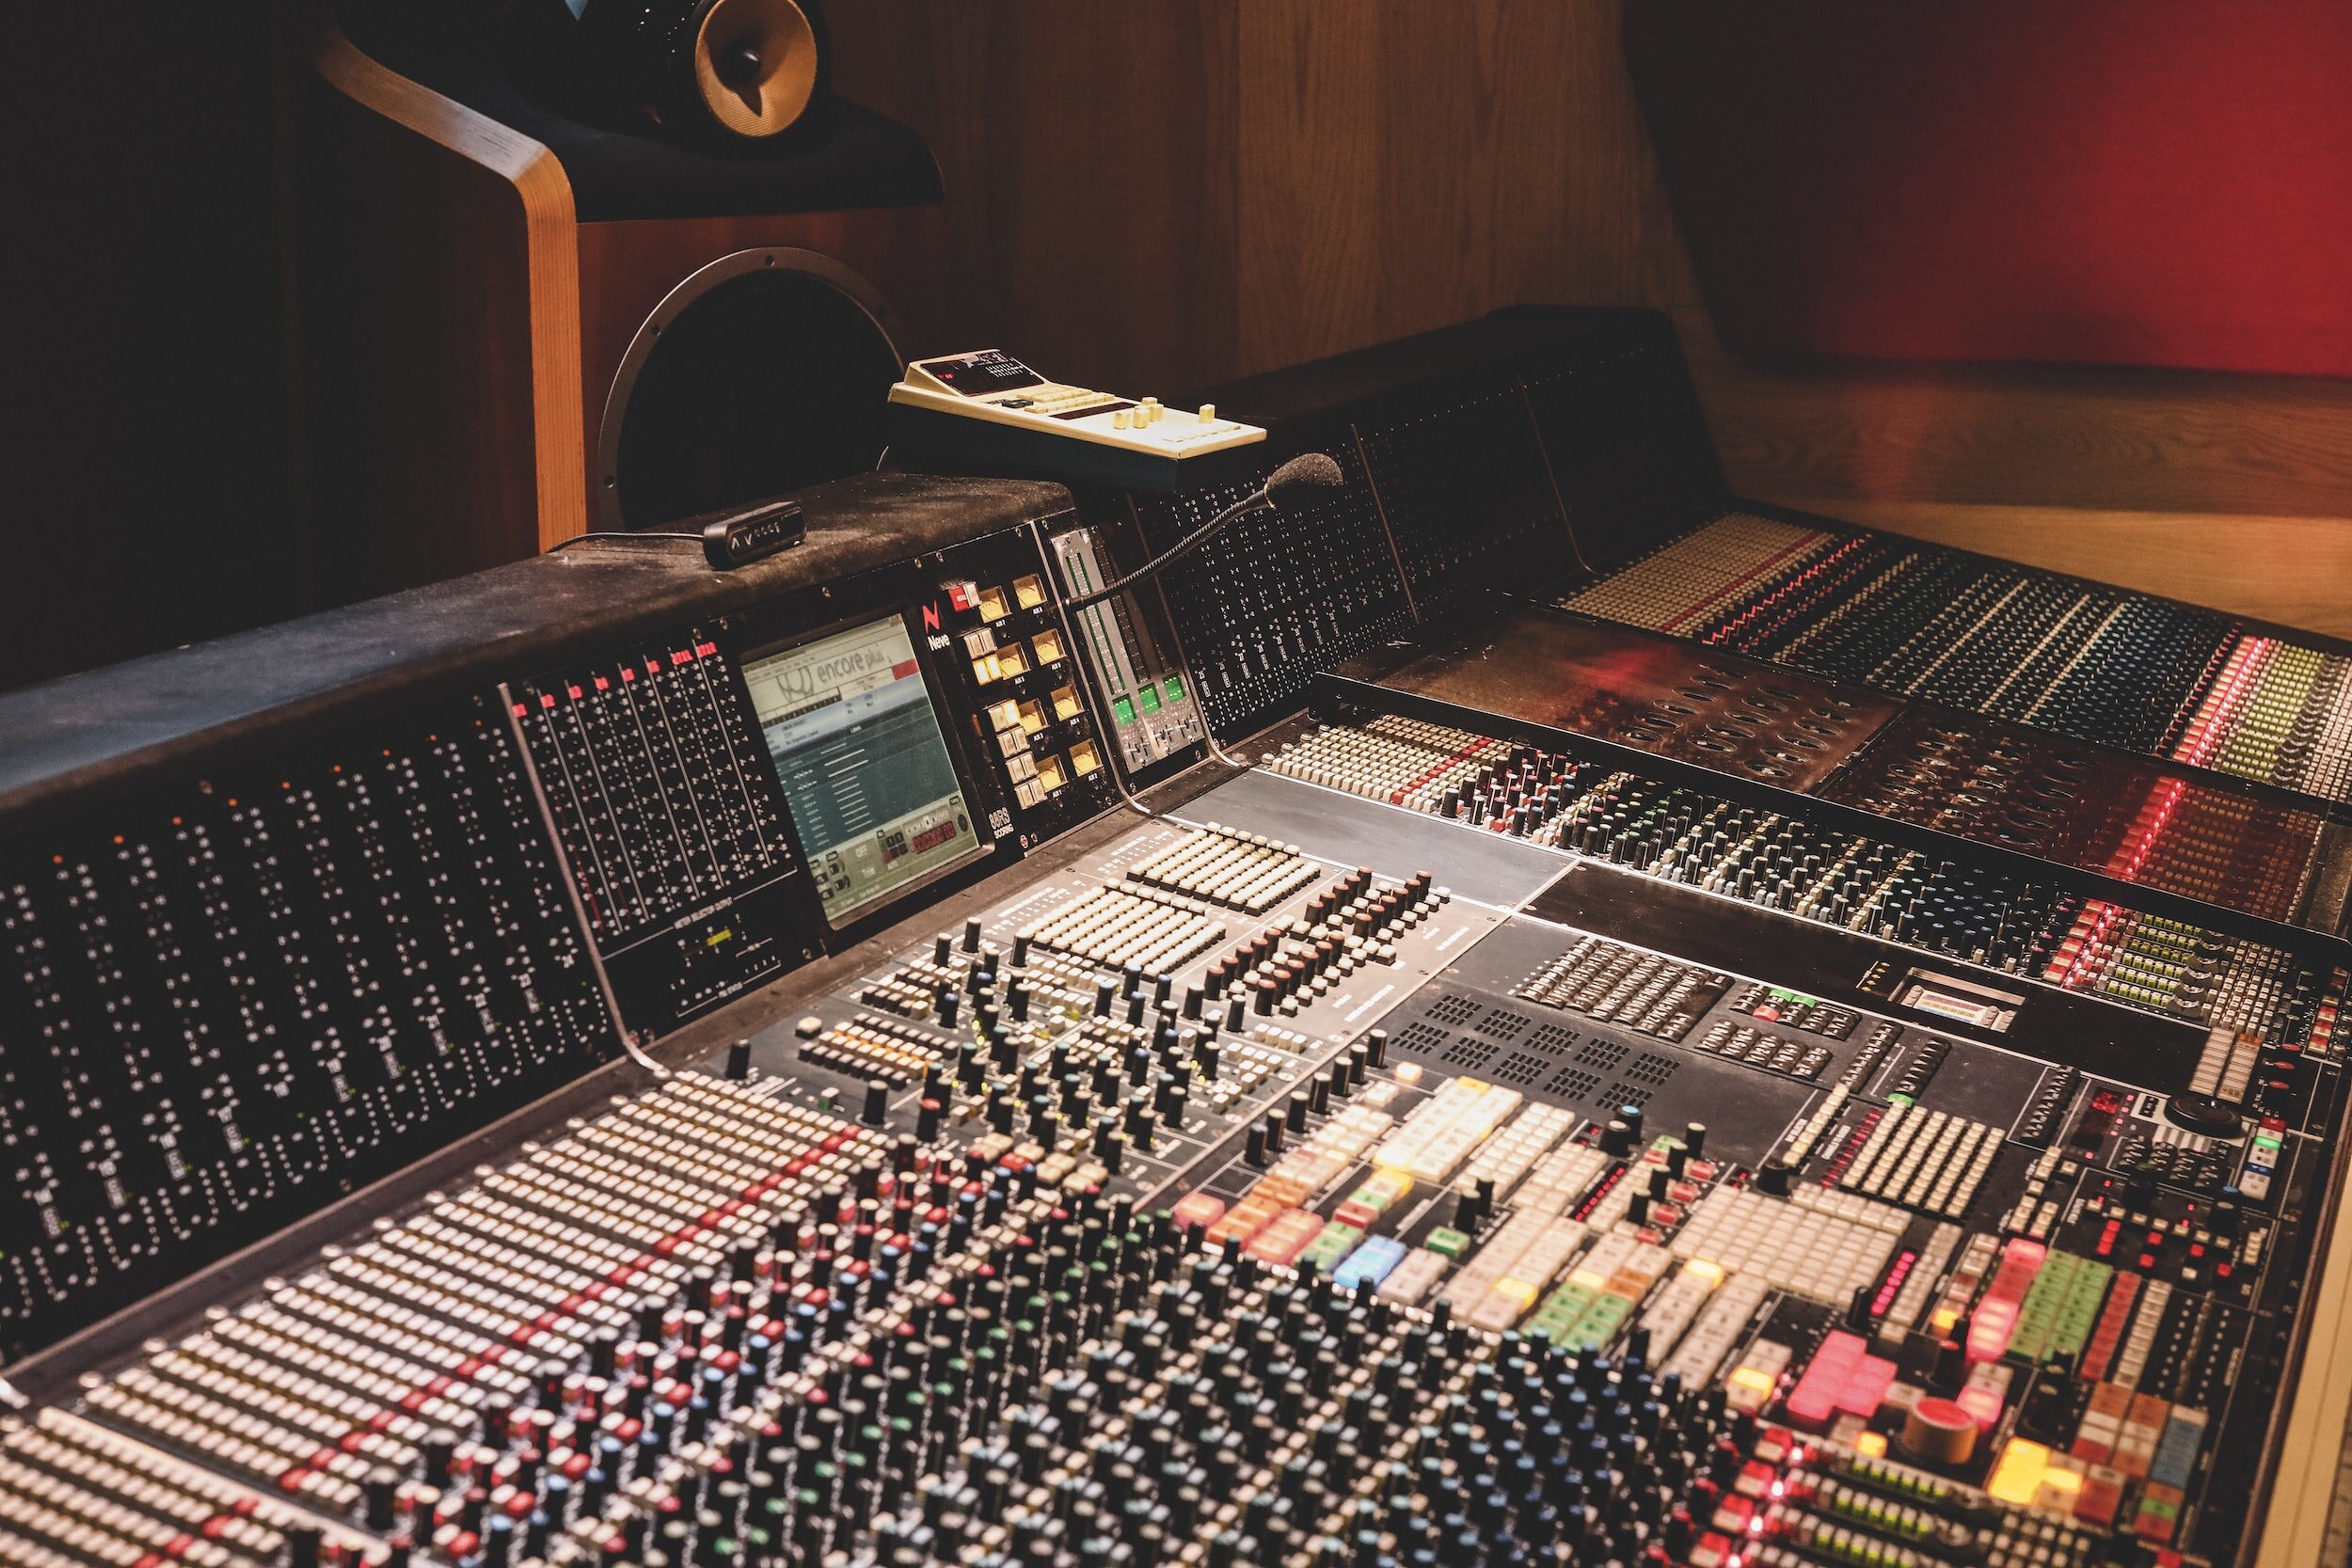
In the mixing stage, we blend and balance the individual elements of our recording. This stage is critical in ensuring the complete richness of the guitar is captured, with no aspect dominating the others. This balancing act becomes especially crucial when recording classical guitar, where we often employ multiple microphones to capture a comprehensive sonic image of the instrument.
Balancing the Multiple Microphones
During my recording sessions, I often employ multiple microphones, each positioned at different locations to capture a broad spectrum of the guitar's tonality. Each microphone contributes a unique facet to the overall sound, and blending these distinctive 'voices' is key to creating a robust and rich recording.
When using the AB Stereo technique, I often process both microphones together, maintaining the natural balance they create. However, it's not uncommon that I might apply additional EQ or other treatments to each microphone separately, if there is a problem that stands out.

M/S Stereo with Neumann TLM 193 & 170, each microphone gets different treatment
For more complex microphone arrays, I apply thorough care to each microphone, treating each channel individually. This might involve applying EQ adjustments or other processing to each track separately, to ensure they blend harmoniously together. For a classical guitar, I aim for a mix level of around -18 dBFS, with peaks no higher than -6 dBFS.
It's crucial to monitor each channel's levels, ensuring that none are too loud or overdriven. This helps prevent potential distortion and maintains the integrity of the recording, leading to a balanced and natural-sounding result.
Using Reference Tracks to Maintain Perspective
Working extensively on my mixes sometimes makes me overly familiar with the material, leading to a potential loss of objectivity. To counter this, I utilize reference tracks. These are, essentially, sonic benchmarks that guide me in crafting the depth, presence, and dynamic contrast of my guitar recordings. My advice is to make a list of your favourite-sounding classical guitar recordings and occasionally compare them to your mix.
While the aim is not to mimic these references, juxtaposing my mix with these standards helps regain perspective and fosters fresh insights. This practice ensures that my recordings can confidently stand alongside commercially produced tracks, adding an invaluable layer of quality control to the mixing process.
Preserving the Dynamics: Taming Peaks Without Sacrificing Expressiveness
Classical guitar draws much of its expressive power from subtle variations in loudness and intensity. To honour this characteristic, I strive to preserve the instrument's natural dynamic range as much as possible in my mixes, generally avoiding the use of compression, which can flatten these dynamics and yield an unnatural sound.
In some cases, however, a track may have rogue peaks that cause distortion. To prevent this, I turn to a limiter, specifically the FabFilter Pro-L2. This limiter tactfully reins in these peaks, maintaining the overall dynamic shape of the performance without introducing the potential adverse effects of compression.

High-quality studio monitors for accurate listening
There are exceptions, of course. If I'm faced with a subpar recording that needs salvaging, or if the classical guitar is part of an ensemble mix, I might cautiously introduce compression to help the guitar find its place among the other instruments. But for solo classical guitar recordings, my preference is always to allow the instrument's natural dynamics breath. The true beauty of the classical guitar, after all, resides in its subtleties and nuances.
Mastering Levels: The Final Adjustments to Your Classical Guitar Recording
Mastering is the last but certainly not the least important stage in music production. It's in this phase that we delicately adjust the overall levels and tonal balance of the mix, making sure it's polished and cohesive for listeners. In classical guitar recordings, mastering's primary goals are to ensure that the recording sounds its best across various playback systems and to prepare it for distribution on streaming platforms. While mastering doesn't drastically transform the recording, it refines it, solidifying its sonic integrity and ensuring it's ready for the world to hear.
Deciphering LUFS for Consistent Perceived Loudness
A significant aspect of mastering is understanding and correctly using LUFS, or Loudness Units relative to Full Scale. Unlike Peak or RMS levels, which measure the absolute values of audio signals, LUFS take into account the human perception of loudness. In other words, they measure loudness as our ears perceive it.
This is based on the fact that human hearing is frequency-dependent. We are more sensitive to some frequencies compared to others, especially in the mid-range. LUFS measurements integrate these psychoacoustic principles, providing a more accurate measure of perceived loudness. This ensures recorded music retains its intended impact, regardless of the playback scenario, providing consistency across different platforms and distribution methods.

Youlean Loudness Meter is an essential tool
A reliable loudness meter is a vital tool for effective mastering. My choice is the Youlean Loudness Meter, a free tool that's become an invaluable asset in my mastering toolkit as it provides accurate LUFS measurements, peak levels, and true peak readings, all crucial for mastering.
The Youlean Loudness Meter also gives us the ability to monitor the loudness over time, providing a clear, visual representation of the dynamic range throughout our recording. This information is crucial when making adjustments during mastering.
Aiming for Optimal Loudness
Mastering is not about winning a loudness war. Instead, it's about achieving a comfortable and consistent listening level that provides an enjoyable experience across various listening scenarios. I typically aim for a loudness level of -14 LUFS. In addition, I ensure that my recordings remain below -1dB True Peak. This practice avoids potential clipping and distortion, preserving the natural dynamics and integrity of the recording.
Striking the Right Tone, One Level at a Time
The journey towards a professional-sounding classical guitar recording is a meticulous one. It calls for a keen eye (and ear) at every stage of the process, from capturing a clean signal, through balancing your recording and mixing levels, to the final act of polishing your track through mastering.
But it not just about mastering the technicalities. It's a delicate dance between the science of sound and the artistry of music. We're not simply chasing perfect readings on a meter. Our true pursuit is to transpose the nuances, emotions, and soul of the performance into a recording that touches the heart of the listener.

A Comprehensive Guide to Gain Staging, Recording, Mixing, and Mastering Levels for Classical Guitarists
Part I - Gain Staging & Recording Recording
As we, classical guitarists, have ventured into the world of recording, we've faced the intriguing challenge of capturing our instrument's perfect sound. After meticulously learning about different microphones, mastering the art of microphone arrays, and optimizing our room for the ideal recording tone, we often feel ready to immortalize our masterpiece. Yet, beneath this readiness lies a vast universe of elements that we need to fine-tune to achieve an optimal recording. Among these, understanding gain staging, recording levels, mixing, and mastering levels is crucial.
While there's a plethora of information available on the internet, it can often feel like trying to find our way through an intricate maze, riddled with confusing technical jargon and conflicting advice. In light of this, I've decided to consolidate my personal insights, specific tips, and favorite tools into this comprehensive guide. My aim is to shed some light on these crucial aspects and assist you in capturing and polishing your classical guitar recordings to perfection.
dB Trivia
But first, we have to familiarize ourselves with decibels or dB. These logarithmic units are used to measure the intensity of audio signals. The world of digital audio can be treacherous if you're not careful - one misstep could lead to clipping or distortion, which occurs when the audio signal exceeds 0 dBFS (decibels relative to full scale). Attention to detail is pivotal.
Recording Levels & Gain Staging: Laying the Foundation for a Great Recording

The journey to a great recording begins with understanding gain staging. Gain staging is a process that ensures a clean, distortion-free recording while leaving enough breathing room for further processing during post-production. This involves setting optimal levels of audio signals at each stage of your recording chain. In the context of home studios, this often involves just your instrument, an audio interface, and perhaps some ITB (In The Box) processing.
However, even in this simplified chain, ensuring good gain staging remains crucial. This starts with the sound of your instrument in the room. You'll need to ensure your guitar's sound is clear, resonant, and free from any unwanted noise or interference. Careful placement of the microphones is also key.
Each microphone and each placement will give a different color and character to your recording. When setting up my microphones, I experiment with different placements and distances. Finding the sweet spot is an art - it should capture the guitar's natural tone while minimizing room noise. Adjusting the distance and angle of your microphones can help control not only the tone but also the levels: too close and the sound might be overly loud or boomy; too far and the signal could be weak, leading to a noise-prone recording when amplified. Have a look at my Stereo Microphone Techniques for the Classical Guitar guide..
The next step in the chain is the audio interface. This is where the acoustic energy, the sound waves your guitar produces and your microphones capture, are converted into digital signals your computer can understand.
Your audio interface typically has preamps which amplify the microphone's signal to a level suitable for the Analog to Digital Converter (ADC). The gain knob on your interface controls this amplification. It's crucial to find the right balance here: a signal that's too weak may introduce noise when you try to increase the volume later, while a signal that's too strong risks clipping, distorting your guitar's natural sound.

Once gain staging is properly set, the next crucial part of the process is managing your recording levels. Recording levels refer to the strength or amplitude of the audio signals being recorded in your DAW. In other words, it’s about how loud the recorded audio will be.
For classical guitar, I aim for an average level (or RMS level) around -18 dBFS to -12 dBFS, with peaks not exceeding -6 dBFS. This ensures a healthy signal level without risking distortion or clipping. These values might not mean much if you're just starting out, but understanding them and using a metering tool to monitor your levels will make a big difference in the quality of your recordings.
For those of you who, like me, prefer to use an external preamp along with a separate ADC, the gain staging process involves an additional step but the principle remains the same. Using an external preamp like the AEA TRP2 or SPL Crescendo duo, allows for even more control over the tonal characteristics and the level of the signal coming from your microphones.
Once the signal is conditioned by the preamp, it then goes into a separate ADC, such as the RME ADI-2 Pro FS in my case, which converts the analog signal into digital. Adjusting the input level on the ADC is equally crucial as on the audio interface's preamp for those who use an integrated solution. The goal is the same - ensuring a healthy signal level without risking distortion or clipping, which for me is around -18 dBFS to -12 dBFS RMS, with peaks not exceeding -6 dBFS.
This might seem like an extra layer of complexity, but in my experience, the flexibility and control provided by separate high-quality preamps and ADCs can lead to even better results, and it's worth considering if you're serious about recording.
To sum up, good gain staging for a classical guitar recording involves capturing a clean signal from your guitar, through the air, into your microphones, then into your audio interface, and finally into your DAW. Each step requires careful attention, but with practice and patience, the results can be immensely rewarding.
Additional Tips for Optimal Gain Staging:

I mainly use Vovox Sonorous and Sommer Epilogue cables for a peace of mind
Starting with a Clean Signal: The quest for the perfect recording begins long before hitting the record button. I ensure that my guitar is properly set up and my strings are in good condition to minimize extraneous noise and to allow for effecient dynamics.
High-Quality Cables: Cables can often be overlooked, but they are a critical part of the signal chain. Investing in high-quality cables can prevent unwanted noise and interference in the signal.
Room Acoustics: The room's acoustics can impact the recording significantly. A quiet and sonically balanced room can help ensure a clean, high-quality recording.
Monitoring the Signal Chain: Vigilance is key throughout the recording process. By continuously monitoring the levels throughout my recording chain, I can prevent unexpected overloads or distortions and ensure the best quality recording.
Using Metering Tools for Precision
Youlean Loudness Meter is an essential tool
For those of us who want to be precise with our levels, I highly recommend using metering tools. One of my favorite tools is the Youlean Loudness Meter. This handy software allows me to monitor not only the loudness of my recording but also the dynamic range. The free version is good enough for most cases, and you can support the developers by purchasing the pro version which provides some additional features.
Maintaining Dynamic Control
Classical guitar's essence lies in its subtleties and nuances. Dynamics - the interplay between the quietest and loudest notes, crescendos, decrescendos - bring the music to life, allowing your listeners to connect more deeply.
When setting my recording levels, I always leave ample headroom for these dynamics, striking a balance so that the louder sections don't cause distortion or clipping and the quieter parts remain clear and noise-free. Remember, amplifying a quiet, clean recording is always preferable to fixing a loud, distorted one.
Additionally, transient details - quick, high-energy moments - require careful attention to avoid distortion or getting lost in the mix. Proper recording levels ensure these moments are accurately captured, adding to the richness of the final recording.
Striking the Right Tone
In conclusion, understanding and managing recording levels, along with proper gain staging, can make a significant difference in capturing a perfect performance. It can be the difference between a recording that sounds amateur and one that stands up to professional scrutiny. With careful attention to detail, patience, and practice, you'll be on your way to making recordings that you can be proud of.
Stay tuned for Part II of this series, where we'll dive deeper into the realm of audio recording as we explore the importance of levels in the post-production stages - mixing and mastering. This is where your carefully recorded tracks are polished into a cohesive, balanced, and compelling final product. Until then, happy recording!

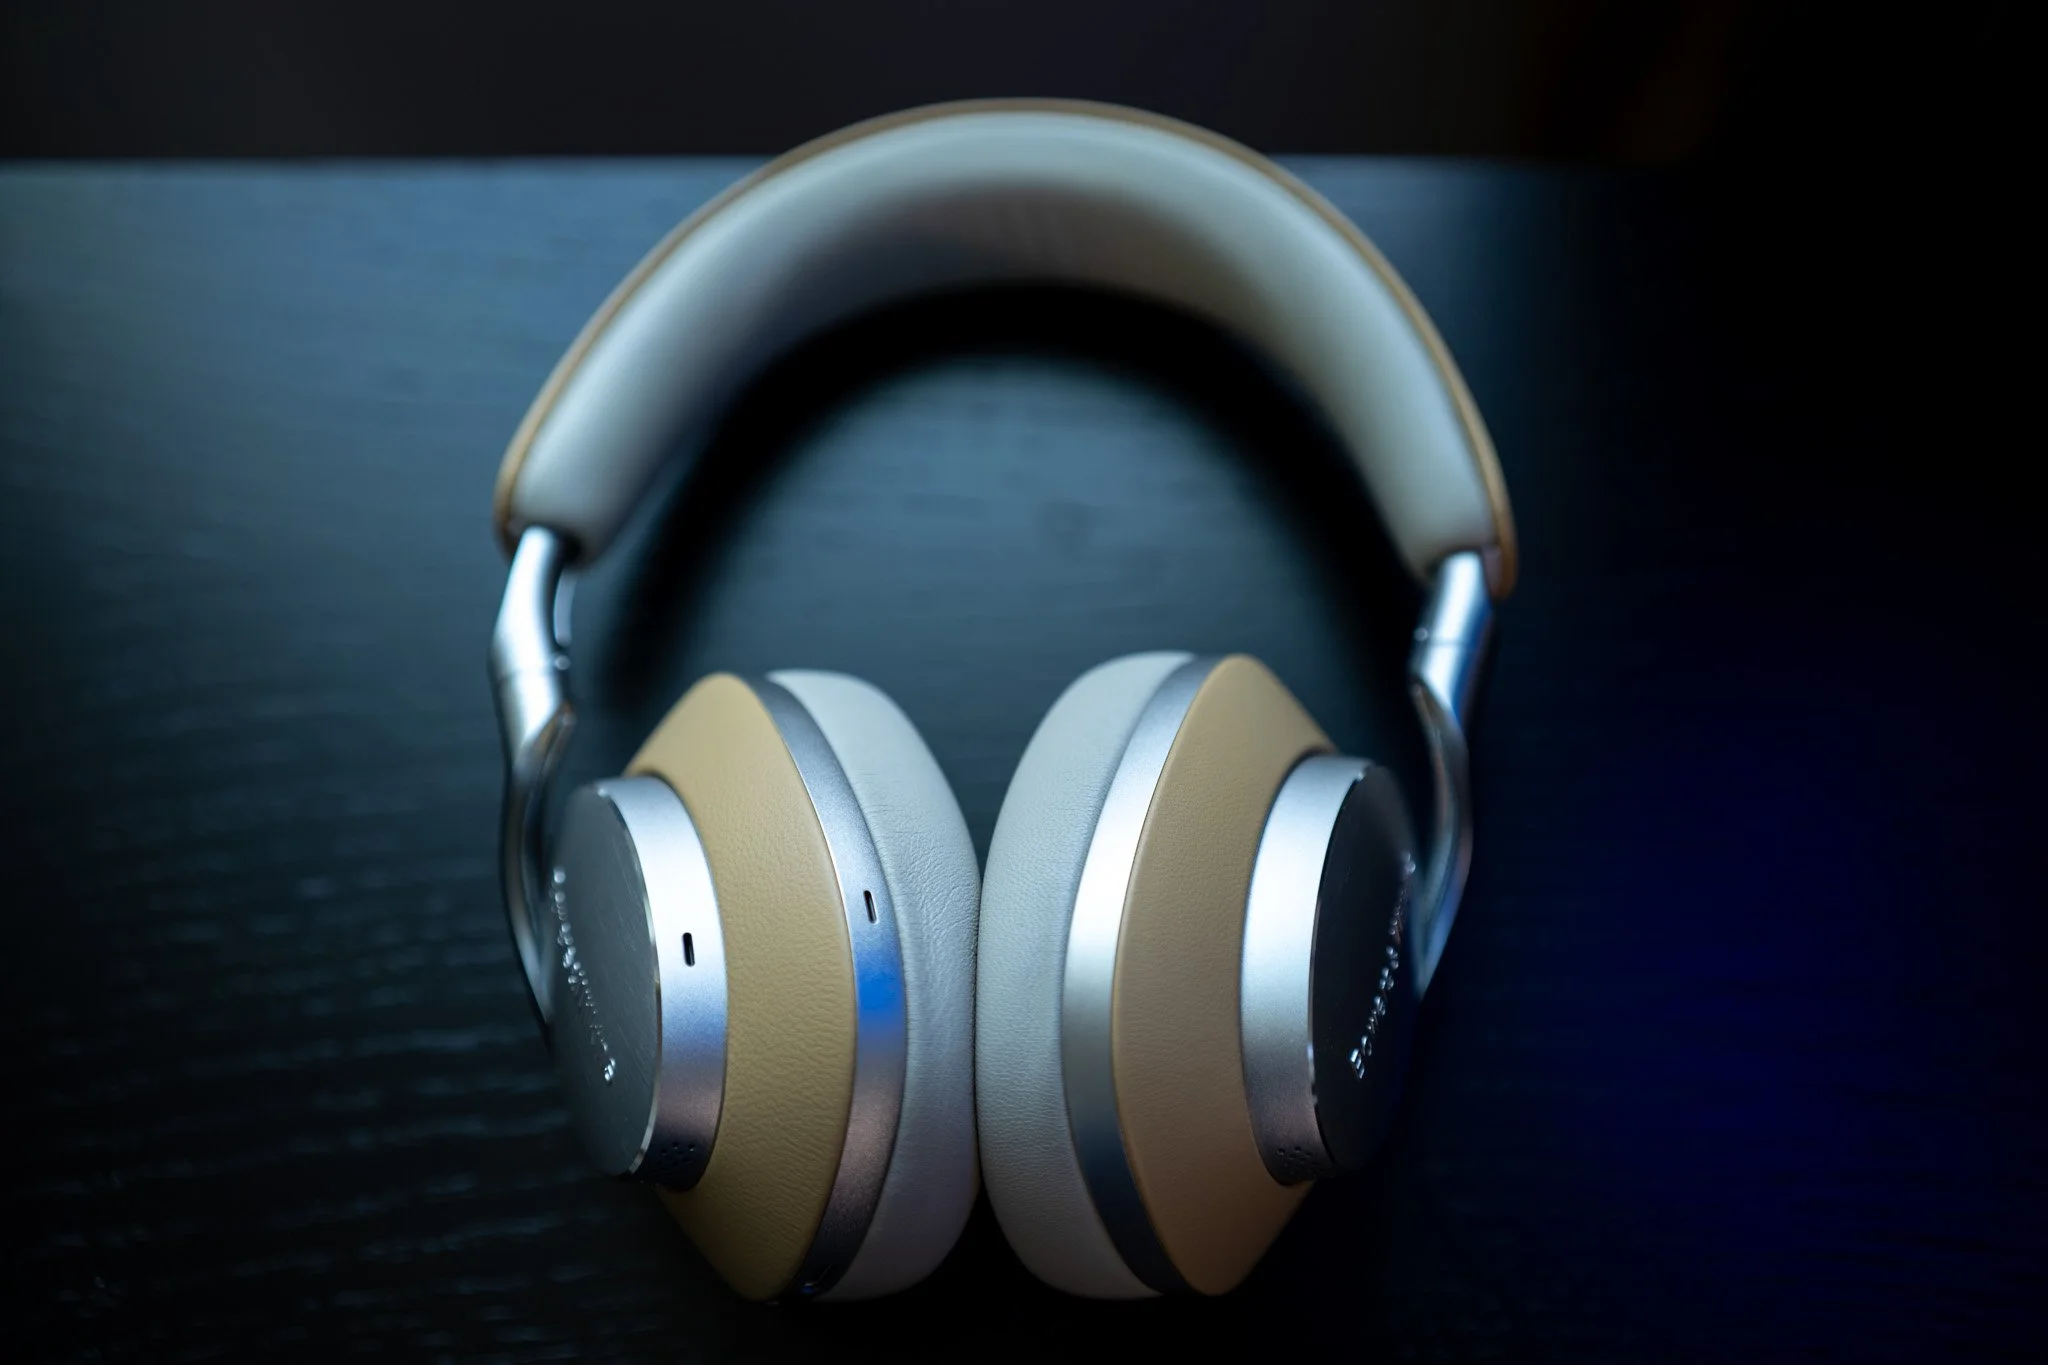
Bowers & Wilkins Px8 Review
The Quest for the Perfect Portable Headphones
For the longest time, I've been searching for a pair of decent portable headphones that could deliver realistic sound. I often found myself commuting with full-sized wired headphones, as the Bluetooth technology just wasn't mature enough to satisfy my audio desires. However, in recent years, several high-end Bluetooth headphones have emerged, catching my attention and offering a glimmer of hope.
Enter Bowers & Wilkins (B&W)
Bowers & Wilkins, a British company with a rich history dating back to 1966, has long been renowned for its high-quality audio equipment. With a dedication to innovation and a passion for creating the best possible listening experience, B&W has been a leader in the audio industry, catering to audiophiles and casual listeners alike. In fact, high-end B&W speakers can often be found in mastering studios for classical music, a testament to their exceptional sound reproduction capabilities.
A Chic and Elegant Choice
Bowers & Wilkins Px8: A Chic and Elegant Choice
About three months ago, I decided to take the plunge and invest in the B&W Px8 headphones, and I've had ample time to explore their features and performance. I opted for the Tan version, which boasts a sophisticated design with cast aluminium arms and fine Nappa leather trim. While the black version looks a bit more generic, the 007 and McLaren special editions are visually appealing but come with a heftier price tag.
The Px8 is designed with ultra-plush ear cups and a hot spot-free headband, making them incredibly comfortable for extended listening sessions. The headphones gently clamp from the sides instead of resting on the head, ensuring an ideal fit.
The included carrying case is stylish, and protective, and features thoughtful touches like a magnetic lid for the cable compartment, making it a great travel companion to the headphones.

A stylish protective case for the B&W Px8

A practical cable compartment
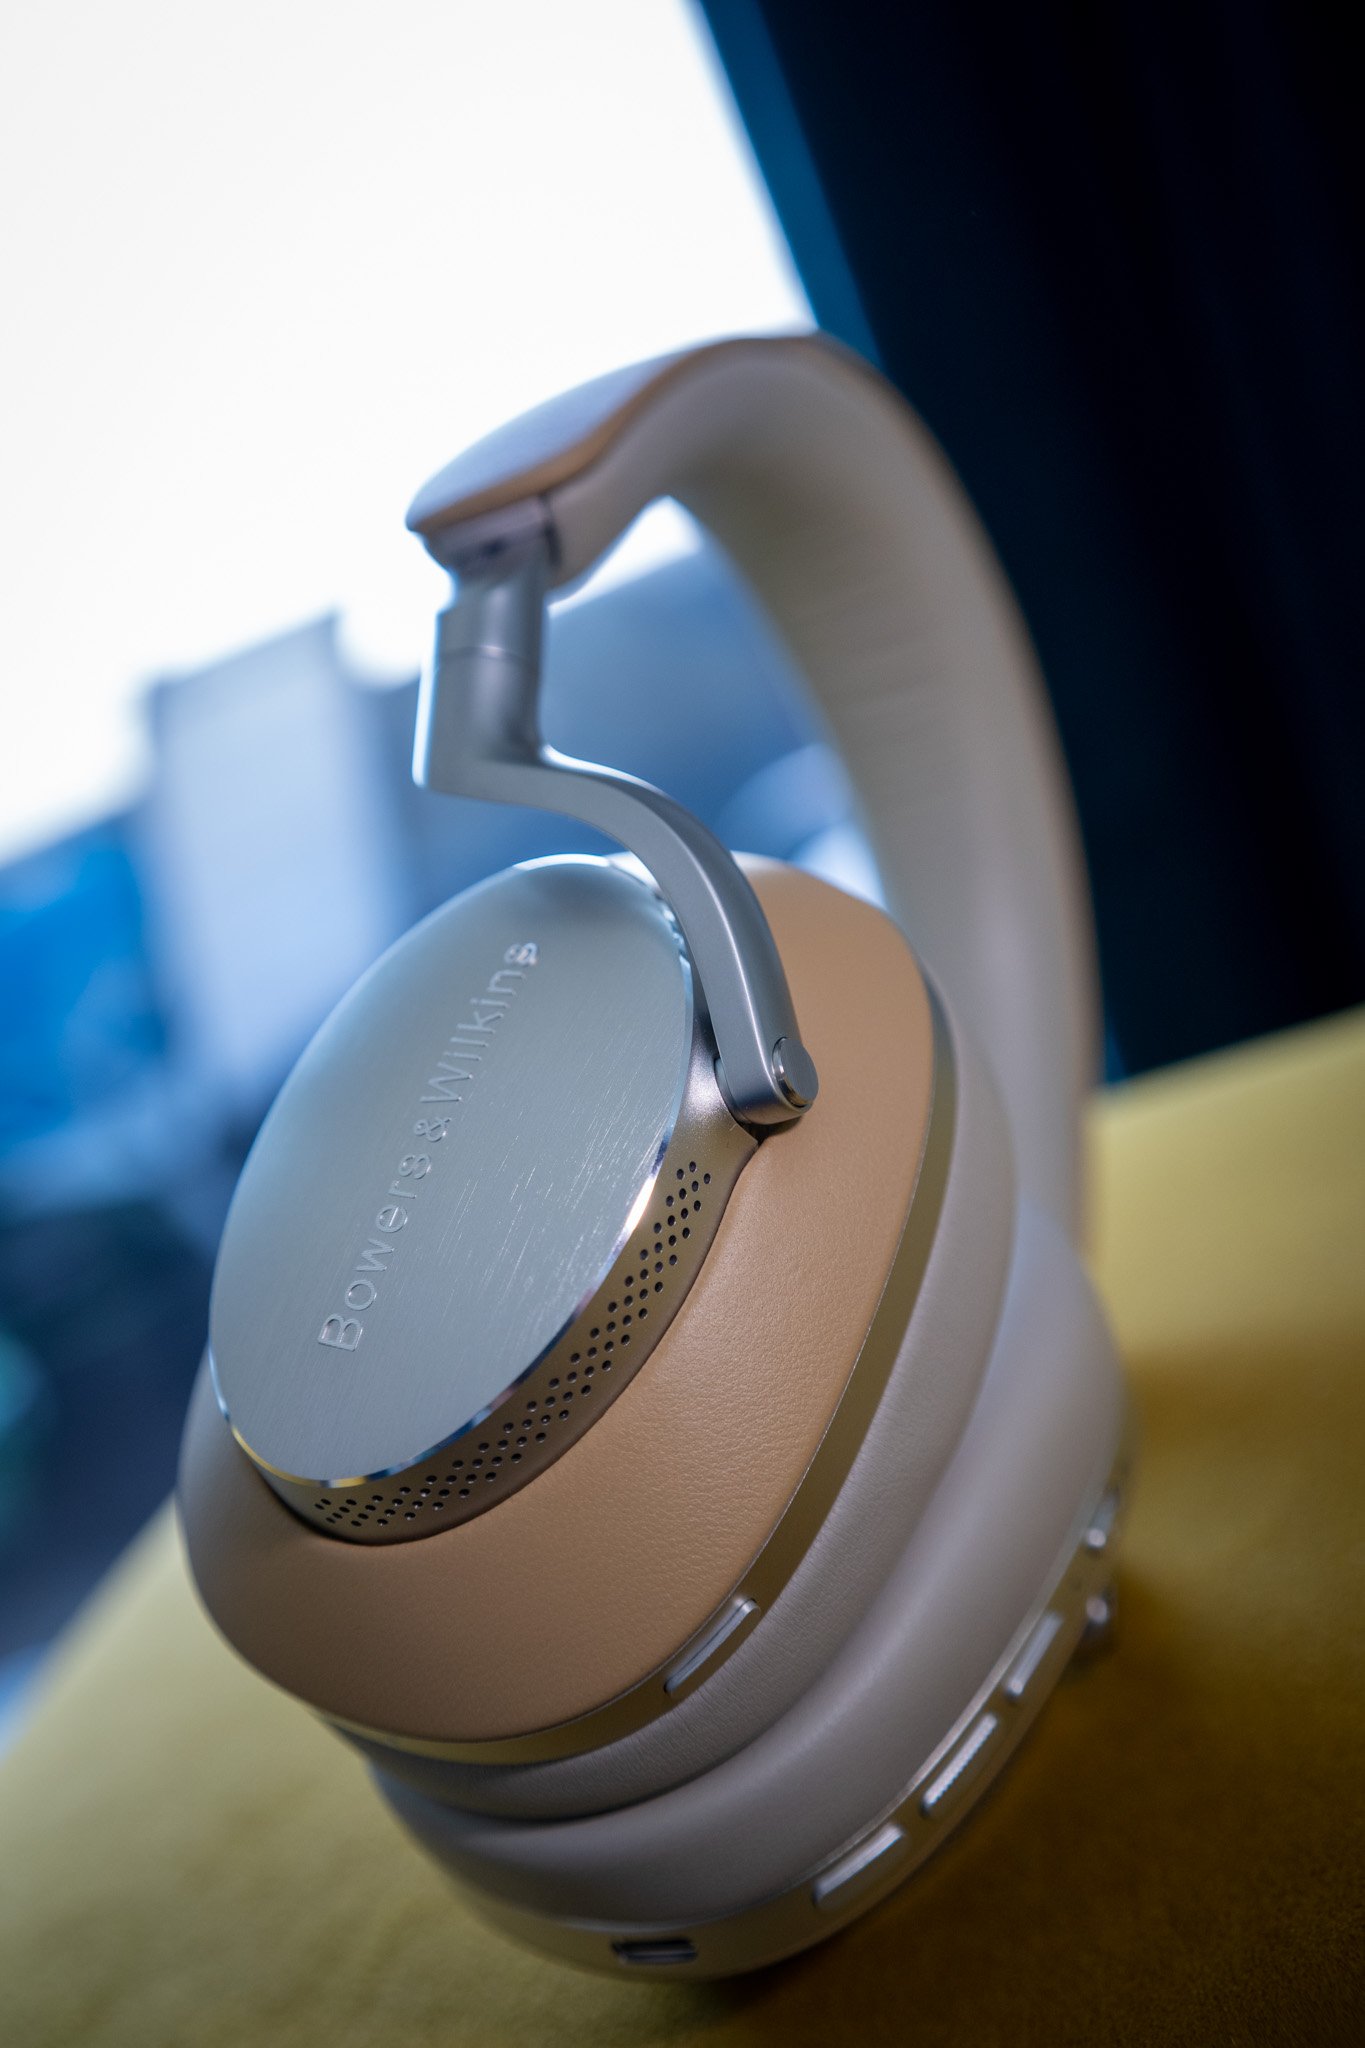
Technical Prowess
The Px8 headphones come with an array of technical features, such as hybrid noise cancellation, ambient pass-through, wear-detection sensor, and Bluetooth 5.2 with aptX™ Adaptive. They support multiple Bluetooth codecs, including aptX™ Adaptive, aptX™ HD, aptX™, AAC, and SBC, ensuring compatibility with a wide range of devices.
The Px8's Bluetooth connectivity is seamless, allowing me to waltz, tango, or just wander around my apartment without any interruptions or cut-offs. Plus, they can be connected to a MacBook via USB for an even richer audio experience.
The Px8's controls are responsive, intuitive, and thankfully, free from sluggish touch buttons. This means you can effortlessly adjust volume, pause, or skip tracks without missing a single tone.

Intuitive physical controls
Uninterrupted Classical Music Indulgence
With an impressive battery life of 25-30 hours, the Px8 headphones will keep you immersed in the intricate nuances of your favourite symphonies, concertos, or solo classical guitar performances for days on end. Plus, a quick 15-minute charge provides 7 hours of playback - perfect for when you're on the go.
Impressive Audio Performance with Minor Caveats
The angled Carbon Cone drivers deliver crystal-clear audio with minimal distortion (<0.1% THD at 1 kHz/10mW). While the out-of-the-box tuning is a bit bassy and warm for my taste, a quick adjustment using the companion app gets the sound just right. There is a very slight hint of compression, likely due to the codecs used, but it's not a deal-breaker, and the overall audio quality remains enjoyable and immersive.
Audiophile-level Classical Guitar Experience - Unshackled by Cables
As a classical guitarist, I treasure the authenticity of timbre, and the Px8 headphones rise to the occasion with their remarkable audio reproduction. The nuances of each note, the nails, the strings, the resonance of the wood, and the ambience of the room come together to create a captivating and immersive listening experience - it's like being transported to a private recital.
Although I wouldn't rely on these headphones for mixing purposes (I have my trusted Focal Clear Pro MG and Beyerdynamic DT 880 headphones for that), the Px8 offers an impressive listening experience for classical guitar music, capturing the intricate details without becoming overly analytical or excessively enthusiastic. The most remarkable aspect?
Finally being able to indulge in such exquisite audio quality without the limitations of cables, providing an even more enjoyable and liberating listening experience. That being said, B&W's unique sound signature is truly a standout feature, and I can't help but wish they were still making wired headphones for professional use.

Ultra-plush ear cups and angled Carbon Cone drivers
A Quiet Place
The Px8's noise cancellation works like magic, effectively blocking out the world without compromising sound performance. The passive noise damping is quite decent for street noise, allowing you to still enjoy your music while maintaining some awareness of your surroundings. The active noise cancellation truly shines in environments like the U-Bahn, where background noise is easily dampened. The pass-through option is a nice bonus, although it could sound a bit more natural. I'm looking forward to testing these headphones on flights this summer, anticipating an even more serene and enjoyable in-flight experience.
B&W Px8 vs B&O H9 Gen 3 - A Clear Winner
Bowers 6 Wilkins Px8: A Symphony of Performance, Design, and Comfort
When comparing the B&W Px8 to the B&O H9 Gen 3, the Px8 emerges as the clear winner in terms of comfort, sound realism, and design. For those who have read my review on the H9 (click to read my review), you'll know that I appreciate the sound quality, but they can be quite painful to wear for extended periods. The Px8 not only outperforms the H9 in terms of comfort, allowing for long listening sessions without discomfort but also delivers a more realistic and refined sound experience.
A Playful Conclusion
After spending three enjoyable months with the B&W Px8 headphones, I can confidently say that their impressive technical features, long battery life, and effective noise cancellation make them a top pick for anyone seeking high-quality headphones.. Initially, I got them as a portable device to use outside of the house, but they've become my go-to headphones for casual listening at home when I'm not working on my music. While they do come with a relatively high price tag, if you can manage the expense, the Px8 headphones are a fantastic choice.
Crafting Your Sound: Shaping Classical Guitar Recordings with EQ
Part I - High-pass, Low-Pass Filtering and Shelving EQ
Many guitarists - and I plead guilty - spend a lot of money on new equipment to improve the sound of their recordings. I'm not suggesting that decent equipment isn't helpful, but the truth is that it's certainly easier to buy new stuff than to learn how to make the most of what you already have. In this article, I'm going to focus on a cheaper and more effective way to improve the sound of your classical guitar recordings: EQ.
Equalization is a powerful tool that allows you to boost or cut specific frequencies in your recording, which can drastically change its overall tone and character. Mastering EQ can help you create recordings that bring out the unique qualities of your guitar and playing technique. Instead of constantly buying new equipment, invest in experiences that enrich your musical journey, such as attending concerts or workshops.
Disclaimer: No two Classical Guitars are the same
One of the beautiful things about classical guitars is that each instrument has a unique voice. No two classical guitars are the same, therefore it's essential to choose an instrument that complements your playing style and taste. Besides, different genres require distinct guitars to sound authentic. Take the time to experiment with a diverse range of guitars and find the one that feels and sounds right for you, as, without doubt, it will have the most significant impact on the final result of your recordings - after the guitarist. Likewise, every recording space is unique. Your room will impose its character on the recording, so before even pressing the record button, make sure that your guitar sounds the way you want in your room.

Disclaimer: No one-size-fits-all
While it's helpful to learn from other guitarists and recordings, it's unlikely that you'll get the same results by blindly copying EQ settings or microphone techniques. Instead, it's crucial to develop the ability to identify what EQ is doing to the sound and use that knowledge to shape the recording to your liking. This means listening closely, experimenting, and learning to trust your ears. As you become more familiar with how different frequencies interact, you'll be better equipped to make informed EQ decisions that complement your music.
Also, take a look at the Best Studio Monitors for Classical Guitar guide, as they are essential to make reliable decisions regarding EQ.
Everything should work in tandem
Having a clear artistic vision is essential when using EQ. For example, if you're aiming for an intimate sound, you'll want to choose a microphone placement and EQ settings that complement each other to create a warm and cosy tone. In this case, you may want to experiment with mic placement options that bring the microphones closer to the guitar and EQ settings that emphasize the low-mid and mid-range frequencies. Microphone choice is also critical, as overly analytical microphones or ones designed for free-field use would capture too much detail.
On the other hand, if you're going for a concert hall experience, you'll want to experiment with microphone placement and EQ that gives the audience perspective and create a sense of space and depth. In this instance, you may want to use a pair of microphones further away or employ multiple microphones to capture different aspects of the guitar's response. Then, use complimentary EQ to shape the sound as though your guitar was captured in a larger space.
To get some inspiration take a look at the Three-Microphone Setup for Recording the Classical Guitar.
Using High- and Low-Pass Filters

High-pass and low-pass filters should be the first things you apply, even before you make any other decision on how you want to EQ your recording. Ideally, if your preamp or microphone has a high-pass filter, you should engage it. A gentle roll-off of low and high frequencies will remove unwanted sounds and give you a cleaner recording. Additionally, you will be able to make more informed EQ decisions. In some occasions, no further equalisation is necessary to achieve a well-balanced recording.
For classical guitar, I always start with a mild high-pass filter at about 60Hz (-6dB/Oct) and a low-pass filter at about 18KHz (-6dB/Oct), and then I work from that. You may need to apply sharper high-pass filter settings if your room isn't as quiet and noises such as street rumble creep into your recording. You could either adjust your settings to a higher frequency, use a -12dB/Oct slope, or try both). Similarly, to eliminate some of the finger-moving sounds or chair squeaks, you might need to set a lower low-pass frequency and a sharper slope.
Make sure to find a balance between removing unwanted frequencies and preserving the natural character of the recording. Overuse of these filters can lead to an unnatural, thin sound.
Shelving EQ

Shelving EQ allows us to adjust the amplitude of all frequencies above or below a certain point and is another extremely effective tool in our EQ toolkit. It can be useful for creating a more balanced sound or giving a subtle shape to the recording.
For example, if you find that the low end of your recording is overpowering, you can use a low-shelf filter to reduce the amplitude of all frequencies below a certain cutoff point (usually around 200-250Hz) a couple of dB. Thus, effectively reducing low-end boominess. Conversely, if your recording sounds somewhat thin, a low-shelf filter boost of a couple of dB at around 125Hz should rectify that.
Furthermore, if your recording sounds too bright or harsh, you can cut frequencies above about 3.5 kHz by a few dB with a high-shelf filter. Or boost all frequencies above 8-10Khz if the recording lucks brilliance and air. Be especially careful when boosting high frequencies, because they can expose the poor sound of your room or your playing.
Tip - And while most guitarists don't really like boosing the high-end as this might emphasize mechanical sounds, I find that a subtle boost of frequencies above 2,5KHz in combination with a bit more potent cut of frequencies below 250Hz, under the right circumstances, result in a very classy sound. Provided the recording isn't too sharp or harsh and the playing is short of non-musical sounds.
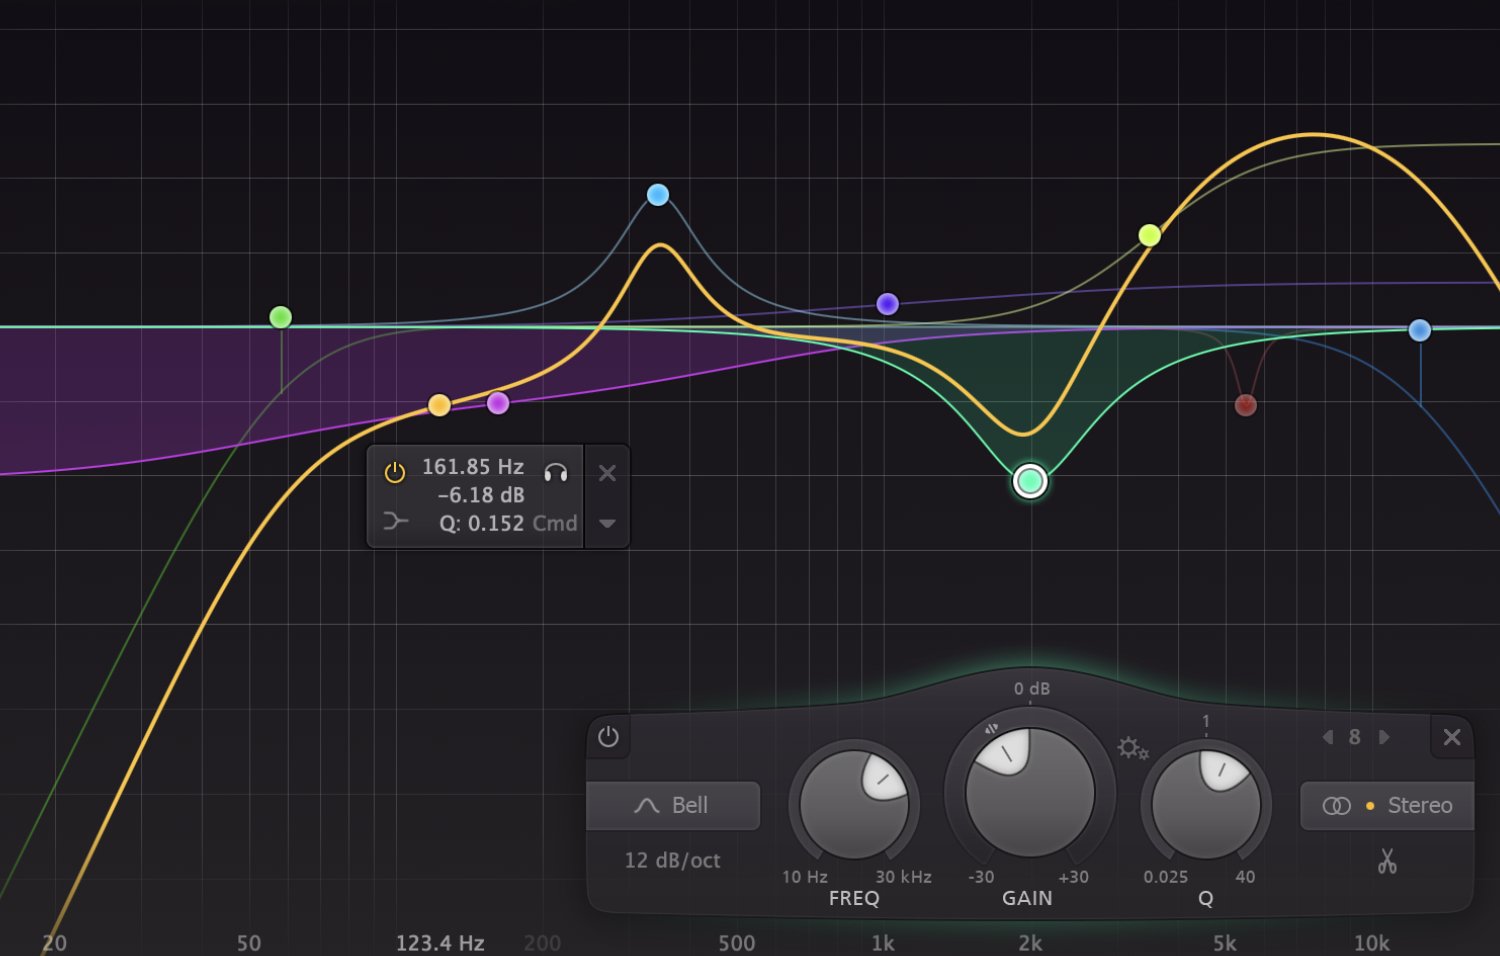
My Secret Weapon: The FabFilter Pro-Q3
One of my favourite plugins for classical guitar recordings is the FabFilter Pro-Q3. Admittedly, not much of a secret if you have been here for a while (read the Three Most Essential Plugins for the Classical Guitar) . The Pro-Q3 offers precise control over the frequency spectrum with a range of filter types and is easy to fine-tune via the graphical interface.
To make my life easier, I have created a set of custom presets that I use as a starting point for different recording scenarios. These presets are designed specifically for classical guitar and can save me a lot of time when mixing. My custom presets pack “EQ Essentials” is available in the CGT store, so if you also have the FabFilter Pro-Q3, you could use my presets in your workflow. But it's important to remember that there is no one-size-fits-all solution and that you'll need to adjust them for your recordings.
Final thoughts
In conclusion, EQ is an essential and powerful tool for creating professional-quality classical guitar recordings. However, it's important to remember that EQ is just one part of the recording production. Don't underestimate the quality of your recording space and microphone placement. Keep in your mind, creating great recordings is a journey. With practice and patience, these guidelines can help you enhance the sound of your recordings and capture the beauty and nuance of the classical guitar.
In part II of this series, we will delve deeper into the use of Parametric EQ to further enhance your recordings. Parametric EQ offers even more precise control over frequency adjustments, allowing you to zero in on problematic frequencies and carve out a more refined sound. We'll discuss how to identify and address problem areas in your recordings and provide tips for using the parametric EQ to shape the sound of your guitar. And finally, in part III, we will explore some of the more advanced settings of FabFilter Pro-Q3. Stay tuned!

A Beginner's Guide to Home Recording for Classical Guitarists
Home recording technology has come a long way in recent years, and it's now easier than ever for classical guitarists to record high-quality audio from the comfort of their own home. If you are a classical guitarist looking to record your music at home, you may be wondering where to start. In this beginner's guide, I will go over the essential tools and techniques you'll need to get started with home recording for classical guitarists. From choosing the right microphone and recording software to setting up a recording space and editing and producing your tracks, I will cover everything you need to know.

Choosing the Right Equipment
The first step in setting up a home recording studio for classical guitar is choosing the right equipment. There are a few key pieces of equipment that every home recording studio should have:
Microphones: A good pair of microphones is essential for recording the classical guitar. There are many different types of microphones to choose from, each with unique characteristics. I often like to employ large diaphragm condensers for their low self-noise.
Read the buyer's guide on the Best Microphones for Classical Guitar.
Audio interface: An audio interface is a device that connects your microphones to your computer, allowing you to record audio digitally. Besides, an audio interface allows you to connect your headphones and studio monitors.
Read the buyer's guide on the Best Audio Interfaces for Classical Guitar.
Studio Monitors: Studio monitors are specialized speakers that are designed for use in recording studios. They differ from regular home speakers in that they have a relatively flat frequency response without boosting or attenuating any particular frequency. Studio Monitors are ideal for mixing and mastering music, as they allow you to hear the true sound of your recordings.
Read the buyer's guide on the Best Studio Monitors for Classical Guitar.
Headphones: Headphones are an important part of any home recording setup, as they allow you to hear all the nuances in your playing and recordings. I prefer open headphones for mixing, editing and music listening, while closed headphones are necessary if you want to do overdubs.

Setting up a Recording Space
Once you have the necessary equipment, the next step is to set up a recording space that will allow you to produce high-quality audio. Here are a few things to consider:
Acoustics: The acoustics of your recording space will have an immense impact on the sound of your recordings. A room with decent acoustics will produce a balanced and natural sound, while a room with poor acoustics can produce a boomy sound and introduce flutter echo to your recordings. To improve the acoustics of your recording space, you can use acoustic treatment products such as acoustic panels, bass traps and diffusers to absorb or diffuse sound waves.
If you are on a tight budget, you can read my post on Three Ways to Improve your Recording Space Without Spending Any Money.
Organization: Keep your recording space organized and ready to use at any time. This means having all your equipment in position and easy reach, so you don't have to spend time searching for things when you want to record. Furthermore, a cluttered and disorganized space can be distracting and make it difficult to focus on your playing. By setting up your room in a functional and organized way, you'll be able to focus on your playing and create better recordings.
Lighting: Good lighting will set the mood and create a comfortable practising recording environment. Natural light is usually the best choice, but if you don't have access to natural light, you can use artificial lighting to create a similar effect.

Getting Started with Recording Software
Once you have your equipment and recording space set up, the next step is to choose recording software. There are many different options available, ranging from free software with basic features to professional-grade software with advanced capabilities. Some popular DAW (Digital Audio Workstations) for recording classical guitar include:
Audacity is a free, open-source recording software popular with many classical guitarists. It offers a range of basic recording and editing features and is easy to use especially for beginners.
Apple GarageBand is a digital audio workstation that comes pre-installed on many Apple computers. It offers a range of basic recording and editing features and is suitable for beginners.
Apple Logic Pro is a professional-grade recording software widely used by music producers. It offers a wide range of advanced features and includes the most complete library of virtual instruments and a comprehensive set of plugin effects of any DAW.
Steinberg Cubase is another professional-grade recording software and a great alternative to Logic Pro if you are a Windows user. Cubase Elements is powerful enough for most classical guitarist applications and is affordable for those just getting started on recording.
Recording Techniques
Once you have your equipment and software set up, you are out of excuses; it's time to start recording! Here are a few tips for achieving the best sound from your classical guitar recordings:
Experiment with microphone placement: The position of the microphones relative to the guitar will have a huge impact on the sound of your recordings.
For a detailed description of various microphone techniques, read my post on Stereo Microphone Techniques for the Classical Guitar.
Set up the gain on your audio interface: The gain control on your audio interface determines the level at which your guitar is recorded. Set the gain to a level that avoids clipping (distortion) or a weak signal. Set the peaks (loudest parts) to reach around at around -6dB, so that you'll have plenty of headroom.
Have the right mindset for recording: An often overlooked aspect of the recording is the mindset and mood you bring to the recording. Be relaxed and focused when recording, so that you can capture the best performance possible. Take breaks as needed to ensure that you are feeling fresh and energized.
For more suggestions, read my post on 5+1 Things You Should Do Before You Press the RECORD Button, from the perspective of a Classical Guitarist.

Editing and Producing Your Recordings
Once you've recorded your classical guitar tracks, the next step is to edit and produce your recordings to create a professional-sounding final result. Here are a few things to consider:
Be conservative with editing: Editing audio has become pretty simple, but too much editing makes your recordings end up sounding lifeless.
Use plugin effects wisely: While it's necessary to use EQ and Reverb plugins to fine-tune your recorded sound, create the right mood for your music, and enhance the sound of your tracks. Try not to overprocess the recording. Aim for a natural sound for your solo classical guitar music. For further information on plugins, read my post Three Most Essential Plugins for the Classical Guitar.
Set the levels correctly: Make sure that the volume of your music is loud enough but doesn't clip (distort) the outputs. Leaving about 1 dB of headroom is a good practice.
Exporting your music: When you're happy with your produced recordings, it's time to export them as a final audio file. Make sure to save your tracks in a high-quality format, such as WAV or AIFF, to preserve the sound quality of your recordings.

Conclusion
In conclusion, recording your music at home can be a rewarding and fulfilling experience, and it's easier than ever to get started with the right equipment and software. By following the tips and techniques outlined in this guide, you'll be well on your way to creating recordings you can be proud of.

5+1 Things You Should Do Before You Press the RECORD Button, from the perspective of a Classical Guitarist
The expeditious progress of technology since the dawn of the millennia has allowed musicians to be more self-sufficient than ever before. We can record, produce, and distribute our music without ever having to leave the house. Concert guitarists have always been masters of the art of independence; we perform solo most of the time, use only our instruments always, and are responsible for keeping them fit (string changes, tuning, cleaning, etc.). It comes with no surprise that guitarists have jumped the wagon of self-recording. Besides not needing much gear-wise, a couple of microphones, an audio interface, some headphones, and the recording setup is complete.
Managing all these duties is hard enough. On top, there is also the infamous red light syndrome that haunts musicians. It sometimes seems that the weight of this endeavour is too high to overcome. Discipline, dedication, and a good routine are prerequisites. In this post, we will not discuss the best microphones or plugins; I want to prepare you rather for the recording date with a few easy-to-follow suggestions to ensure that you will put your best performance on tape.
1. Have a plan

It is always a good practice to write down what you want to record and how your plan to go about it. If you are going to record multiple pieces, will you record several takes of each piece, or will you play the whole program several times? What is the order? What is the purpose of the recording? Documenting and archiving, or an upcoming album?
Make a plan. Then follow it, or don't. It is okay to change it as it is beneficial to remain flexible. Au contraire, without one, to begin with, it can quickly get too chaotic.
2. Setup in advance
Switching between putting on the performer, engineer, and sometimes even the videographer hats is not to be taken lightheartedly. The different tasks not only require respective skills, they also demand enough time to fine-tune all the details. Anticipate for quite a few trials until you have configured everything to taste. Going back and forth between setting up microphones, camera angles, and playing bits of music for the tests, can quickly wear you down. Therefore, if possible, set up everything the day before, thus on the recording day, you can focus only on the performance.
If this is not an option, reevaluate the length and goals of the recording session and add the necessary setup time. And before you jump into the recording, make sure to take a break. You will need a few moments to recenter yourself. Try to relax, get mentally prepared for the mission: to record your masterpiece.
3. Be prepared

Unless you are recording to document your progress, you will need to know your pieces inside out. The choreography of your hands should be practised to perfection and beyond. Allow your body to move with the pace of the music; freely, effortlessly. Study each element of the score meticulously, and memorise it if you can. Know how you articulate every phrase, each voice, how long is the fermata on the 10th measure, and express the difference between P and PP in each section. Be diligent. Again, allow for the unexpected. While playing, the piece might want to lead you to a different place; embrace it. Follow your instincts. But, start with the confidence of control.
4. Establish a routine that gets you in the zone
I could argue that recording should not be too casual, much like preparing and giving a recital. Depending on your goals and time, though, sometimes one has to squeeze a few recording moments into a rather busy schedule. Getting motivated and focused can get tricky under such circumstances. Besides, not every day is the same, so we are not always as inspired.
Observe and explore a few mechanisms to assist in getting in the zone quicker. Weather is meditation, fasting, listening to music, or pouring caffeine into your bloodstream, only you can decide. Find out what works for your lifestyle and establish a routine around it. Preferably, you should find a few alternative options.
5. Do not compare yourself
We do not live in a bubble, and neither does our art. We evaluate our efforts in context. Listen to your favourite recordings, and get inspired. Take notes on the performance subtleties, and try to imitate aspects of it in your practising. But, you must forget everything at some point. On the day of the recording, it is just you and your guitar; no time for self-doubt. So, be yourself, and allow the things that make you unique to manifest themselves. There is no other way to do it anyway.
Bonus - If you are recording on location, make a list, and write down all the essential gear you need to have with you. Do not forget the extra cables and batteries, SD cards, some tape and a Swiss army knife. A faulty cable or missing a 3/4" adapter can be a reason to end the session prematurely. Embarrassingly.
Closing Thoughts
Whether you are recording for professional purposes or yourself, remember to enjoy each and every part. If you follow the above guidelines, chances are that you will go home with a fantastic recording. If not, there is always another day, a second chance to conquer the session. After all, the path to greatness is always in constant dispute.

Bang & Olufsen Beoplay H9 (3rd Generation) Review
They do sound good, but it's not all fine.
Wireless headphones that don't sound like a bloated mess are hard to come by. Professional audio brands don't seem interested in this market segment, while consumer products are often tuned so weirdly that it gives me nausea even when I think about it; clarity and definition sit very low in the design goals list.
Admittingly, I avoided some of the more expensive ones. I already have high-end wired headphones, and I couldn't justify spending too much on wireless headphones just for casual use. Besides, budget wired headphones that sound excellent are not scarce, while good sounding, comfortable headphones of the wireless sort seem to be an elusive combination.
However, a couple of months ago, I found a great deal on the Bang & Olufsen Beoplay H9 3rd generation and decided to purchase them.
Bang & Olufsen
Bang & Olufsen is a Danish premium headphone and speaker manufacturer with an almost century-old history. With a pretty much consumer-oriented marketing and a glamorous design aesthetic, it gives the impression of a lifestyle brand rather than a high-end audio manufacturer. Although it is undeniable that part of its success is attributed to the market that lusts for premium, higher-status products, reports about the superior sound quality are always favourable.

Bang & Olufsen H9 3rd Generation
First impressions
Unboxing the Beoplay H9 3rd gen. is everything you expect from such a brand. The box has a snug fit and feels much like an Apple product; opening the lid has an ultra-smooth action. The headphones sit comfortably on a soft-feeling moulded cell to keep them safe during transportation. There is also a carrying pouch and a basic assortment of cables. I like the attention to detail, but honestly, I would gladly trade the "high-end" experience for a decent carrying case since the included cloth is a mere dustcover. It is noteworthy that both the anniversary edition H95 and the HX, the succeeder of the H9, come with a hardshell case.
The headphones feel good on the hand and are well made; metal yokes, leather earpads, metal sliders, cushioned fabric headband and quality plastic earcups. A unique feature of the Beoplay is the mechanism that extends the chokes as it moves fluidly instead of having the more usual clicky steps. The action is buttery smooth, and the resistance is ideal as it's not difficult to adjust but holds its place strongly enough.

The pouch is nice, but mainly for the dust or light scratches.
Sound and tweakability
Pairing the H9 3rd gen. with my Google Pixel and MacBook was effortless, and after listening to some classical music, I was pleasantly surprised by the sound quality. The B&O sound is smooth and easy to listen to without sacrificing clarity much. The stock response is a bit recessed on the highs, resulting in a warmer overall presentation, but the drivers are flexible enough, so I could easily fine-tune to my liking with the free Beoplay app.
Low notes are deep and well behaved; they don't overwhelm the overall image. The H9 3rd gen. midrange is pretty competent; well-captured recordings sound fairly realistic. Instruments sound like themselves, with their individual tonal qualities distinguished.
The high-end response matches the overall sound signature of Beoplay. It doesn't demand your attention but is not too restrained either. It supports the natural reproduction of instruments and voices and grants a less analytic and more fun listening experience. The room ambience in solo recordings is more laid-back than on typical studio headphones.
I would not use the H9 3rd gen. for mixing or other critical listening purposes, so they won't replace my Focal Clear MG or even my trusted Beyerdynamic DT880. However, for casual listening and the convenience that the wireless connectivity offers, I am happy finally have a Bluetooth headphone that sounds good enough for the intended uses. With the noise-cancelling turned off, the presentation is more akin to open headphones rather than closed, which is an impressive feat.

Controls and connections.
Active noise-cancelling
Engaging the active noise-cancelling alters the sound to some extent. There is less depth and meat to the sound, and the highs become somewhat more fake-sounding as if filters are applied on both ends of the spectrum. There is also a noticeable increase in self-noise. So, it's not an option I would leave "on" all the time, but, I accept the lessening of the overall sound quality for the times when outside noise could render listening without noise-cancelling unbearable.
The effect of noise cancelling is quite decent, but compared to other headphones, it is not nearly as powerful.
Transparency mode
The implementation of the transparency mode of the Beoplay doesn't make much sense to me. The responsiveness of the touch interface is pretty sluggish, so if someone talks to me when I'm wearing them, it is way faster to remove the headphones and talk to them than to engage in funny gestures with my fingers on the right earcup until I find the correct spot to get to the transparency mode. Besides, the resulting sound is rather repulsive.
I could see the benefits of the transparency mode if it wouldn't pause whatever you were listening to before or even more so if it could work during a call to hear my voice more naturally. But, that's not how it functions.
Touch me if you can
I like the idea of a futuristic world where everything will be effortless and efficient, but the touch interface on the H9 3rd gen. is neither. Au contraire, there is a throughout unresponsiveness that becomes annoying pretty fast. I prefer the more typical set of buttons for controlling the headphones anytime. Saying that, the circular gesture for controlling the volume is works smoothly.
(Dis)comfort
The sound quality and feel of the H9 3rd gen. could make me overlook these minor complaints, which in the grand scheme might appear superficial. Unfortunately, my biggest gripe is about the second most crucial aspect of any headphone. The Beoplay H9 3rd gen. is one of the most uncomfortable headphones I have ever worn. The earcups are somewhat small for an around-ear headphone and press the ears, but the worst part is the headband. I cannot understand how a manufacturer with such a long history in the industry could not get the headband right. I can only wear the B&O for about 45 minutes before they become unbearable. Regrettably, I didn't do any extended listening sessions during the return period, so I had to keep them.
Wireless range and battery
The range is exceptional. I could move from room to room without any issue. Although the Bluetooth protocol is older, I haven't experienced any drop-offs or other ill effects. Battery life is adequate for normal use.

They lay nicely flat.
Getting passive
The B&O H9 3rd generation sports a 3,5 input that bypasses the on-board DAC and offers a passive experience, which was a decisive factor for me when I purchased them as I could still use them when they are out of juice. In addition, this ensures that the headphone won't become an expensive paperweight when, in a few years, the battery will not be able to hold a charge. Unluckily, following the trend of our times, the battery is not user-replaceable.
When the H9 3rd gen. is connected passively to my MacBook the sound is pretty decent. When I plug the B&O into any high-end DAC, like my RME ADI-2 Pro FS, the limitations of the drivers become apparent as a slightly harsher character is being exposed. This perhaps means that part of the balance and elegance of the Beoplay become possible through digital manipulation. This is not a critique but rather just an observation.
Final thoughts
Annual design revisions, upgraded Bluetooth protocol and futuristic touch interfaces are not enough to ignore that the Bang & Olufsen H9 3rd gen. are uncomfortable to wear for a prolonged time. Maybe it's just me, so I could only recommend them if you can find them at a fair price and a vendor with a good return policy. If you don't have any hot spots, the sound is reasonably satisfying for wireless headphones.

Three Ways to Improve your Recording Space Without Spending Any Money
Let’s talk about the room - Part I
When we think about improving our recorded sound, we usually think about upgrades in gear; we lust for new microphones, interfaces, guitars, etc. We don't want to buy new things; we absolutely need them. Sometimes, we even postpone recording altogether until we have the budget for purchasing said gear.

The harsh truth that we sometimes don't want to admit is that spending more money on gear will not fix fundamental issues. Getting a good sound in the room before we hit record is essential, as essentially, this is the sound that our microphones hear and our interfaces capture. Fix it in the mix does not apply with classical guitar recordings wherein room and performer are equally exposed.
Having used all sorts of gear in all possible situations, I rank all the elements of the recording chain in this order: guitarist, guitar, room, microphones, engineer, playback system, post-production skills, preamps, converters, cables. Leaving everything else aside, in this article, I examine a few ways to get the best out of a typical residential room without spending any money.
Disclaimer - room treatment can be approached from a more technical standpoint which I plan to discuss here in the future. Contrarily to what the vendors of acoustic panels will say, household items can be used as a pragmatic alternative, even more so considering the singular commitment of a classical guitar recording space.

First. The sitting position.
Sometimes out of being lazy or just practical, we set up everything as is and keep the room as we would normally use it, especially if we don't have a dedicated music room. Considering the degree that the room affects the recorded sound, searching for a suitable sitting position should not be overlooked.
Before all else, when I enter a new space for a session, I try to figure out the best sounding position in the room. This habit applies both for on-location to home recordings and even concerts to some degree. I'm not getting into detail about on-location recordings and big spaces now, as this goes beyond the purpose of this text.
I have assembled a few guidelines to help you search for the perfect sitting position in your room but keep in mind that every room has unique sound properties.
First of all, you want to avoid sitting close to the walls and most definitely steer clear of the corners; the build-up of low frequencies and the early reflections will cloud the direct sound of the guitar. Also, the centre of the room is far from an ideal sitting position, especially in a room with parallel walls.
In an ordinary rectangular room, if possible, you'd want to sit alongside the long walls about three-fourths to two-thirds of the length of the room. In addition, I find that sitting a bit off-centre and facing the front wall at a slight angle towards the longest distance produces the best results; this modest break of symmetry helps.
Nonetheless, you need to experiment with your space as every room is different. Perhaps asking someone else to play your guitar in a couple of different positions and try to listen is not a bad idea. If this is not possible, pay attention to the sound while you play; singing can also assist you in identifying the room modes. Moreover, you'll need to record yourself in various spots and listen critically; recording the same piece can make comparisons less ambiguous.
What you are looking for is the most balanced sound; play all notes of your guitar in sequence as well as your favourite piece, and if it gets boomy or any frequency stands out a lot, try a few different angles or move a little. If the room is untreated, which probably is, the result will not be outstanding, but in any case, it is worth finding the position where standing waves are not encouraged, then acoustic treatment can be employed.

Second. Other uses for your books.
Speaking of acoustic treatment, this goes without saying, at least to some extent. But, as our rooms usually serve (at least) a dual purpose, a playing/recording space along with a listening/production room, some compromises have to be made. Critical listening requires a controlled environment, while what makes a good room for recording acoustic instruments can be partially subjective.
I have recorded in all sorts of situations, from big halls with a vast reverberation to heavily treated studios with no ambience at all as well as everything in between, thus I have concluded that I genuinely don't enjoy playing in an acoustically dead room. Even if the captured sound in such a controlled room is somewhat easier to handle, the performance and feel of the music always take a big hit. Clever microphone placement and good post-production skills can make almost any room sound acceptable, contrary there is nothing we can do to improve an uninspiring performance.
Thankfully, the classical guitar is not the loudest instrument around, with a lot of its energy residing is in the mids and highs, so it is not impossible to minimize the small room sound signature. Whilst is more convenient to record at home, on-location recording is never out of the question; I could always visit one of the exceptional sounding halls in Berlin or elsewhere when absolute sound is required. It is also refreshing to work on other rooms.
Wherein large rooms we have to deal with diffuse sound fields, which pose their challenges anyway, small rooms suffer from early reflections and resonances associated with standing waves. Dealing with the low frequencies below 300Hz is rather troublesome as wavelengths are large and spread omnidirectionally, while higher frequencies behave more like rays.
The key here is to use a combination of diffusion and absorption strategically. Since broadband diffusers and absorbers can get expensive fast and need to be quite thick to have any effect at the low-mid and low frequencies, there is a free alternative you can use effectively: books.
Books placed on shelves create an uneven surface, forming some sort of diffuser from which sound waves are reflected in different directions. Moreover, paper absorbs some of the sound energy, so a bookshelf works in addition as an absorber.
Gather your books and build a bookshelf on the front-facing wall (in the typical control room, the front wall is considered the one where the monitors are placed, here I use the term to indicate the wall you face when you play your guitar). Use different book sizes and thicknesses, and experiment on the relative depths; this bookshelf will absorb and scatter the sound in the room while maintaining some liveliness.
Admittingly, a bookshelf won't do much to the lower frequencies, and its properties will be somewhat random. However, you probably have plenty of books in your household already, and a bookshelf is more eye-pleasing. Plus, they are nice to read from time to time.

Third. The floor.
Since the guitar hangs in closer proximity to the floor than any other reflective surface around you, bouncing frequencies would cloud the direct sound. Also, the somewhat low ceilings and small dimensions of residential rooms dictate for closer and lower microphone positioning that say a concert hall, thus heightening the problem.
To tame the room ambience to a certain degree, place a rug between your guitar and the microphones. Avoid covering the whole room with a carpet, but rather use a small to medium-sized one.
Experiment with a few different sizes and thicknesses until you find what works in your space. Your goal is to allow the microphones to capture a cleaner sound while maintaining the room ambience. The absorption will only be effective at the high frequencies. I use a woollen rug of medium thickness that extends from just under my seating position to a bit further than the position of the microphone stand.
Closing
With the advancement in technology over the last twenty years, quality recording equipment has become pretty affordable consequently capturing compelling recordings at home is no longer impossible. However, we should not forget that the microphones capture the sound of our guitars in our rooms. So, be intentional and learn trust your ears.

Focal Clear MG Professional from the perspective of a Classical musician
Focal is a household name in the audio world, renowned among professionals and amateurs, besides hi-fi and car audio enthusiasts. With over 40 years of history, it is safe to say that they know speakers. Headphones is a relatively recent endeavour for them, but with the introduction of the open-back Utopia some five years ago, Focal shook the industry. Soon after, Elear and Clear follow at more budget-friendly prices.
After four years from the release of the original Clear's, and many developments at their closed-back headphone arsenal, Focal employs all recent innovations and research with a sole objective. The aim is to improve the mid-priced open-back design and assure the purest listening experience at home and the studio.

The Focal Clear MG Professional.
My usual complaint about headphones is that most are made to either sound too analytical (read bright) or too fun. Either way, the result is an unnatural reproduction; instruments tend to sound false. Whilst I understand the uses of the analytical headphone in the recording environment or the fun element for those who prefer a more produced sound. As a classical guitarist, I'm used to hearing real instruments in the wild, and unfortunately, only a few headphones succeed in replicating them in an honest but exciting way.
In addition, a seamless transition between my monitors and headphones is far more productive in my workflow, along with keeping me sane with tonal decisions. Focal, being first a speaker manufacturer, approached headphones from that perspective. A choice that I appreciate and fully endorse.
The original Clear has been warmly received by producers and audiophiles as it strikes a fine balance of clarity, dynamics and realism. The question is what the new MG version can improve on to be worth the extra money.

An elegant protective case.
Presentation
The box might say "professional" on it, but Focal, having one of its feet in the HiFi world, has learned a few tricks about presentation.
The Clear MG Professional come in a minimalistic black box that feels almost as expensive as some headphones from other manufacturers. Upon opening, a hardshell case covered in some kind of reddish fabric emerges. A (too?) tight zipper allows it to open flat; the headphone is sitting comfortably and safely inside the moulded cavity. There is a bit of extra room for the short and relatively stiff but high-quality cable. I love keeping my equipment secure, especially when travelling, and the provided case is one of the best I've seen. Also, everything smells like expensive french cologne.

Extra earpads and coiled calbe.
Furthermore, a rectangular presentation case holds the extra earpads and the additional coiled cable. I tried to use the coiled cable when I first got the Clear MG about three months ago because I wanted a longer reach for my setup, but it is utterly unusable; heavy, bulky, junky. A second straight but longer or a much less weighty coiled cable would have been much prefered.

At 1.2m the straight cable is quite short for most uses.
With the included cables ranging from inoperable to awkward, I wish that Focal (and other headphone manufacturers) would give us the option to purchase just the headphone and case, without any extras, for a couple hundred less. I know they won't, but I hate to own (and pay for) things that I'll never use.
Are you professional enough?
Similarly to the original, there are two versions of the same headphone; the Clear MG and the Clear MG Professional. According to Focal, there should be no real difference between the two versions other than the aesthetics and included accessories. I bought the MG Professional because I have more use for an additional pair of earpads. I also prefer the subdued red on black aesthetics to the more luxury-looking copper version. Either version is gorgeous, no question.

Elegant honeycomb pattern on the earcups.
Looks and feel
As mentioned the headphone looks stunning. The redesigned grille with the honeycomb pattern, soft genuine leather on the headband and plush matching microfiber cushions for the ears and lower part of the headband make the Clear MG one of the best-looking headphones on the market today.

The headband with perforated microfiber cloth ensures ample wearing comfort.
Apart from the aesthetics, the Clear MG is also extremely well-built. With all metal parts, everything feels solid and premium. The plugs fit snug and with a very satisfying "click". The spring-loaded mechanism on the earcups ensures ample comfort and seal. The perforated earpads also feel very smooth and comfortable, maybe not as luxurious as real leather ones, but they breathe more. There is enough space for medium ears, but people with large ears might find them a bit tight overall.
Although the headphone is quite heavy at around 450g, the weight distribution is such that the Clear MG don't tire me even after hours of listening or mixing.
Listening and comparisons
Build quality, looks and comfort are vital, but what good is a €1500 headphone if it doesn't sound incredible?
While other headphones, like the Sennheiser HD800 or Beyerdynamic T1 series, seduce the listener with a big stage presentation and ample highs, Focal takes the total opposite approach. The Clear MG prioritises realism, tonality, dynamics and intimacy while remaining detailed and transparent. The result is the most realistic listening experience headphones can offer; finely recorded instruments sound as they do in real life.
The high-end sits where it should be for music listening and production. The Clear MG doesn't emphasise recording artefacts or noise like the Beyerdynamic DT1990/880 but doesn't hide anything either. It delivers highs in a more or less unopinionated way. I find the high-end emphasis of the Beyer's to be welcome during some stages of music production, especially early on, and don't plan on selling them. But, I honestly enjoy the balance and purity of the Focal much more.

The headphone sits comfortably inside the carrying case.
There is a lot of misconception about detail retrieval and the typical high-end boost in headphones and speakers. Many people are used to a V- or U-shaped sound, which can be impressive but inaccurate. With acoustic instruments, most things happen in the middle frequencies. If those are not presented honestly, the timbre of instruments suffers. The original Clear's had a slight bit of pointy mids, which forced me to return them eventually. Focal solved that issue with the Clear MG's as mids are phenomenal here; low-mids sound full and defined, and high-mids offer excess detail. Music sounds real.
Lows are also exceptional. Keep in mind that I don't listen to bass-heavy music, but with solo instruments, orchestral music or even jazz ensembles, the low end is much fuller than what you expect from an open-back headphone. It provides essential support but never overwhelms. Not unless the music is poorly mixed.
Although I mainly use monitors (Focal and Geithain) for tonal decisions, this is the first time I can be confident to mix with headphones when travelling or setting up microphones on location. Also, switching between monitors and headphones doesn't make me schizophrenic.

Honeycomb grill inside the earcups as well.
Criticism
There is only one somewhat negative thing I can say about the frequency balance of the Clear MG, and this only applies to music listening. They can be slightly forgiving on the high-end, but if mids or lows are not captured or mixed masterfully, the Focal's will shout out the problems.
The extremely low distortion of the Clear MG reveals compression and muddiness almost to a fault. Incorrectly positioned spot microphones on orchestras were also easy to identify effortlessly. On the other hand, great recordings can sound extraordinary and with such purity that brings tears to the eyes.
Non-fatiguing
With extra-long listening evening sessions during the Covid madness, it became apparent that not only the Clear MG are very comfortable for lengthy sessions but also practically fatigue-free. The even tonality and low distortion don't tire my ears in a way that other more shouty headphones or speakers do.

The earpads fit rather snug.
A clear keeper
The Focal Clear MG is a wonderfully designed headphone with striking resolution and depth; string and wind instruments, guitars, pianos, and singers sound rather spectacular. If I close my eyes, the playback medium disappears, as if I sit next to the performers. That's the greatest compliment I can give to any headphone.
Now, I only need to find a nice aftermarket cable, any suggestions?

Neumann KH 80 DSP Studio Monitors Review - I'm not thrilled!

The iconic Neumann badge.
Neumann is arguably one of the most influential microphone makers, responsible for numerous classic microphones that have captured some of the most historic performances; Neumann has defined our perception of how great recordings sound and represents the highest class of musical production.
During the last decade or so, things have gradually been changing at the Berlin headquarters. At first with the introduction of more affordable microphones, like the TLM 102 that brought the famous Neumann badge to the home studio, and more recently with microphone preamps, studio headphones and monitors. Neumann aims to cover every need of the recording studio.
Active Studio Monitors

Imposing looks; similar to the KH120.
The KH 80 DPS Studio monitor borrows from the design of its bigger sibling, the KH 120, which itself is based on the Klein + Hummel O 110. Apart from the size difference, the KH 80 is made of plastic instead of aluminium to be more portable, but also cheaper to make. Furthermore, DPS is utilised to achieve a flatter frequency response, with finer phase response, and a sophisticated room correction algorithm.
The small Neumann monitor has been warmly received by home and professional engineers alike, many also claim that it is even better than the KH 120 for midrange detail retrieval. Most reviews I could find were very positive, similarly to my experience with the KH 120 and KH 310. Therefore, I was looking forward to trying a pair of KH 80's in my room. Is time for me to buy a new pair of small monitors?
Handling
The KH 80 DSP arrived tightly packed. They are smaller and much lighter than you might expect. Unfortunately, their plasticky build, the thin mains cable with the flimsy plug and the ultra-tight space on the back for the XLR cable don't give the best first impressions. It seems that Neumanneiser cut some corners here, but hopefully, the sound will make me forget these weaknesses.

The space for the connectors is limited; I guess it is a plus for very tight spaces.
As soon as you power on the Monitors, the Neumann badge in the front illuminates in red for a few seconds and then turns to white when they are ready for use. The curvy housing is finished in matt sparkly grey; the black woofer, and the tweeter with its substantial waveguides look pretty cool, I have to admit.
Apart from these nice touches, the KH 80 feel more like an oversized computer speaker than a serious studio monitor. I can see the appeal of compactness and lightness for those who seek a good sounding but portable monitor for location recordings, but for the price, I am a bit underwhelmed.
So, how do the KH 80 Studio Monitors sound?
I had the monitors for almost two months, I used them in different productions, as well as regular listening sessions of a variety of (mainly classical) music. I got familiar enough with the KH 80 to be confident with they sound, but I'm a bit baffled with them.

Don't get me wrong, it is a decent sounding monitor. The greatest feat of Neumann is how tight and defined they managed to get the low end for such a tiny monitor. Bass and low mids provide enough depth, greater than what the size suggests, and good enough accuracy.
The rest of the range is less inspiring though. The midrange has a somewhat boxy quality to it; guitars, in particular, tend to sound harsher than with other systems. It is revealing enough, but If you get the mid frequencies to sound right on the KH 80, they will end up sounding too polite in general.
I was expecting a more revealing presentation on the top end, but higher-mids and highs here sound slightly more laid back than I wished. I like that the KH 80 is a non-fatiguing and relaxed monitor, but it won't display otherwise obvious problematic audio artefacts.
The imaging of the KH 80 is very good for the price and offers plenty of localization from left to right, as well as useful front to back information. Reverbs sound realistic and are it is easy to hear what the different settings affect.
All in all, I could make the KH 80's work for me, but I was not sad when I returned them.
Auto stand-why?

Controls.
One of the seemingly trivial things that annoyed me with the KH 80's is the auto-standby feature, or rather, the performance of it. The monitors would automatically go on standby after about 90 minutes of inactivity. Then, by running through a relatively loud signal, the monitors would wake up, and after a few seconds, they would be ready for use.
On paper, this is fantastic as it would mean that I have one less thing to worry about when I leave my desk. The issue is that each monitor has a mind of its own. Sometimes, one monitor would go on standby first, or one monitor would need a louder signal to wake up. The result is that I had to tolerate several times loud music for a few seconds until both monitors were awake.
Besides turning this "feature" off, it is possible to change the time before standby mode but as with the other DSP capabilities of the monitors, their implementation is rather quirky and off-putting that I didn't bother. I cannot understand why in this day of age, Neumann couldn't implement a more intuitive solution. I live in Berlin and every second person here is either an artist or a software developer, it wouldn't have been too hard to find the right people for this. Neumann is a hardware company, and software is an afterthought, but they need to take it more seriously.
Conclusion
Overall, the KH 80 is a decent monitor with some desirable attributes, but I think that Neumann hit slightly off-target with a monitor that is neither analytic nor the most fun. It is rather, dare I say, a bit boring sounding. It is an ultra-compact and light monitor, that sounds as big as it looks. Perhaps that is its strongest achievement, or maybe I was expecting a bit too much from Neumann. For a little more money, the KH 120 is a better and bigger sounding monitor; for considerably less, the Focal Shape 40 is hard to beat for the price.

Ollo Audio S4X Reference Headphone Review
Ollo Audio is a relatively new headphone company, based in beautiful Slovenia. They are not famous, at least not yet; but, they already managed to create some buzz around their two headphones, a closed and an open back. Both designs promise a natural response, while the open headphone, the S4X, is marketed as reference headphone.
My main complaints about most headphones are that they are either too bass-heavy, too harsh in the highs, or too expensive. Therefore, as soon as I heard about Ollo's ambitions to produce a high-quality, reasonably priced open-back headphone with flat frequency response, I knew I had to try it.

From the edge of the Alps
The S4X comes in a rather minimal box, both in size and appearance. Upon opening, one is treated with a canny slogan: "Save the planet, you can't listen to music in space". Along with the headphone, here is a small black paper pouch that protects the removable cable, and a pleather carrying bag. The presentation is simple and imparts a handcrafted feeling.
There is also a black envelope that encompasses various documents. Besides a manual, there is a printed frequency response measurement and a hand-signed certificate of authenticity. Neat touches. Lastly, a caution notice alerts us not to press hard the headphones on flat surfaces, to avoid distorting the membrane of the speakers.
Manufacturing and comfort

The headphone itself looks quite handsome and feels very well made. Quality materials have been used throughout; wooden earcups, stainless steel grills and headband, along with memory foam earcups. The weight of the S4X is substantial, but the self-adjusting strap in combination with the plush feeling of the earpads, made of a hybrid of velvet and pleather, make them very comfortable to wear for hours.
Although these are over-ear headphones, the earpads are what I consider as medium-sized. They fit my ears snuggly and are deep enough, but there is not much space around. If you have larger ears than average, you will feel them getting squeezed.
Another nice touch is the removable cable that terminates on a dual 2.5mm TRS for the cups, and 3.5mm TRS that connects to the source. A 3,5mm to 6.3mm adapter is included to accommodate any setup. The cable is 2 meters in length, of good quality and light, so it doesn't weight down the headphone. It has cloth braiding until the Y split for extra protection; then divides into two red rubberized cables that connect into each cup to minimize microphonics.

The cups don't have L/R markings; they become left or right speakers depending on which cable-end you connect to them. This interchangeability makes servicing very easy, but since the lettering on the cable is tiny, it gets a bit annoying to look for it every time. A coloured connector would have been preferable, but that's only a small annoyance and is easy to fix.
Reference(s)
When I received the Ollo's about two months ago, I let them burn-in for about 100 hours and have been using them since almost daily. I've been directly comparing them with the Focal Clear Pro, various Beyerdyanamics, and AKG's, along with PSI and Focal studio monitors.
A fantastic headphone for me doesn't have a sound of its own; it gives me an honest presentation and ensures a seamless transition between it and my monitors, regardless if I use headphones for mixing, mastering, or pure enjoyment.
Reality check
I'm happy to report that Ollo's claim for a flat headphone is not just marketing talk.
The S4X has a full response and shows remarkable depth in its presentation; the instruments feel real. The sound is natural with fast transient response. Also, there seems to be an absence of earcup resonances.
Other than the slightly elevated low-end, no frequency stands out. Bass is solid-sounding and has an excellent extension. Mids are delicate and detailed, and highs are smooth and non-fatiguing. The sound is true to the source. Ollo's have a similar to my monitors' response; much more than my other headphones - other than the Focal Clear Pro.

The soundstage is average with an intimate presentation; the Ollo's put the listener on the stage with the musicians. I also get the impression that the S4X are a bit like a semi-open headphone instead of a fully open design. Detail retrieval is above average, but not in the realm of the Focal Clear or Beyer T1.2.
Listening to properly captured classical guitar recordings, the sound is immersive with every detail presented accurately. If there are problems in the recording or performance, the headphone will show it without shouting at you. This makes it both an excellent tool in the studio and an enjoyable listening experience at home.
In use
With an impedance of 32 Ohm, the headphone is easily driven even by mobile devices. It does sound considerably better with my RME ADI-2 Pro FS or the RME Babyface Pro FS.
Their small size makes them also, great for location work; although Germany is on lockdown since November and I didn't have the chance to test them in that application.
A modular approach
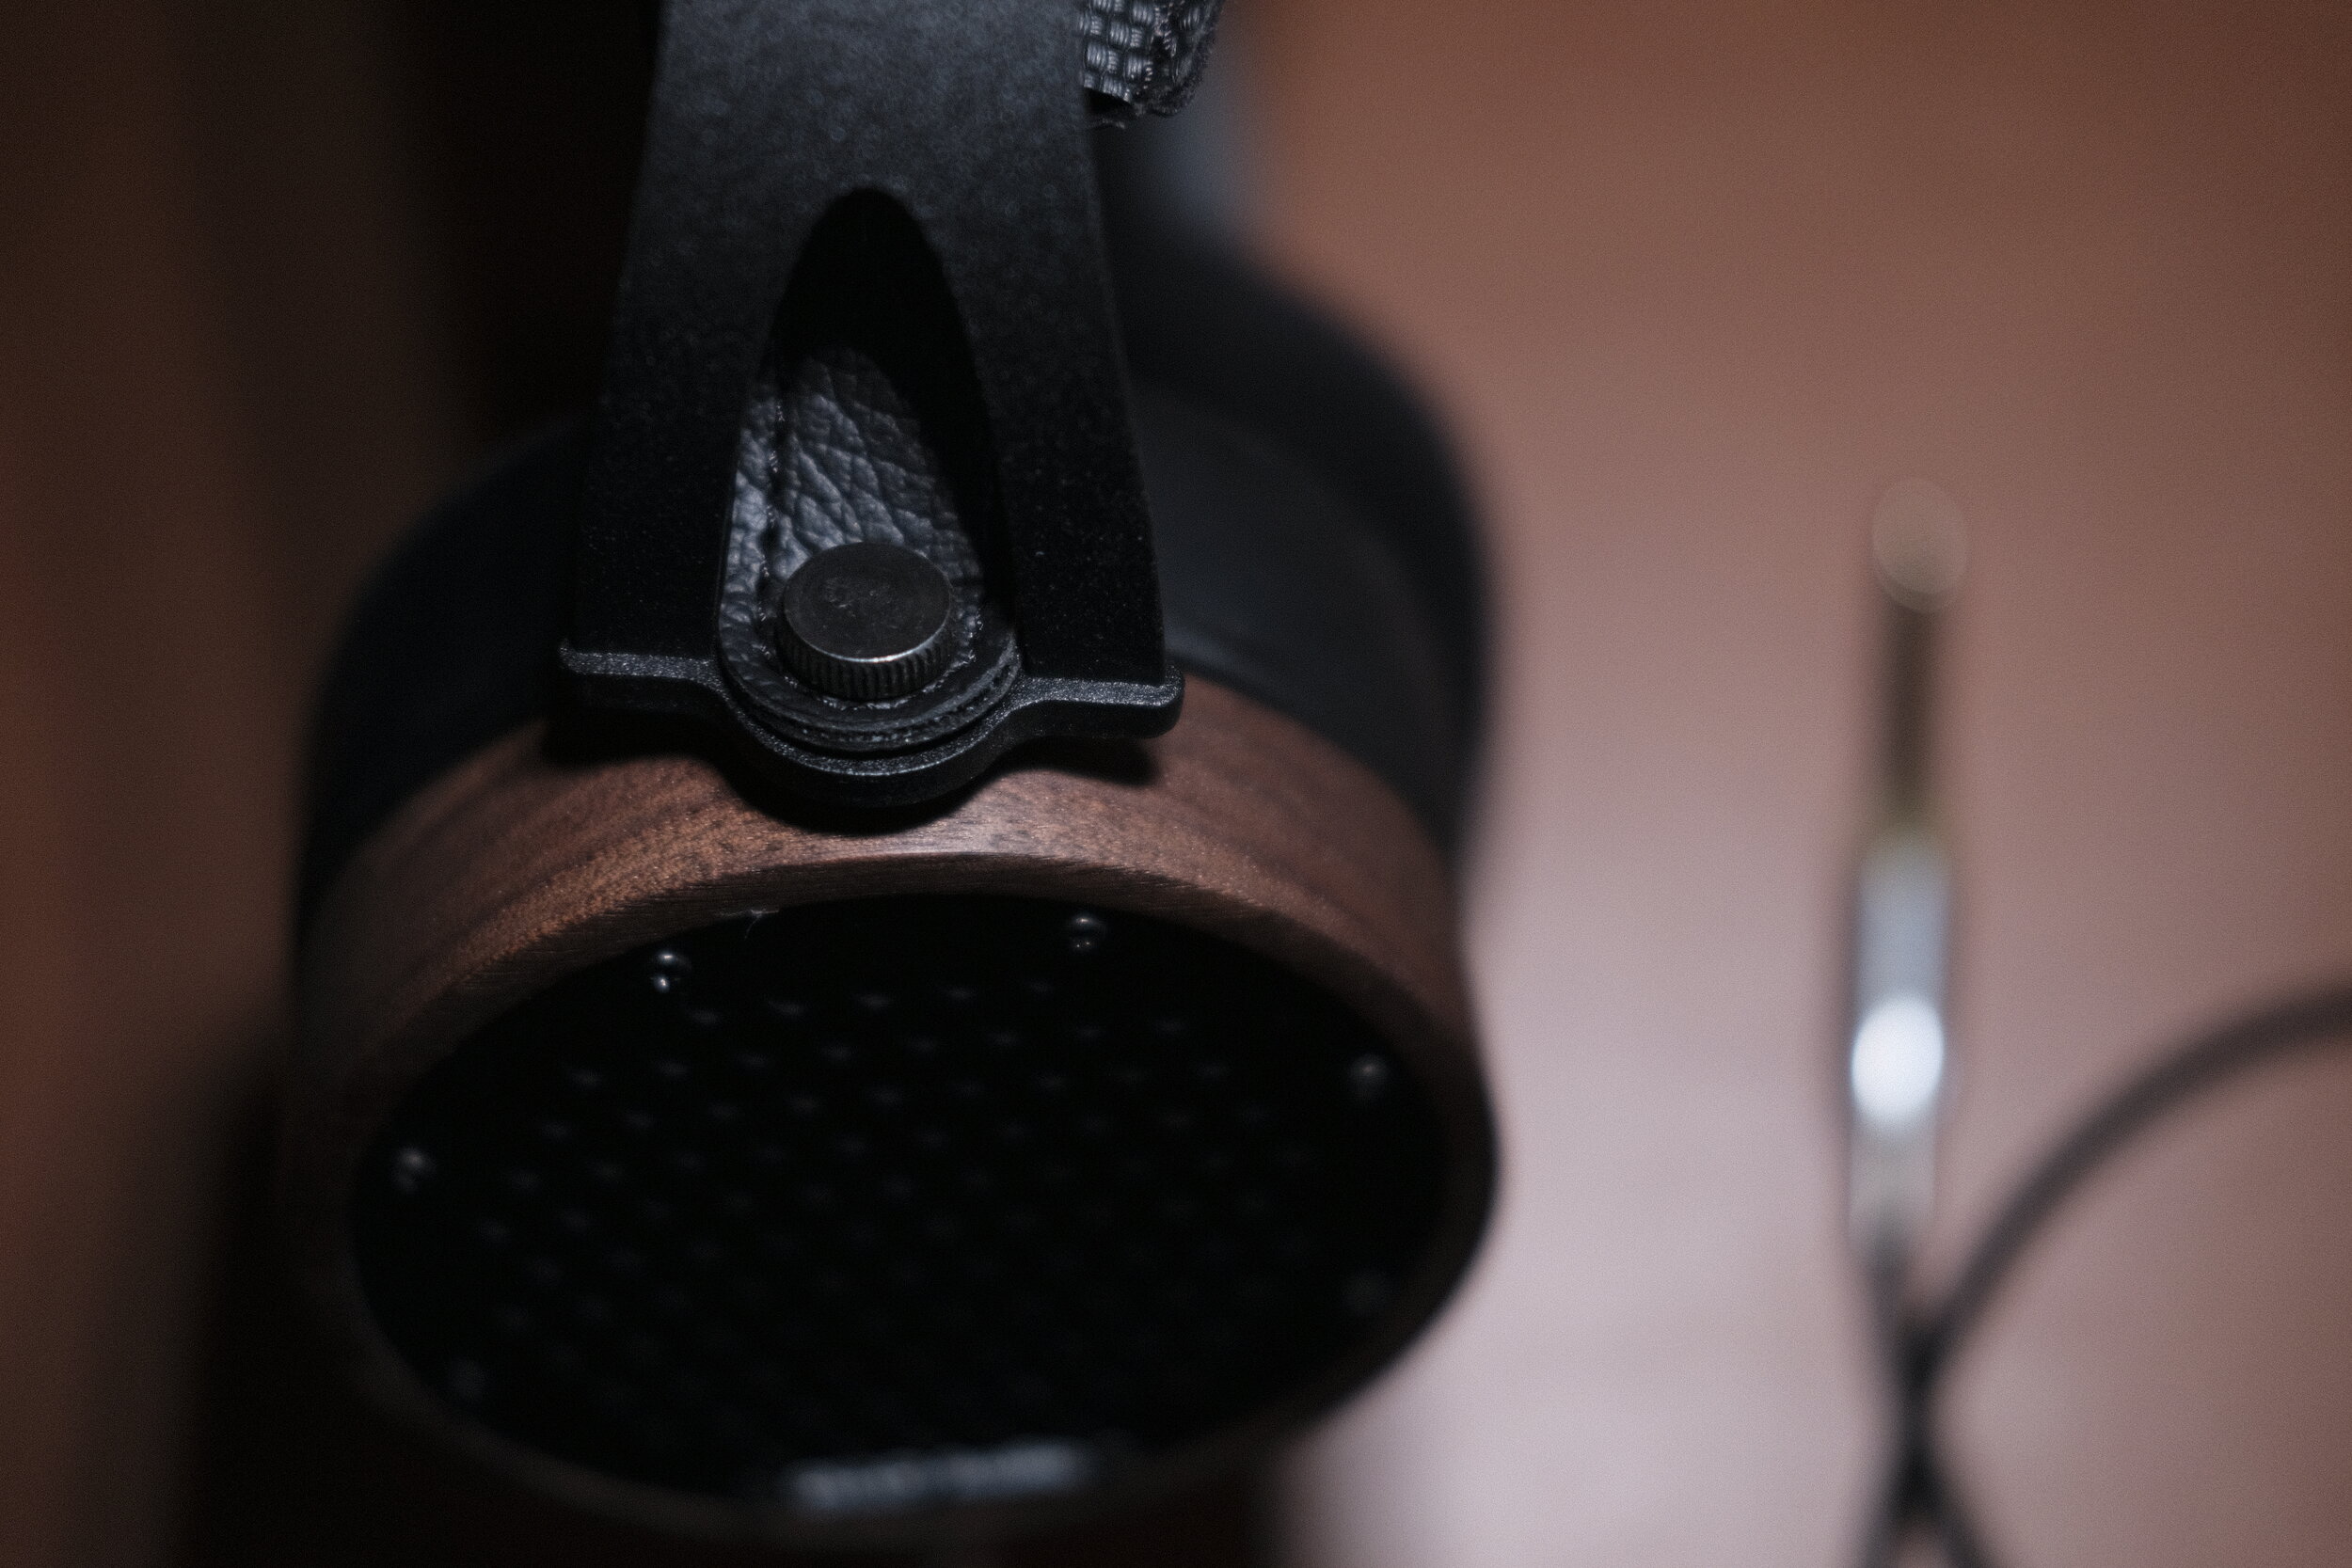
Aside from the sound, what's cool about Ollo is the philosophy behind the designs. They allow their customers to service the headphones themselves, if the necessity arises, as every part is easily replaceable at home. To sweeten the deal, even more, they offer a five-year warranty, and the ability to upgrade the headphones with new drivers and other parts.
In other words, Ollo promises a customer experience opposite to that of almost every other headphone (and not only) company.
Complaints

My only gripe with the S4X is the excessive rining of the stainless steel headband. It only occurs when you put them on or touch it for some reason, so in actual use, it is not a problem, It does give a negative impression on an overall very well thought out headphone.
Honestly, I got used to it and it doesn't bother me anymore, but I wish that Ollo would find a replacement or a way to decouple the headband from the driver.
I would also like to see a hardshell case option, as it would offer better protection when travelling.
Conclusions
Ollo's marketing is quite aggressive and bold, but it is probably necessary at this stage as they need to get noticed. Unlike some of the most popular brands which have flooded the market with numerous models, Ollo seems to listen to their customers and refine their designs.
I don't know if the S4X is a brutally honest headphone, like Ollo claims; but it is an accurate and detailed headphone, without being overly analytic.
The refined and natural sound, coupled with excellent craftsmanship, and the fact that there is no middle man to inflate the prices, make it one of the best headphones in their price range and well above.

Stereo Microphone Techniques for the Classical Guitar
Stereo recording is the technique that involves two microphones that due to the captures the time differences of sound waves coming from a source, which gives depth and space to the recording. Similar to how our ears and brains record and process sound.

The Classical Guitar, albeit small, is an instrument with a complex sound and subtle peculiarities; and as such, it sounds better when is captured in stereo. Various stereo recording techniques have been developed since the early 1940s; each with distinct advantages and disadvantages.
If you ask, which is the best microphone technique for capturing the classical guitar in stereo, I'm afraid that the answer is not so simple. Room size, acoustics, the instrument, and the purpose of the recording, play a significant role; as well as our individual preferences.
In this article, I describe the most common stereo techniques from the point of you of a classical guitar recordist. I discuss their strengths and weaknesses, as well as prefered uses for each setup.
Note: This article is a work in progress; X/Y, M/S, and NOS setups will be added in the following weeks.
Spaced Pair Setups
AB Stereo

AB Stereo Array
The AB Stereo recording technique is based on a pair of spaced Directional or Omnidirectional microphones and provides in a pleasing and accurate capture with useful spatial information.
For home recordings, AB Stereo is one of the best options as it is easy to implement and get a consistent sound. A pair of Cardioids is usually preferred as they can successfully attenuate the room ambience.
Omnidirectional microphones capture the true low-end of the instrument though and have no proximity effect. You can position them closer to the source in a small room, or further away if the acoustics allow.
Application
Use a (minimum) distance of 20cm between the microphones for the most natural result. You can use a greater width, as the distance from the instrument increases, for a wider capture. I prefer a width between 30 and 40cm, for small/medium rooms, and up to 60cm for large halls.
If you position the AB Setup close to the guitar, you should avoid placing any microphone opposite to the soundhole, to prevent boominess. A microphone on each side of the soundhole will give the most balanced sound, off-axis towards the fretboard for more articulation or opposite of the bridge for a fuller sound.
The microphones are most commonly parallel to each other; but, since most microphones show a degree high-end directivity, we can fine-tune their response by angling them on the horizontal plane. If you aim them slightly outwards, you can attenuate some of the unpleasing mechanical noises of the guitar (fretting noises, squeaking, nails, etc.) You can also angle them slightly inwards to reject some of the room reflections.
The directional information as captured by an AB Stereo is not as accurate as of the coincident and near-coincident setups. This attribute can be an advantage if the performer moves a lot and assists in avoiding off-balanced results. I hardly ever pan the channels hard left and right, to preserve the integrity of the central image of the classical guitar.
The biggest drawback of the AB Stereo is its leaser compatibility with MONO playback (for example, a youtube video played on a smartphone); as a result, comb-filtering may be introduced.
Suitable Polar Patterns: Omni, Cardioid
Advantages
Easy implementation
Pleasing sound
Useful spatial information
Control of room ambience
Disadvantages
Playback in MONO may introduce comb filtering
Not the most accurate directional information
And here is a real-world example of the use of AB Stereo on Classical Guitar in a professional setting. I used a pair of Austrian Audio OC818 microphones set in a Custom Polar Pattern that combines the best of Cardioid and Omni qualities. The spacing of the microphones is 26cm. The goal was to capture the pure tone of my Angela Walter guitar together with the incredible sounding main hall of the Musikbrauerei in Berlin.
Near Coincident Setups
ORTF Stereo Technique

ORTF Stereo Array
Developed in the 1960s by the Office de Radiodiffusion Télévision Française, the ORTF is a stereo microphone configuration that with the use of two near coincident Cardioid microphones mimics the human ears.
The spacing of 17cm and 110° angle emulate respectively the distance between our ears and the shadow effect of the human head. The result is a realistic depiction of the sound field, both in directional and spatial areas, as well as a reasonable Mono compatibility.
Application
A pair of first-order Cardioid condensers is required for a proper ORTS, 17cm between the capsules and 110° angle. Other directional patterns can be used with respective changes in the width; for example, Schoeps suggests a distance of 21cm for the MK22 Open Cardioid capsules. You can also adjust slightly both the spacing and angle for the best sound.
The most critical aspect of ORTF is to balance the direct and diffuse sounds, as there is not much you can do in post-production afterwards. As always a minimum distance of 50cm is advised to avoid boominess, but I have had better results with a distance of 80cm to 110cm. At greater distances, a low-end boost might be required to compensate for the loss of low-end of directional microphones.
The ORTF main application is for large-scale sources, like orchestras and choirs. If positioned in a close distance, you might experience loss of focus with a perceived hole in the centre.
Consequently, depending on the room acoustics, the ORTF stereo array may be proved problematic in a home recording setting. As you might either have to place the microphones further away from the instrument, capturing the unattractive ambience of a small room, or suffer a smeary sound if you position the array closer.
Suitable Polar Patterns: Cardioid
Advantages
Realistic stereo field
Reasonable Mono compatibility
Disadvantages
Perceived Hole in the middle and loss of focus if positioned close to the source
Coda
Distance

The distance of the microphones to the source depends purely on the room size, the instrument, and the setup. As a rule of thumb, keep it smaller than that of the microphones to the front and side-walls. But never closer than 50cm.
Directional microphones have a sweet spot where the proximity effect eliminates, and the low-end frequency response becomes linear. If the microphones are not in the ideal position, you might need to apply a Low-Shelf EQ (boost or cut). Omnidirectional microphones have a better low-end response regardless of the distance but capture sound from all directions. So, be careful not to end up with an overly roomy recording.
Height
Most classical guitarists angle their guitars somewhat upwards to push the sound further back (and fill a concert hall). Correspondingly, the height of the microphones depends mainly on the distance to the guitar. The closer they are to the instrument the lower they need to be. If you place the microphones further away from the guitar, they need to be higher to retain definition and accuracy.
The sound travels as an impulse rather than a beam though, so there is some room for experimentation. If you prefer a fuller sound, you can position the microphones slightly lower. Contrarily, you can increase the clarity if you put the microphones higher. Use your ears and taste.
Vertical Angle
You can also exploit microphone angles in the vertical plane; you can increase clarity if they are on-axis with the top of the guitar, or aim them at a higher point to attenuate some of the high-end and undesired mechanical noises from the strings and nails.
About the Samples
Austrian Audio OC818 and OC18
I recorded all the examples with a pair of Austrian Audio OC818. I choose the OC818 for their clear sound, low self-noise, and multi-pattern options. The height of the microphones was 103cm (centre of the capsule), and the distance from the guitar was 90cm.
The signal chain was an AEA TRP2 Microphone Preamp into an RME ADI-2 Pro FS ADDA Converter.
I didn't provide samples in other distances as they would only give cues about my room and instrument, without adding value to you.
Closing thoughts
Recording the classical guitar is a meticulous exercise. Regardless, if you want to record your next album, a video for youtube, or your performances to share with your friends, it is an utterly satisfying process. It is also a reason to practice harder and become a better guitarist.
Before your press "rec" for the first take, allow some time to find the best position, height, and angle. It can be a matter of having an excellent recording or rendering the whole session useless. Small changes in this context may have dramatic results; they act as a physical equalizer.
There have been quite a few times that I had to re-record a performance because of a poor decision, or having to rely on heavy equalization to make it acceptable when it was (almost) impossible (or expensive) to record again at the same location.
I hope that this guide will be helpful in your recording adventures in the quest of capturing the best qualities of your instrument and room.

6 Common Mistakes When Recording the Classical Guitar at Home, Part II
Part II - Post Processing
Professional sounding classical guitar at home is not a fantasy anymore or at least achieving a recording quality that is not embarrassing to share. Affordable audio interfaces, preamps and microphones have flooded the market these last decades, with increasing performance and processing power. Rooms, recording techniques and mixing are holding us back.
In the first part on the 6 Common Mistakes When Recording the Classical Guitar at Home, I tried to encourage you to try out different microphone positions and to study your room acoustics.
The second part focuses on some of the common mistakes of beginner classical guitar recordists on utilizing a proper signal chain and achieving satisfactory results in post-processing.
Mistake no.1 - Improper gain staging

AEA TRP2 Gain Knobs
The fear of clipping the converters leads some amateur recordists to use too little gain, resulting in recordings that are low in level. Without adequate signal-to-noise rations, these recordings will become noisy when any attempt is made to bring them at a normal level during mixing or playback. Contrarily, recording too “hot” will possibly clip the converters and can introduce nasty sonic artifacts to the audio. In either case, the recording will suffer from a limited dynamic range and high noise; attributes that we don't usually associate high-quality classical guitar recordings.
My advice is to aim between -6dB to -12dB as a maximum peak level (not average), per channel. Therefore, when you are happy with the placing and distance of your microphones, do a couple of test recordings, play as loud as you would normally do and set the gain levels accordingly. If you set the levels correctly, you will have a healthy and strong signal, but even if you (or another guitarist you are recording) eventually get carried away during the performance, you still have enough headroom to avoid digital clipping.
Mistake no.2 - Unrealistic panning
Classical guitar is a small instrument, radiating sound from a definite point in space. One of the worst choices you can make if you record in stereo (which you should) is to use a too wide panning. Regardless of if the listener is an audiophile type, sitting on his couch perfectly balanced in front of a pair of top-tier speakers, or a regular person listening to music with earbuds. A hard-panned left and right guitar will sound unnaturally wide and cloudy.

Proper panning of Stereo AB channels
A realistic classical guitar recording is one that creates a phantom image of the instrument right in the middle of the speakers, but with some space around it. Such recordings can remove the playback medium and transport the listener in the room with the player.
In typical AB Stereo scenarios, I pan one channel at 3 o'clock and the other at 9 o'clock. I fine-tune the panning according to the polar pattern of the microphones, how apart they are set, and the distance from the guitar.
Mistake no.3 - Limiting dynamics
Classical guitar is not the most dynamic instrument, and if anything, we should strive to capture as much dynamic range as possible (it starts from the player, so we should also prioritise dynamics in performance). Compressors, on the other hand, are designed to do just the opposite; minimize the dynamic information of an audio track by limiting the loudest notes and boosting the softest signal.
The classic Universal Audio limiting amplifier
Compressors do make the initial playback sound more exciting and powerful… for a few seconds, but in my opinion, it never pays back. Some of the problems that are introduced with the use of compressors in solo classical guitar recordings are squeezed dynamics, increased noise level and altered instrument tone.
Cross-genre guitarists employ compressors more often, as they learn that they can be invaluable in a dense mix. But I haven't found any use for dynamic limiting in a properly captured classical guitar recording.
Therefore, unless you have to deal with issues of the room or improper microphone positioning, don't use compressors on classical guitar recordings.
Mistake no. 4 - Being afraid of using filters

High-pass filter’s switch on an Austrian Audio OC18
Many microphones feature high-pass filters, the most common are 40Hz, 80Hz and 120Hz; the same is true for some dedicated outboard preamps. But many beginner recordists are afraid to take advantage of them. The truth is that in the context of the classical guitar, not much musical information is presented at the low-end frequencies. Most of what is below around 80Hz is unwanted room rumble and weird resonances; therefore by attenuating them, we end up with a cleaner recording. Capturing what is essential and leaving out the rest.
As low frequencies can have a lot of energy, it is preferable to cut undesirable low-end before the signal hits the converters, if possible. This tactic allows us to set the gain and levels appropriately and leads to better signal-to-noise ratios. But even if your microphones or preamps don't have any filters, you can still apply a high-pass filter in your DAW to remove non-essential information.
I also like to use a low-pass filter to remove high-end information that is inaudible, so that my audio consists of only the frequencies I can hear. A gentle roll-off of the low (below 50Hz) and high frequencies (above 18000Hz) is a good starting point. An EQ plugin with these basic filters is the first plugin I load on every track. You can read more on the article Three Most Essential Plugins for the Classical Guitar.
Mistake no.5 - Not learning how to use an equalizer
Other than the low- and high-end unwanted information that we can simply remove with the appropriate filters, undesirable resonances can occur in the audible range as well. These can be caused by the imperfect rooms that we are recording in, our instruments or our technique. Obnoxious resonances can and will distract the listener.
Learning how to use an equalizer to detect and attenuate or eliminate such issues will make the listening experience much more pleasurable.
The best way to identify an offending frequency is by using your ears. I know that this doesn't sound like great advice, but keep reading. When you detect something that you don't like, add a bell-shaped point on your EQ with an extreme boost and search through the suspected range, like dialling in an analogue radio.
Once you find the irritating frequency, the sound should be quite disturbing at that point, apply a notch or a generous cut with a narrow Q. Toy around with the Q value to find the sweet spot; a setting that makes the problematic sound disappear but lets the rest of the audio unaffected.
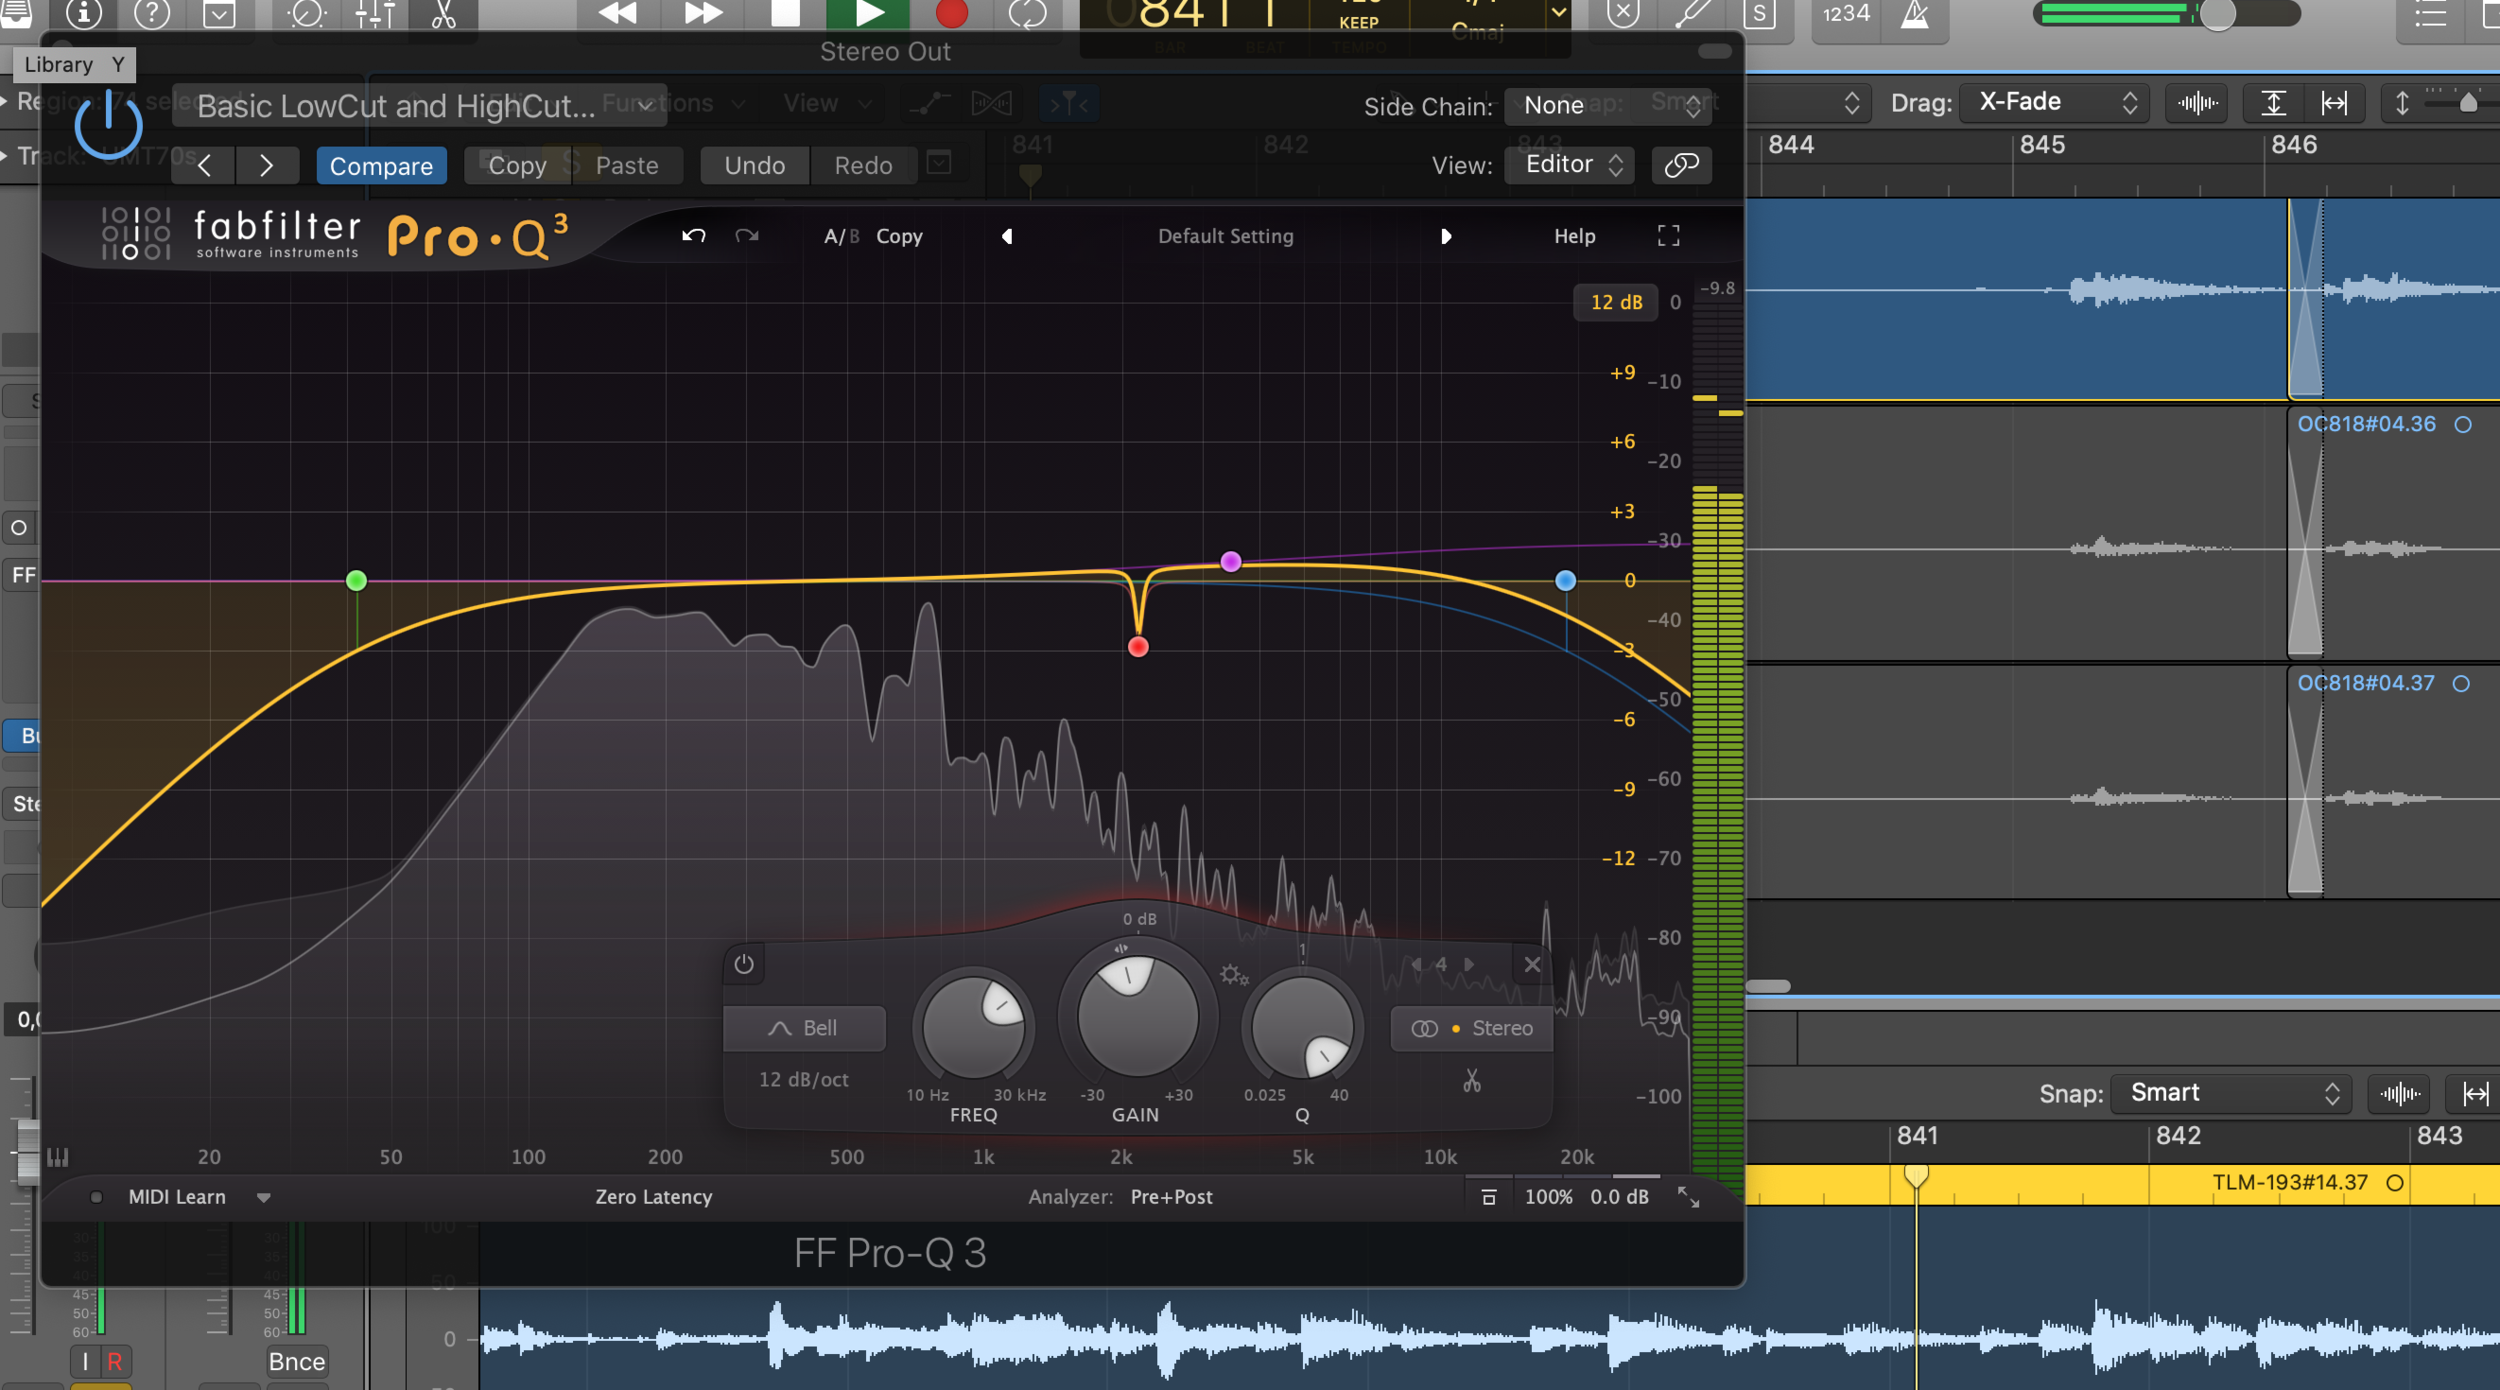
FabFilter Pro-Q 3 with HP & LP Filters, a narrow Q Cut and a High Shelf Boost
Another use for an EQ is to change the overall balance of the recording. Sometimes you'd prefer a slightly fuller recording, or there is just a bit too much low-end. Perhaps the treble is a bit piercing, or you'd like to add some more clarity and articulation. Making gentle adjustments like these are generally uncomplicated with the use of Low or High Shelf adjustments. Just a couple of dB's can make a drastic difference to the evenness and impact of our music.
Just be careful not to overdo it, and always compare your mixes to your favourite recordings.
Finally, you can also use an equalizer to completely change the sound of an instrument and shape it to your liking. But if you've been diligent with the microphone positioning, and you like your guitar sound, you won't have to.
Mistake no.6 - Too much reverb

Placing the music into an artificial hall is a necessary lie
As I write on the Three Most Essential Plugins for the Classical Guitar article, nothing will affect the listener more than the physical space that the music takes place.
When we record at home, most rooms are not interesting enough, and so we need to enhance their sound with artificial reverb. But it is easy to overuse reverb, as it makes everything sound "better". Or so we think when we first enter the home recording world.
Most beginner recordists tend to choose a random church preset without any consideration to requirements of the music, tempo and other aesthetic choices. The result is a flood of unnatural and unattractive recordings which instead of sounding realistic or enchanted, they feel cheap.
Learn how the Time, Size and EQ settings found on your reverb plugin of choice to fine-tune the sound the ambience. Then turn down the Mix a little bit more than what you think it should be. Lastly, compare your efforts to commercial recordings (not that those are not guilty of overusing fake church algorithms).
Closing thoughts

Proper mixing can turn a decent recording into a great one
I hope that this article will make you more conscious of your post-processing choices. I need to write dedicated articles for the use of equalizers and reverb as there is a ton of things to discuss.
I know that many guitarists don't want to fuzz around with plugins, but proper audio processing can transform a recording. Mixing is an art in itself; a necessary evil that can turn a decent recording to a great one. Quality classical guitar recordings are important for your audience and benefit the classical guitar community as a whole. Thus, it's definitely worth the time and effort to learn how to mix your audio. Alternatively, you may search for someone else to do that for you.
Tip: You don't have to mix every track from scratch; after all, you probably record the same instrument with the same microphone technique and in the same room all the time. Create a template in your DAW with your basic panning, filter and reverb settings. You'll still have to tweak around a bit, as not every piece favours the same settings, nor every day is the same. Templates are great time savers.

Beyerdynamic DT 880 Premium Edition 250 Ohm Review
Natural-sounding headphone for professional mixing, mastering, and home listening. Or is it?
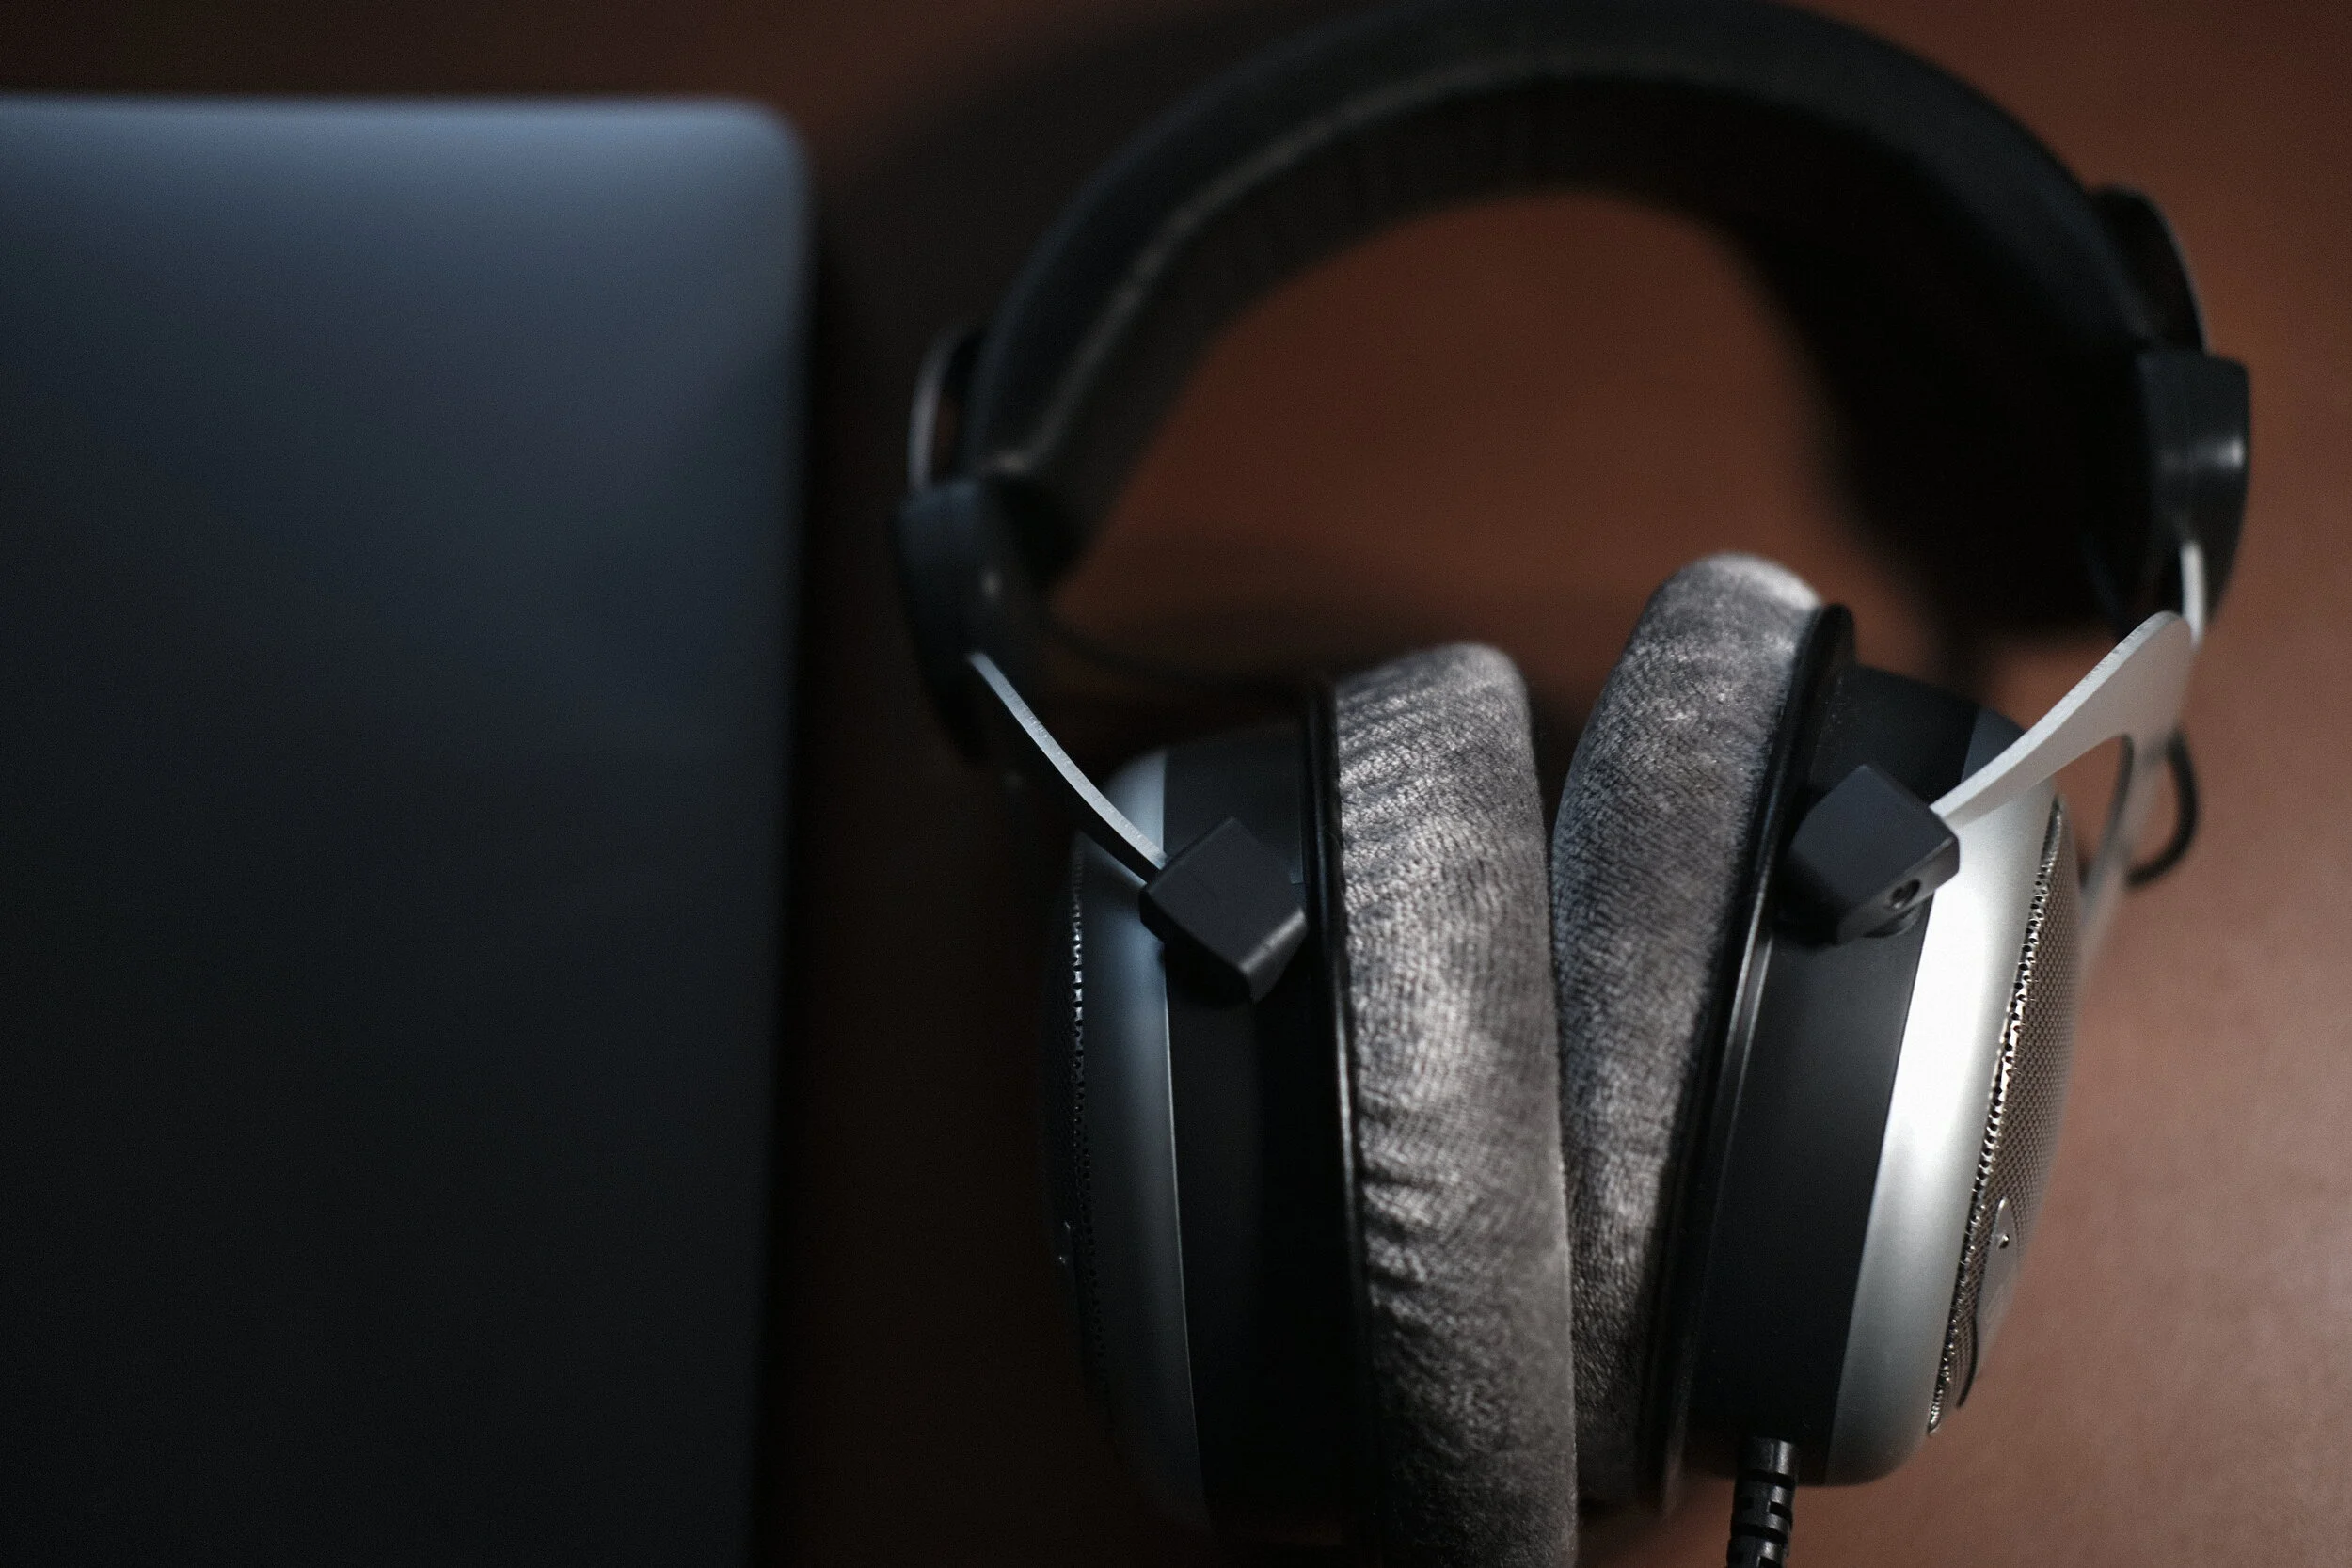
I love listening to music on headphones, I think it is the second-best way to immerse oneself into the music, to get isolated from the "world" around. For engineers, producers and home recordists, headphones can also be invaluable tools for analytical listening and be used as a reference for mixing.
This is my first headphone review on the site. Headphone reviews are usually audiophile-centric (whatever that means), but I don't care much about magic dust.
For casual listening and mixing purposes, I would love my headphones to sound as close as possible to my Focal monitors, for a seamless transition. For analytical listening, I want to hear the air around the fingers as they reach for the strings. If you think this a hyperbole, the answer is yes, but you know what I mean.
The question is if the Beyerdynamic DT 880 250 Ohm can fulfil any or both of these roles. Is it analytical, relaxed or neutral?
Incarnations
Beyerdynamic needs no introduction, they are around since the early 1930s and there is some type of DT headphones in every studio around the world. Noteworthy is that all their professional products are still made in Germany.
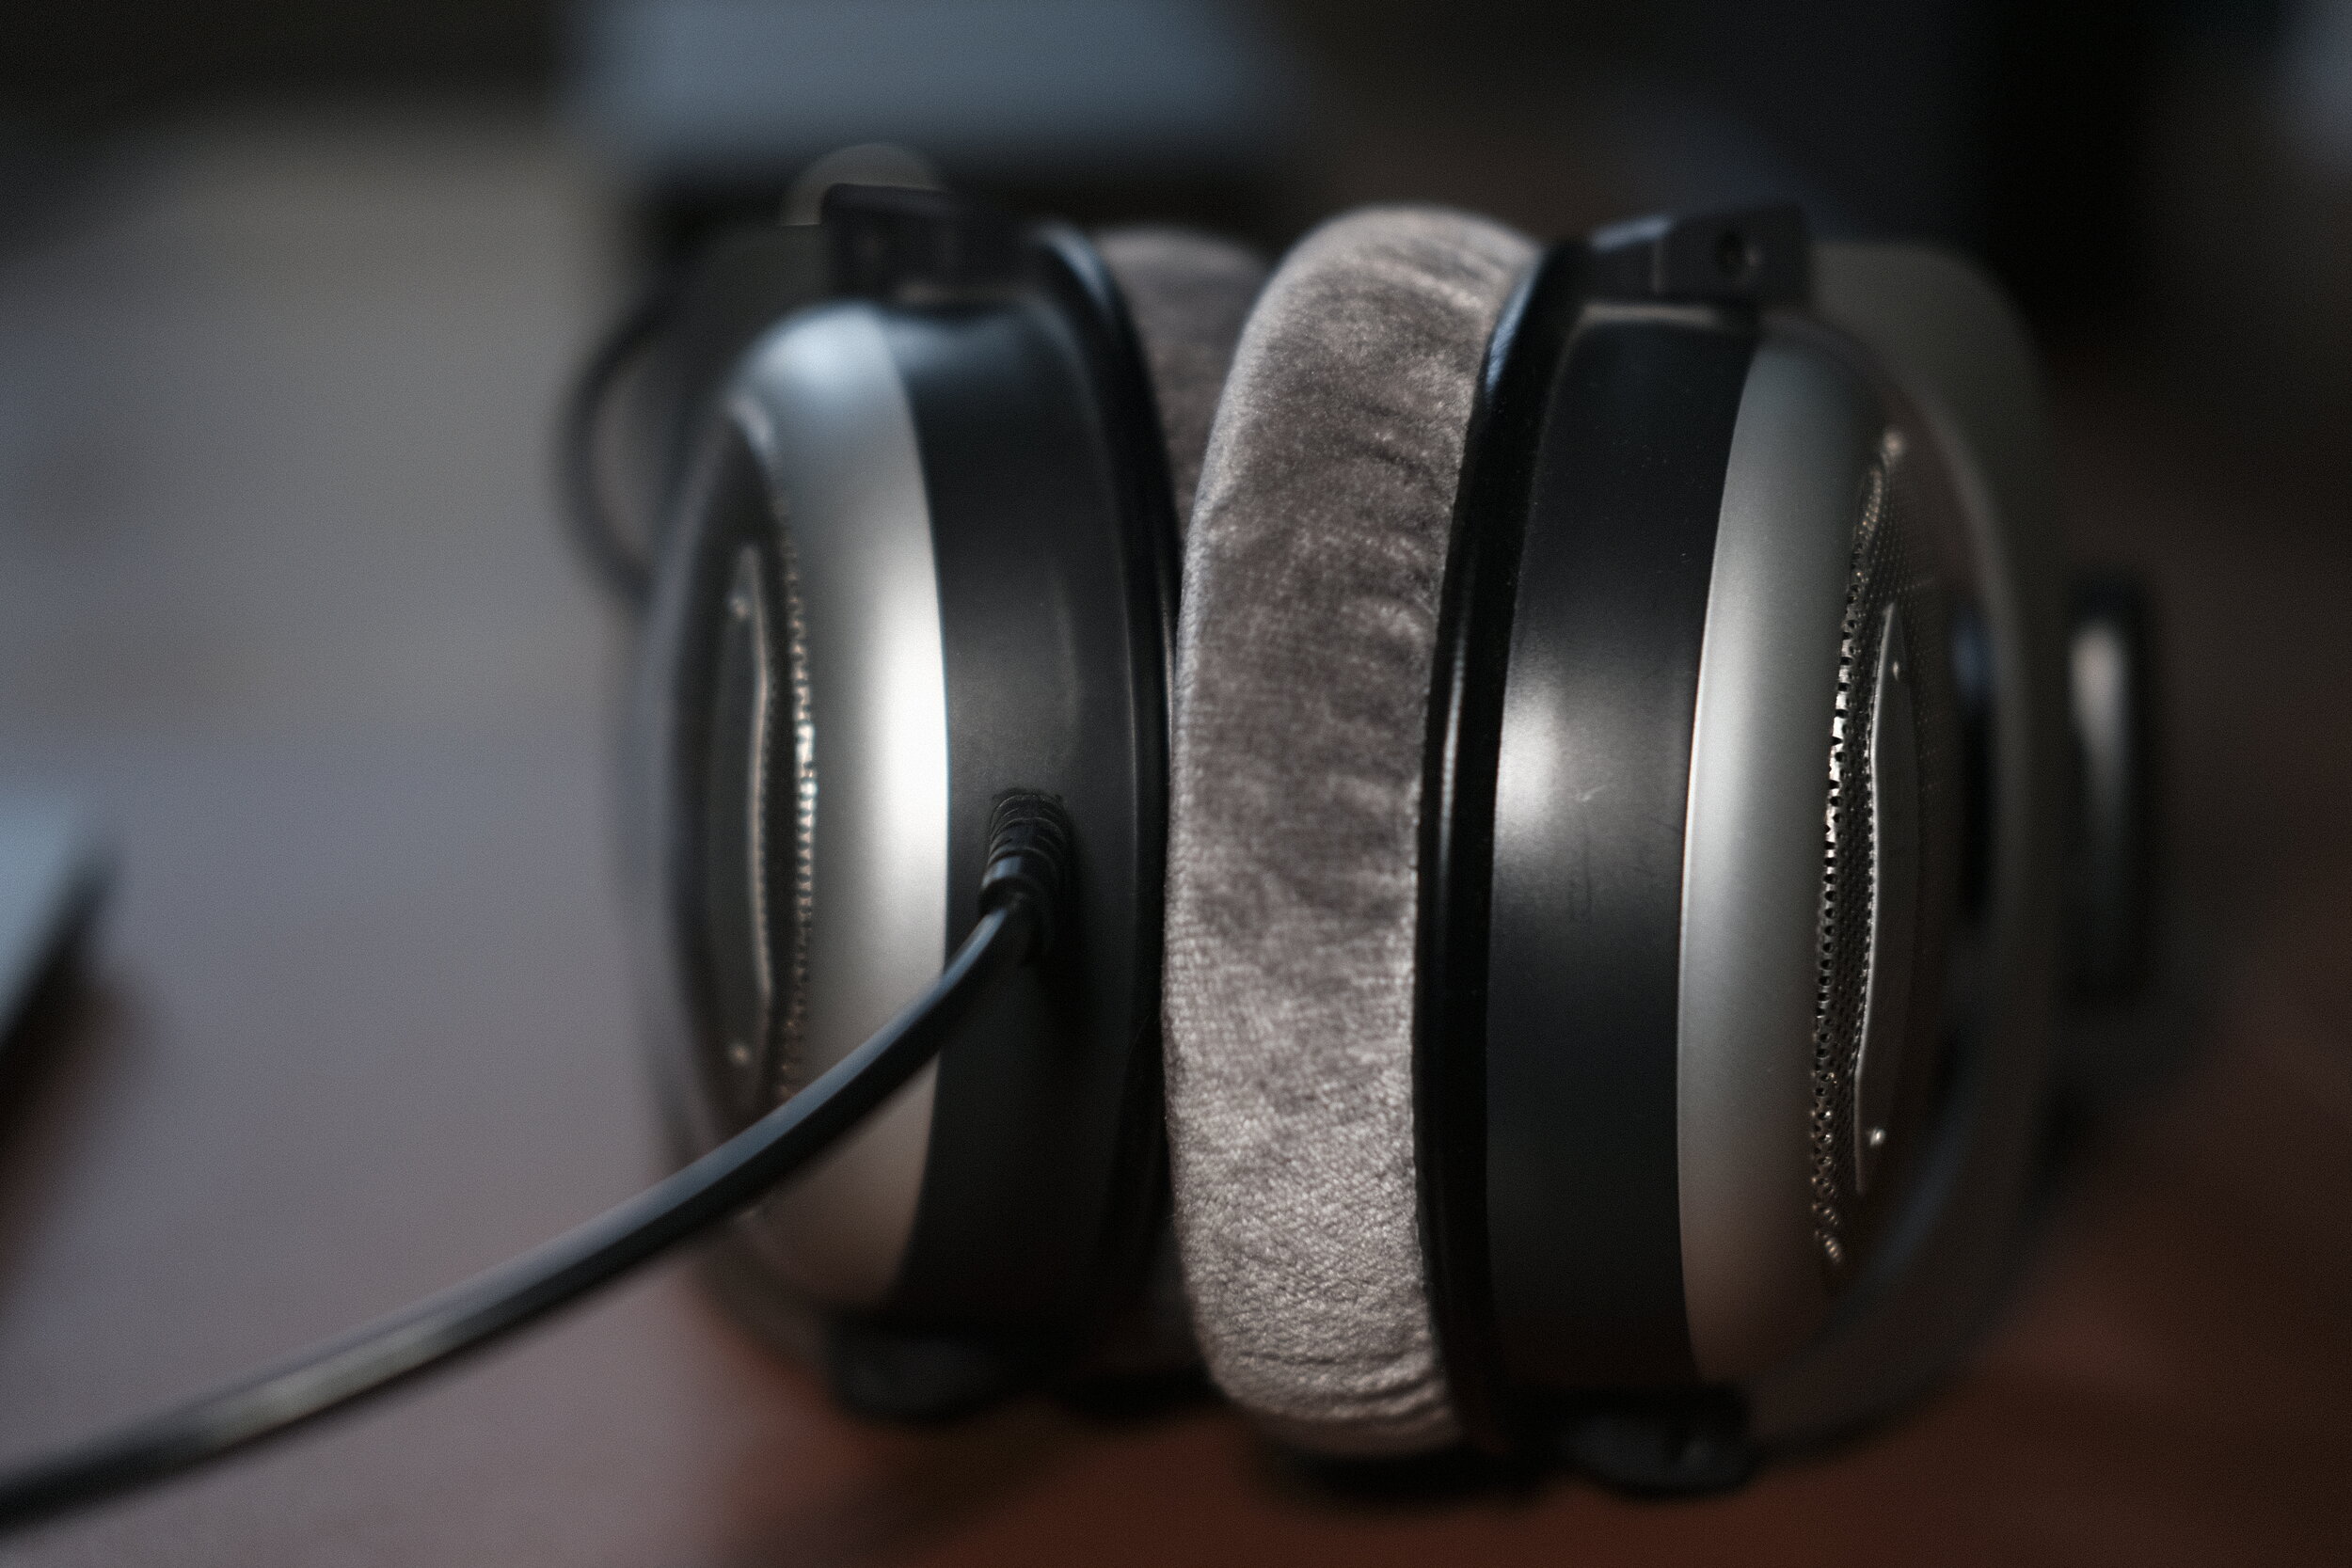
The cable is non-removable
Introduced in 1980, the DT 880 is a semi-open design, ideal for mixing and mastering according to Beyerdynamic. There are two distinct versions, the Pro for professional use and Premium Edition for home listening. Both sound the same though, with only some minor visual differences. I bought the Premium Edition because I prefer the straight cable (they are also slightly cheaper), but I would like the headband to be removable like on the Pro version.
The Premium Edition comes with a pleather foamed case for transporting, which is extremely bulky so it gets seldom used. The DT 880 rarely leaves my desk anyway. A slightly smaller and more convenient hard-shell nylon case is also available by Beyerdynamic at a reasonable cost.
Manufacturing and comfort
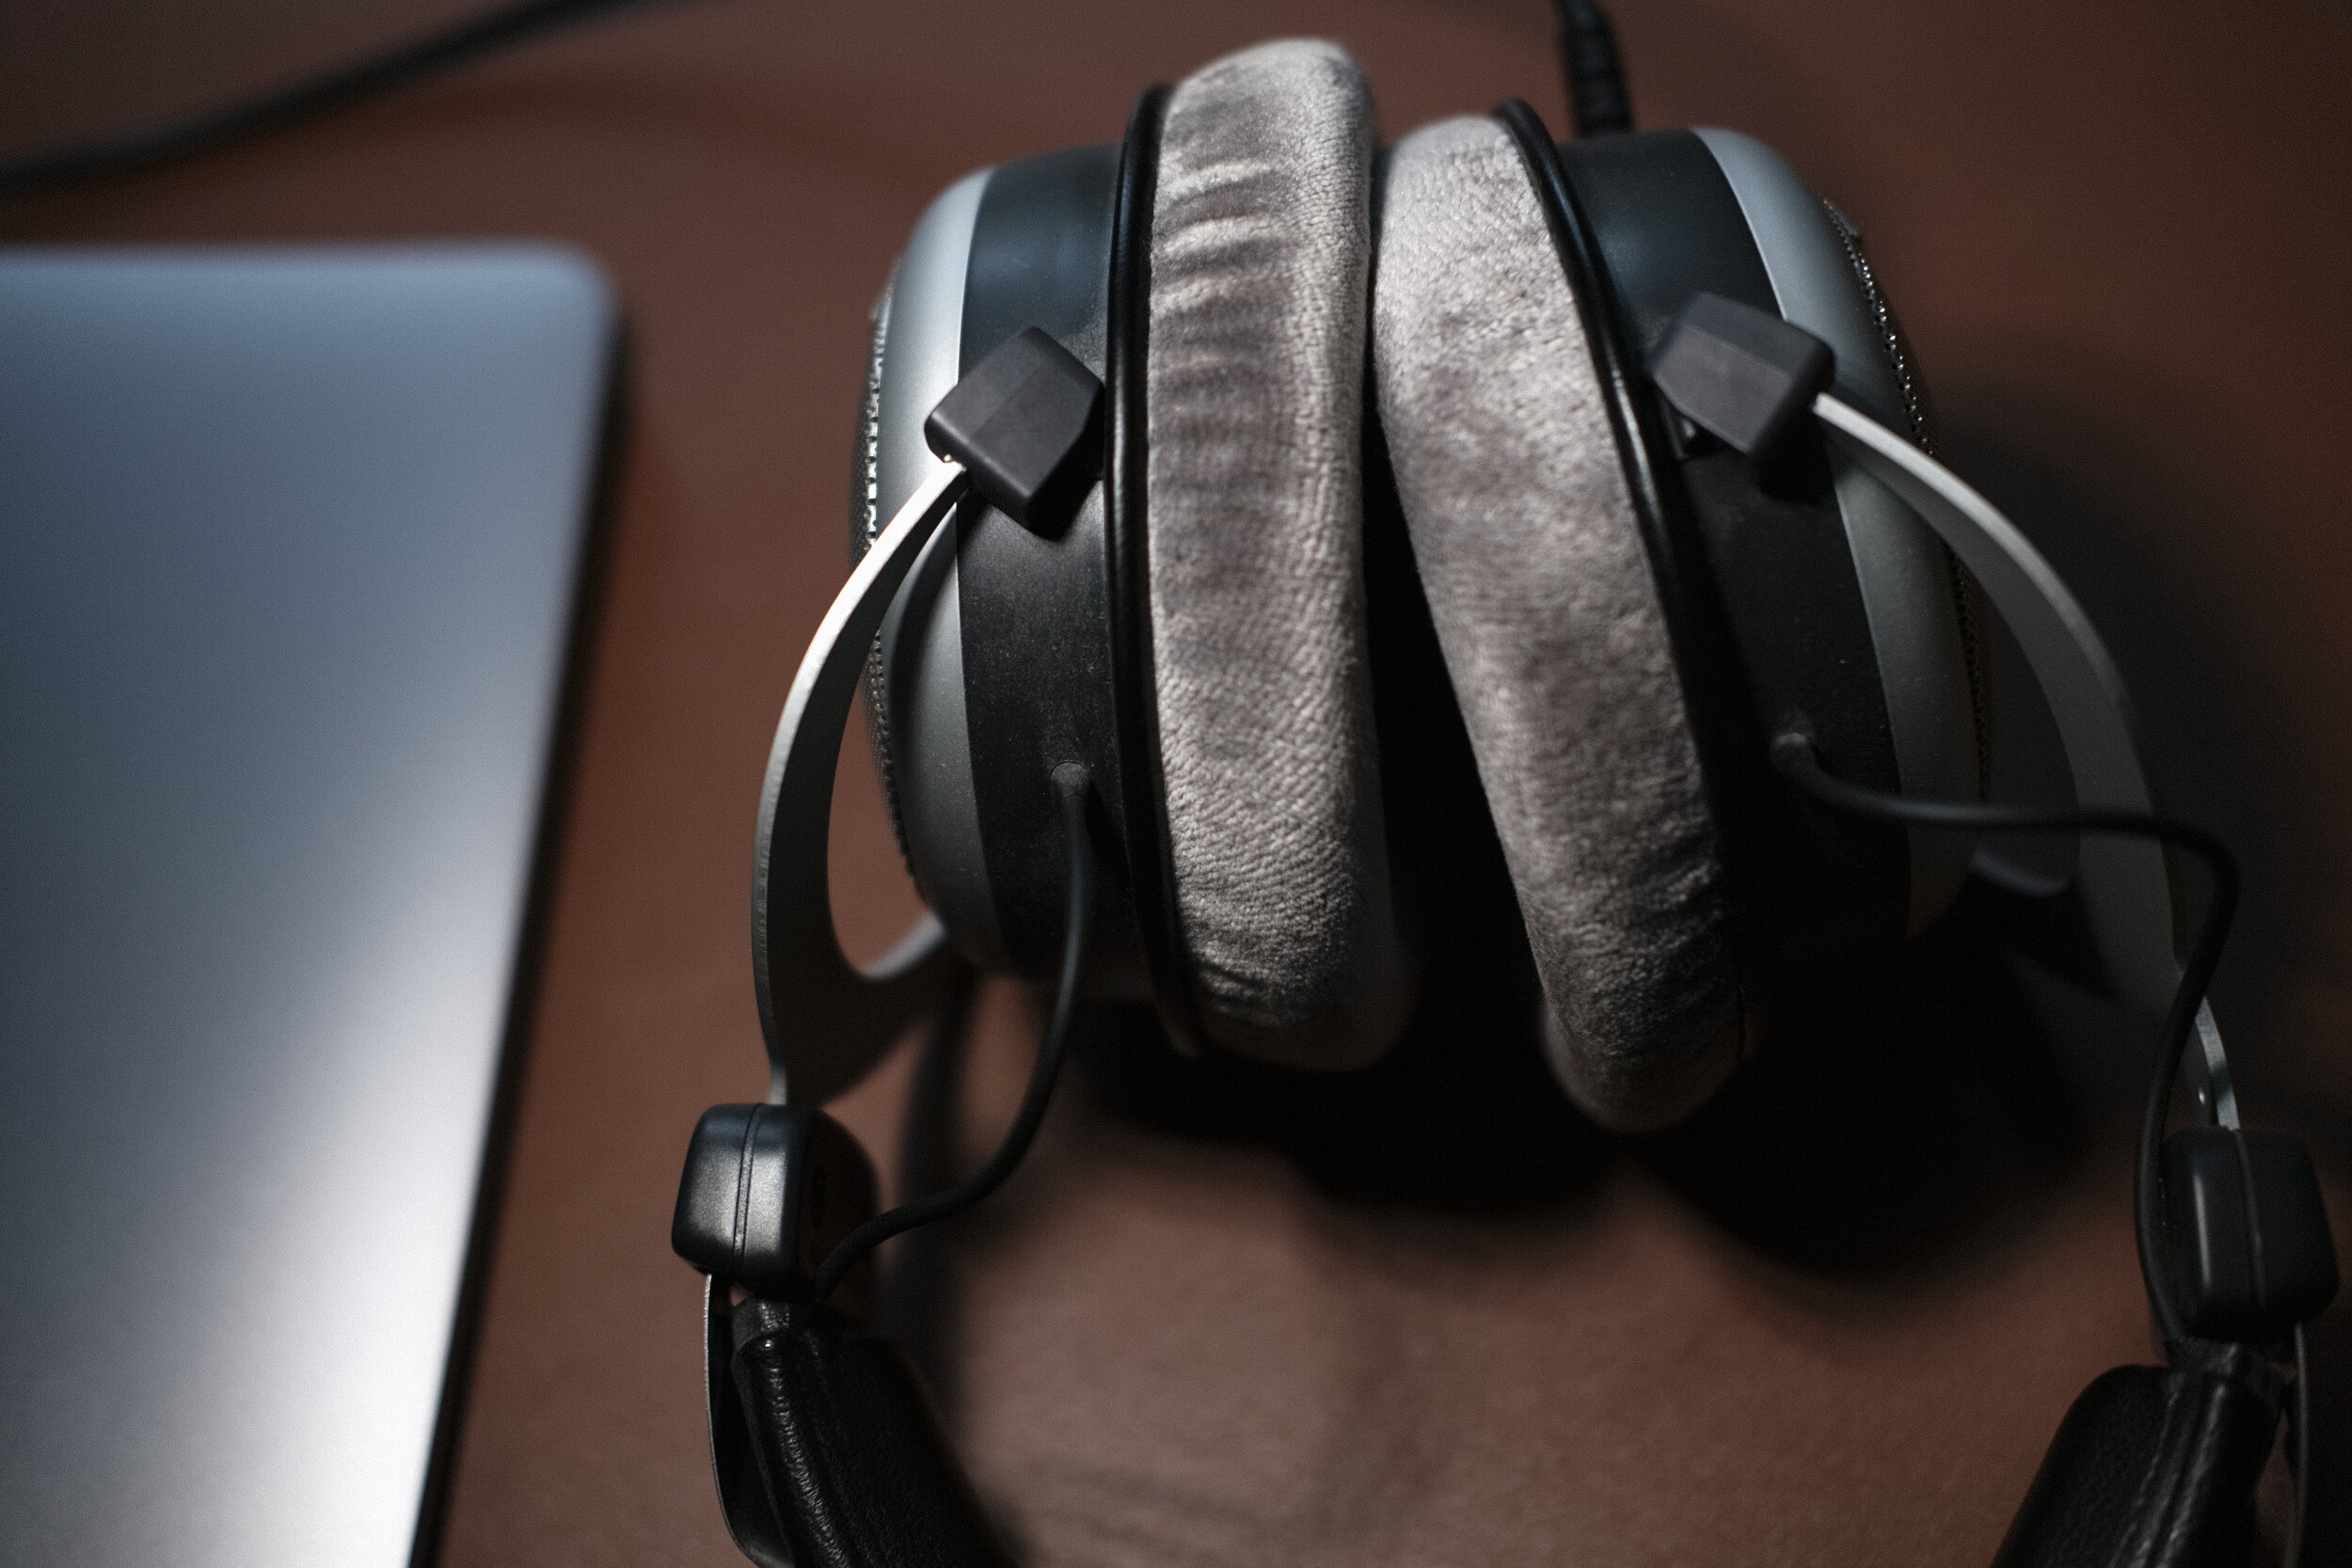
Industrial design with a mix of metal and plastic
The headphone follows the industrial design aesthetic of most Beyerdynamic products. I find the understated blend of black and grey shades very pleasing, and the mix of metal and top-quality plastic makes it very robust. The manufacturing of the DT 880 is impeccable; I have them since the beginning of 2018 and although it has slid from my desk quite a few times, it looks and functions just like the first day.

The cable could be shorter
The DT 880 sits on my head very comfortable; the large velour ear pads and that thick padding on the headband allow for extended listening sessions without ever getting tired. The cable on the other hand is an aberration; it is thick, permanently fitted on one side, and way too long. The quality is decent, but I wish I could swap it with a smaller one as the RME ADI-2 Pro FS is at hands reach from my sitting position.
Listening
Although I believe that the DT 880 are some of the best headphones in their price range and even well above, I have mixed feelings about their performance. I know, that's not what you wanted to read, but let me explain.
The sound is generally neutral, especially the low-end and mids. They reach deep, but the bass is never exaggerated; if anything it can be quite lean for some tastes. The mids are pure and open, every detail is utmostly portrayed. There is a slight emphasis on the low-mids, but it is negligible.
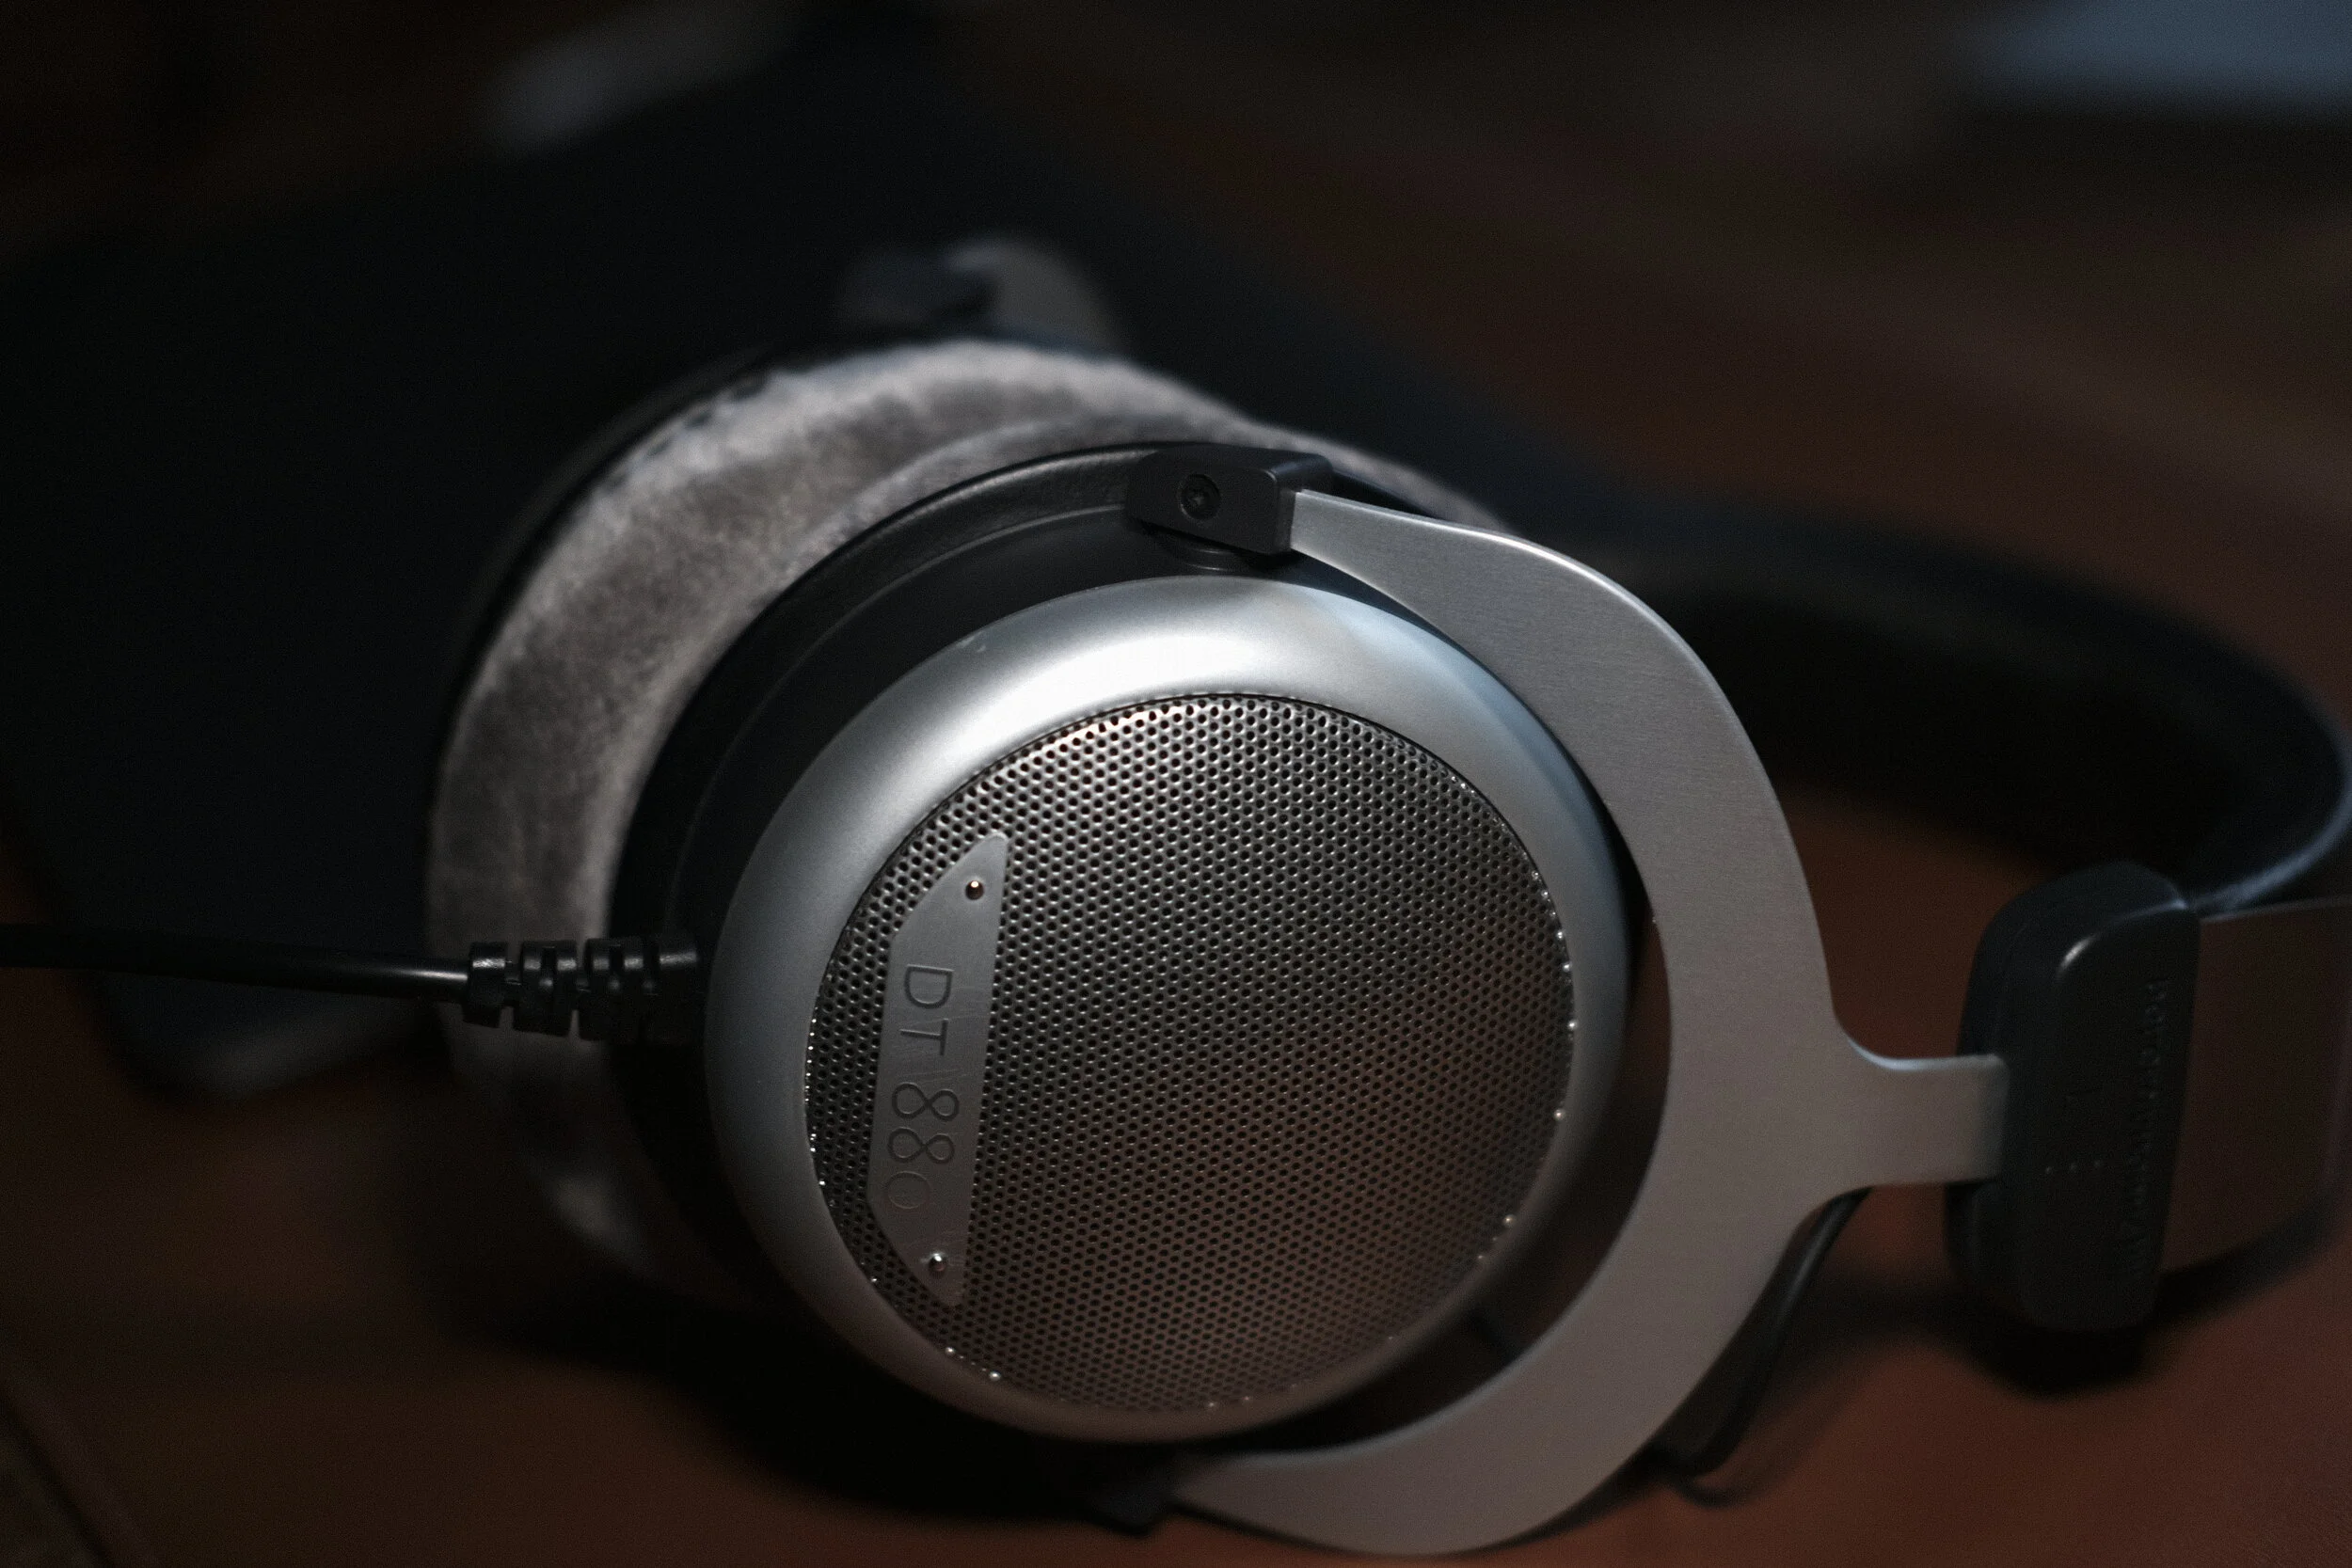
Beyerdynamic DT 880 Premium Edition
My difficulty in loving the DT 880 is the high-end, which tends to be unnaturally piercing and sharp. Even some luscious and generally dark David Russel recordings can sound dazzling. The enlarged trebles are useful only when I search for undesired sound in my recordings; for any other listening purpose, it only takes out from the beautiful balance of the rest of the range.
The presentation is transparent and wide, the drivers are fast and the delivery dynamic. The biggest strength of the DT 880 comes from its ability to represent the individual frequencies in a disunited manner, detached from each other. This aspect is invaluable for analytical listening, but as a result, the headphones don't let me forget that I'm listening to a recording; the medium never disappears entirely.
Correction required
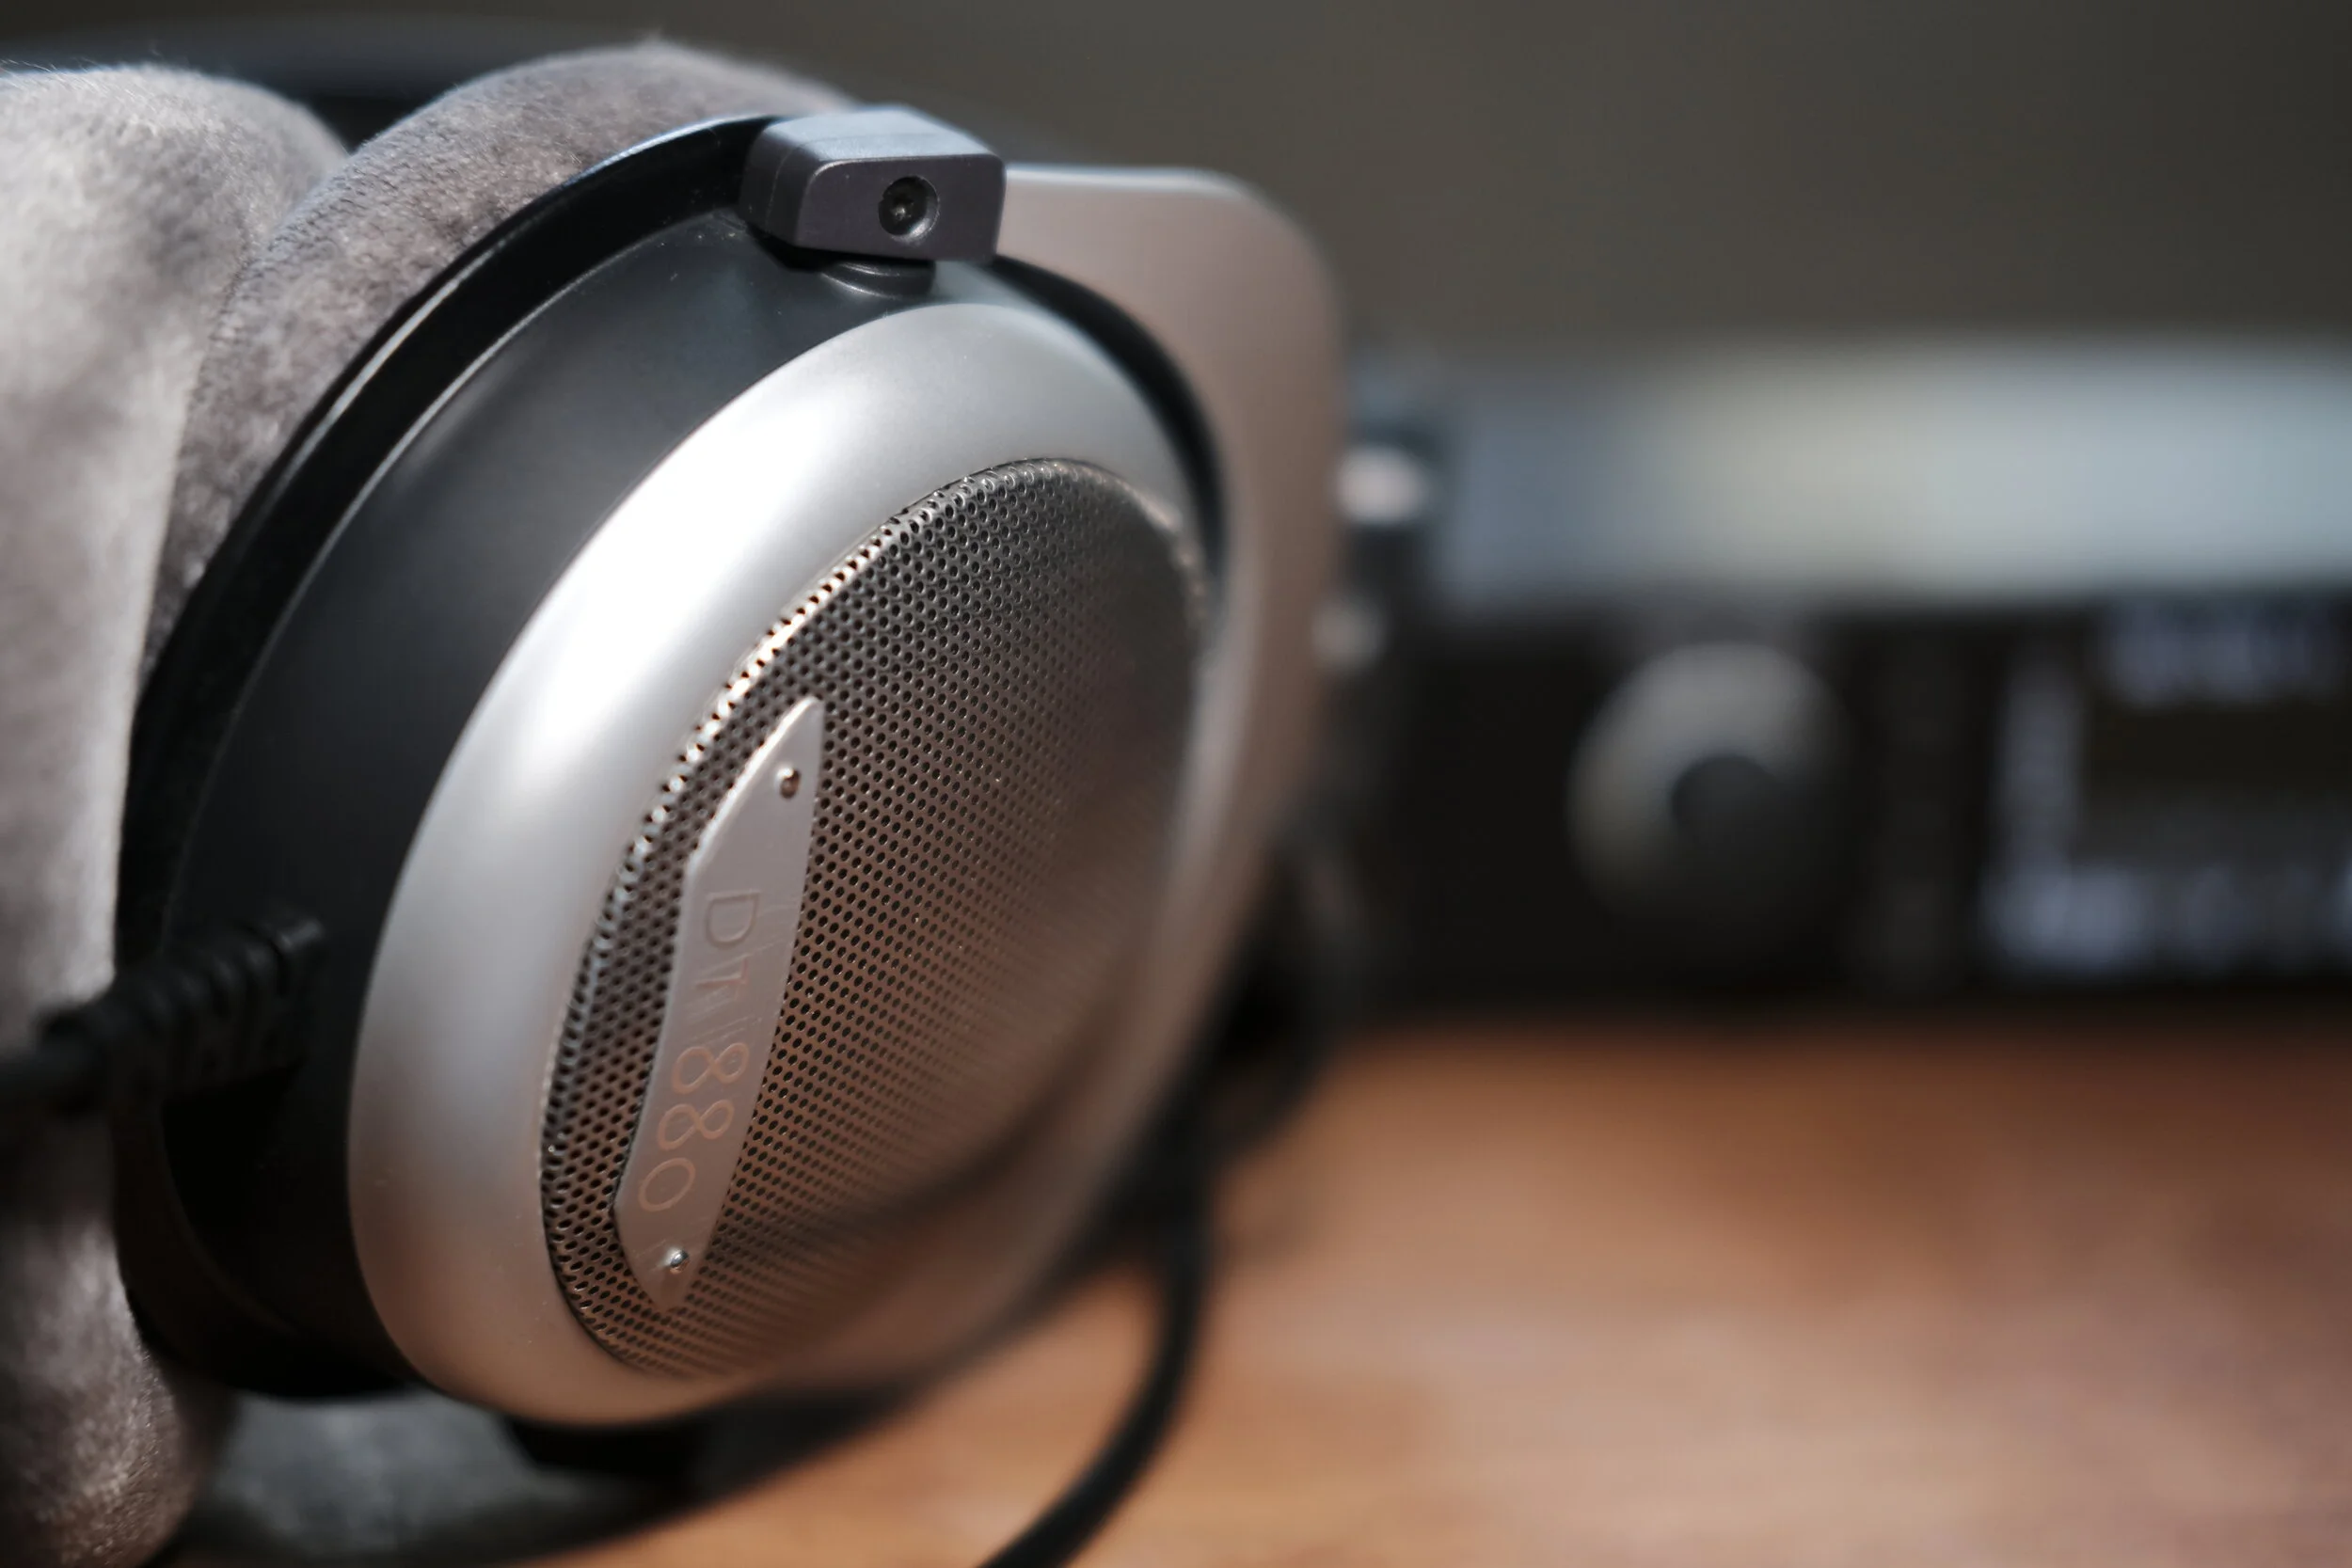
Beyerdynamic DT 880 and RME ADI-2 Pro FS
The DT 880 can improve dramatically if you are willing to bother with an equalizer. I had to create a custom EQ preset on the RME ADI-2 Pro FS to be able to appreciate them more. Taming the high-end makes the Beyerdynamics more comparable to my monitors. Still, the headphone remains utterly detailed but much more enjoyable than without any equalization applied.
I wonder if Beyerdynamic could fix the treble response on the production model. Maybe they don't want to tweak such a classic design, or possibly they want you to buy the new T1.3, which seems to be the ideal headphone for people without hearing loss.
Ohmage
My version of the DT 880 is the 250 Ohm. Even if there is a reasonable level for my ears (I usually listen to music at relatively low levels) when I use it even though my MacBook's output, the sound improves significantly when I drive it with the ADI-2 Pro FS. A more power-hungry 600 Ohm version is also available, as well as a 32 Ohm version for mobile use. In any case, you won't hear what this headphone is possible to deliver if you don't pair it with a high-quality amplifier and DAC.
Beyerdynamic’s DT 880 vs DT 770 and DT 990

Mini jack and 6.3 mm screw adapter
Beyerdynamic offers three main alternatives at a similar price range, all with unique strengths. From the three, the DT 880 is the most balanced and natural-sounding, admittingly apart from the treble spike. The DT 990 is a fully open design and exceedingly analytic. To be honest, every time I listen to anything with it, I get dizzy with its excessive high-end. Finally, the DT 770 is closed-back and its main use is in the studio during tracking. It blocks external sounds to creep in and vice versa, but it doesn't sound nearly as nice as the DT880.
Conclusion
The Beyerdynamic DT 880 is clean and balanced for the most part, adequate for any professional use. It responds well to EQ, which can make it much more useful; the analytic Beyerdynamic nature is always present though, so it is impossible to get absorbed in the music. Considering its engineering and performance, the DT 880 is pretty affordable and is probably the best headphone at that price range, especially if you are willing to use some form of correction.
By the way, if you are still wondering; the best way for someone to fully appreciate the music is, of course, attending a concert.

Three Most Essential Plugins for the Classical Guitar
With the seemingly unlimited processing power of modern computers and affordability of recording equipment, it is not hard to make amazing recordings on location or even at our living rooms; and there is no need to wear a white coat to be able to use a microphone anymore.

Abbey Road recording engineers in white coats
This democratisation of music production brought an abundance of plugins; plugins that we can use to shape our music in any shape or form we can imagine. We don't need to buy expensive and bulky hardware equalizers and reverb units anymore.
Albeit the plethora of plugins, I adopt a minimal approach. There are just a few of them that I use every day and consider to be crucial for my workflow. Here are the three most essential plugins for the classical guitar:
Phase Metering with the 2CAudio Vector
The classical guitar is a rich and complex-sounding instrument, and as one, it can only be fully appreciated when recorded in stereo. Most of the stereo microphone techniques require the microphones to be placed at some distance with each other, and the more microphones you use, the easier it gets to face phasing problems.
Phasing occurs when the wave shapes of two or more microphones are not perfectly aligned in the time domain. This attribute is not entirely undesirable; as the sound begins its journey from the plucked strings and the vibrations of the top of the guitar, our notes travel as sound waves towards the microphones and reach them at slightly different times. Combined with additional waves that reflect on the walls and other objects around us, all with small but not insignificant delays, these slight differences help to create the stereo effect that we experience. Not dissimilar to how our ears and brains perceive and interpret the world around us.
When these differences are augmented to a greater degree, phasing occurs and has a noticeable influence on the sound quality of our recordings. Cancellations and comb filtering can potentially strip fundamental frequencies from our recording, leaving the recorded guitar sound thin and weak. Phase problems can be fixed during mixing by aligning the offending tracks, but it's always preferable to take the extra time and correct this when setting up the microphones.

2CAudio Vector
Here is my process. After finding the desired positions of the guitar(ist) and microphones, I make the first test recordings, then I immediately load the 2CAudio Vector plugin to check for any phase issues. If needed, I move one of the microphones a centimetre or two, closer or further away. Possibly, I need to adjust the angle of the microphone(s). I make small changes and repeat as many times as necessary.
Any result higher with than +70 is acceptable, I strive though for an average of +80 or higher.
Additionally to the phase-meter, the 2CAudio Vector displays a visual spatial meter, a long-term average level, and panning meters. It is a very important tool, and, it is free.
Alternatives - for those who are on a Mac and use Logic Pro X, Apple provides a bare essential but usable alternative; the Correlation Meter, found under the Metering group. If free options are not for you, iZotope offers the Insight 2 metering plugin at a substantial price, which offers a lot of additional metering tools that can be handy.
Filtering, Tone Shaping and Surgical Corrections with the FabFilter Pro-Q 3
Learning how to use an equalizer correctly can transform a good recording to a world-class one. Not to say that it can save your wallet from the need of better guitars, microphones and other gear.
A gentle roll-off of the low (below 50Hz) and high frequencies (above 18000Hz) is my starting point. There is not much if any classical guitar information at these ranges and most speakers (for home, or even pro-audio) will attenuate these frequencies. I don't want my recordings to have much information that I cannot hear, anyway.

FabFilter Pro-Q 3 in Action
Tip: I've created a preset with these filters so that I don't have to set them up every time. Better yet, I have created a logic template with my plugins and panning presets that I load any time I start a new session. Small things can make our lives easier and save a lot of time.
Next, I'll try to see if there is any unwanted frequency or resonance that needs to be tamed or even eliminated. I use a wide Q band when boosting frequencies for the smoothest response, and a narrow Q band when cutting to eliminate the offending frequency without affecting nearby elements.
And finally, I might apply a mild high shelf, boost or cut of a couple of dBs, if I find the need to get a crisper or darker sound. If there is too much body or not enough fullness, I apply a mild low shelf cut or boost. A little goes a long way.
To be honest, most of my solo recordings nowadays have a very limited amount of EQ (needless to point out that all the microphone comparisons on this site have no EQ or other processing). I try to get it right before the signal converts to digital, taking a great deal of consideration on the room and microphone technique, and my fingers on the guitar. Yet sometimes this is not possible for various reasons, and learning how to sculpt your sound with an equalizer can be invaluable.
For example, last year I decided to record my classical guitar at a historic monument in Greece, Zalongo. I took my trusty Sony PCM D100 portable recorder with me... on top of the mountain. The high altitude proved to be very challenging, the wind didn't allow for any normal position of the recorder, so it ended up being too low and on the side. When I returned home, I thought that the recording was ruined, but careful equalization saved the day.
My recent series of articles exclusively focuses on how I utilize EQ. If you are interested in gaining more knowledge about it, these articles are a great resource to refer to: Crafting Your Sound: How to shape your classical guitar recordings with EQ
The FabFilter Pro-Q 3 is one of the finest equalizers on the market. The sound is clean and precise, yet with some extra dimensionality and sweetness. The GUI is as intuitive as is breathing, the possibilities offered are virtually endless. Besides, a convenient real-time spectrum analyser to better judge what your EQ choices are affecting is available, as well as other useful tools. It is not cheap, but it is the best!
Alternatives - any modern DAW would have a decent equalizer built-in, basic filtering will be effortless, but more complicated sculpturing will be somewhat limited. Waves Q10 is an affordable equalizer with somewhat similar functionality and interface.
Telling sweet lies with the 2CAudio Aether
Considering that the performance is excellent, the general tone and attributes of the guitar well captured; anything we add at this point is a lie. Adding reverb to a recording is a necessary lie, as nothing will affect the listener more than the physical space that the music takes place.
Contrarily, nothing is more repulsive than a terrible recording trying to hide behind a wash of cheap "church" ambience.
Tip: As reverb tends to smear the sound to a considerable degree, I make most judgments regarding EQ, microphone positioning, etc. without the plugin engaged. I want to have the best possible result, before applying any enhancing effects. I fine-tune my levels, panning and equalizer choices with the reverb later.

2CAudio Aether Algorithmic Reverb
Applying reverb needs to be a mindful process. To some extend it is a stylistic choice; what is appropriate for the music, what expressive and dramatic elements we want to convey. According to these questions, I choose an algorithm or preset, a starting point, but the settings need tweaking to fit the overall character of the music.
Room reverb has the power to make a recording feel real and accessible, friendly, like having a guitarist play for you in the same room. A medium or larger hall sound will present the audience with a feeling that they have attended a professional recital; a formal setting. Lastly, larger halls and churches can distance the musician from the audience, maybe even from the instrument itself, granting an elusive and ethereal mystique.
Some audiences might prefer the intimate warmth of the Segovia's recordings, while others find pleasure in the spaciousness of Julian Bream's recordings, yet others might seek a middle ground; not too dry, not too wet. For me, it primarily depends on the actual music.
When fine-tuning the settings, the tempo and rhythms of the piece must be considered; how much space exists between notes, how quick do they change, how dense is the harmony, etc. Faster pieces need shorter reverb tails or they will sound blurry, slower pieces might benefit by longer ambience tails. I fine-tune these parameters on a song to song basis, a few times I might even add automation to the adjustments.
All rooms have a sound, they accentuate and attenuate different frequencies, like employing a catholic EQ. Any decent reverb plugin will offer some adjustability for regulating the response of its algorithms. Most of the time, I tend to tune my reverbs a little darker so that they are not as obvious. Taming the low end can also be desirable to help the recording be a little clearer. At rare cases, I will use two instances of the plugin with different settings on high and low responses.
Tip: The place of the reverb on the signal chain matters, I sometimes like to put the Reverb before the EQ. Hence the general equalization applies to the recorded sound as a whole, almost like shaping a classical guitar tone recorded in a larger room. I avoid any drastic boosts or cuts in that case though.

2CAudio Aether’s intensive list of presets
The 2CAudio Aether is the most expressive and expensive-sounding reverb plugin I have ever witnessed. It is an algorithmic reverb and can sound quite realistic but always musical and impressive. It has excellent room and hall emulations, suitable for classical and acoustic music, still, it can create any ambience sound you can imagine. 2CAudio provides an enormous preset library for the Aether to get you started, and the adjustability is intense. Right now it is on sale.
Alternatives - I started with the 2CAudio Breeze, before migrating to its bigger brother. Breeze offers a similarly excellent sound, at a bare essential and affordable package. It offers less tweakability, but that might be a good thing as the Aether can sometimes overwhelm the inexperienced. Breeze 2 should be even better than the first version I was using. I have also heard good things about the Exponential Audio PhoenixVerb, but have yet to try it.
I’ve recently tested about a dozen different reverb plugins, to find the Best Reverb Plugin for Classical Guitar.
Closing thoughts
I have and sometimes use other plugins as well, but I try to keep an as-small-as-possible armoury. By limiting my plugin choices, I can concentrate on the music. I want to have to take as few unimportant decisions as I need.
If you are on the market for a new EQ or reverb plugin, this article can give you some fine options. But I also hope that this text might inspire you to learn and use what you already have, use your ears to make mindful adjustments, and finally present your music as you intend.

A Three-Microphone Setup for Recording Classical Guitar
An M/S Stereo alternative
Classical Guitar is a complex and rich sounding instrument; as such, it sounds better when is recorded with at least two microphones. A statement that you must have read several times already if you hang out at this site. Some engineers argue though that guitar is a relatively small instrument which tends to sound too "wide" when recorded with the most conventional stereo techniques; thus sounding unrealistic in playback.
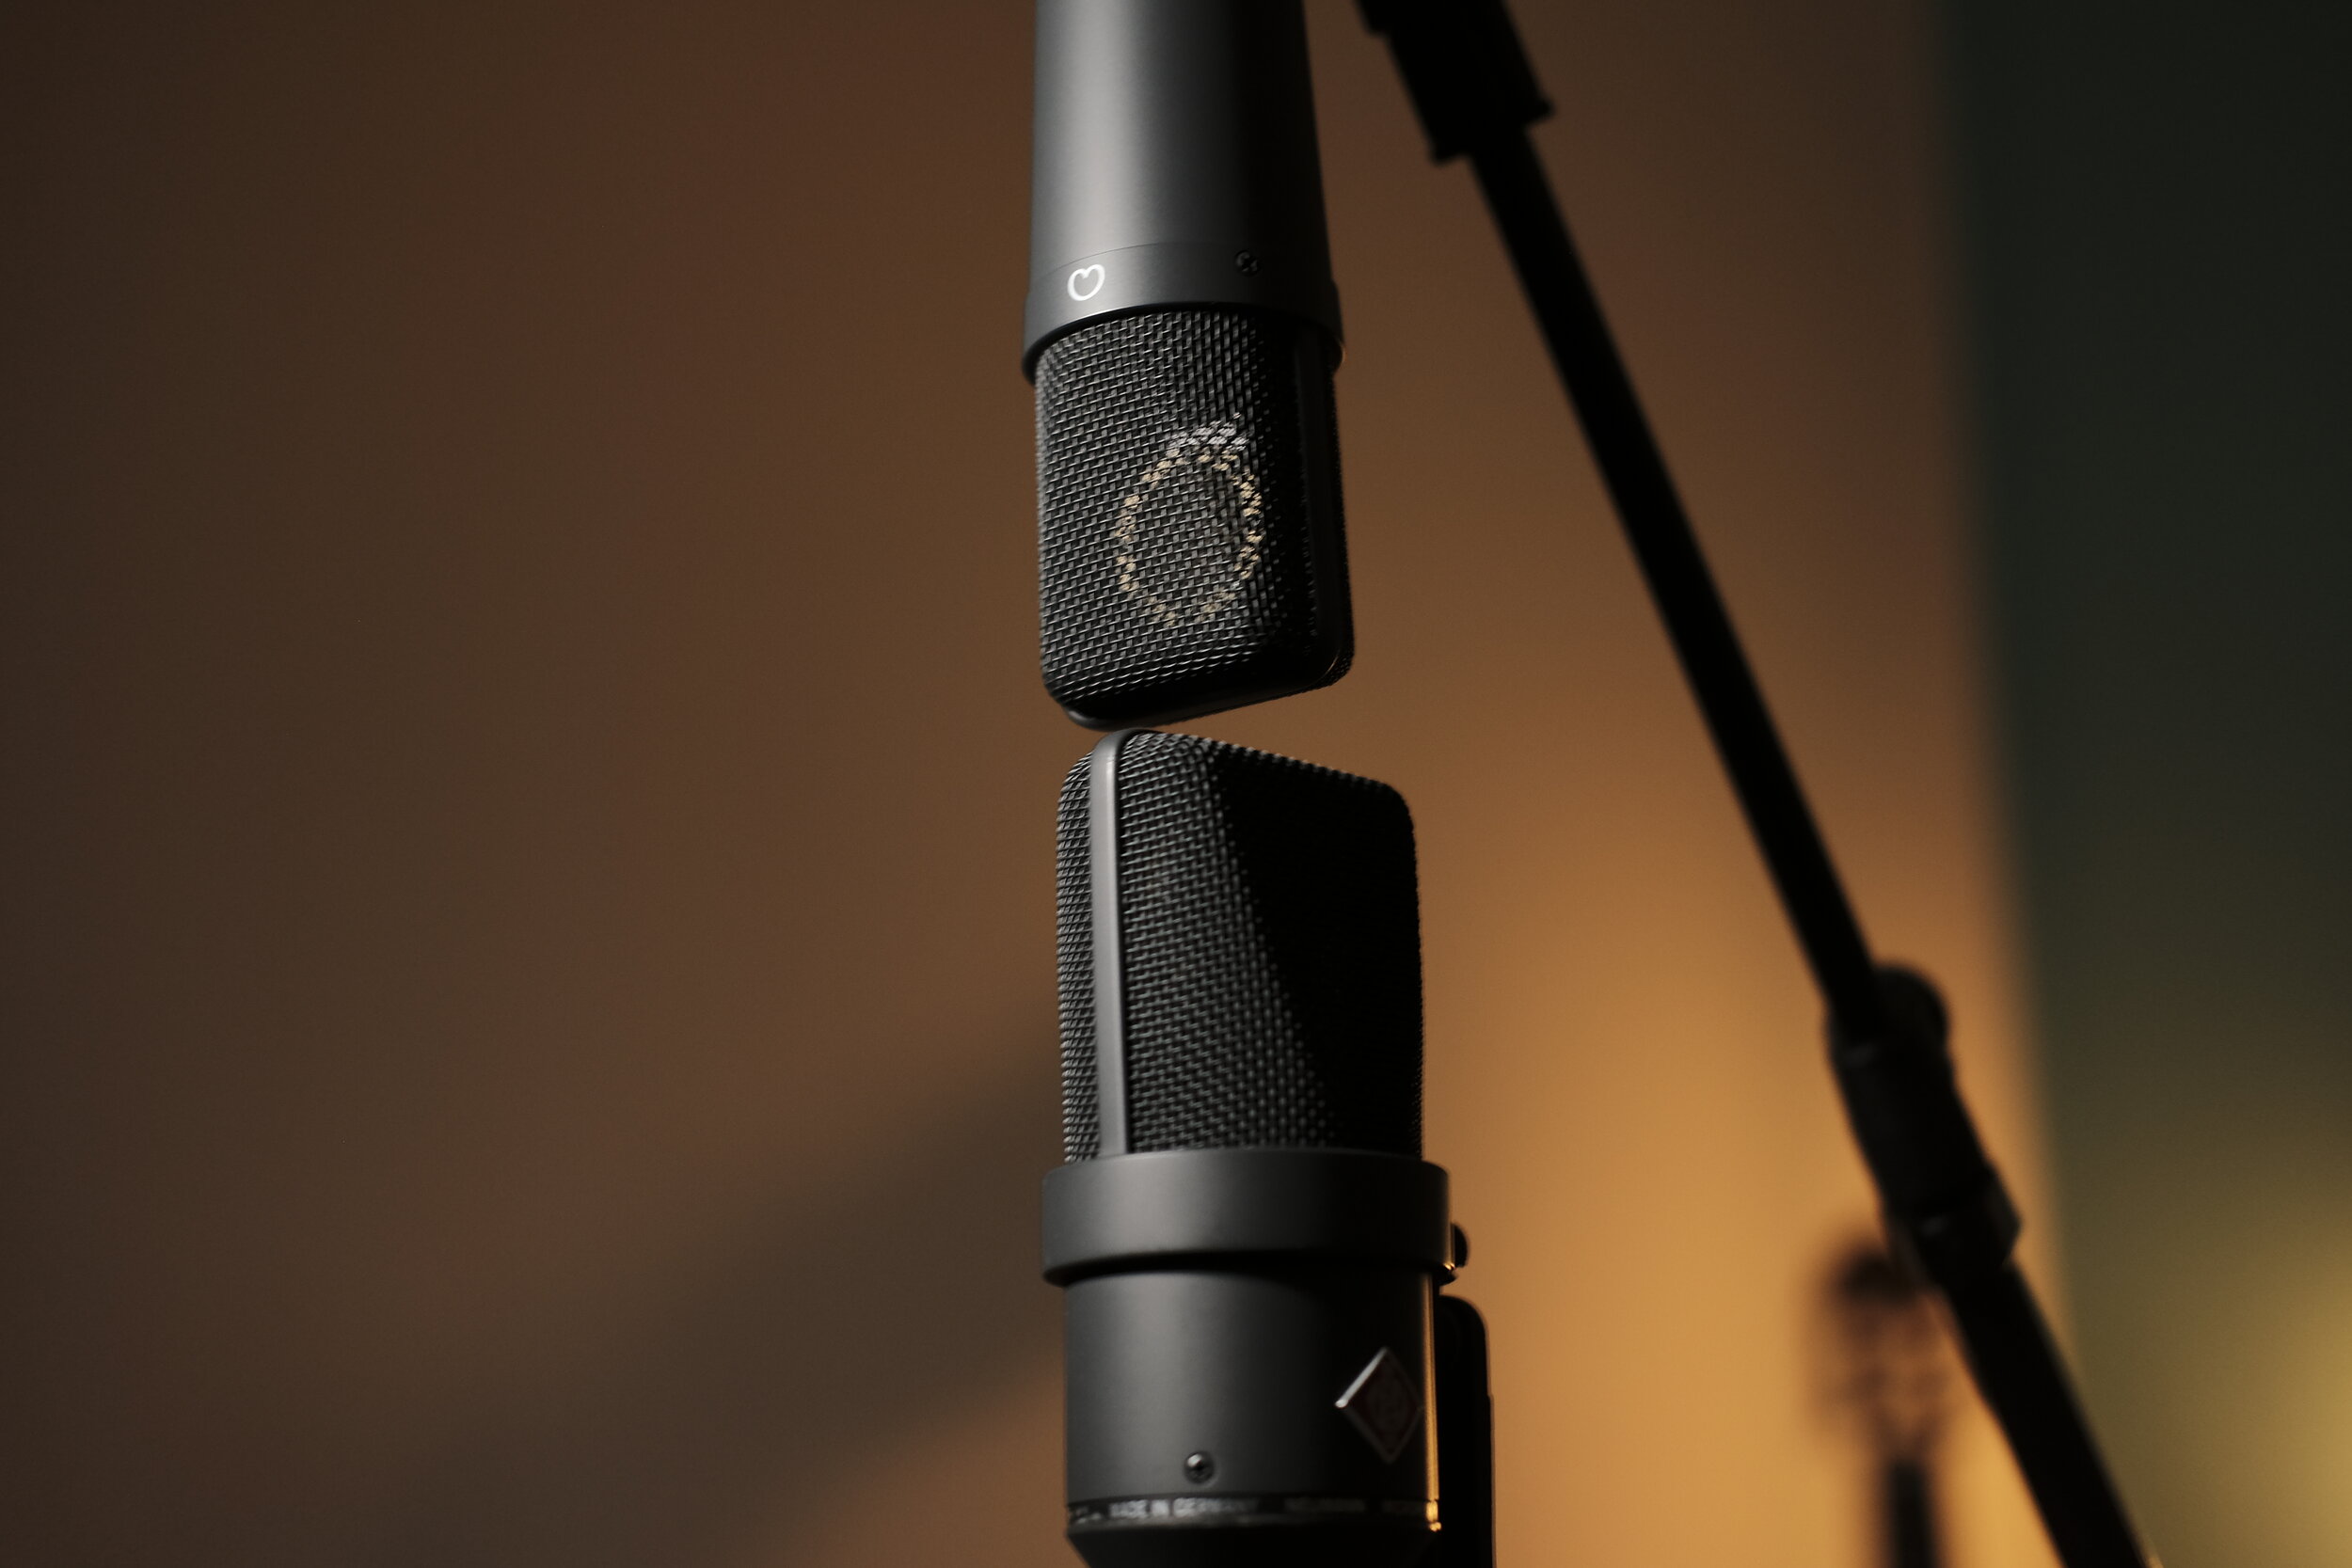
Neumann TLM 193 and TLM 170 in M/S Stereo Configuration
Mid/Side stereo, which I discuss in my Three M/S Stereo Setups for the Classical Guitar article, is usually praised for its truthful representation of the classical guitar. The elimination of phasing problems and the flexibility it offers during mixing are additional important advantages, however, it is not immune to potential issues. Namely, the collapse of the room information in mono reproduction, and the inability to hear the resulted-combined sound without some processing to the channels (or the use of an M/S matrix). Lastly, symmetrical Figure-8 microphones, required for the "Side" channels, with a balanced response are generally expensive.
Alternatively, the combination of a "Mono" microphone placed at close-proximity and a "Stereo Pair" at some distance, shares some similar advantages without the drawbacks of M/S Stereo. Hence the Three-Microphone Setup is an appropriate option for capturing the subtleties of the classical guitar.
Purpose in position
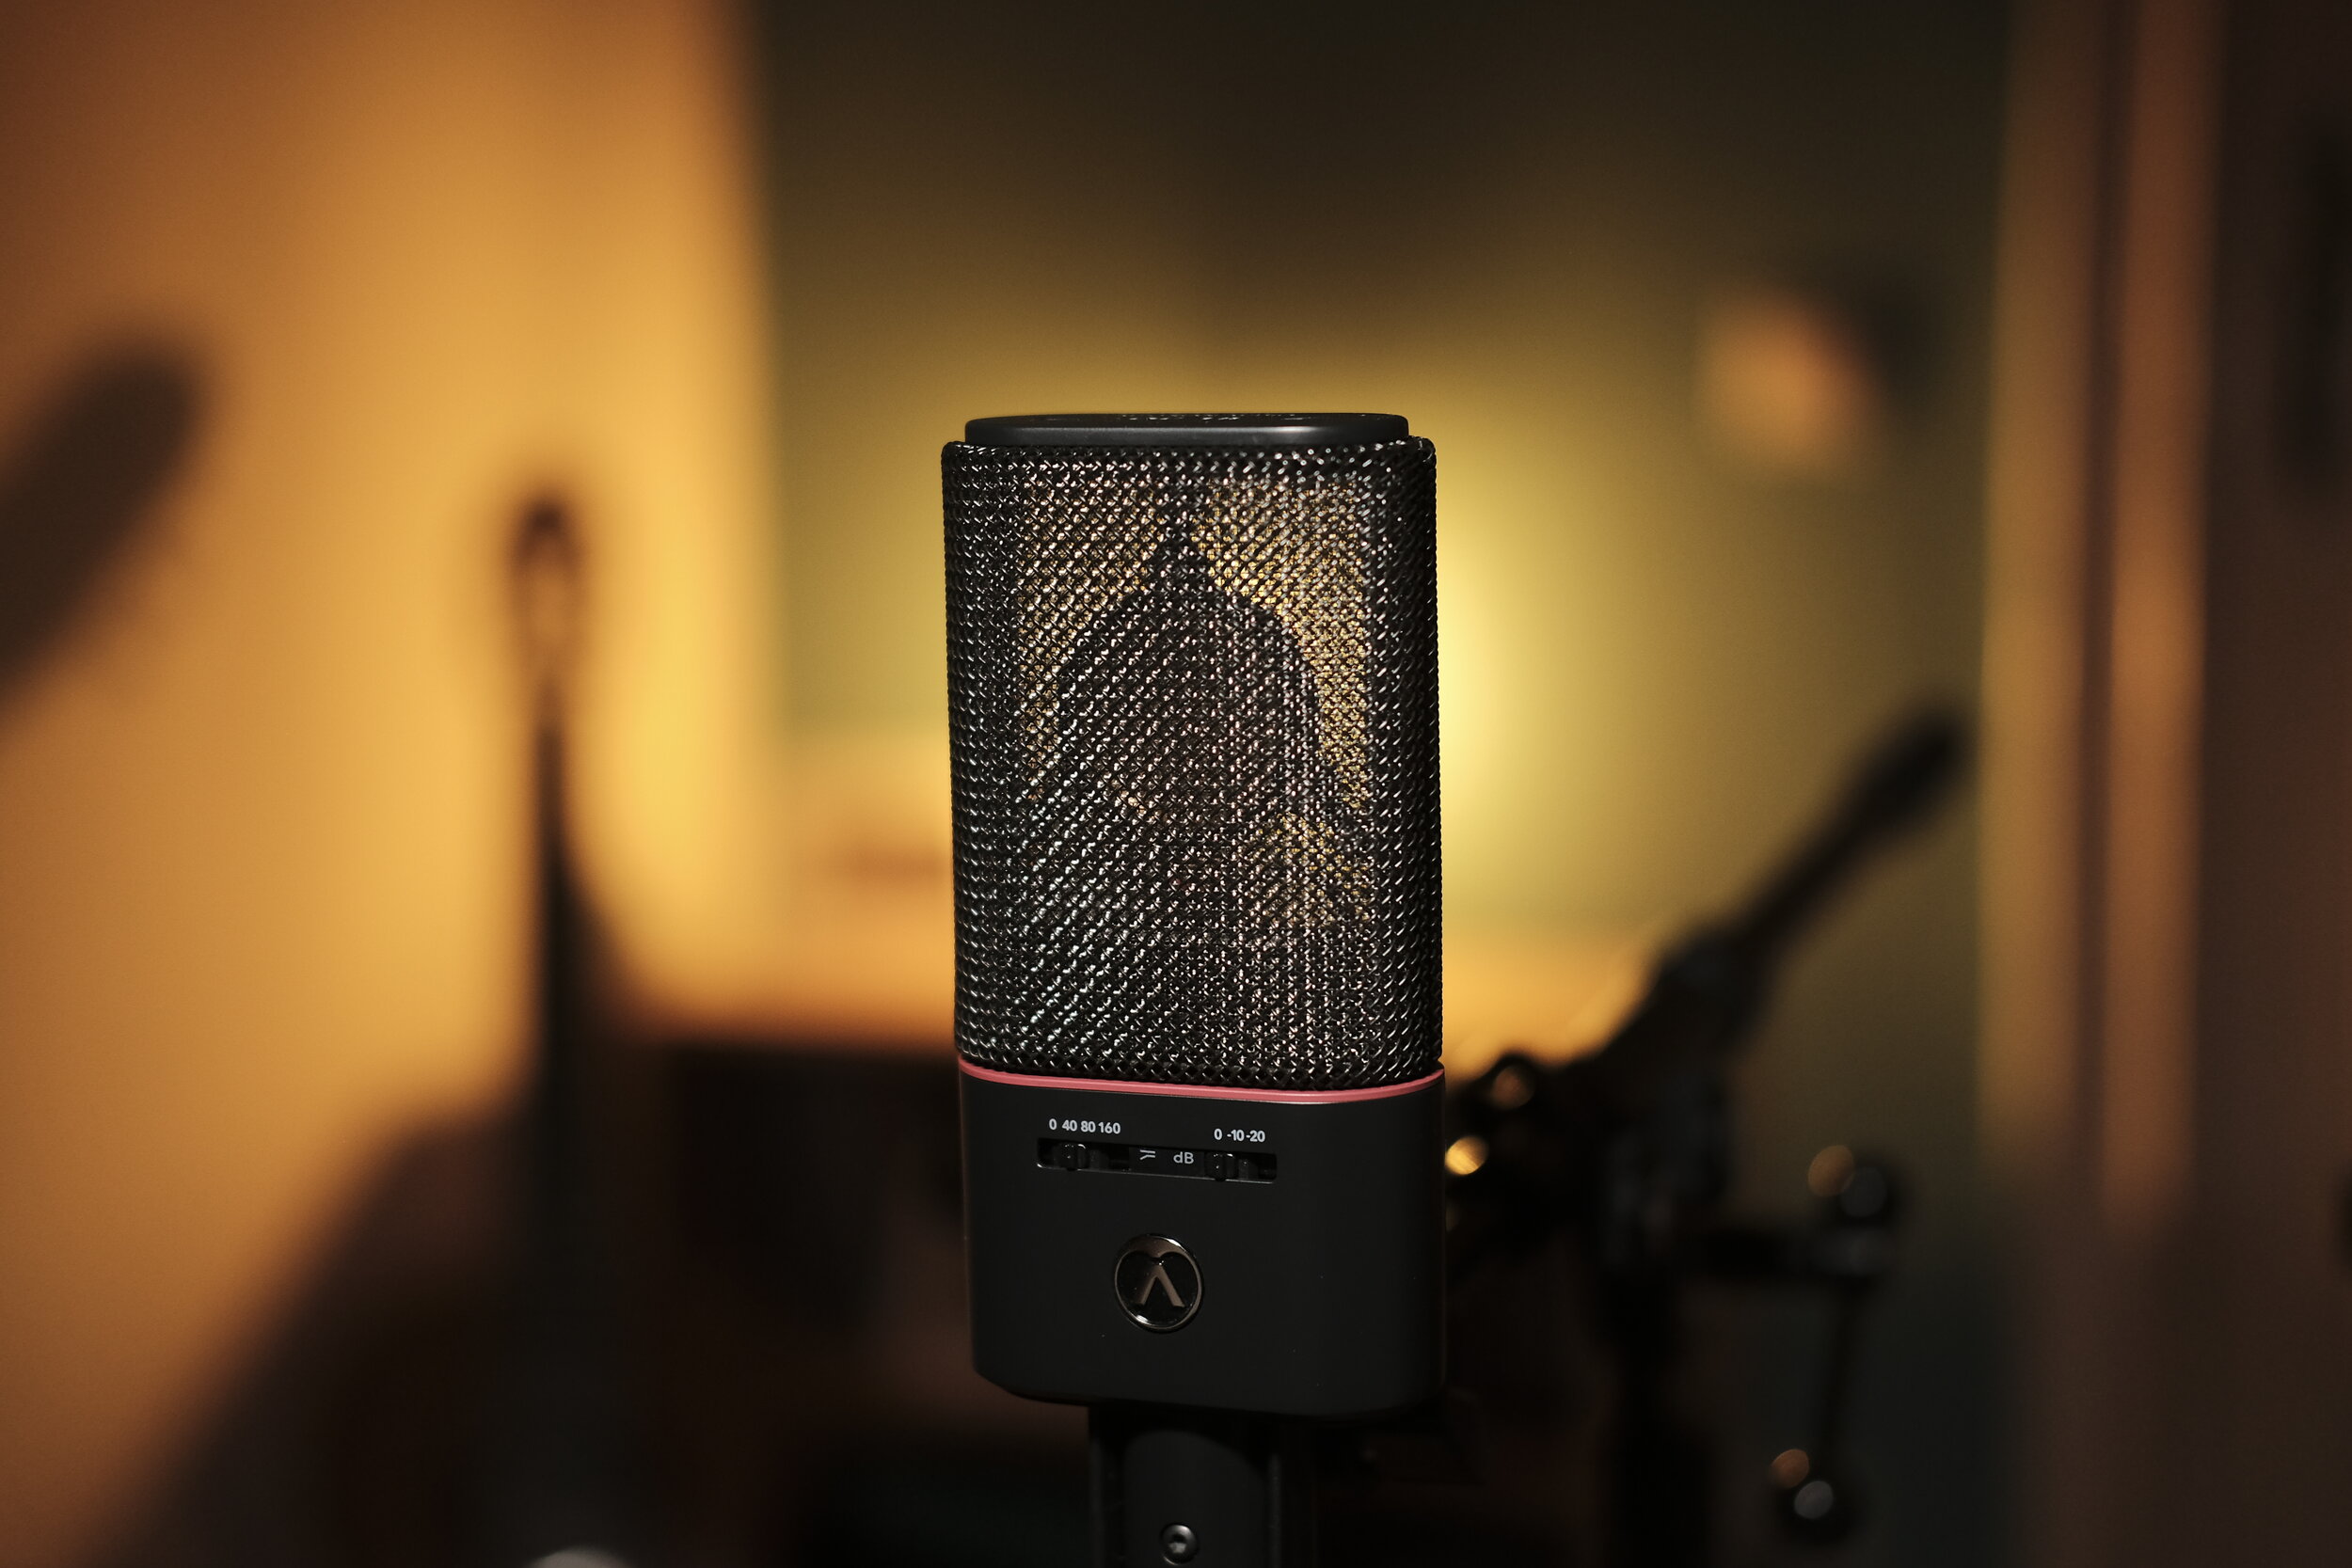
Austrian Audio OC18 - A Large Diaphragm Cardioid Condenser
The "Mono" microphone is positioned close to the instrument (at about 50cm, although some could go as close as 30cm) to capture a full-bodied sound. I recommend a large-diaphragm condenser with a smooth treble response for this position; as not only it will capture the fullest sound, but the slower transient response of the large capsule will also give a less analytic, more relaxed response.
The "Stereo Pair" is placed a little further away to capture the sound of the room. A pair of small-diaphragm condensers is ideal here due to the better off-axis response and can be either Omni or Cardioid patterns depending on the acoustics. The actual distance depends mainly on the room; accordingly, as the distance increases, the height of the microphones should be increased as well. The distant pair brings to the mix crucial depth, space and some high-end articulation.
Decisions; Player vs Audience
Another way to see the three-microphone setup is as a fine compromise between the intimacy of what the player hears and the somewhat distant experience of an audience member.
During mixing, the three channels can be balanced to the desired sound; from close to distant and everything in between. Either the "mono" or the "stereo pair" can be used as the base sound. Think about a mono capture with some extra space or a distant pair with added fulness.
Examples
For the first recording, I used a Neumann TLM 193 relatively close to the guitar, and a wide pair of DPA 4011As as room microphones.
In isolation, neither the Mono signal nor the AB pair sounds particularly great. The first is somewhat plain and too direct, while body and weight are missing from the AB pair. When mixing all three microphones, the combined sound gets defined and three-dimensional; thus more real.
I made another example of the same setup and the exact same distances, this time with an Austrian Audio OC818 in Cardioid for the Mono duties. The AB pair is still the DPA 4011A. If you have read my Austrian Audio OC818 review, you already know that I love their sound, and I wanted to hear how well they can mix with the DPA microphones.
Combining M/S and Room Microphones
A few months ago, I also experimented with combining an M/S pair of Neumann TLM 193 and AEA N8 up close and a stereo pair of Austrian Audio OC818s at some distance, you can hear the result in this recording of Bach's Cello Prelude no.2.
Some things to take care of
If you want to try the Three-microphone setup, it is important to listen to the recording as a whole before committing to any microphone position. The Mono microphone may be judged alone if you plan to use for the main sound, but don't make bold decisions without listening to the combined audio.
Potential phasing nightmares is one of the biggest drawbacks of this setup, so take extra care to eliminate any issue and check with a proper phase meter plugin regularly (read my article on the Three Most Essential Plugins for Classical Guitar).
Lastly, although the recording should be evaluated as a whole, the close and distant setups might need to be EQed separately. Nevertheless, you may apply a catholic EQ with basic filters and sculpturing.
Cheaper Alternatives

Line Audio CM3 - A budget SDC with an surprisingly good sound
Apart from the aforementioned combinations, any microphone could do a decent job. If you just starting and your budget is limited, buy the best large-diaphragm condenser you can afford and a pair of cheaper small-diaphragm condensers, like the Line Audio CM3/CM4 (read my comparison of the Line Audio CM3 and DPA 4011A).
Final thoughts
I've seen mostly AB, XY, ORTF and sometimes M/S setups explored by engineers and home recordists for the classical guitar. All of which can produce excellent recordings given the right circumstances. Yet, I find that with more elaborate techniques I can capture the instrument, at home or on location, with exceptional precision, without any disadvantages. Except maybe for needing more input channels, cables, stands, and more time for the setup.
A Three-Microphone setup can shine in a very wet hall, as it allows us to capture the body and definition of the instrument while including as much ambience as desired. In a home recording of the classical guitar, it offers great flexibility, if not to provide ambience, it combines the intimacy and fullness of a close pick-up with some extra depth provided by the spaced pair.
So, what do you think? Have you tried a three-microphone setup? Which microphones have you used?

6 Common Mistakes When Recording the Classical Guitar at Home
Part I - The room and the microphones
You just bought a couple of microphones and want to start recording your classical guitar at home; share your recordings with your friends, archive your performances, or start your career as a professional guitarist or recordist. Additionally, recording yourself will force you to look straight into your flaws, thus improving you as a player.
These past few months, I have received quite a few emails and taught several Skype sessions with the focus on recording classical guitars. There are a few mistakes that seem to be common, mistakes that we all do when we first start recording.
In this article, I discuss some of the flubs of the beginner recordist that have to do mainly with the microphones and the room.
You can also read the 6 Common Mistakes When Recording Classical Guitar at Home, Part II article, where I discuss about utilizing a proper signal chain and achieving satisfactory results in post-processing.
Mistake no.1 - Not spending enough time to study the room

Julian Bream - A Life on the Road (Book, 1982)
Every room is different, and If I had to take something out of the brilliant Julian Bream’s book "A Life on the Road" is how essential is to take the extra time to find the spot of where the guitar sounds the best in the room you are; the position in the room and the angle towards the sides are some of the things to consider.
Of course, Julian Bream mainly talks about performances, but the same logic applies to the recording aspect as well. The best sounding spot in the room will allow you to play more comfortably, thus you might sculpture a nicer sound of your guitar; and depending on the microphone technique you use, added ambience or the elimination of unwanted reflections will have an enormous impact on the final recording.
Usually, most of us sit where it is convenient and don't think much about positioning the microphones, as long as they are not in the way. Some others, they like symmetry and will position themselves or the microphones in the middle of a square or rectangular room; the worst sounding spot in a room like this, introducing a plethora of problems that are impossible to remove.
So, try a few different positions, angle the guitar towards one of the sidewalls, maybe sit a little closer to the back wall, to give some space and allow the guitar to project properly. Better yet, ask someone else to play the guitar, ask them to try a few different positions and observe how it affects the sound. Use your ears as if they were the microphones.
Mistake no.2 - Placing the microphones too far away from the guitar

Norbert' Kraft’s distant miking with a spaced pair of Neumann microphones
If you have ever watched any Naxos videos, you must have noticed Norbert Kraft's distant and wide miking. Similar techniques can be seen any many famous recordings. Getting influenced by professional recordists can be inspiring, but also equally misleading as the source material is very different. Techniques that can be excellent in a church, large halls, or even a well-treated studio never apply to the smaller room reality of the home recordist.
By following such techniques you might end up placing the microphone(s) closer to the front wall than the guitar. Even when the microphone(s) are close to equal in distance, it is possible to end up with an overly diffused and roomy sound; as a result, the sound of the small room will be forever embedded in your recording. Getting too wide will also be a problem if the room is not wide enough. Also, the guitar is a small instrument and rarely benefits from a very wide pick up. Therefore, try moving the microphones closer to the guitar but not too close.
Mistake no.3 - Placing the microphones too close to the guitar

Pat Metheny - nylon string recording; don’t try this at home!
After failing with the "church-technique", many of us want to get rid of the small room sound altogether, we have amazing reverb plugins anyway, and start positioning the microphone(s) very close to the guitar, I mean really close. To a similar erroneously path can arrive those with an acoustic guitar background or those who have witnessed some terrible close-miking examples in even famous recordings.
The problem is actually... threefold:
Firstly, by placing the microphones too close, finger and other mechanical noises will creep in, resulting in an annoying and unattractive recording. You may start cutting high frequencies to remove some of those artefacts but sooner or later you'll end up with an immensely dull recording.
Then, most of us usually start with directional microphones, those exhibit a pronounced low-end frequency response due to the proximity effect. One can balance the unwanted boost with careful EQ-ing, but beginner recordists won't have the skills for that. The low-frequency boost combined with the need to cut high-end information will produce an unbalanced imitation of a classical guitar.
Furthermore, the classical guitar is a complex instrument; every part of the top projects different frequencies that they all combine at some point to create a cohesive and rich sound. Normally this point is around the length of the soundboard, about 50cm, that should be the limit of how close you can get with the microphone(s): Greater distance is preferable if the room allows, but, never record classical guitar closer than 50cm.
Remember, classical guitar needs space!
Mistake no.4 - Not experimenting with microphone height, angle and techniques
Placing the microphone(s) at the height of the guitar is a decent place to start, but as microphone height and angle influences so much the overall character of the recording, ignoring other possibilities will frustrate you as you will have to fight with post-processing to get the desired result. It is preferable to spend the extra time and set up the microphone(s) correctly.
Normally, as classical guitarists learn to project their sound slightly upwards, the further away you place the microphone(s), the higher they should be positioned. And, by allowing the microphone(s) to face a bit downwards, so to be on-axis with the guitar, you can achieve a realistic and full-range recording with great definition. This technique will capture what is usually called the "audience perspective".

Spaced AB Pair of Austrian Audio OC818 at 103cm height that point slightly downward
If you notice that the guitar, guitarist or microphones to sound a little sharp, you can angle the microphones slightly off-axis to reach a smoother treble response.
In the case of spaced pairs, it is not uncommon to point the microphones somewhat outwards so that they are not parallel to each other. But in a small room, and at greater distances, additional room reflections will soak into the recording. Thus, I've found that is more desirable to point the microphones slightly inwards or a little higher to achieve a mildly off-axis response but with less "room" in the recording.
For those who pursue an intimate and fuller sound, with a tame high-end and less room, what is called the "player's perspective"; miking the guitar a little closer and with the microphone(s) lower is a good place to start. Avoid placing any microphone opposite of the soundhole, otherwise, the recording will become boomy. For an even fuller sound, place the microphone(s) lower yet, and point them upwards.
The discussion about miking techniques is a complicated one and deserves its own article(s), but until I write it, these ideas should get you a bit more involved.
Mistake no.5 - Not checking for phase problems in stereo recordings

The 2CAudio Vector plugin includes a phase meter and its free!
The classical guitar should be recorded in stereo. Either a pair of spaced condensers or one of the several other stereo setups will do. Except for the coincident microphone techniques, like M/S Stereo and X/Y, any technique that involves two or more spaced microphones, can potentially become a phase nightmare.
Phasing has a noticeable influence on the sound quality of your recording, as due to cancellations and comb filtering it can potentially leave your recorded guitar sound thin and weak. Be sure to check for phasing problems with a proper plugin (I use the 2CAudio Vector, it has a phase meter, plus some other welcome features and its free), adjust the microphones until you minimize phase - everything higher than 80% on the meter is acceptable. You can still compensate for phasing during mixing, but it’s always better to take care of it beforehand.
Mistake no.6 - Thinking that more expensive microphones or preamps will fix all problems
Shopping for new microphones, interfaces and other toys... I mean tools... is fun; a big chunk of writings on this site is about reviewing and comparing recording equipment. But, at this age, pretty decent recordings can be made with a reasonable budget. So blaming the gear is only an excuse for not willing to go the hard way.
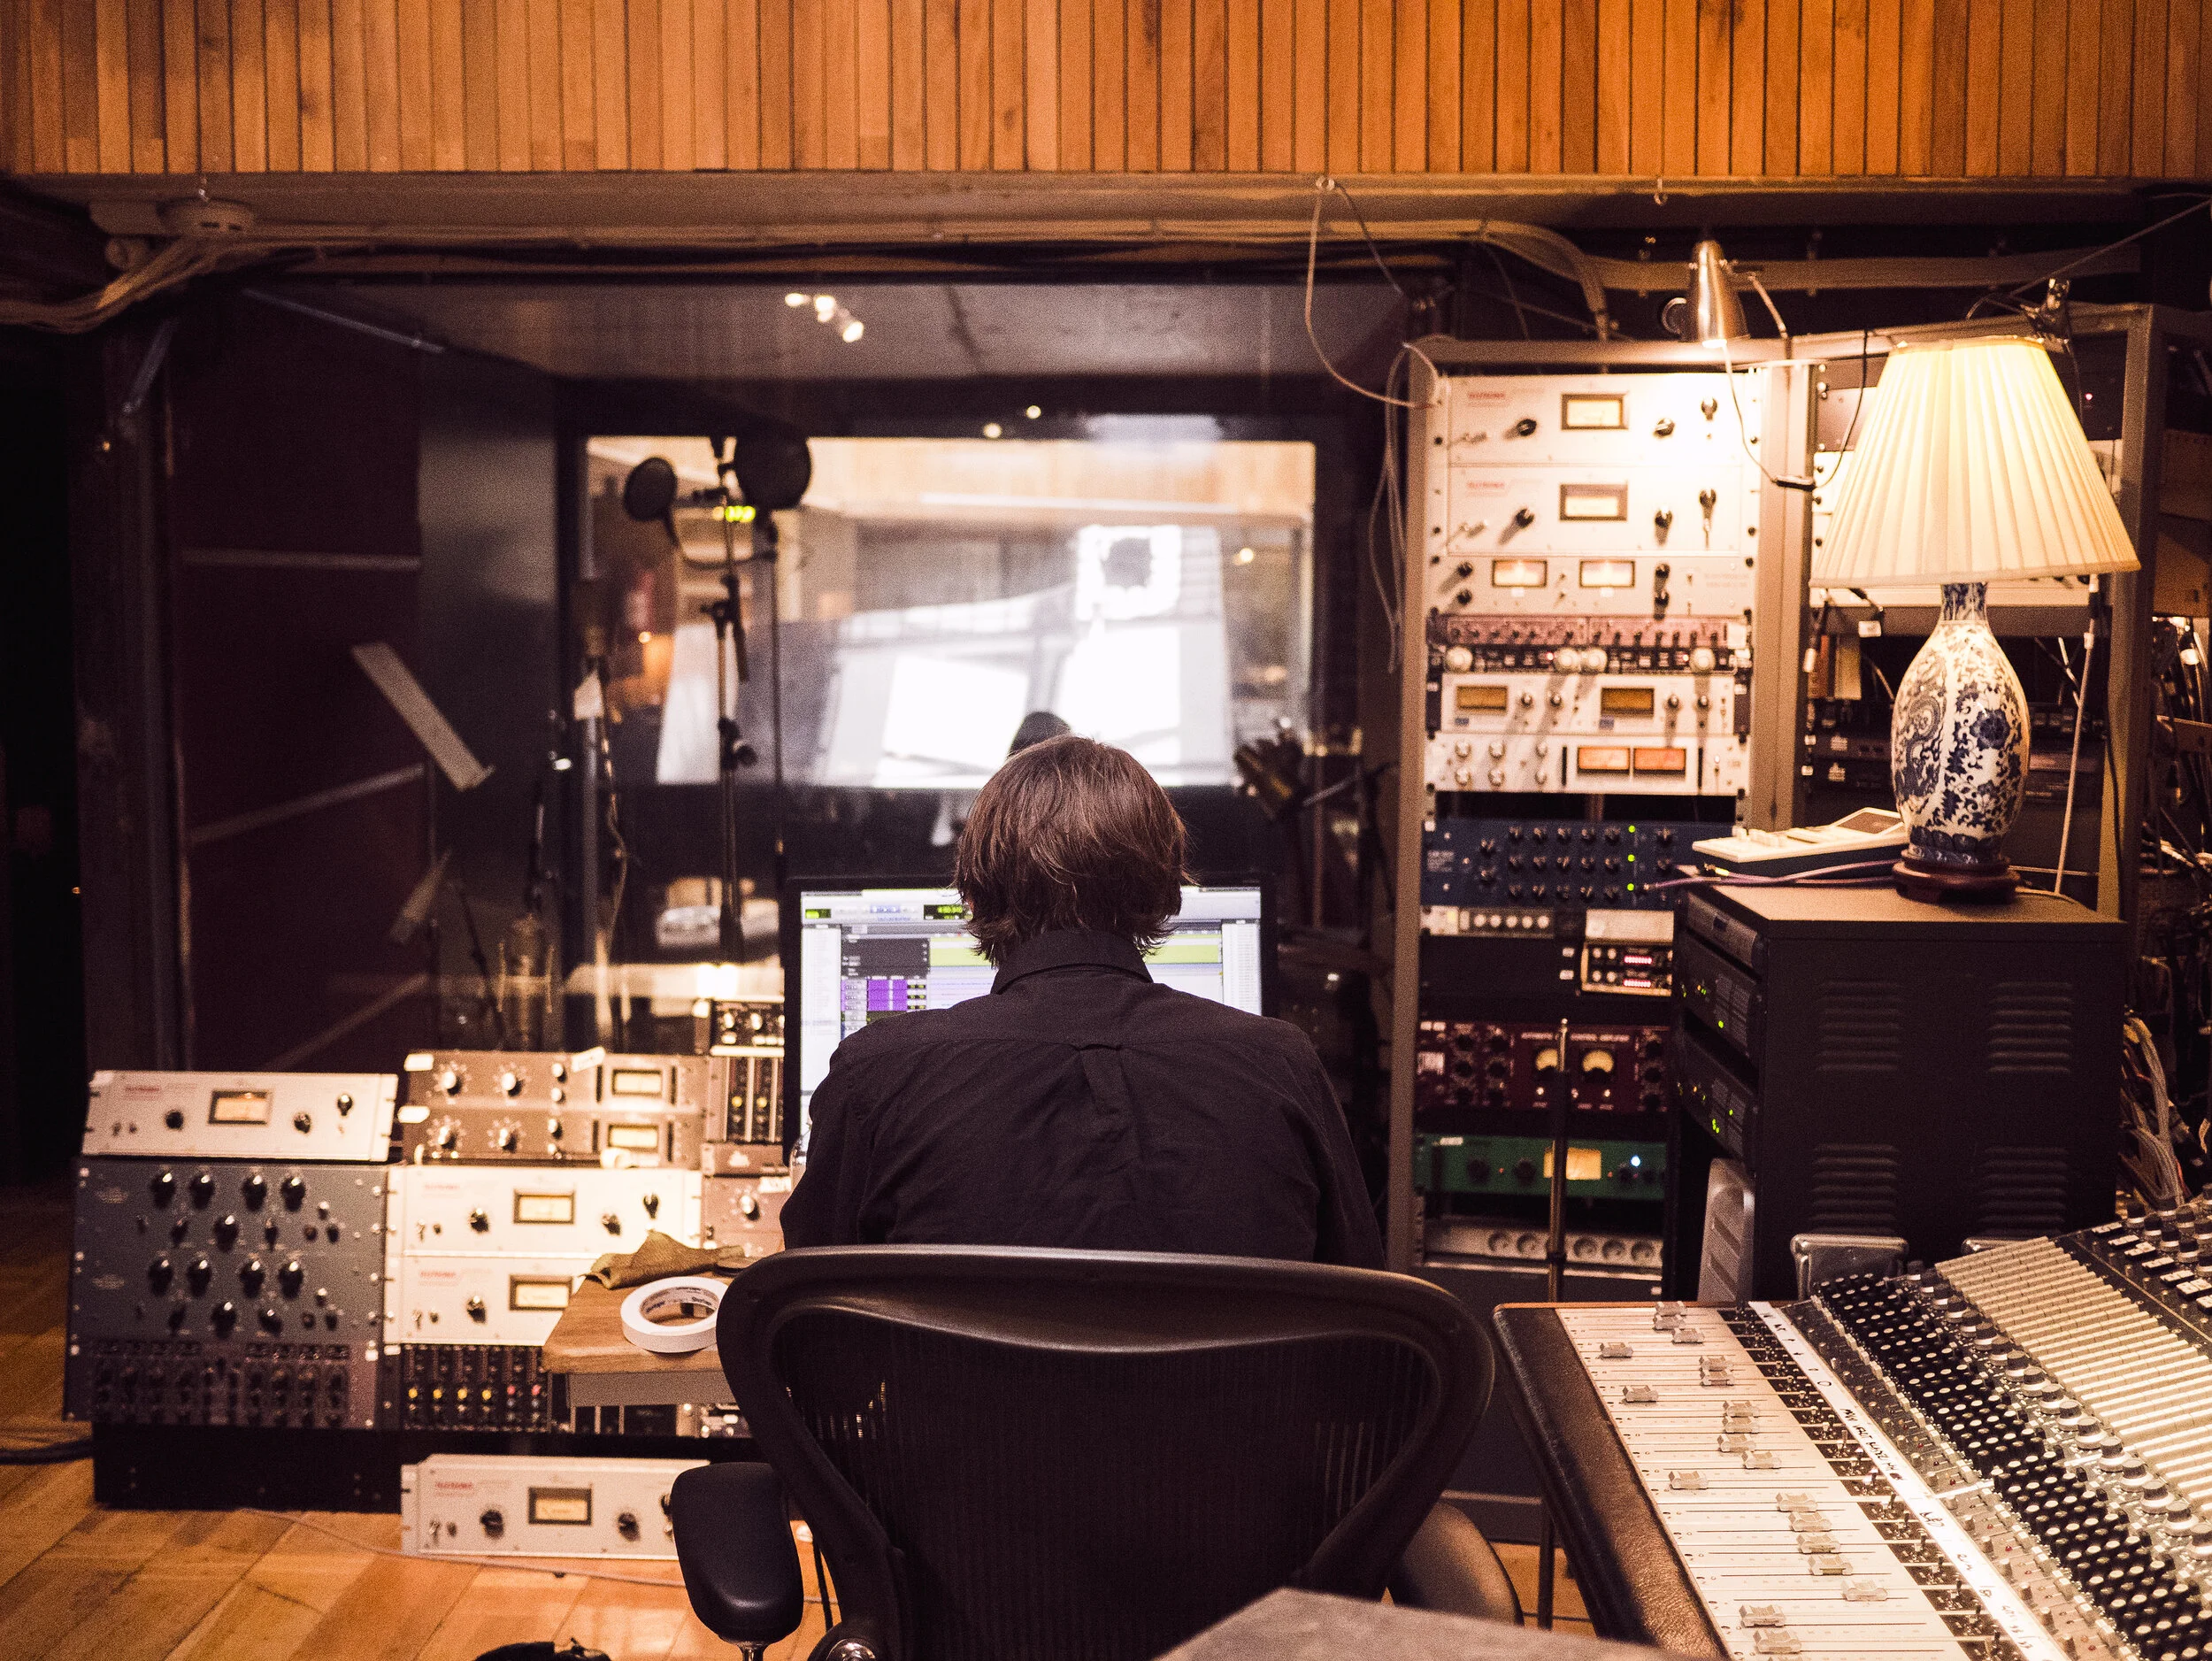
Refrigerator racks with outboard equipment can be fun, but we can do a lot with a couple of decent microphones and an audio interface
I'm not arguing that equipment doesn't matter; it does. It just not going to substitute for bad microphone positioning, an unsuitable room or not refined guitar technique. Contrary, more accurate and detailed microphones will accentuate any of the problems that are present.
Learning how to use what you've got, experiment with various microphone techniques and positions; take steps to adjust your room for a better sound. And why not, maybe spend some time practising and try to be well-rehearsed before you press the record button. These are some basic actions to take that can drastically improve your recordings in a meaningful way.
Closing thoughts
Mistakes are part of the learning process; don't be afraid to make them, and don't hesitate to experiment. After all, recording is a journey, and the process of trying things can be a valuable lesson in becoming a more accomplished recordist.
I hope that this article might encourage you to try out different microphone positions, learn and improve your room. Optimistically, the information provided here will guide you to make better recordings.

Audient iD14 USB Audio Interface Review
Audient's renowned console preamps on your desktop
The introduction of the iD22 was a huge success for Audient. It combined preamps ported from their expensive consoles, pristine converters, a monitor controller and enough connections to satisfy even the most demanding users. With the iD14, Audient promises to deliver the same quality, into a small, affordable audio interface and accomplishes that by stripping down the device to the bare essentials.
Minimalist appeal
The iD14 is housed in a slim all-metal body with a minimalist design and classy aluminium knobs. It doesn't only look beautiful on any desktop but is robust enough for travelling and location recordings.

An all-metal no nonsense design.
A big encoder knob controls the speaker or headphone output, an illuminated button is in charge of the switch. By pressing down the encoder, the selected output is muted. There is another button for DIM (lowering of the output level) and a user-defined software controlled function key. The physical controls on the iD14 are very intuitive, and all the knobs and buttons have a satisfying feel to them.
The two excellent discreet Class-A mic-preamps have 56dB of gain, with an extra +10dB boost and polar switches available in the software mixer. A high-pass filter, similarly to the iD22, would have also been welcome. My biggest gripe though is that the gain pots are practically usable only about at the last third of their travel. There is not enough juice until then, then they jump in gain even with the slightest turn of the knob, making it difficult to set the levels perfectly.

DI and Headphones plugs are easily accessible.
There is an ADAT input which can accommodate eight additional inputs for bigger projects, but, due to the limitations of that protocol with only a maximum sample rate of 48KHz. The higher sample rate of 96KHz for the extra channels can be attained when only four additional digital inputs are used.
In the front side, there is a high-quality JFET instrument input as well as one headphone output. I like that these are located there, as I usually like to plug-in various headsets.
Capturing Tones
The mic preamps have plenty of clean gain. The sound manages to be transparent, with some added thickness and warmth to the body. The highs are smooth and show a slight boost. The iD14 captures a classy, transparent but not sterile capture that compliments most sources. The DI is excellent as well, designed to emulate the sound of tubes, and I have used it with great success.
The conversion quality in unforeseen for an interface of this price, the speakers output is quite revealing, making precise EQ and reverb adjustments a breeze. The headphone output it looses some of the clarity but is decent enough for the project studio.
For those who like to work on the go, the iD14 can be powered via USB from your laptop, Audient claims that to achieve that, the conversion had to be a step down from their flagship models. That shouldn't be a concern though, as the iD14 sill delivers a joyful, engaging playback. Unfortunately, you need to plug into the mains power to activate the +48 phantom.
I/O connections.
Lastly, the output metering ladder has eight pairs of LEDs, but sadly there is no way to check the preamp input level on the device. You can still see the levels in the software mixer, but considering that the interface is marketed towards project studios, having more visual meters on the box would have been more practical.
Putting that aside, I have used the iD14 numerous times. I have recorded classical and electric guitars, cello, various female and male voices, as well as solo piano and a piano trio on location. It always delivered an excellent sound with stable operation.
Life in a digital world
The software mixer has a nice-looking modern UI and follows a similar spartan approach to the physical unit, allowing access to some basic and advanced settings of the iD14. The most important feature is the ability to wire the input directly to the speakers for zero-latency monitoring while mixing it with the playback from the computer. The ability to create different CUE mixes for the headphones and the speakers is also neat.
Samples with the iD14 from my residency in Lithuania
Bare bones finesse
With the iD14, Audient strips away all the non-essential functions while still retaining the core qualities of its bigger siblings to deliver a high-performance interface to the project studios.
Alternatives
If you are happy with the features, nothing can beat the iD14 at this price range. Focusrite Clarett 2pre USB has a similar feature-set, with better conversion, but at a higher cost.
Pros
Excellent sounding preamps
Impressive converters
Robust build
An intuitive, uncluttered UI
Price
Cons
Gain knobs too jumpy at the last third of the turn
No input-metering on the device
Lack of high-pass filter