
Three Ways to Improve your Recording Space Without Spending Any Money
Let’s talk about the room - Part I
When we think about improving our recorded sound, we usually think about upgrades in gear; we lust for new microphones, interfaces, guitars, etc. We don't want to buy new things; we absolutely need them. Sometimes, we even postpone recording altogether until we have the budget for purchasing said gear.

The harsh truth that we sometimes don't want to admit is that spending more money on gear will not fix fundamental issues. Getting a good sound in the room before we hit record is essential, as essentially, this is the sound that our microphones hear and our interfaces capture. Fix it in the mix does not apply with classical guitar recordings wherein room and performer are equally exposed.
Having used all sorts of gear in all possible situations, I rank all the elements of the recording chain in this order: guitarist, guitar, room, microphones, engineer, playback system, post-production skills, preamps, converters, cables. Leaving everything else aside, in this article, I examine a few ways to get the best out of a typical residential room without spending any money.
Disclaimer - room treatment can be approached from a more technical standpoint which I plan to discuss here in the future. Contrarily to what the vendors of acoustic panels will say, household items can be used as a pragmatic alternative, even more so considering the singular commitment of a classical guitar recording space.

First. The sitting position.
Sometimes out of being lazy or just practical, we set up everything as is and keep the room as we would normally use it, especially if we don't have a dedicated music room. Considering the degree that the room affects the recorded sound, searching for a suitable sitting position should not be overlooked.
Before all else, when I enter a new space for a session, I try to figure out the best sounding position in the room. This habit applies both for on-location to home recordings and even concerts to some degree. I'm not getting into detail about on-location recordings and big spaces now, as this goes beyond the purpose of this text.
I have assembled a few guidelines to help you search for the perfect sitting position in your room but keep in mind that every room has unique sound properties.
First of all, you want to avoid sitting close to the walls and most definitely steer clear of the corners; the build-up of low frequencies and the early reflections will cloud the direct sound of the guitar. Also, the centre of the room is far from an ideal sitting position, especially in a room with parallel walls.
In an ordinary rectangular room, if possible, you'd want to sit alongside the long walls about three-fourths to two-thirds of the length of the room. In addition, I find that sitting a bit off-centre and facing the front wall at a slight angle towards the longest distance produces the best results; this modest break of symmetry helps.
Nonetheless, you need to experiment with your space as every room is different. Perhaps asking someone else to play your guitar in a couple of different positions and try to listen is not a bad idea. If this is not possible, pay attention to the sound while you play; singing can also assist you in identifying the room modes. Moreover, you'll need to record yourself in various spots and listen critically; recording the same piece can make comparisons less ambiguous.
What you are looking for is the most balanced sound; play all notes of your guitar in sequence as well as your favourite piece, and if it gets boomy or any frequency stands out a lot, try a few different angles or move a little. If the room is untreated, which probably is, the result will not be outstanding, but in any case, it is worth finding the position where standing waves are not encouraged, then acoustic treatment can be employed.

Second. Other uses for your books.
Speaking of acoustic treatment, this goes without saying, at least to some extent. But, as our rooms usually serve (at least) a dual purpose, a playing/recording space along with a listening/production room, some compromises have to be made. Critical listening requires a controlled environment, while what makes a good room for recording acoustic instruments can be partially subjective.
I have recorded in all sorts of situations, from big halls with a vast reverberation to heavily treated studios with no ambience at all as well as everything in between, thus I have concluded that I genuinely don't enjoy playing in an acoustically dead room. Even if the captured sound in such a controlled room is somewhat easier to handle, the performance and feel of the music always take a big hit. Clever microphone placement and good post-production skills can make almost any room sound acceptable, contrary there is nothing we can do to improve an uninspiring performance.
Thankfully, the classical guitar is not the loudest instrument around, with a lot of its energy residing is in the mids and highs, so it is not impossible to minimize the small room sound signature. Whilst is more convenient to record at home, on-location recording is never out of the question; I could always visit one of the exceptional sounding halls in Berlin or elsewhere when absolute sound is required. It is also refreshing to work on other rooms.
Wherein large rooms we have to deal with diffuse sound fields, which pose their challenges anyway, small rooms suffer from early reflections and resonances associated with standing waves. Dealing with the low frequencies below 300Hz is rather troublesome as wavelengths are large and spread omnidirectionally, while higher frequencies behave more like rays.
The key here is to use a combination of diffusion and absorption strategically. Since broadband diffusers and absorbers can get expensive fast and need to be quite thick to have any effect at the low-mid and low frequencies, there is a free alternative you can use effectively: books.
Books placed on shelves create an uneven surface, forming some sort of diffuser from which sound waves are reflected in different directions. Moreover, paper absorbs some of the sound energy, so a bookshelf works in addition as an absorber.
Gather your books and build a bookshelf on the front-facing wall (in the typical control room, the front wall is considered the one where the monitors are placed, here I use the term to indicate the wall you face when you play your guitar). Use different book sizes and thicknesses, and experiment on the relative depths; this bookshelf will absorb and scatter the sound in the room while maintaining some liveliness.
Admittingly, a bookshelf won't do much to the lower frequencies, and its properties will be somewhat random. However, you probably have plenty of books in your household already, and a bookshelf is more eye-pleasing. Plus, they are nice to read from time to time.

Third. The floor.
Since the guitar hangs in closer proximity to the floor than any other reflective surface around you, bouncing frequencies would cloud the direct sound. Also, the somewhat low ceilings and small dimensions of residential rooms dictate for closer and lower microphone positioning that say a concert hall, thus heightening the problem.
To tame the room ambience to a certain degree, place a rug between your guitar and the microphones. Avoid covering the whole room with a carpet, but rather use a small to medium-sized one.
Experiment with a few different sizes and thicknesses until you find what works in your space. Your goal is to allow the microphones to capture a cleaner sound while maintaining the room ambience. The absorption will only be effective at the high frequencies. I use a woollen rug of medium thickness that extends from just under my seating position to a bit further than the position of the microphone stand.
Closing
With the advancement in technology over the last twenty years, quality recording equipment has become pretty affordable consequently capturing compelling recordings at home is no longer impossible. However, we should not forget that the microphones capture the sound of our guitars in our rooms. So, be intentional and learn trust your ears.

6 Common Mistakes When Recording the Classical Guitar at Home, Part II
Part II - Post Processing
Professional sounding classical guitar at home is not a fantasy anymore or at least achieving a recording quality that is not embarrassing to share. Affordable audio interfaces, preamps and microphones have flooded the market these last decades, with increasing performance and processing power. Rooms, recording techniques and mixing are holding us back.
In the first part on the 6 Common Mistakes When Recording the Classical Guitar at Home, I tried to encourage you to try out different microphone positions and to study your room acoustics.
The second part focuses on some of the common mistakes of beginner classical guitar recordists on utilizing a proper signal chain and achieving satisfactory results in post-processing.
Mistake no.1 - Improper gain staging

AEA TRP2 Gain Knobs
The fear of clipping the converters leads some amateur recordists to use too little gain, resulting in recordings that are low in level. Without adequate signal-to-noise rations, these recordings will become noisy when any attempt is made to bring them at a normal level during mixing or playback. Contrarily, recording too “hot” will possibly clip the converters and can introduce nasty sonic artifacts to the audio. In either case, the recording will suffer from a limited dynamic range and high noise; attributes that we don't usually associate high-quality classical guitar recordings.
My advice is to aim between -6dB to -12dB as a maximum peak level (not average), per channel. Therefore, when you are happy with the placing and distance of your microphones, do a couple of test recordings, play as loud as you would normally do and set the gain levels accordingly. If you set the levels correctly, you will have a healthy and strong signal, but even if you (or another guitarist you are recording) eventually get carried away during the performance, you still have enough headroom to avoid digital clipping.
Mistake no.2 - Unrealistic panning
Classical guitar is a small instrument, radiating sound from a definite point in space. One of the worst choices you can make if you record in stereo (which you should) is to use a too wide panning. Regardless of if the listener is an audiophile type, sitting on his couch perfectly balanced in front of a pair of top-tier speakers, or a regular person listening to music with earbuds. A hard-panned left and right guitar will sound unnaturally wide and cloudy.

Proper panning of Stereo AB channels
A realistic classical guitar recording is one that creates a phantom image of the instrument right in the middle of the speakers, but with some space around it. Such recordings can remove the playback medium and transport the listener in the room with the player.
In typical AB Stereo scenarios, I pan one channel at 3 o'clock and the other at 9 o'clock. I fine-tune the panning according to the polar pattern of the microphones, how apart they are set, and the distance from the guitar.
Mistake no.3 - Limiting dynamics
Classical guitar is not the most dynamic instrument, and if anything, we should strive to capture as much dynamic range as possible (it starts from the player, so we should also prioritise dynamics in performance). Compressors, on the other hand, are designed to do just the opposite; minimize the dynamic information of an audio track by limiting the loudest notes and boosting the softest signal.
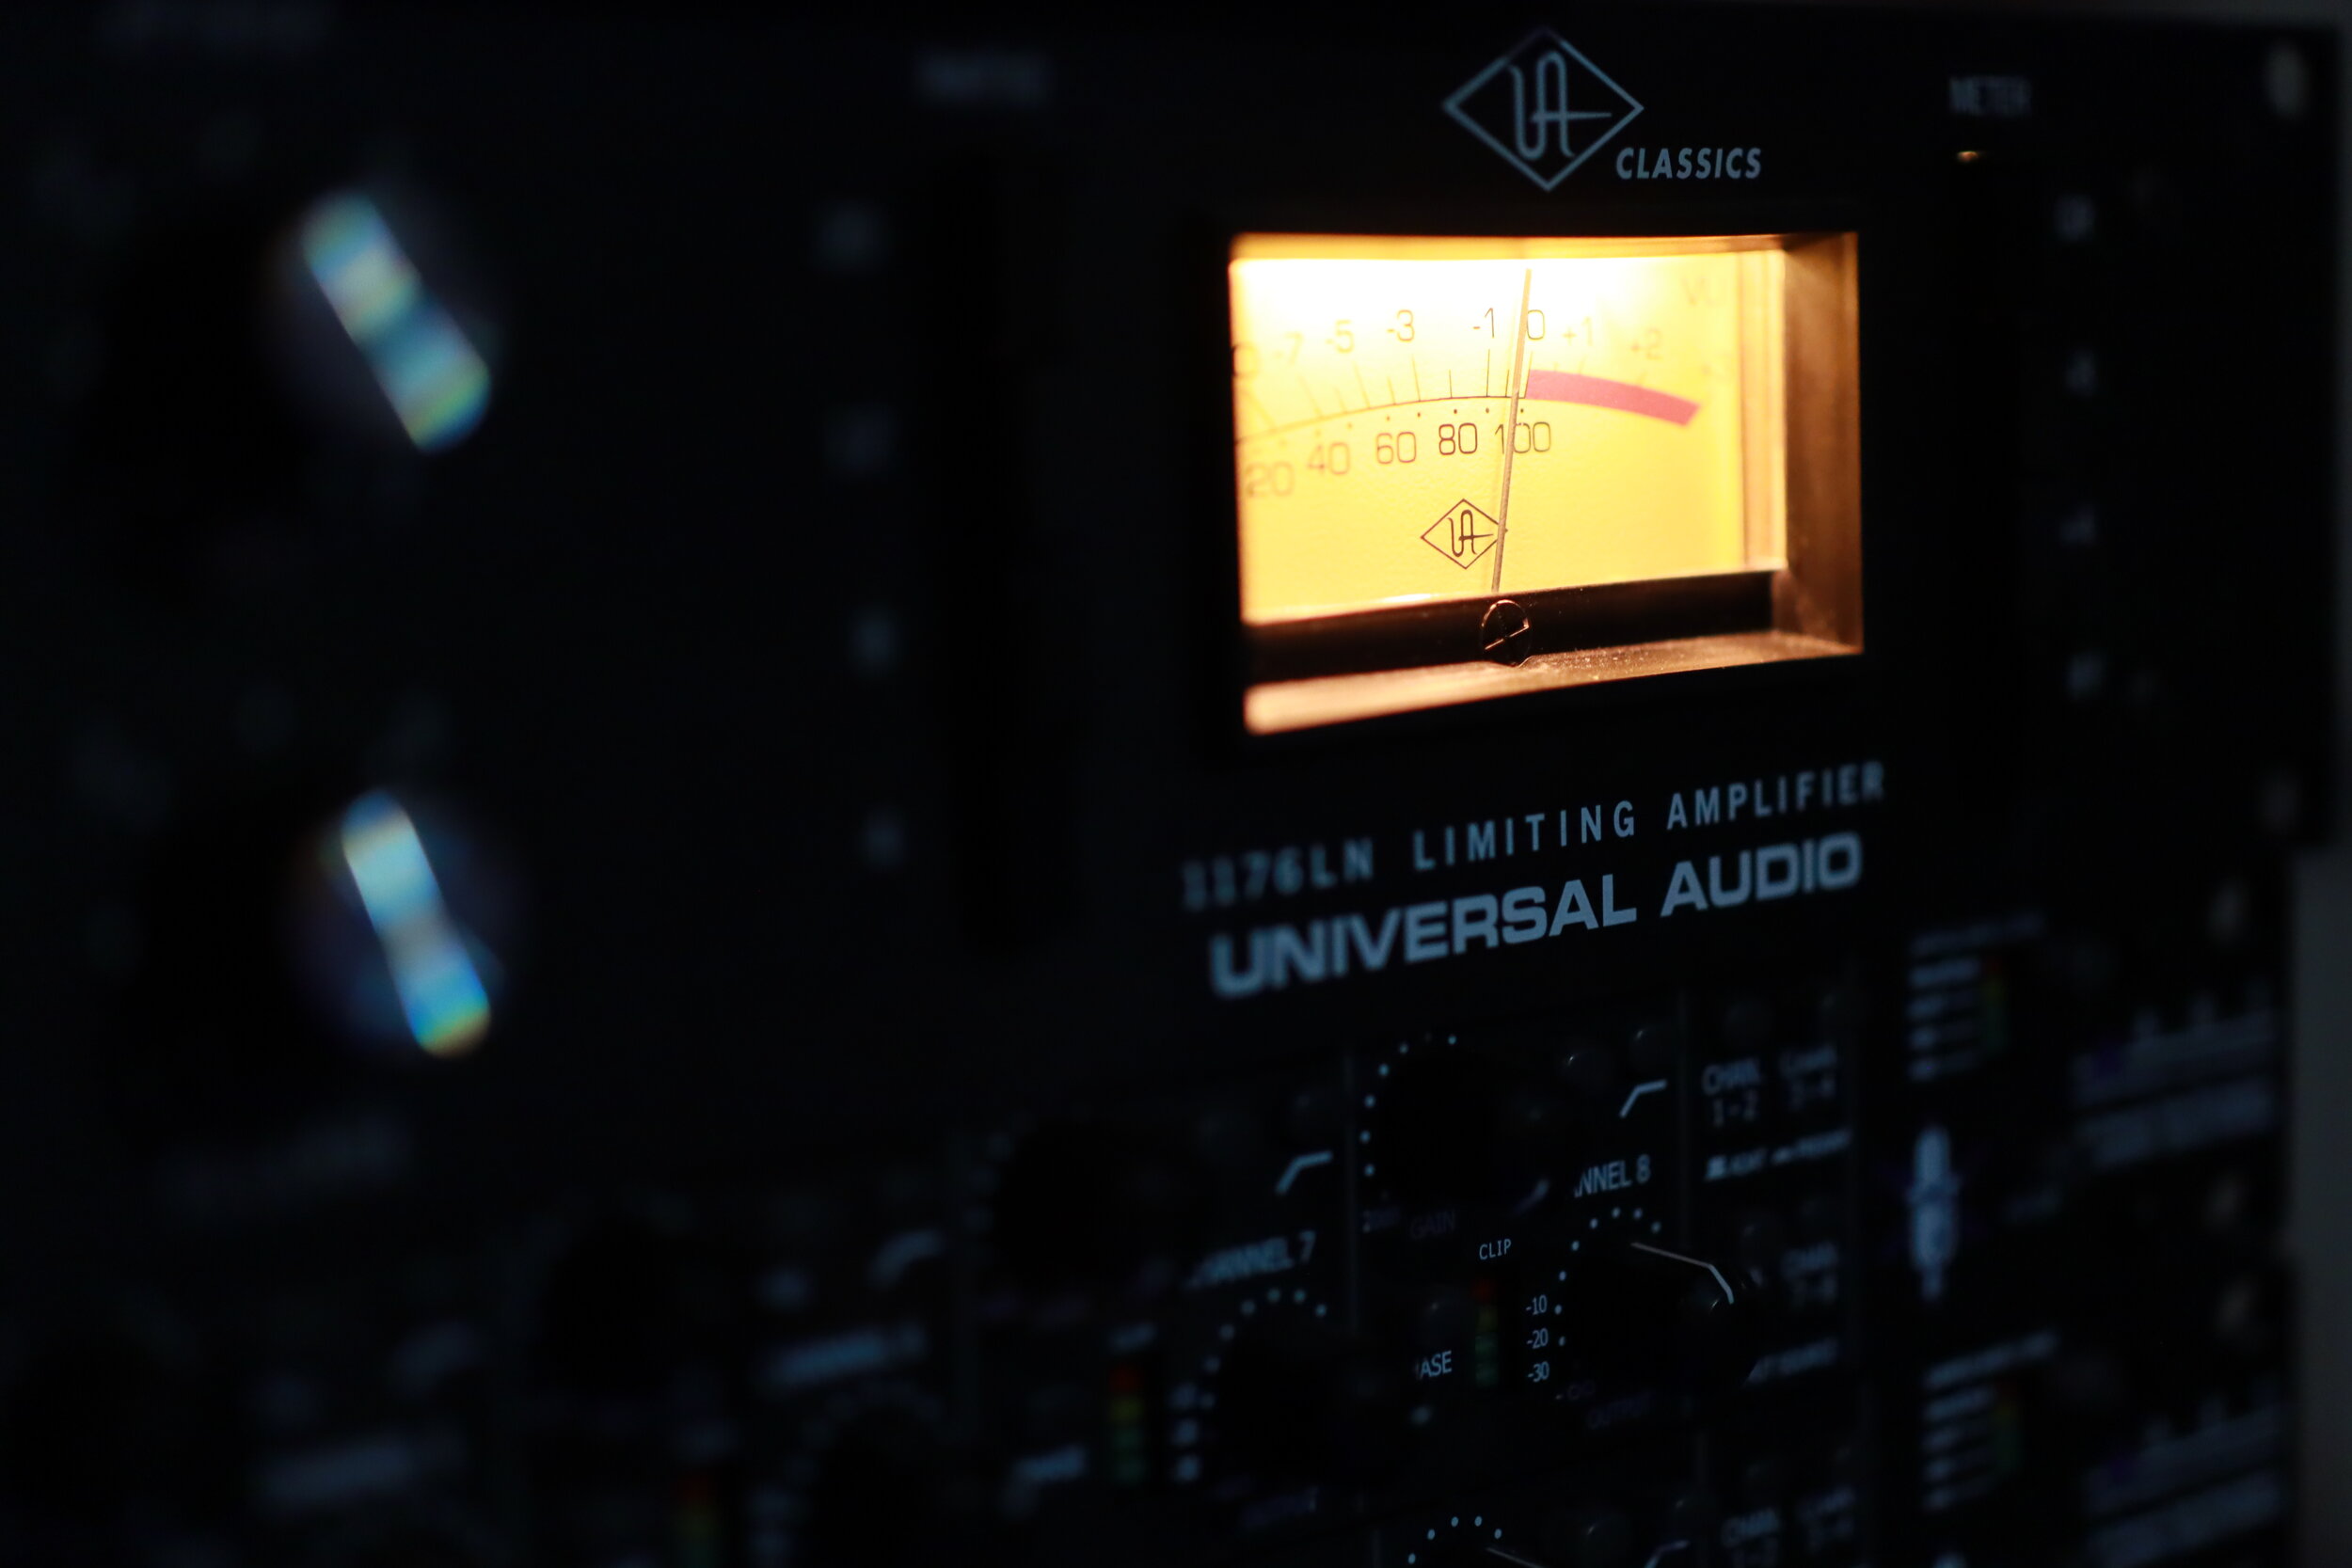
The classic Universal Audio limiting amplifier
Compressors do make the initial playback sound more exciting and powerful… for a few seconds, but in my opinion, it never pays back. Some of the problems that are introduced with the use of compressors in solo classical guitar recordings are squeezed dynamics, increased noise level and altered instrument tone.
Cross-genre guitarists employ compressors more often, as they learn that they can be invaluable in a dense mix. But I haven't found any use for dynamic limiting in a properly captured classical guitar recording.
Therefore, unless you have to deal with issues of the room or improper microphone positioning, don't use compressors on classical guitar recordings.
Mistake no. 4 - Being afraid of using filters

High-pass filter’s switch on an Austrian Audio OC18
Many microphones feature high-pass filters, the most common are 40Hz, 80Hz and 120Hz; the same is true for some dedicated outboard preamps. But many beginner recordists are afraid to take advantage of them. The truth is that in the context of the classical guitar, not much musical information is presented at the low-end frequencies. Most of what is below around 80Hz is unwanted room rumble and weird resonances; therefore by attenuating them, we end up with a cleaner recording. Capturing what is essential and leaving out the rest.
As low frequencies can have a lot of energy, it is preferable to cut undesirable low-end before the signal hits the converters, if possible. This tactic allows us to set the gain and levels appropriately and leads to better signal-to-noise ratios. But even if your microphones or preamps don't have any filters, you can still apply a high-pass filter in your DAW to remove non-essential information.
I also like to use a low-pass filter to remove high-end information that is inaudible, so that my audio consists of only the frequencies I can hear. A gentle roll-off of the low (below 50Hz) and high frequencies (above 18000Hz) is a good starting point. An EQ plugin with these basic filters is the first plugin I load on every track. You can read more on the article Three Most Essential Plugins for the Classical Guitar.
Mistake no.5 - Not learning how to use an equalizer
Other than the low- and high-end unwanted information that we can simply remove with the appropriate filters, undesirable resonances can occur in the audible range as well. These can be caused by the imperfect rooms that we are recording in, our instruments or our technique. Obnoxious resonances can and will distract the listener.
Learning how to use an equalizer to detect and attenuate or eliminate such issues will make the listening experience much more pleasurable.
The best way to identify an offending frequency is by using your ears. I know that this doesn't sound like great advice, but keep reading. When you detect something that you don't like, add a bell-shaped point on your EQ with an extreme boost and search through the suspected range, like dialling in an analogue radio.
Once you find the irritating frequency, the sound should be quite disturbing at that point, apply a notch or a generous cut with a narrow Q. Toy around with the Q value to find the sweet spot; a setting that makes the problematic sound disappear but lets the rest of the audio unaffected.
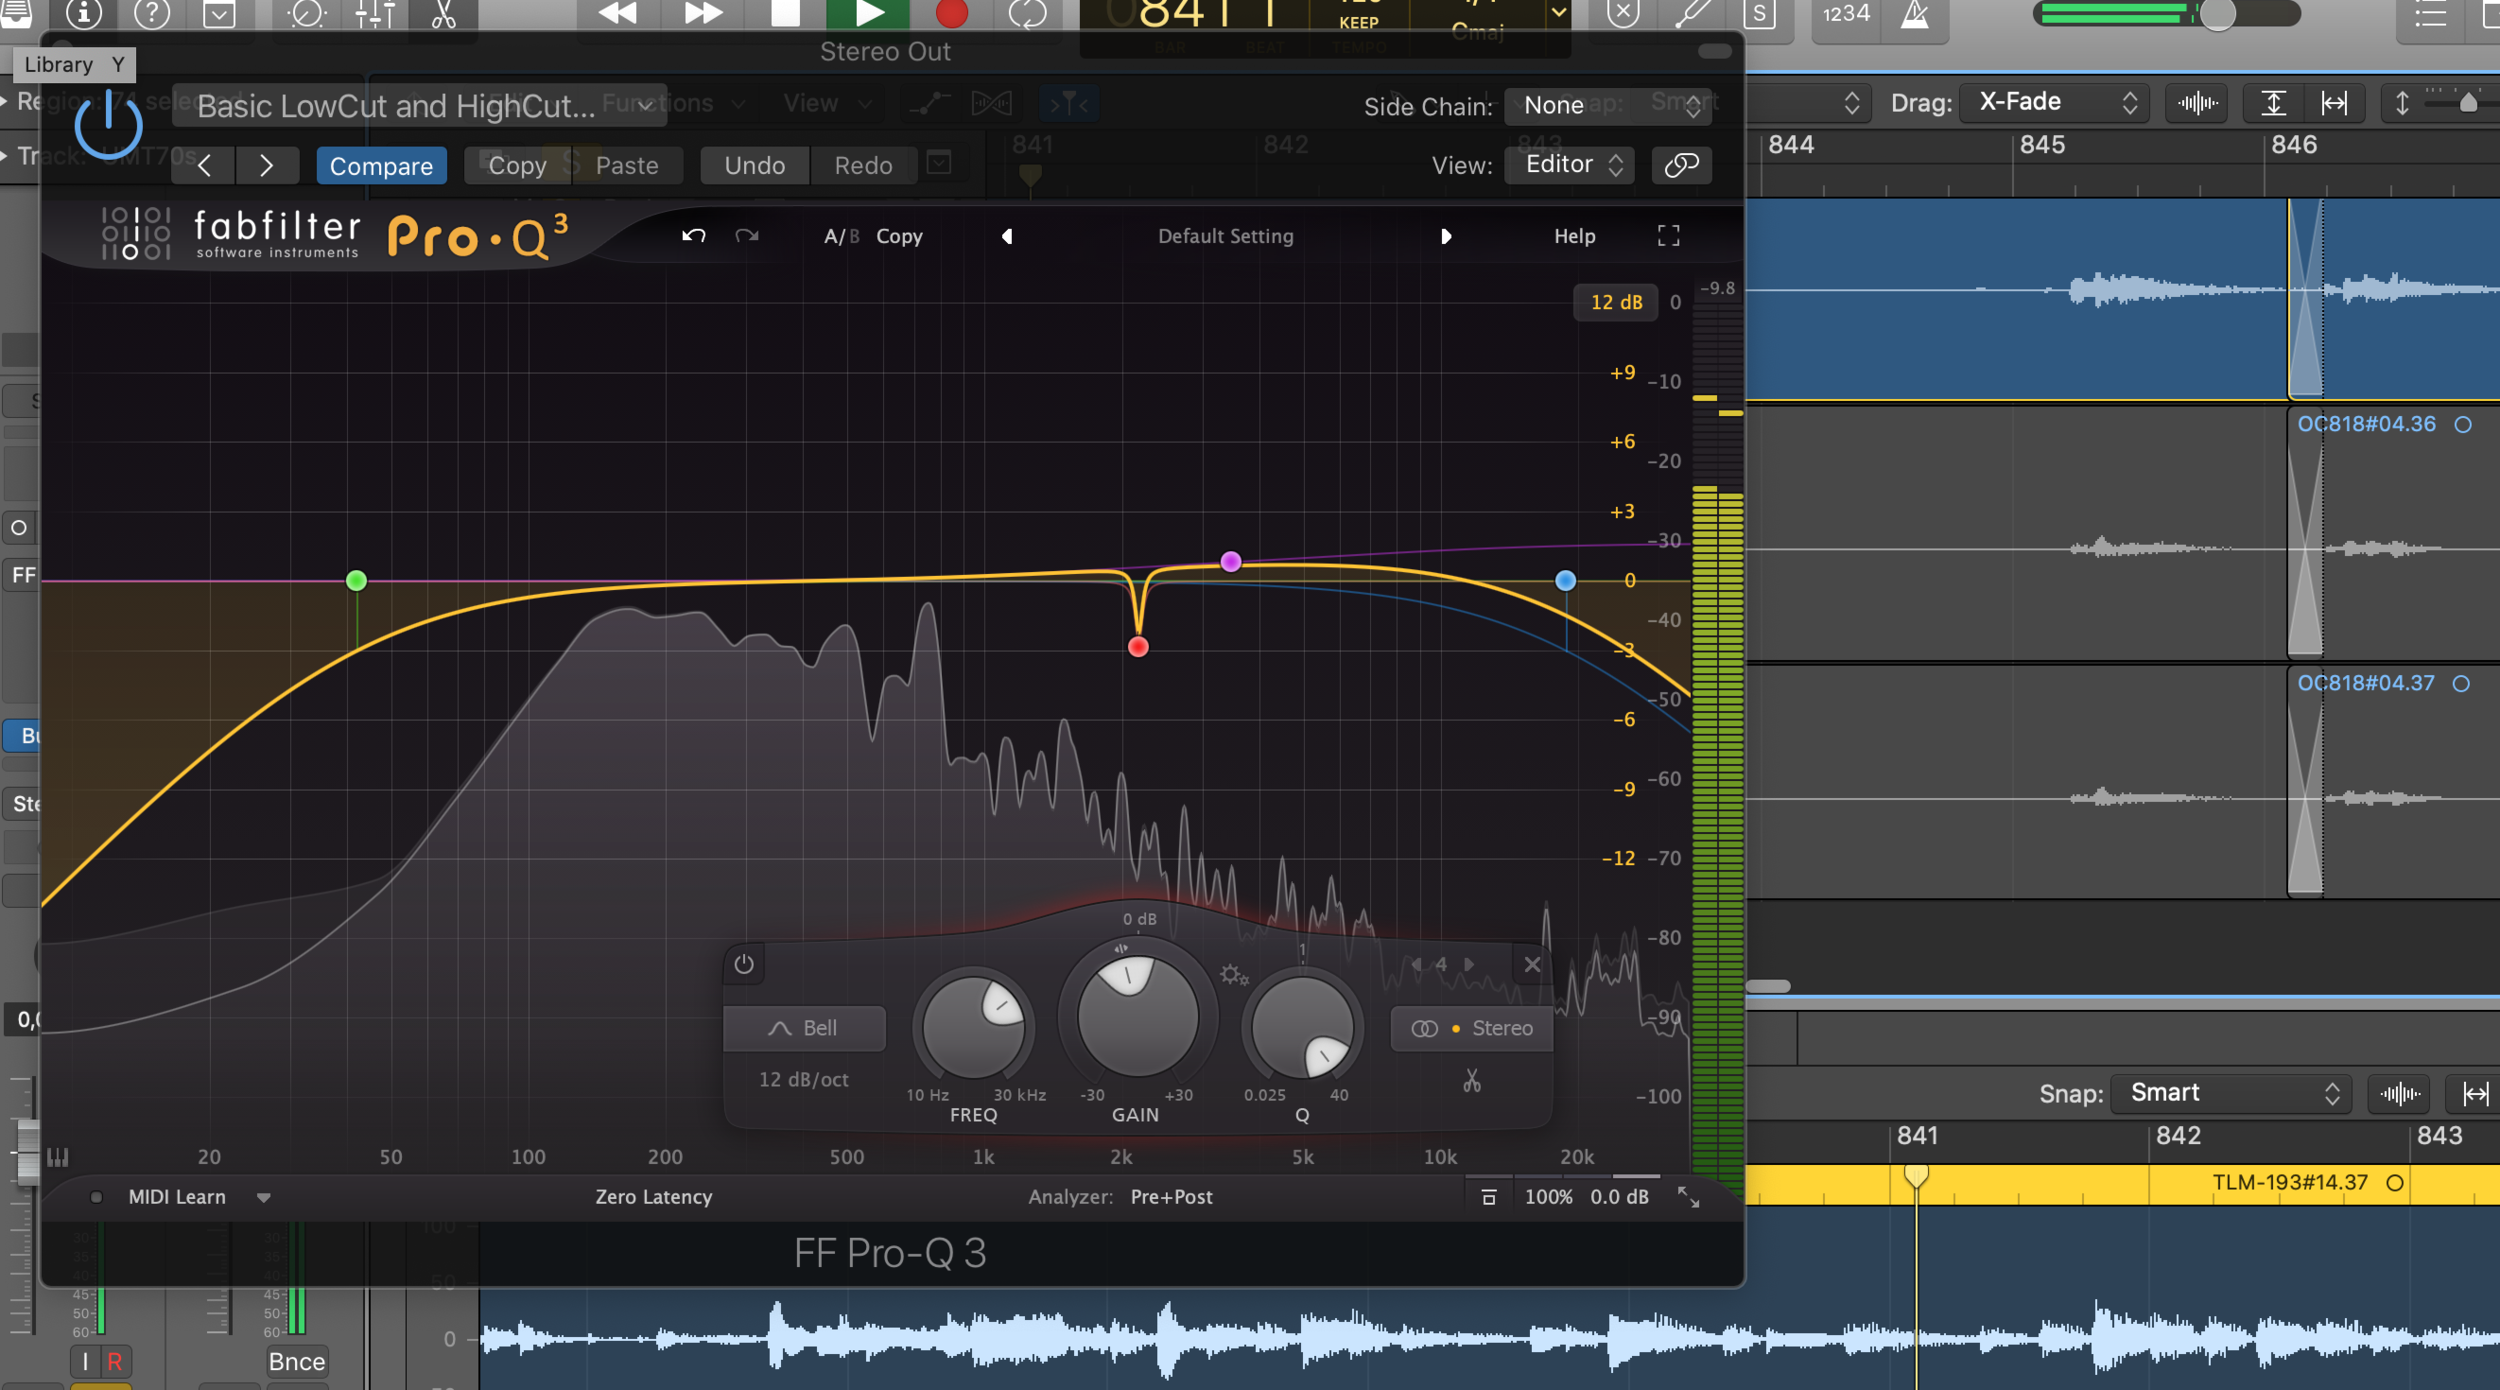
FabFilter Pro-Q 3 with HP & LP Filters, a narrow Q Cut and a High Shelf Boost
Another use for an EQ is to change the overall balance of the recording. Sometimes you'd prefer a slightly fuller recording, or there is just a bit too much low-end. Perhaps the treble is a bit piercing, or you'd like to add some more clarity and articulation. Making gentle adjustments like these are generally uncomplicated with the use of Low or High Shelf adjustments. Just a couple of dB's can make a drastic difference to the evenness and impact of our music.
Just be careful not to overdo it, and always compare your mixes to your favourite recordings.
Finally, you can also use an equalizer to completely change the sound of an instrument and shape it to your liking. But if you've been diligent with the microphone positioning, and you like your guitar sound, you won't have to.
Mistake no.6 - Too much reverb

Placing the music into an artificial hall is a necessary lie
As I write on the Three Most Essential Plugins for the Classical Guitar article, nothing will affect the listener more than the physical space that the music takes place.
When we record at home, most rooms are not interesting enough, and so we need to enhance their sound with artificial reverb. But it is easy to overuse reverb, as it makes everything sound "better". Or so we think when we first enter the home recording world.
Most beginner recordists tend to choose a random church preset without any consideration to requirements of the music, tempo and other aesthetic choices. The result is a flood of unnatural and unattractive recordings which instead of sounding realistic or enchanted, they feel cheap.
Learn how the Time, Size and EQ settings found on your reverb plugin of choice to fine-tune the sound the ambience. Then turn down the Mix a little bit more than what you think it should be. Lastly, compare your efforts to commercial recordings (not that those are not guilty of overusing fake church algorithms).
Closing thoughts

Proper mixing can turn a decent recording into a great one
I hope that this article will make you more conscious of your post-processing choices. I need to write dedicated articles for the use of equalizers and reverb as there is a ton of things to discuss.
I know that many guitarists don't want to fuzz around with plugins, but proper audio processing can transform a recording. Mixing is an art in itself; a necessary evil that can turn a decent recording to a great one. Quality classical guitar recordings are important for your audience and benefit the classical guitar community as a whole. Thus, it's definitely worth the time and effort to learn how to mix your audio. Alternatively, you may search for someone else to do that for you.
Tip: You don't have to mix every track from scratch; after all, you probably record the same instrument with the same microphone technique and in the same room all the time. Create a template in your DAW with your basic panning, filter and reverb settings. You'll still have to tweak around a bit, as not every piece favours the same settings, nor every day is the same. Templates are great time savers.
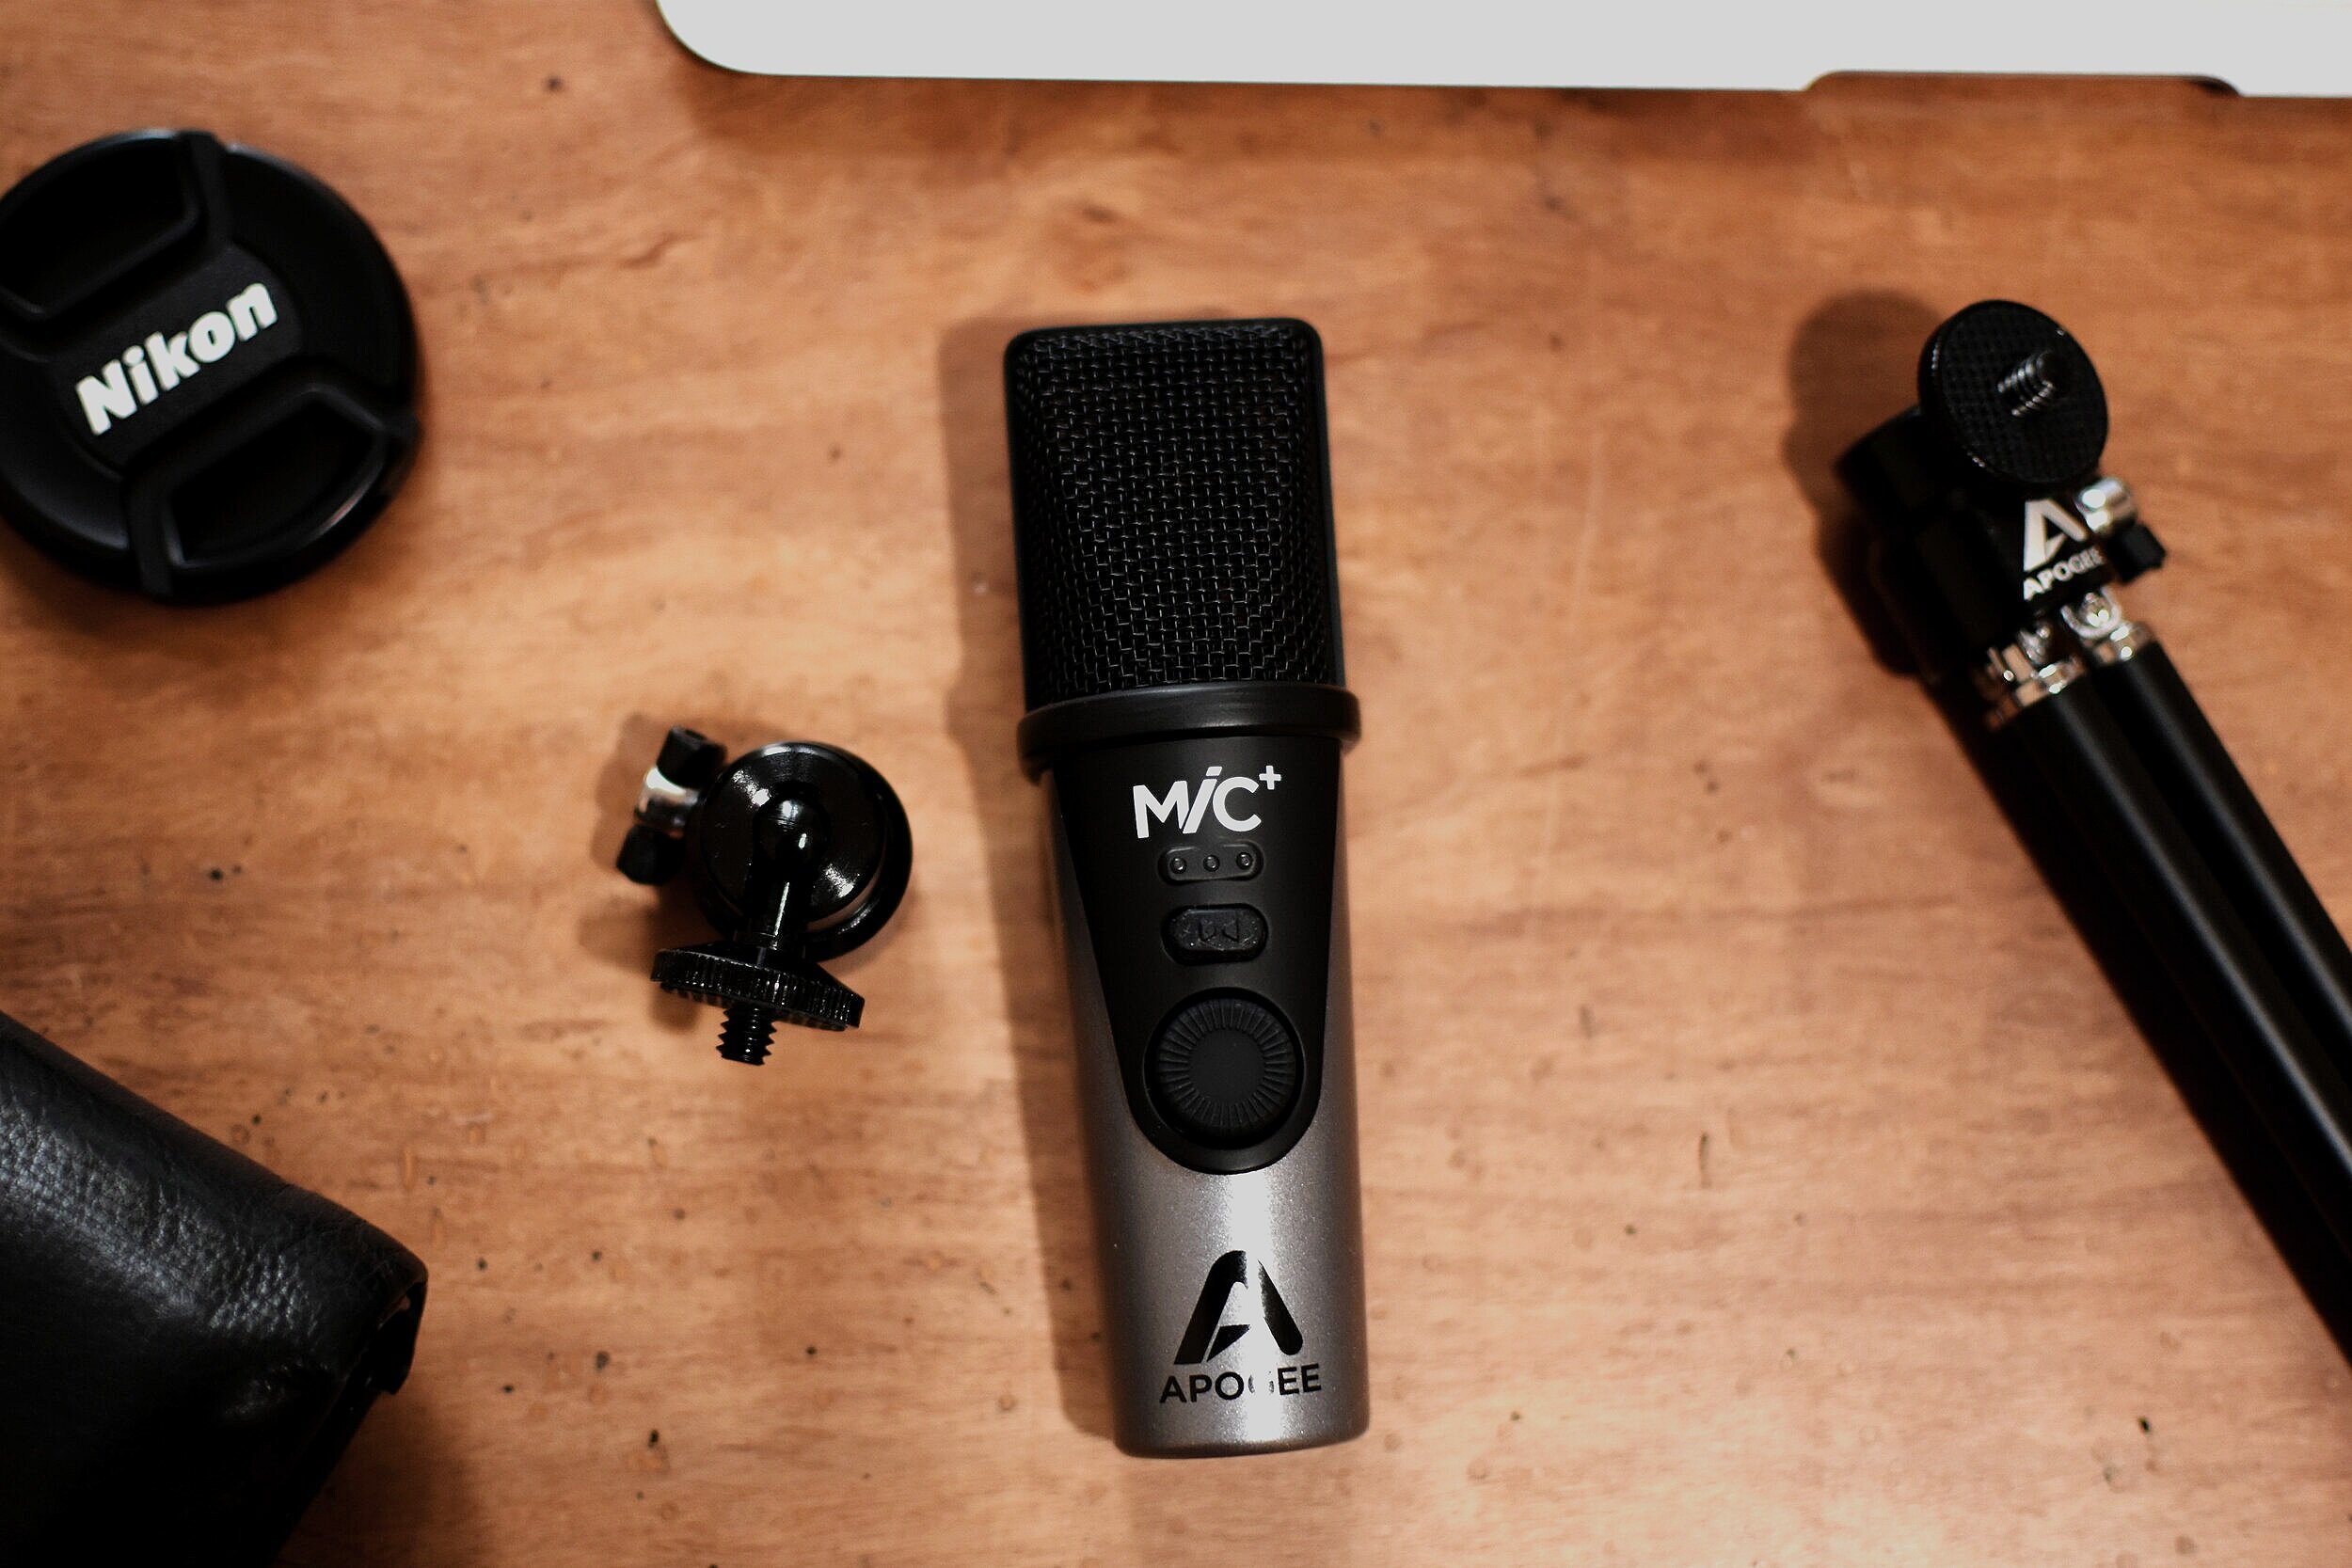
Apogee MiC+ on a Classical Guitar
Apogee´s new USB microphone promises improved sound quality and lower noise floor from its predecessors.

Apogee MiC+ on it’s Tripod
I wanted to buy a USB microphone for some time now but the ones that I have tried in the past didn't convince me. USB microphones are usually guilty of high self-noise that can be quite problematic when recording such a subtle instrument as the classical guitar. Additionally, since they are mainly aiming for voice-overs, vocal recordings, podcast and such activities, they are usually quite bright for my tastes.
The new MiC+ is definitely an improvement over the older versions. The self-noise is audible in comparison to my normal setup but I don't find it to be a problem for non-commercial uses. It is also a little bit on the bright side, but natural enough for use with a classical guitar and other acoustic instruments.

Apogee MiC+ Connections
It seems very well made and I believe it can take some beating, but don't forget it is a sensitive condenser capsule in there, so don’t drop it.
Apogee includes in the package everything you need to start recording right away; desktop tripod, microphone stand adaptor and USB Type A, USB Type C and Lightning cable. My only gripe is that the supplied cables are rather short, connecting the MiC to a Desktop or Laptop computer will be proven a challenge.
Comparisons

A few diffefent recording options.
My next task was to see how the MiC+ compares with several different options; alternatives that have clear-cut strengths and definite uses, but I consider them to fall into a similar budget. From a tiny portable recorder (Olympus LS-P2), to a budget SDC (Line Audio CM3), to a higher priced LDC (Neumann TLM102).
Olympus LS-P2
+ the cheapest, the smallest, doesn't require any additional gear, it is stereo
- most self noise, although its mids are sweet-sounding, the sound is somewhat narrow and small
Apogee MiC+
+ affordable, comes with everything you need and it only requires a phone/tablet or computer to work, a decent headphone output
- noisier that the CM3 or TLM102, much brighter, feels cheaper
Line Audio CM3 (read my review)
+ smooth and natural sound, no colour, small, cheap, comes with plastic case
- needs decent preamps to avoid added noise, not very detailed, needs an audio interface/cable/stand (additional cost)
Neumann TLM102 (read my review)
+ clear and defined sound, nice articulation, a little bit of colour but never harsh, practically noiseless
- needs an audio interface/cable/stand (additional cost), big (actually it is very-very small for a LDC, but for the sake of this comparison), expensive
Conclusions
All in all, it is a great mini microphone and although it is not meant to replace a discrete signal chain with high end microphones, preamps and converters, having access to such equipment when I'm on the road is not usually an option and the MiC+ comes to fill the gap as it sounds better than most portable recorders and it fits in the pocket of my jacket.