
5+1 Gear Pitfalls to Avoid as a New Music Producer
Embarking on the journey of music production can be both exhilarating and daunting. With so much equipment, advice, marketing campaigns, and internet forums, it's easy to feel overwhelmed. These sources often make it seem like your recordings are worthless unless you're using the highest-end gear possible. These are mistakes we all make when we start (at least some of them), but it's not difficult to avoid them if you approach things with the right mindset. Here are some key points to help you navigate your early days as a music producer.
Stay tuned for Part II, where I'll cover practical tips on room acoustics, maintaining motivation, and more.

Navigating the complex world of music production starts with a clear path and the right mindset.
1. Don't invest in expensive gear right away
There are many budget options that will get you started with recording and help you gain valuable experience. As you progress, you'll start to realize what works for you and what doesn't, allowing you to solidify your preferences. Jumping into high-end gear too soon can turn into a very costly adventure.
2. Don't sidegrade
Unless you're exploring different possibilities with polar patterns and microphone techniques, or the gear you have is completely wrong for the sound you're after, avoid sidegrading. It's wiser to wait until you can upgrade to higher-end gear that will produce better recordings and serve you for many years.
When I first got started, I bought a budget 2-mic input interface. Later, I "upgraded" to several other interfaces with similar characteristics, each promising a more pristine sound. Maybe on paper they were better, but in real life, I wasn’t getting any better results. My microphone and production technique, as well as my room acoustics, were not up to par. It was a costly lesson that taught me the importance of improving my skills and setup environment rather than constantly sidegrading gear.
When you know what you need, buy the best equipment you can afford and stick with it for a long time.
3. Don't overcomplicate things

A cluttered setup can hinder creativity and productivity. Keep it simple and focus on the essentials.
A simple pair of cardioid microphones into a decent audio interface will allow you to apply the basic microphone techniques. Starting with a straightforward setup helps you focus on mastering the fundamentals of recording and mixing, without getting bogged down by technical complexities. As you gain confidence and experience in your production skills, you can gradually explore more elaborate setups, as adding more equipment and experimenting with advanced techniques will make more sense once you have a solid understanding of the basics and a clear vision of the sound you want to achieve.
4. Don't postpone your recording sessions until you can afford the next gadget
This is a never-ending process. There will always be a new piece of gear or software that seems essential, but waiting for the perfect setup can hinder your progress and creativity. Cover the basics (mics, audio interface, cables/stands, monitors/headphones) and start making music today! The experience you gain from actual recording sessions is invaluable and will teach you more about your needs and preferences than any amount of research or waiting. Plus, working within limitations often fosters creativity, pushing you to find innovative solutions and develop a unique sound.
5. Don't fall for the hype trap

Avoid getting caught up in the hype. The newest gear isn't always necessary for producing great music.
The gear market is constantly evolving, with new products being released all the time. It's easy to get caught up in the hype of the latest equipment, as well as the allure of vintage gear that promises a unique sound. However, the newest gear isn't always necessary for producing great music, and while vintage gear can have its charm, it is not essential.
When I first started, after getting my first decent pair of microphones, I fell into the hype of tube preamps. I bought a budget preamp, but as you might guess, budget and quality in tube preamps don’t go hand in hand. The results were subpar. I sold it and searched for a better-specced one, which was quite expensive. Still, I was not happy with the results. I found the coloration almost unnoticeable at low levels and completely undesirable at high levels for my taste and uses. There was also more apparent noise at any level than even my onboard interface preamps. Eventually, I learned that I could achieve the results I was after with solid-state preamps, but it was a costly lesson.
Focus on learning and maximizing the potential of the gear you already have before considering an upgrade. Remember, great music comes from skill and creativity, not just from high-end or vintage equipment.
Bonus - Don't get a loan to finance an expensive gear purchase
Taking out a loan to finance expensive gear might seem like a way to get ahead, but it's a terrible idea. You risk ending up in debt without any guarantee of earning more from your music. It won't really matter if your first recordings are done with Neumann microphones and Grace preamps. There are budget alternatives that can give excellent results for the price and allow you to put your music out there without the financial strain. Focus on building your skills and portfolio first; the high-end gear can come later when it's truly needed and affordable.
Conclusion
Remember, while good equipment can enhance your recordings, the true essence of music production lies in creativity and skill. Starting out with the right mindset and a focus on essentials will help you build a strong foundation. What you have is probably enough. Focus on developing your abilities and understanding your tools. Build your way up, making each step count.
What do you think about the points I'm making? Do you have any experiences or tips you'd like to share? Leave a comment below and let's discuss! And don't forget to check out Part II for more practical tips on room acoustics, staying motivated, and more.
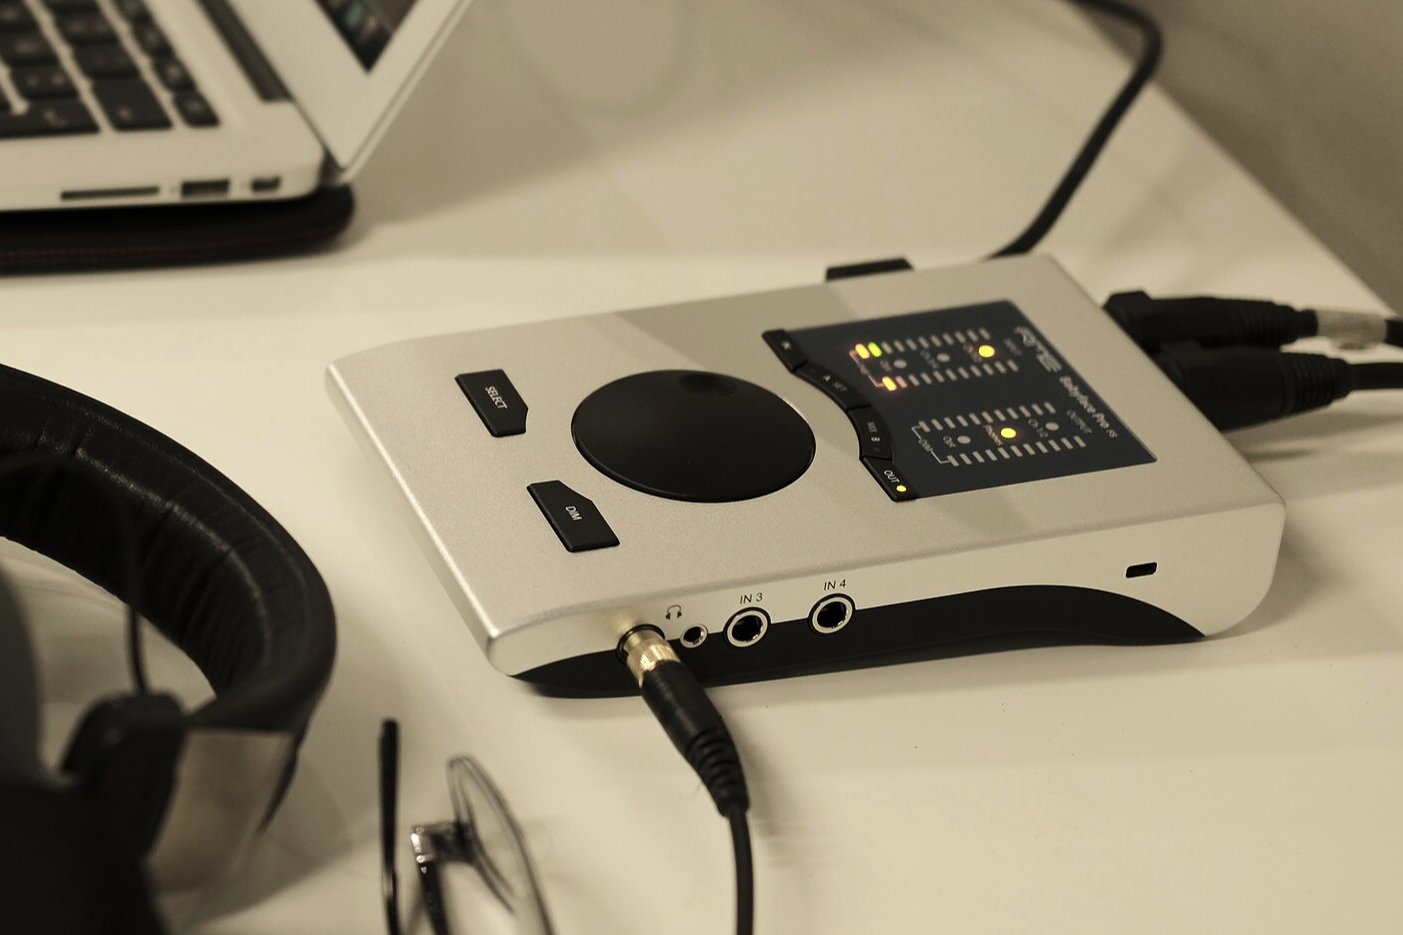
RME Babyface Pro FS Review
The best portable audio interface gets a welcome refresh.
There have been ten years since the introduction of the first Babyface; a portable interface with a unique form and the renown RME build-quality and performance stability. Five years later, the Pro version arrives and brings performance updates in practically every aspect and a new luxurious aluminium chassis. The latest revision updates it clock and now includes a full SteadyClock FS circuit as in the ADI-2 Pro FS for lowest jitter, as well as an improved 3,5 TRS headphones output with 90 mW, from the 70 mW that is found on the older version, and the same output op-amp as on RME's ADI-2 Pro.

The BabyFace takes on a remote location session.
Newly designed analogue and digital circuits improve the SNR and THD figures for the microphone inputs and monitor outputs, while innovative energy-saving technologies allow the Babyface Pro FS to remain bus-powered for portable setups. A small size, high-performance drivers and a fine fidelity designate the new RME as one of the best small audio interfaces for the home studio or the producer on the go.
The Device

A slight slope, tilts the controls towards the user
The Babyface Pro FS is housed in a tough chassis cut from a single block of aluminium. It has a slight slope, that tilts the controls and the metering LEDs towards the user for greater accessibility. It looks quite elegant in real life, much better than any pictures I've seen. The craftsmanship of the unit is exemplary and all the buttons have a satisfying feel to them.
Apart from the two excellent mic-preamps on the back of the unit, there are two additional line-inputs on the right side should you wish to connect it to an external preamp. A lot of small interfaces can only handle two inputs, which are generally enough for classical guitar, but the two extra channels can be proven rather helpful the few times that I might need to record a larger ensemble or experiment with different microphone setups.
Digital I/O with up to 8 channels is also available via ADAT or SPDIF to accommodate bigger setups.
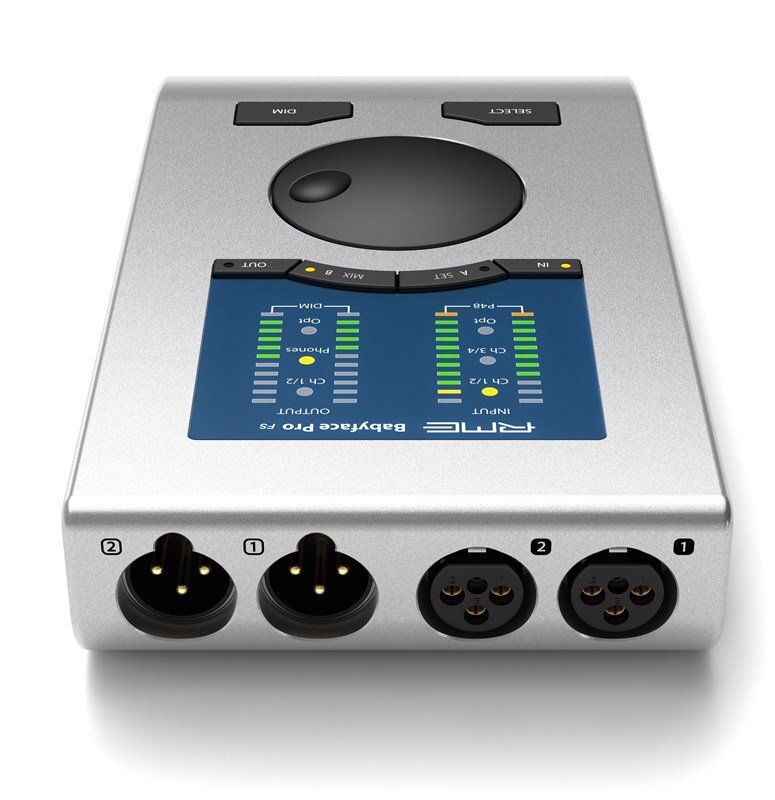
Preamp inputs, monitor outputs and comprehensive metering.
Two balanced XLR outputs feed the monitors is another welcome feature that is rarely seen on interfaces of this size. A surprising inclusion though is a pair of independent headphone busses, one with with a standard jack, the other with a mini-jack socket. Unfortunately, there is no separate control for the two phones, and according to RME, the TRS phone would be 6dB louder. Nevertheless, the next time you will forget the 6,3mm to 3,5mm adaptor on a location recording, you won't be miserable.
Considering the portable nature of the Babyface Pro Fs, I think that RME missed the mark with the provided hardshell case. Don't get me wrong, it is great to have and more than welcome, but it adds a lot of unnecessary bulk. The case itself, although not as premium as the interface, seems durable enough. Opening it up reveals a lot of unused space, with almost one-third of it to be empty. There are slots for the USB and Midi cables, which is handy, and another one for a power supply - that is not included. A case exactly the right size just for the unit would be preferable, I can always throw all the necessary cables in my backpack anyway.
The Babyface has a DC input for standalone applications, but as mentioned the power supply is not provided by RME as the interface is fully bus-powered. I haven't used one to test if there is any additional performance profit.
Unusually for any product in 2020, a two-hundred-page printed manual is included, both in German and English.
Clarity in abundance
True to the reputation of RME, the BabyFace Pro FS delivers a clear and articulate sound. The low-end is full, much better than of most competitive interfaces, while the midrange and high-end remain accurate. The ADDA conversion has only a tad less realism and depth than that of my ADI-2 Pro FS, but I was expecting that.
The preamps are also excellent, I wouldn't hesitate using them for any production. The lack of colouration might make them seem sterile for sources that might benefit from a bit of character. For classical guitar and other acoustic instruments, I find them to be precise and truthful. Might not be as refined or pleasing as expensive outboard preamps, but there is nothing to complain about for interface preamps.
Drivers and TotalMix FX
What separates RME to most other interface manufacturers is the perfect harmony of software and hardware implementation. The in-house developed drivers grant to its interfaces unparalleled stability and performance, and the Babyface Pro FS is no exception. The latency times are the lowest (the lower the better) in its class and working with the interface is seamless. Audio dropouts and other issues that occur in badly written drivers can diminish the user experience or even render a recording useless, however, the Babyface has been flawless in that regard. RME also provides extended support, with driver updates and service for many years after a typical product lifecycle; an OS update wont turn the unit into an expensive doorstop.

The BabyFace Pro FS is equipped with DSP effects for zero-latency monitoring.
Additionally, the TotalMix FX console comes packed with every sensible routing option and zero-latency DSP effects. My needs are pretty straight-forward though, and I have only used a fraction of the possibilities provided. The plethora of options can be a disadvantage, as the GUI seems complicated at first, but it is cleverly designed and with a modern look.
Conclusions
Excellent conversion, small size and the best drivers for audio known to man, place the RME on top of the list of small audio interfaces for the home-studio or location recordings. Although there are plentiful small and portable interfaces, most of them target the consumer or prosumer market. The Babyface Pro FS is one of the few devices that offer professional performance and functionality for the recordists that have fewer demands in terms of channel numbers but don't want to compromise on the audio quality.

DPA 4011A vs Schoeps CMC6 MK22
Other than various Neumann microphones, the most used small-diaphragm condensers in classical concert halls and recordings are made by DPA and Schoeps. The philosophies behind their designs are quite distinctive, as are the usual descriptions of the family sound of each brand. Arguably though, they are more similar than different, as they both belong in the relatively uncoloured realm. But the big question remains; which microphone is better for recording the classical guitar.
To try and answer that question, for my needs and tastes, I had to get demo units of their cardioid microphones.
A Cardioid and an Open-Cardioid
The 4011A is a staple performer for many acoustic/classical instruments when a directional pick-up is required, Schoeps also offers a few different cardioid capsules with their Colette system suitable for a variety of uses. The MK22, which I chose for this shootout, is an open-cardioid. Schoeps describes its characteristics as a combination of the natural low-end of an Omni pattern with the benefit of cardioid directionality. In essence, it is a little wider than their standard cardioid capsule, MK4, and offers a marginally finer bass response.
Comparing the Polar Pattern plots of these microphones, I realised that the MK22 is closer to the characteristics of the 4011A than the MK4, making the decision easier, and this comparison quite logical.

DPA 4011A Frequency Response

DPA 4011A Polar Pattern

Schoeps CMC6 MK22 Frequency Response

Schoeps CMC6 MK22 Polar Pattern
It has nothing to do with sound

The DPA 3511A Stereo Kit
This might be a little unfair to Schoeps, but it's not my fault. DPA arranged for me to have for reviewing the 3511A Stereo Kit; a high-quality aluminium case which except for a matched pair of microphones, includes a lot of premium accessories, like their high-quality microphone mounting clips, shock mounts and a long stereo boom. All made with the highest standards and can be convenient in the field.

Schoeps CMC6 MK22 Set
From Schoeps, all I got was a pair of CMC6 bodies with the MK22 capsules. I know that ultimately the sound is what matters most, and I that can be evaluated without any extra accessories. But getting familiar with the DPA system, elevated my experience.
Another observation that doesn’t have to do with sound is that the NEXTEL finish of the CMC6 preamps and capsules is quite fragile, I thought I could scratch them, just by looking at them. In comparison, the 4011A have a more solid feel and seem more durable.
Setting up
As per my usual recording techniques for the microphone duels, I placed each pair at an AB configuration, with 36cm distance between them, 96cm from the ground and around 70cm from the top of my spruce guitar.
By listening to the samples, it is evident that both microphone pairs provide a solid performance. I would be totally satisfied with either, but there are some differences.
Unambiguous precision
The 4011As have a unique way to draw an utterly accurate and almost holographic image of the classical guitar, without any sign of harshness or hardness that is not a product of the performance. The sustaining notes, ring longer and the complex harmonies are captured clearer, like if they are taken apart.
Without sacrificing detail, the MK22 capsules portray an euphonic result. They are fast and analytic, but yet with a smooth and musical character; as if the performance is treated with a touch of kindness.
Au contraire, the DPA microphones will represent with unambiguous precision all the nuances and subtleties of a world-class instrumentalist and a high-grade luthier guitar; exposing likewise any flaws on a player's technique or the instrument. Their honesty can be brutal and overwhelming in some cases. If the source is good, they are going to reveal it; if not, forget about using them.
The Schoeps's offer a gentle depiction of the performance by applying a veil of wizardry and charming sweetness. However with the DPAs, it is like looking at the recording through a magnifying glass.
Noise concerns
My only gripe with the 4011A is the high self-noise. At 18dB-A the noise is not excessive and in most cases not even noticeable, but it can be bothersome for distant miking with softer instruments, or very dynamic musical styles.
The MK22 with 13dB-A of self-noise is almost as silent as my Neumann TLM 193 which have a remarkable 10dB-A of self-noise performance. In reality, most rooms are noisier than any of these mics.
Back to the original question
Honestly, I cannot say which microphone is better; probably neither is. The Schoeps have a sound, as the DPAs and ideally, I would love to own sets of both. In isolation, both pairs should sound stunning, if not, the problem is certainly not on the chosen pair of microphones.
When I'm not directly comparing and analysing them so closely, I believe that their differences are not as pronounced. Saying that, after hearing to my playing and guitar(s) with the 4011As (and 4006As which DPA also sent me), it is difficult to accept anything less realistic.

Three M/S Setups for Classical Guitar
Capturing the natural room sound of the guitar.
The Mid/Side microphone technique has almost a century of history. Developed by Alan Blumlein in the early 1930s, it became popular in the broadcast studios because of its compatibility with mono. Even in the recording studio, it appears to have many advantages over the most commonly used stereo techniques.
With small instruments like the guitar, it is easy to capture a too wide of an image, resulting in an unrealistic and often a blurry reproduction, especially with ORTF and AB techniques.

Neumann TLM 193 & TLM 170 in M/S Stereo
The "Mid" microphone of M/S provides a solid capture of the instrument, while the "Side" microphone is responsible for picking up the ambience of the room. The right balance of the two microphones allows for a truthful image of the guitar realistically placed in the sound field.
The M/S technique gives you the most control over the stereo spread, but the best part is that you don't have to commit to any balance until the mixdown, as you can always change the balance long time after the recording is finished.
Things to consider
As the "Mid" microphone is responsible for capturing the actual sound of the guitar, it is essential to take the time and make sure that it's placement is optimal. Otherwise, there is not a lot you can do to fix it. Also, if the room ambience is not pleasant there is not a lot you could do to improve it, so you are better off with a close AB technique and using artificial reverb in your DAW during mixing.
Here is one of several M/S setups that I've tried this week. I placed the "Mid" microphone at a distance of 55cm from the top of the guitar, aiming at the midpoint from the bridge and hole. With the capsule being at 96cm high, slightly angled downwards, placing it on-axis with the angle the I hold my classical guitar.
The "Side" microphone with a Figure-8 pattern was simply placed on top of the other at 90 degrees, aligning the capsules as close together as possible, minimizing phase issues. The whole setup was angled slightly to the sidewalls of my room. The room is medium-sized, with a wooden floor, high ceiling and a few interesting angles on the wall, making it relatively live-sounding.

Austrian Audio OC818 M/S Pair
Austrian Audio OC818 in M/S Setup
In this first example, I used an Austrian Audio OC818 pair with the "Mid" microphone was set to cardioid. The response of the Austrian Audio microphones is fairly natural, especially at the low and mid registers. A slight boost is present at the higher frequencies, but it retains the very smooth character of the classic ceramic capsule, making the classical guitar recording to sound polished and vivacious, without any sign of harshness.

Gefell UMT70s M/S Pair
Gefell UMT70s in M/S Setup
The second example utilises a Gefell UMT70s pair, these mics have a unique appearance, an incredibly small grill and an unquestionably satisfying feeling to the touch, the craftsmanship is second to none. The UMT70s shows a distinct bright character with slightly recessed lows in its cardioid pattern. The Gefell microphones offer coloured pickup but maintain a smooth quality. In a way, this combination produces a somewhat more finished recording, with nostalgic charm, it reminded me of some Julian Bream albums. The result is pleasing but differs from the sound that I hear when I play my guitar, in my room.

Neumann TLM 193 and AEA N8 in M/S
Neumann TLM193 and AEA N8 in M/S Setup
An often overlooked aspect of the M/S microphone technique is that it doesn't require a matched pair of microphones. So for the last test, I decided to combine the Neumann TLM 193 with a ribbon microphone for "Side" duties, in this case, an AEA N8.
The TLM 193 has a natural pickup, with good low-end extension, flat mids and unhyped high-end. The most gratifying aspect of the Neumann is that it captures all the nuances of the classical guitar without emphasising any frequency. Additionally, it is dead silent which enhances dynamic playing styles as it allows the notes to fade to complete silence.
The AEA N8 offers an extended high-end in comparison to more traditional ribbons and a very juicy low end. This combination in an M/S setup produces a bigger soundstage and a sound that is reminiscing of the what I hear when I play.
Conclusions
All three setups can produce high-quality recordings, although the perspectives of their designs are different. I'm used to the Neumann sound, and I gravitate towards that, together with the N8 I think they produce the purest and calmest recording, but with the expense of some definition and the higher noise floor of the ribbon. The Austrian Audio microphones are the most versatile and they take EQ well. They are detailed, without sounding overly analytical, and offer an elegant and smooth sounding result. The Gefell combo sounds like an excellent record from perhaps a different era, but if you love that sound, it is impossible to get it with the other microphones.
Coda
The M/S Stereo technique has the potential to create outstanding recordings, captures a full-bodied and defined sound while eliminating phasing issues. Larger halls and resonant spaces are where it excels as it allows us to concentrate on the recording and fine-tune the balance of ambience and close sound during mixing.

Austrian Audio OC818 and the PolarDesigner plugin
What if you could set-up the microphones, record your classical guitar and configure the best polar pattern your room after the recording is finished?

Austrian Audio PolarDesigner Plugin
Polar pattern selection on large-diaphragm condensers is not a new thing, a few microphones intergrade continuously variable selectors that allow in-between pattern selection, or allow the two capsules to be recorded in separate tracks. Austrian Audio expands the possibilities with the PolarDesigner plugin.
The most important feature of the plugin is that it enables us to craft the perfect polar pattern responses across up to five crossover bands, at any time after the recording is finished. To make the plugin even more useful, Austrian Audio has packed a lot more into the PolarDesigner to perfectly fine-tune your sound.
Usual suspects

Austrian Audio OC818 M/S Pair
I decided to try it first on an M/S setup, I used the two output method only on the Mid microphone, I positioned it at 96cm high and around 60cm from the top of my classical guitar with a slight downward angle so that it is on-axis with the spruce top. I placed the second OC818 on top of the first in Figure-8 pattern.
Basic sounds
With the Side mic muted, I concentrated on the Mid mic for a while.
The unprocessed track, with each capsule recorded at a different track, is unusable without the PolarDesigner plugin, but that was expected.
First, I wanted to see how the basic patterns would behave. So, I enable the plugin, as well as some lean low-cut and high-cut filters.


Tweaking the patterns
After playing around with the controls for some time, I found that the Omni pattern assigned to the lower frequencies gives a beautiful body sound to my guitar. Cardioid and Wide-Cardioid patterns were chosen for the mids, to bring tones of the guitar in focus. And for the highs, I used more of a Wide-Cardioid pattern to add some room ambience.

I also used the free-field equalization preset, which I'm not exactly sure what the underneath processing is, but gave more depth and definition to the overall sound. I boosted the lows a little with the proximity control bar.

And finally, I added the Mid channels to the mix and balanced all three to get a natural room sound.
Conclusions
As you can see, the possibilities are endless, and you only have to position the microphones once, record a couple of takes and then figure out the perfect polar response during mixing.
Additionally, on remote location recording, lugging up monitors to accurately check that the microphones are placed in the most desirable position can be quite unattractive. Headphones, on the other hand, are never the best option to judge stereo spread and overall tonal balance. The PolarDesigner plugin allows for fine-tuning to take place with the speakers and room you know and trust at your mixing room.
Click here for the full review of both the Austrian Audio OC818.
PolarPilot App
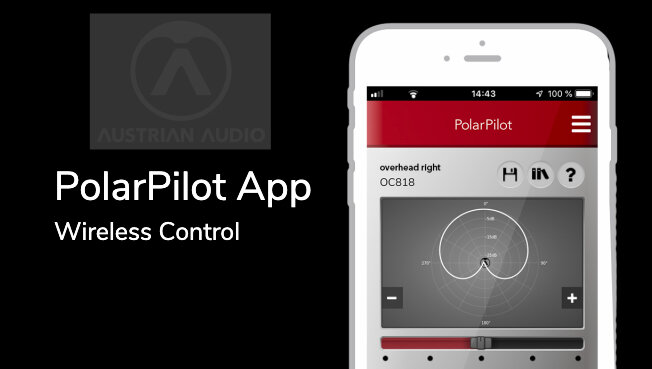
Austrian Audio PolarPilot App
Austrian Audio designed an App that allows for real-time wireless control over the analogue bias voltages of the OC818, allocating 255 discrete polar patterns for us to choose. Plus access to high-pass, and pad in realtime via Bluetooth. Unfortunately, they didn't send me the OCR8 Bluetooth dongle that is required for this to work, so I couldn't test it out.
The judgement day

PolarDesigner Terminator Control
The plugin allows uses some sort of AI that determines what is important and not and provides a spill terminator or maximize target algorithm which should in principle reduce unwanted spill from other instruments But, I didn't get to use.
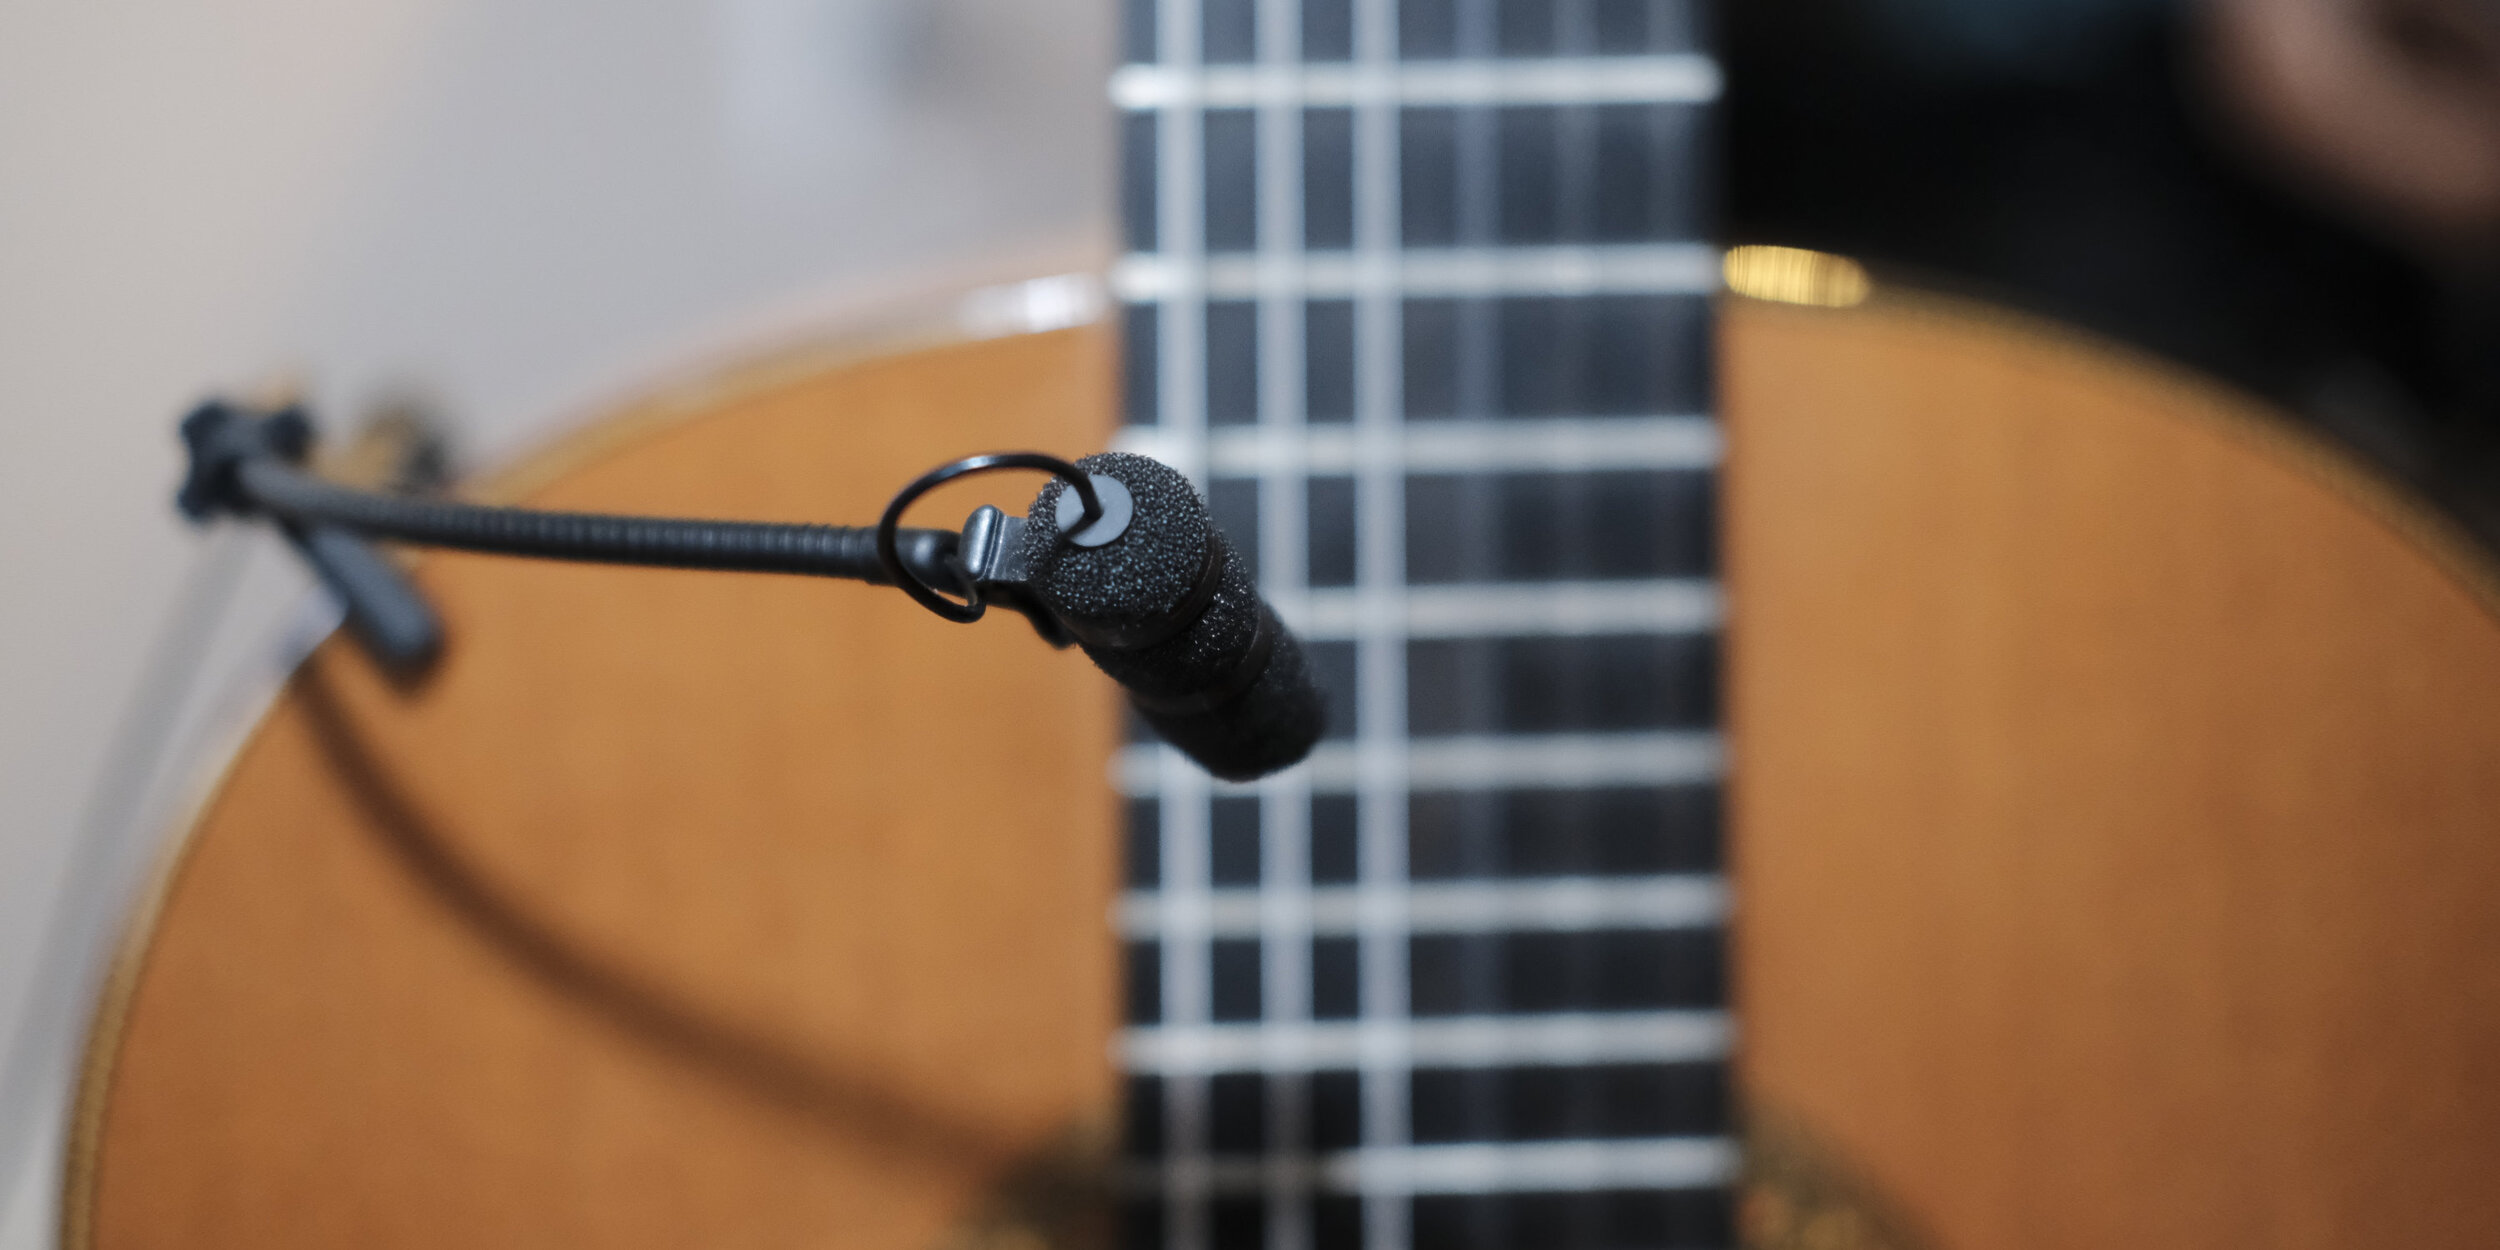
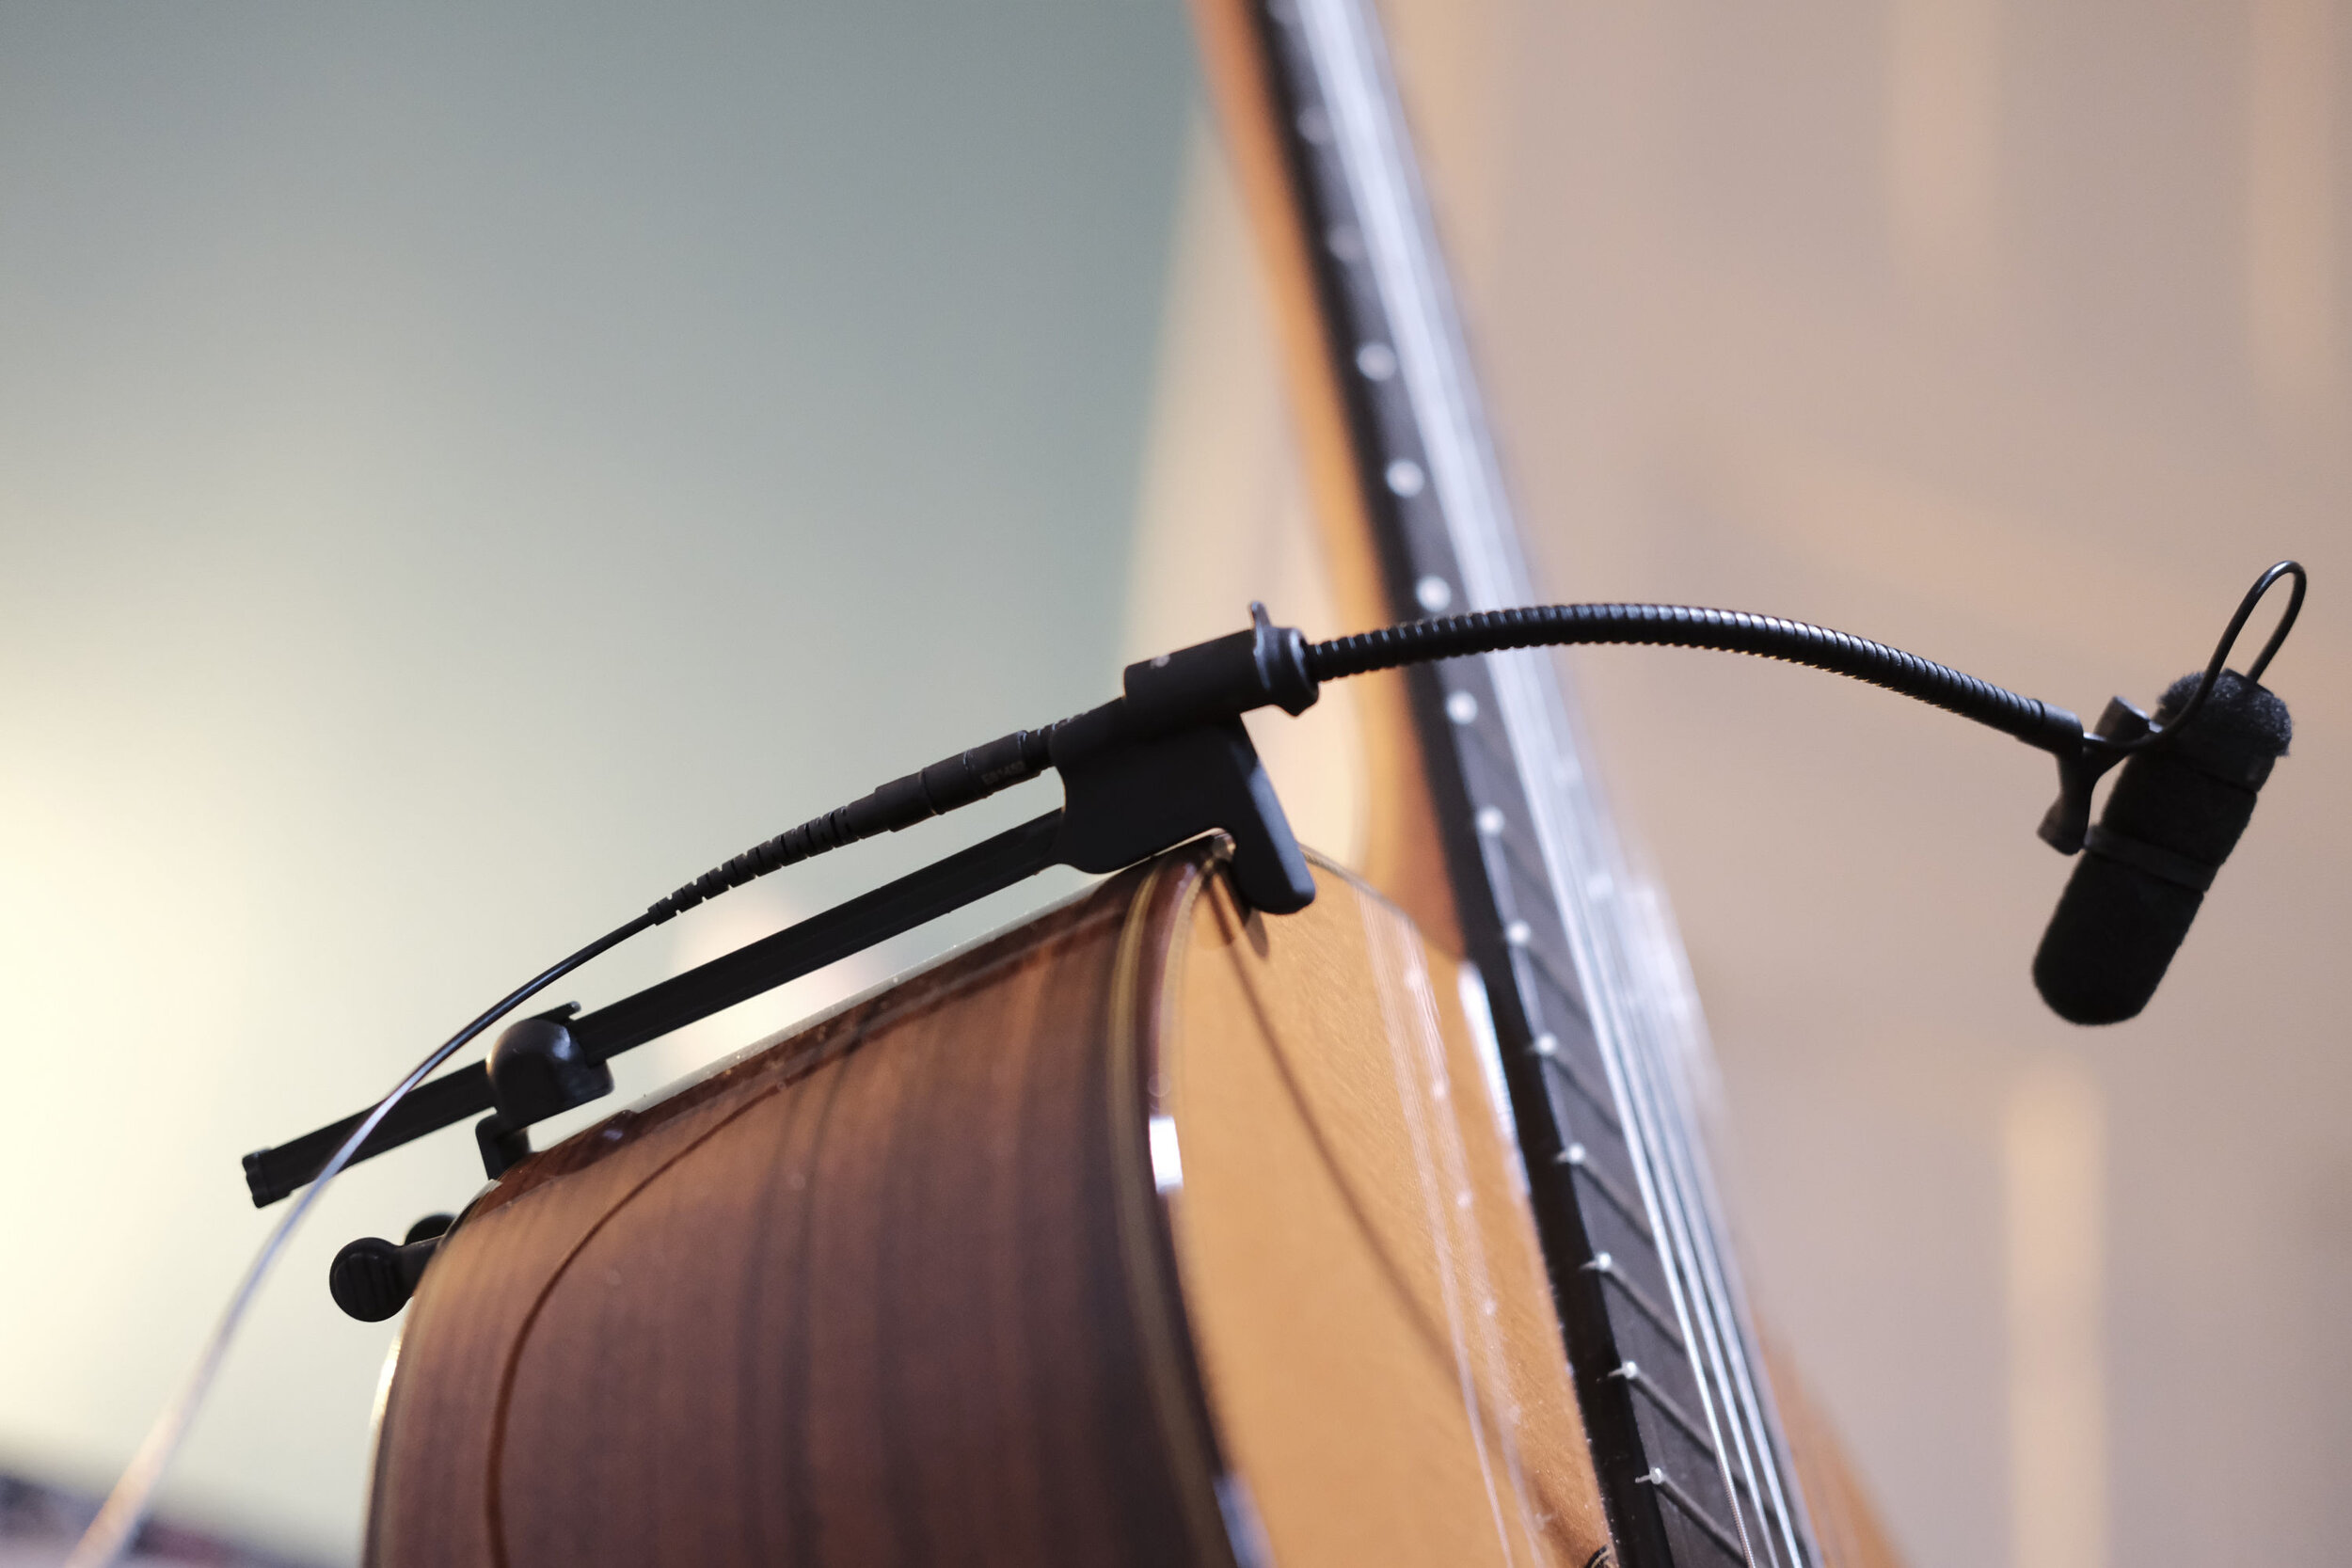
DPA d:vote 4099g Microphone Review
Studio sound for the stage

Danish Pro Audio is acclaimed for manufacturing high-end condenser microphones for acoustic and classical music. The DPA d:vote 4099 is a super-cardioid condenser microphone aimed to bring a high-quality capture on the stage.
Good things come in small packages
The microphone with its accessories is packed in a neat hard-shell canvas case that is pretty light but offers enough protection, making it excellent for the life on the road. Included is a 1,8m MicroDot cable, an XLR adapter and an instrument mount. I have the 4099g which comes with the guitar mount, DPA offers a plethora of options to suit any instrument.
A 140mm gooseneck holds the miniature 4099 capsule and allows for satisfactory positioning. DPA offers a 180mm extension gooseneck, for even more precise placement and the ability to move the microphone further away from the instrument. A brilliant add-on for the studio or a relatively quiet stage, as the extra distance allows the microphone to capture more of the instrument's surface.
The condenser element is covered by a foam windscreen. Although its very light and compact, it seems super-rugged; except for the detachable cable which gives the impression that is very delicate. Maybe it is my paranoia, but I tend to be extra careful with it when I'm on stage, and you will never catch me out without a backup. Saying that I never had a problem so far.
Hearing the tones

Very easy to mount.
I have used extensively the 4099g on my classical guitar for chamber concerts, usually placing the microphone over the 15th fret and aiming slightly toward the soundhole. Depending on the room, I will adjust further to find the sweet spot. The sound is always balanced and detailed, the DPA delivers a natural and full-bodied representation of my instrument.
With a careful speaker/monitor placement, the DPA can take quite some gain before it starts to feedback. Definitely, enough to compete with a grand piano, string/wind instruments and percussion. The super-cardioid pattern helps in rejecting other instruments and noise, but it's not immune to feedback issues.
A positive aspect of having a microphone mounted on the instrument is that even if I move a bit, the sound always stays the same. Additionally, it unclutters the stage from the various stands.
In the studio, the DPA is not the most qualified performer, the miniature capsule exhibits more self-noise than what is satisfactory. I wouldn't hesitate to use it if I had no other option, but I would choose another mount though for more options in placement.

Flat frequency response on-axis, with a slight presence boost for added clarity.
Essential for all instrumentalists
Liliputian proportions, exceptional sonic quality and excellent craftsmanship, establish the DPA 4099 as a great investment for any instrumentalist. It frees us from the stand prison while rejecting unwanted sounds and still manages to deliver accurate and refined sound.

Soundcheck in Berlin - DPA4099g
Cons
Slightly noisy
The cable is too thin (maybe)
Pros
Balanced and detailed sound
Rejection of unwanted instruments/sounds
Easy to attach-remove
Keeps a constant distance from the instrument on stage