
Three Ways to Improve your Recording Space Without Spending Any Money
Let’s talk about the room - Part I
When we think about improving our recorded sound, we usually think about upgrades in gear; we lust for new microphones, interfaces, guitars, etc. We don't want to buy new things; we absolutely need them. Sometimes, we even postpone recording altogether until we have the budget for purchasing said gear.

The harsh truth that we sometimes don't want to admit is that spending more money on gear will not fix fundamental issues. Getting a good sound in the room before we hit record is essential, as essentially, this is the sound that our microphones hear and our interfaces capture. Fix it in the mix does not apply with classical guitar recordings wherein room and performer are equally exposed.
Having used all sorts of gear in all possible situations, I rank all the elements of the recording chain in this order: guitarist, guitar, room, microphones, engineer, playback system, post-production skills, preamps, converters, cables. Leaving everything else aside, in this article, I examine a few ways to get the best out of a typical residential room without spending any money.
Disclaimer - room treatment can be approached from a more technical standpoint which I plan to discuss here in the future. Contrarily to what the vendors of acoustic panels will say, household items can be used as a pragmatic alternative, even more so considering the singular commitment of a classical guitar recording space.

First. The sitting position.
Sometimes out of being lazy or just practical, we set up everything as is and keep the room as we would normally use it, especially if we don't have a dedicated music room. Considering the degree that the room affects the recorded sound, searching for a suitable sitting position should not be overlooked.
Before all else, when I enter a new space for a session, I try to figure out the best sounding position in the room. This habit applies both for on-location to home recordings and even concerts to some degree. I'm not getting into detail about on-location recordings and big spaces now, as this goes beyond the purpose of this text.
I have assembled a few guidelines to help you search for the perfect sitting position in your room but keep in mind that every room has unique sound properties.
First of all, you want to avoid sitting close to the walls and most definitely steer clear of the corners; the build-up of low frequencies and the early reflections will cloud the direct sound of the guitar. Also, the centre of the room is far from an ideal sitting position, especially in a room with parallel walls.
In an ordinary rectangular room, if possible, you'd want to sit alongside the long walls about three-fourths to two-thirds of the length of the room. In addition, I find that sitting a bit off-centre and facing the front wall at a slight angle towards the longest distance produces the best results; this modest break of symmetry helps.
Nonetheless, you need to experiment with your space as every room is different. Perhaps asking someone else to play your guitar in a couple of different positions and try to listen is not a bad idea. If this is not possible, pay attention to the sound while you play; singing can also assist you in identifying the room modes. Moreover, you'll need to record yourself in various spots and listen critically; recording the same piece can make comparisons less ambiguous.
What you are looking for is the most balanced sound; play all notes of your guitar in sequence as well as your favourite piece, and if it gets boomy or any frequency stands out a lot, try a few different angles or move a little. If the room is untreated, which probably is, the result will not be outstanding, but in any case, it is worth finding the position where standing waves are not encouraged, then acoustic treatment can be employed.

Second. Other uses for your books.
Speaking of acoustic treatment, this goes without saying, at least to some extent. But, as our rooms usually serve (at least) a dual purpose, a playing/recording space along with a listening/production room, some compromises have to be made. Critical listening requires a controlled environment, while what makes a good room for recording acoustic instruments can be partially subjective.
I have recorded in all sorts of situations, from big halls with a vast reverberation to heavily treated studios with no ambience at all as well as everything in between, thus I have concluded that I genuinely don't enjoy playing in an acoustically dead room. Even if the captured sound in such a controlled room is somewhat easier to handle, the performance and feel of the music always take a big hit. Clever microphone placement and good post-production skills can make almost any room sound acceptable, contrary there is nothing we can do to improve an uninspiring performance.
Thankfully, the classical guitar is not the loudest instrument around, with a lot of its energy residing is in the mids and highs, so it is not impossible to minimize the small room sound signature. Whilst is more convenient to record at home, on-location recording is never out of the question; I could always visit one of the exceptional sounding halls in Berlin or elsewhere when absolute sound is required. It is also refreshing to work on other rooms.
Wherein large rooms we have to deal with diffuse sound fields, which pose their challenges anyway, small rooms suffer from early reflections and resonances associated with standing waves. Dealing with the low frequencies below 300Hz is rather troublesome as wavelengths are large and spread omnidirectionally, while higher frequencies behave more like rays.
The key here is to use a combination of diffusion and absorption strategically. Since broadband diffusers and absorbers can get expensive fast and need to be quite thick to have any effect at the low-mid and low frequencies, there is a free alternative you can use effectively: books.
Books placed on shelves create an uneven surface, forming some sort of diffuser from which sound waves are reflected in different directions. Moreover, paper absorbs some of the sound energy, so a bookshelf works in addition as an absorber.
Gather your books and build a bookshelf on the front-facing wall (in the typical control room, the front wall is considered the one where the monitors are placed, here I use the term to indicate the wall you face when you play your guitar). Use different book sizes and thicknesses, and experiment on the relative depths; this bookshelf will absorb and scatter the sound in the room while maintaining some liveliness.
Admittingly, a bookshelf won't do much to the lower frequencies, and its properties will be somewhat random. However, you probably have plenty of books in your household already, and a bookshelf is more eye-pleasing. Plus, they are nice to read from time to time.

Third. The floor.
Since the guitar hangs in closer proximity to the floor than any other reflective surface around you, bouncing frequencies would cloud the direct sound. Also, the somewhat low ceilings and small dimensions of residential rooms dictate for closer and lower microphone positioning that say a concert hall, thus heightening the problem.
To tame the room ambience to a certain degree, place a rug between your guitar and the microphones. Avoid covering the whole room with a carpet, but rather use a small to medium-sized one.
Experiment with a few different sizes and thicknesses until you find what works in your space. Your goal is to allow the microphones to capture a cleaner sound while maintaining the room ambience. The absorption will only be effective at the high frequencies. I use a woollen rug of medium thickness that extends from just under my seating position to a bit further than the position of the microphone stand.
Closing
With the advancement in technology over the last twenty years, quality recording equipment has become pretty affordable consequently capturing compelling recordings at home is no longer impossible. However, we should not forget that the microphones capture the sound of our guitars in our rooms. So, be intentional and learn trust your ears.

Audient iD14 USB Audio Interface Review
Audient's renowned console preamps on your desktop
The introduction of the iD22 was a huge success for Audient. It combined preamps ported from their expensive consoles, pristine converters, a monitor controller and enough connections to satisfy even the most demanding users. With the iD14, Audient promises to deliver the same quality, into a small, affordable audio interface and accomplishes that by stripping down the device to the bare essentials.
Minimalist appeal
The iD14 is housed in a slim all-metal body with a minimalist design and classy aluminium knobs. It doesn't only look beautiful on any desktop but is robust enough for travelling and location recordings.

An all-metal no nonsense design.
A big encoder knob controls the speaker or headphone output, an illuminated button is in charge of the switch. By pressing down the encoder, the selected output is muted. There is another button for DIM (lowering of the output level) and a user-defined software controlled function key. The physical controls on the iD14 are very intuitive, and all the knobs and buttons have a satisfying feel to them.
The two excellent discreet Class-A mic-preamps have 56dB of gain, with an extra +10dB boost and polar switches available in the software mixer. A high-pass filter, similarly to the iD22, would have also been welcome. My biggest gripe though is that the gain pots are practically usable only about at the last third of their travel. There is not enough juice until then, then they jump in gain even with the slightest turn of the knob, making it difficult to set the levels perfectly.
There is an ADAT input which can accommodate eight additional inputs for bigger projects, but, due to the limitations of that protocol with only a maximum sample rate of 48KHz. The higher sample rate of 96KHz for the extra channels can be attained when only four additional digital inputs are used.

DI and Headphones plugs are easily accessible.
In the front side, there is a high-quality JFET instrument input as well as one headphone output. I like that these are located there, as I usually like to plug-in various headsets.
Capturing Tones
The mic preamps have plenty of clean gain. The sound manages to be transparent, with some added thickness and warmth to the body. The highs are smooth and show a slight boost. The iD14 captures a classy, transparent but not sterile capture that compliments most sources. The DI is excellent as well, designed to emulate the sound of tubes, and I have used it with great success.
The conversion quality in unforeseen for an interface of this price, the speakers output is quite revealing, making precise EQ and reverb adjustments a breeze. The headphone output it looses some of the clarity but is decent enough for the project studio.
For those who like to work on the go, the iD14 can be powered via USB from your laptop, Audient claims that to achieve that, the conversion had to be a step down from their flagship models. That shouldn't be a concern though, as the iD14 sill delivers a joyful, engaging playback. Unfortunately, you need to plug into the mains power to activate the +48 phantom.
Lastly, the output metering ladder has eight pairs of LEDs, but sadly there is no way to check the preamp input level on the device. You can still see the levels in the software mixer, but considering that the interface is marketed towards project studios, having more visual meters on the box would have been more practical.
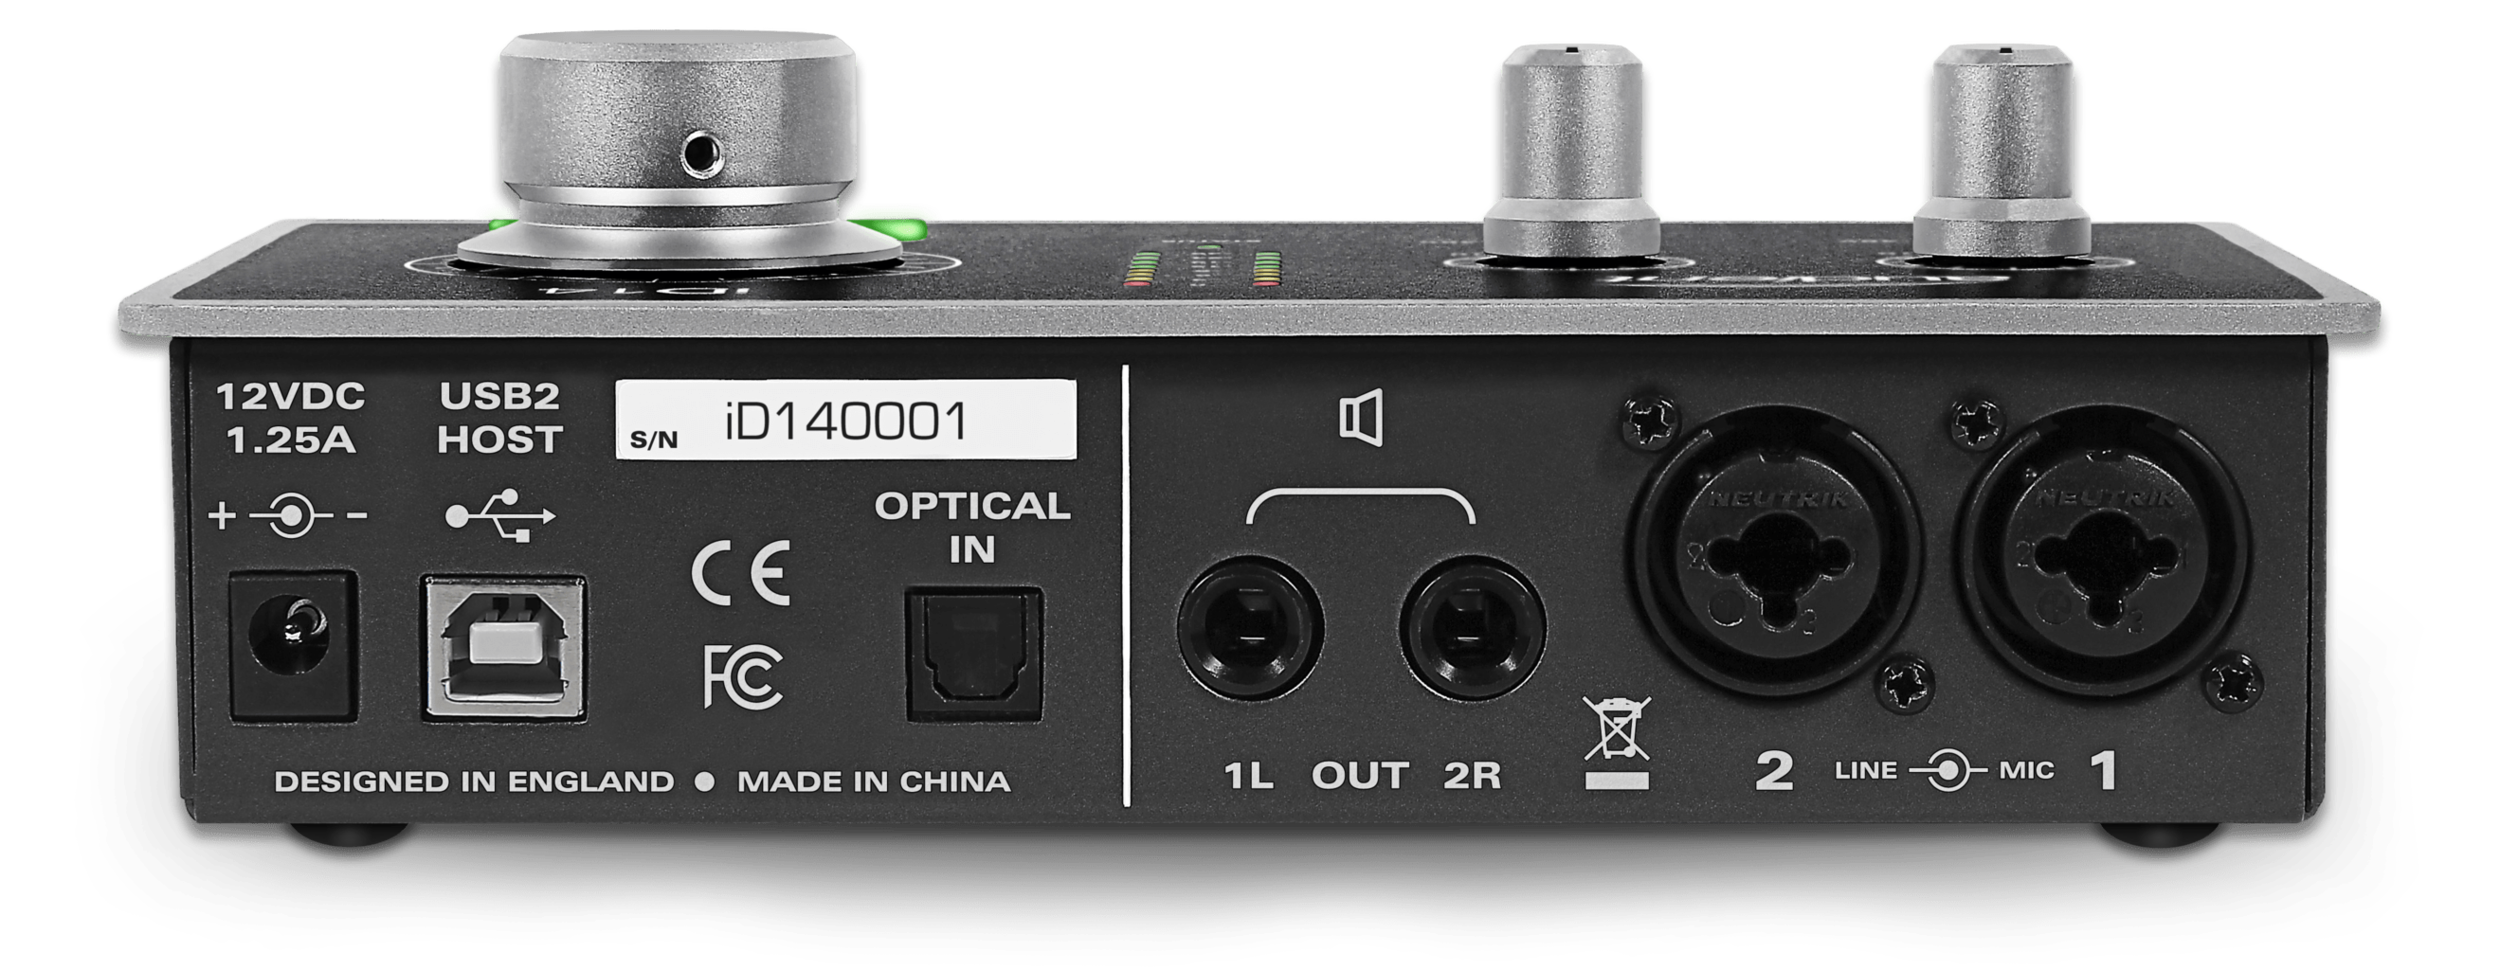
I/O connections.
Putting that aside, I have used the iD14 numerous times. I have recorded classical and electric guitars, cello, various female and male voices, as well as solo piano and a piano trio on location. It always delivered an excellent sound with stable operation.
Life in a digital world
The software mixer has a nice-looking modern UI and follows a similar spartan approach to the physical unit, allowing access to some basic and advanced settings of the iD14. The most important feature is the ability to wire the input directly to the speakers for zero-latency monitoring while mixing it with the playback from the computer. The ability to create different CUE mixes for the headphones and the speakers is also neat.
Samples with the iD14 from my residency in Lithuania
Bare bones finesse
With the iD14, Audient strips away all the non-essential functions while still retaining the core qualities of its bigger siblings to deliver a high-performance interface to the project studios.
Alternatives
If you are happy with the features, nothing can beat the iD14 at this price range. Focusrite Clarett 2pre USB has a similar feature-set, with better conversion, but at a higher cost.
Pros
Excellent sounding preamps
Impressive converters
Robust build
An intuitive, uncluttered UI
Price
Cons
Gain knobs too jumpy at the last third of the turn
No input-metering on the device
Lack of high-pass filter

Neumann TLM 102 Microphone Review
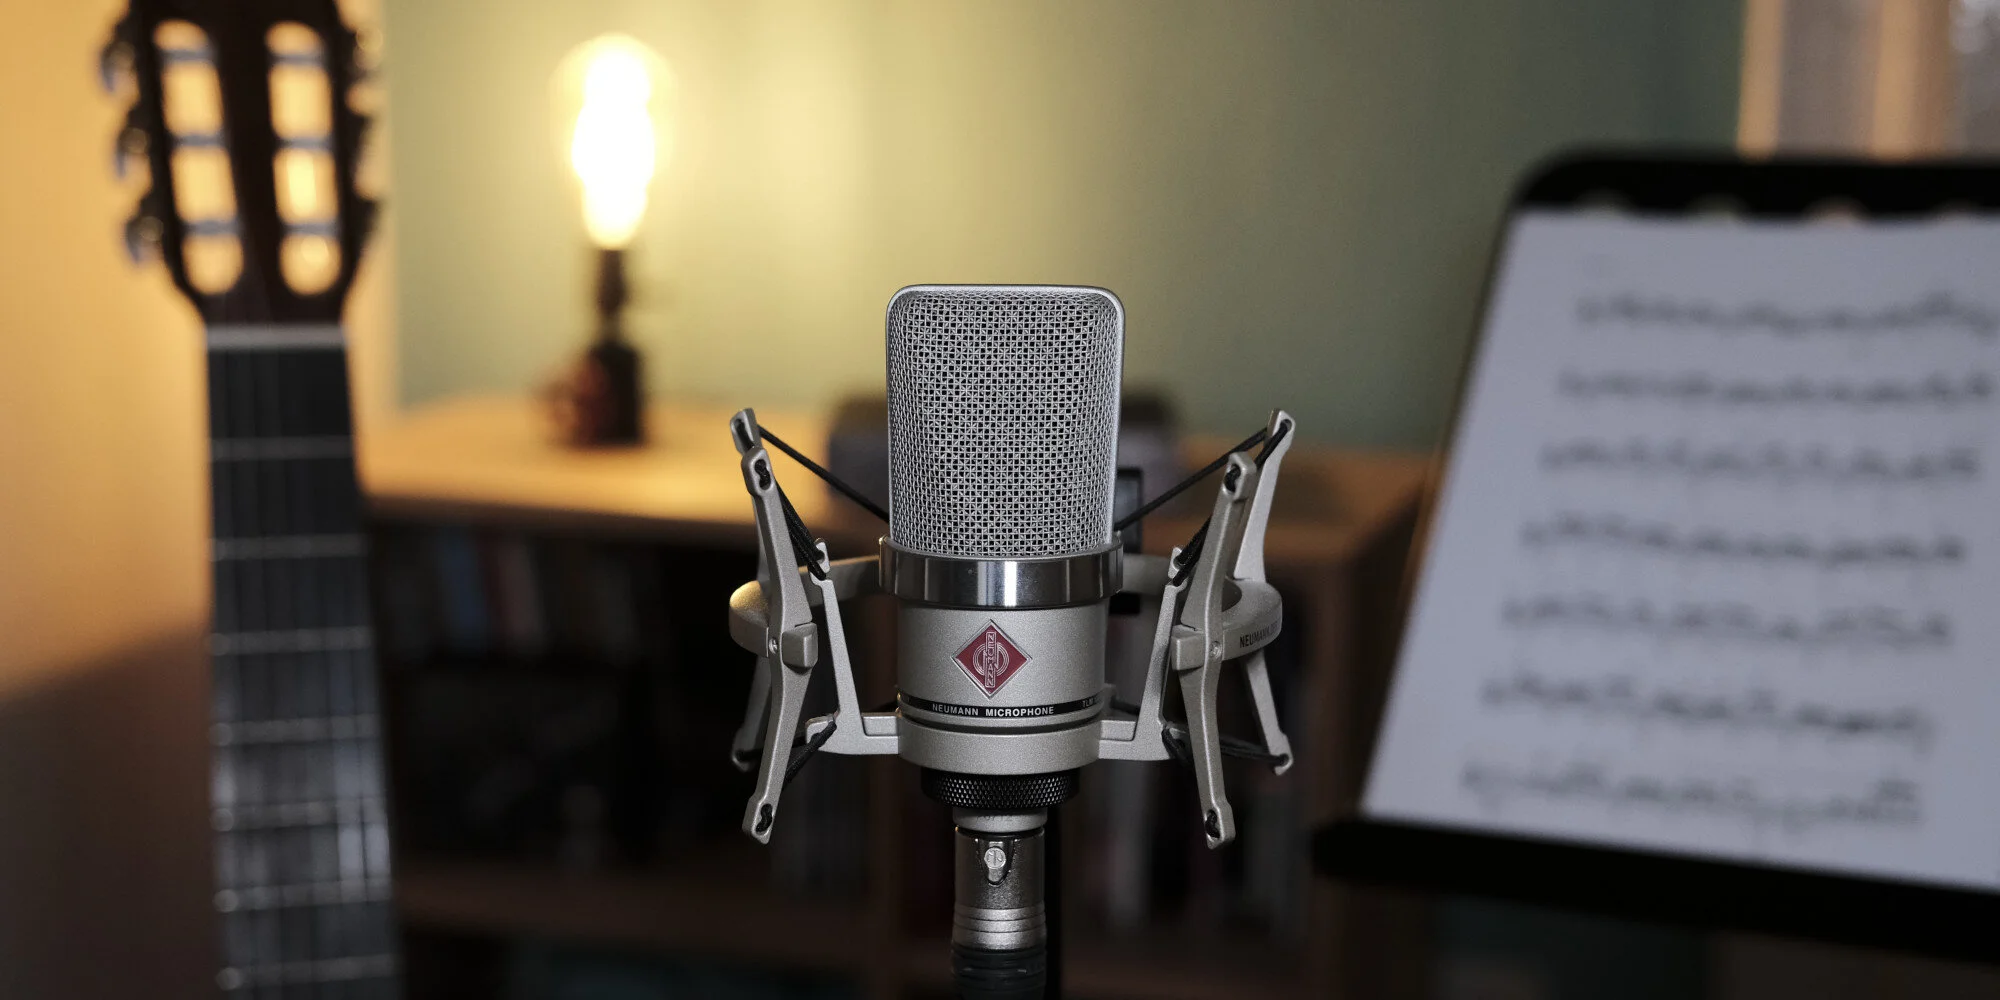
The Neumann TLM 102 is a small, elegant and affordable condenser microphone with an open character, a silky high-end, low self-noise and a distortion-free operation.
A true Neumann for the project studio.
The Neumann TLM 102 is a small, elegant, and affordable condenser microphone with an open character, a silky high-end, low self-noise and distortion-free operation.
Inspection
The TLM 102 is a large-diaphragm, transformerless capacitor microphone with a fixed-cardioid polar pattern. The lack of pad and filters implies a bare-bones design, allowing Neumann to bring the costs down without compromising on the sound.
A relatively small and edge-terminated diaphragm puts it towards the more natural Neumann microphones, and with an SPL tolerance of 144 dB, the TLM 102 is a foolproof candidate for capturing gracefully almost everything.

Neumann badge indicates the front side of the microphone.
It has a classic Neumann design available in a black or nickel matte finish. I have the nickel mic and I find it very stylish, the black one looks just as beautiful. The microphone is engineered to perfection, the chrome ring below the basket and red Neumann badge, give it a classy retro-industrial look. With a tiny size and a weight of approximately 210g, placement is a child's play.
The TLM 102 ships in a foam-lined cardboard box (another cost-cutting move from Neumann), a departure from the usual luxurious wooden box, but it securely fits snug the microphone and stand-mount or shock-mount. The box is sufficient for storage, but I wouldn't use it for travelling.
The frequency range of the TLM102 is flat up to 6kHz, where a slight presence boost kicks in. This adds a touch of brilliance without ever sounding harsh or shrill. It has a relatively low input noise of 12dBA and a moderate sensitivity, allowing it to capture with blooming detail even nuanced delicate instruments.
A high-pass filter could have been useful, as the microphone is sensitive even to the very low frequencies. Engaging one on the preamp or DAW can be sufficient though.

Flat frequency response with a slight presence boost for silky highs.
Investigation
On a classical guitar with the mic opposite of the bridge, leaning slightly inwards towards the sound-hole, and at the distance of around 50 cm. The TLM 102 sounds glorious, with full-bodied lows and mids, and a pleasing high-end, with no sign of harshness. The slight high-end boost contributes to an added clarity, but unlike many budget condensers, it doesn't emphasize unwanted mechanical sounds of playing the guitar.
Newly designed shock-mount with a cut for closer positioning.
I tried the TLM 102 on a brilliant cellist, another instrument that is quite difficult to record convincingly. The tiny Neumann retained its well-behaved nature and clear capture.
On female voices, the proximity boost in the low-mids together with the relatively natural highs of the TLM 102, bring a smoky, almost old-fashioned character. When used on male voices, the microphone provides a thick and rich timbre that allows. The TLM 102 can complement a variety of voices, it always retains its rich and full personality.
Diagnosis
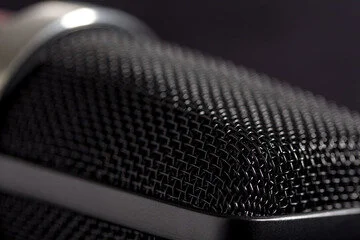
The grille incorporates a dense pop screen, effectively reducing plosives.
After owing a TLM 102 for a few years, one trait remains consistent, this microphone exhibits a strikingly clear-sounding capture but shows enough temper to complement most sources. A pretty desirable attribute, especially for the project studio, as many home recordists will probably use one microphone to record almost everything.
Alternative
At the same price, the Miktek C1 offers a similar natural character with a silky high-end. The Neumann TLM 107 is an excellent alternative if you don't mind spending more, as it offers a similarly natural and smooth capture, with even less self-noise, and added versatility with its 5 polar patterns.
Pros
Full and rich character
Silky highs
Price
Size and weight
Cons
No High-pass filter
Cardboard box