
6 Common Mistakes When Recording the Classical Guitar at Home, Part II
Part II - Post Processing
Professional sounding classical guitar at home is not a fantasy anymore or at least achieving a recording quality that is not embarrassing to share. Affordable audio interfaces, preamps and microphones have flooded the market these last decades, with increasing performance and processing power. Rooms, recording techniques and mixing are holding us back.
In the first part on the 6 Common Mistakes When Recording the Classical Guitar at Home, I tried to encourage you to try out different microphone positions and to study your room acoustics.
The second part focuses on some of the common mistakes of beginner classical guitar recordists on utilizing a proper signal chain and achieving satisfactory results in post-processing.
Mistake no.1 - Improper gain staging

AEA TRP2 Gain Knobs
The fear of clipping the converters leads some amateur recordists to use too little gain, resulting in recordings that are low in level. Without adequate signal-to-noise rations, these recordings will become noisy when any attempt is made to bring them at a normal level during mixing or playback. Contrarily, recording too “hot” will possibly clip the converters and can introduce nasty sonic artifacts to the audio. In either case, the recording will suffer from a limited dynamic range and high noise; attributes that we don't usually associate high-quality classical guitar recordings.
My advice is to aim between -6dB to -12dB as a maximum peak level (not average), per channel. Therefore, when you are happy with the placing and distance of your microphones, do a couple of test recordings, play as loud as you would normally do and set the gain levels accordingly. If you set the levels correctly, you will have a healthy and strong signal, but even if you (or another guitarist you are recording) eventually get carried away during the performance, you still have enough headroom to avoid digital clipping.
Mistake no.2 - Unrealistic panning
Classical guitar is a small instrument, radiating sound from a definite point in space. One of the worst choices you can make if you record in stereo (which you should) is to use a too wide panning. Regardless of if the listener is an audiophile type, sitting on his couch perfectly balanced in front of a pair of top-tier speakers, or a regular person listening to music with earbuds. A hard-panned left and right guitar will sound unnaturally wide and cloudy.

Proper panning of Stereo AB channels
A realistic classical guitar recording is one that creates a phantom image of the instrument right in the middle of the speakers, but with some space around it. Such recordings can remove the playback medium and transport the listener in the room with the player.
In typical AB Stereo scenarios, I pan one channel at 3 o'clock and the other at 9 o'clock. I fine-tune the panning according to the polar pattern of the microphones, how apart they are set, and the distance from the guitar.
Mistake no.3 - Limiting dynamics
Classical guitar is not the most dynamic instrument, and if anything, we should strive to capture as much dynamic range as possible (it starts from the player, so we should also prioritise dynamics in performance). Compressors, on the other hand, are designed to do just the opposite; minimize the dynamic information of an audio track by limiting the loudest notes and boosting the softest signal.
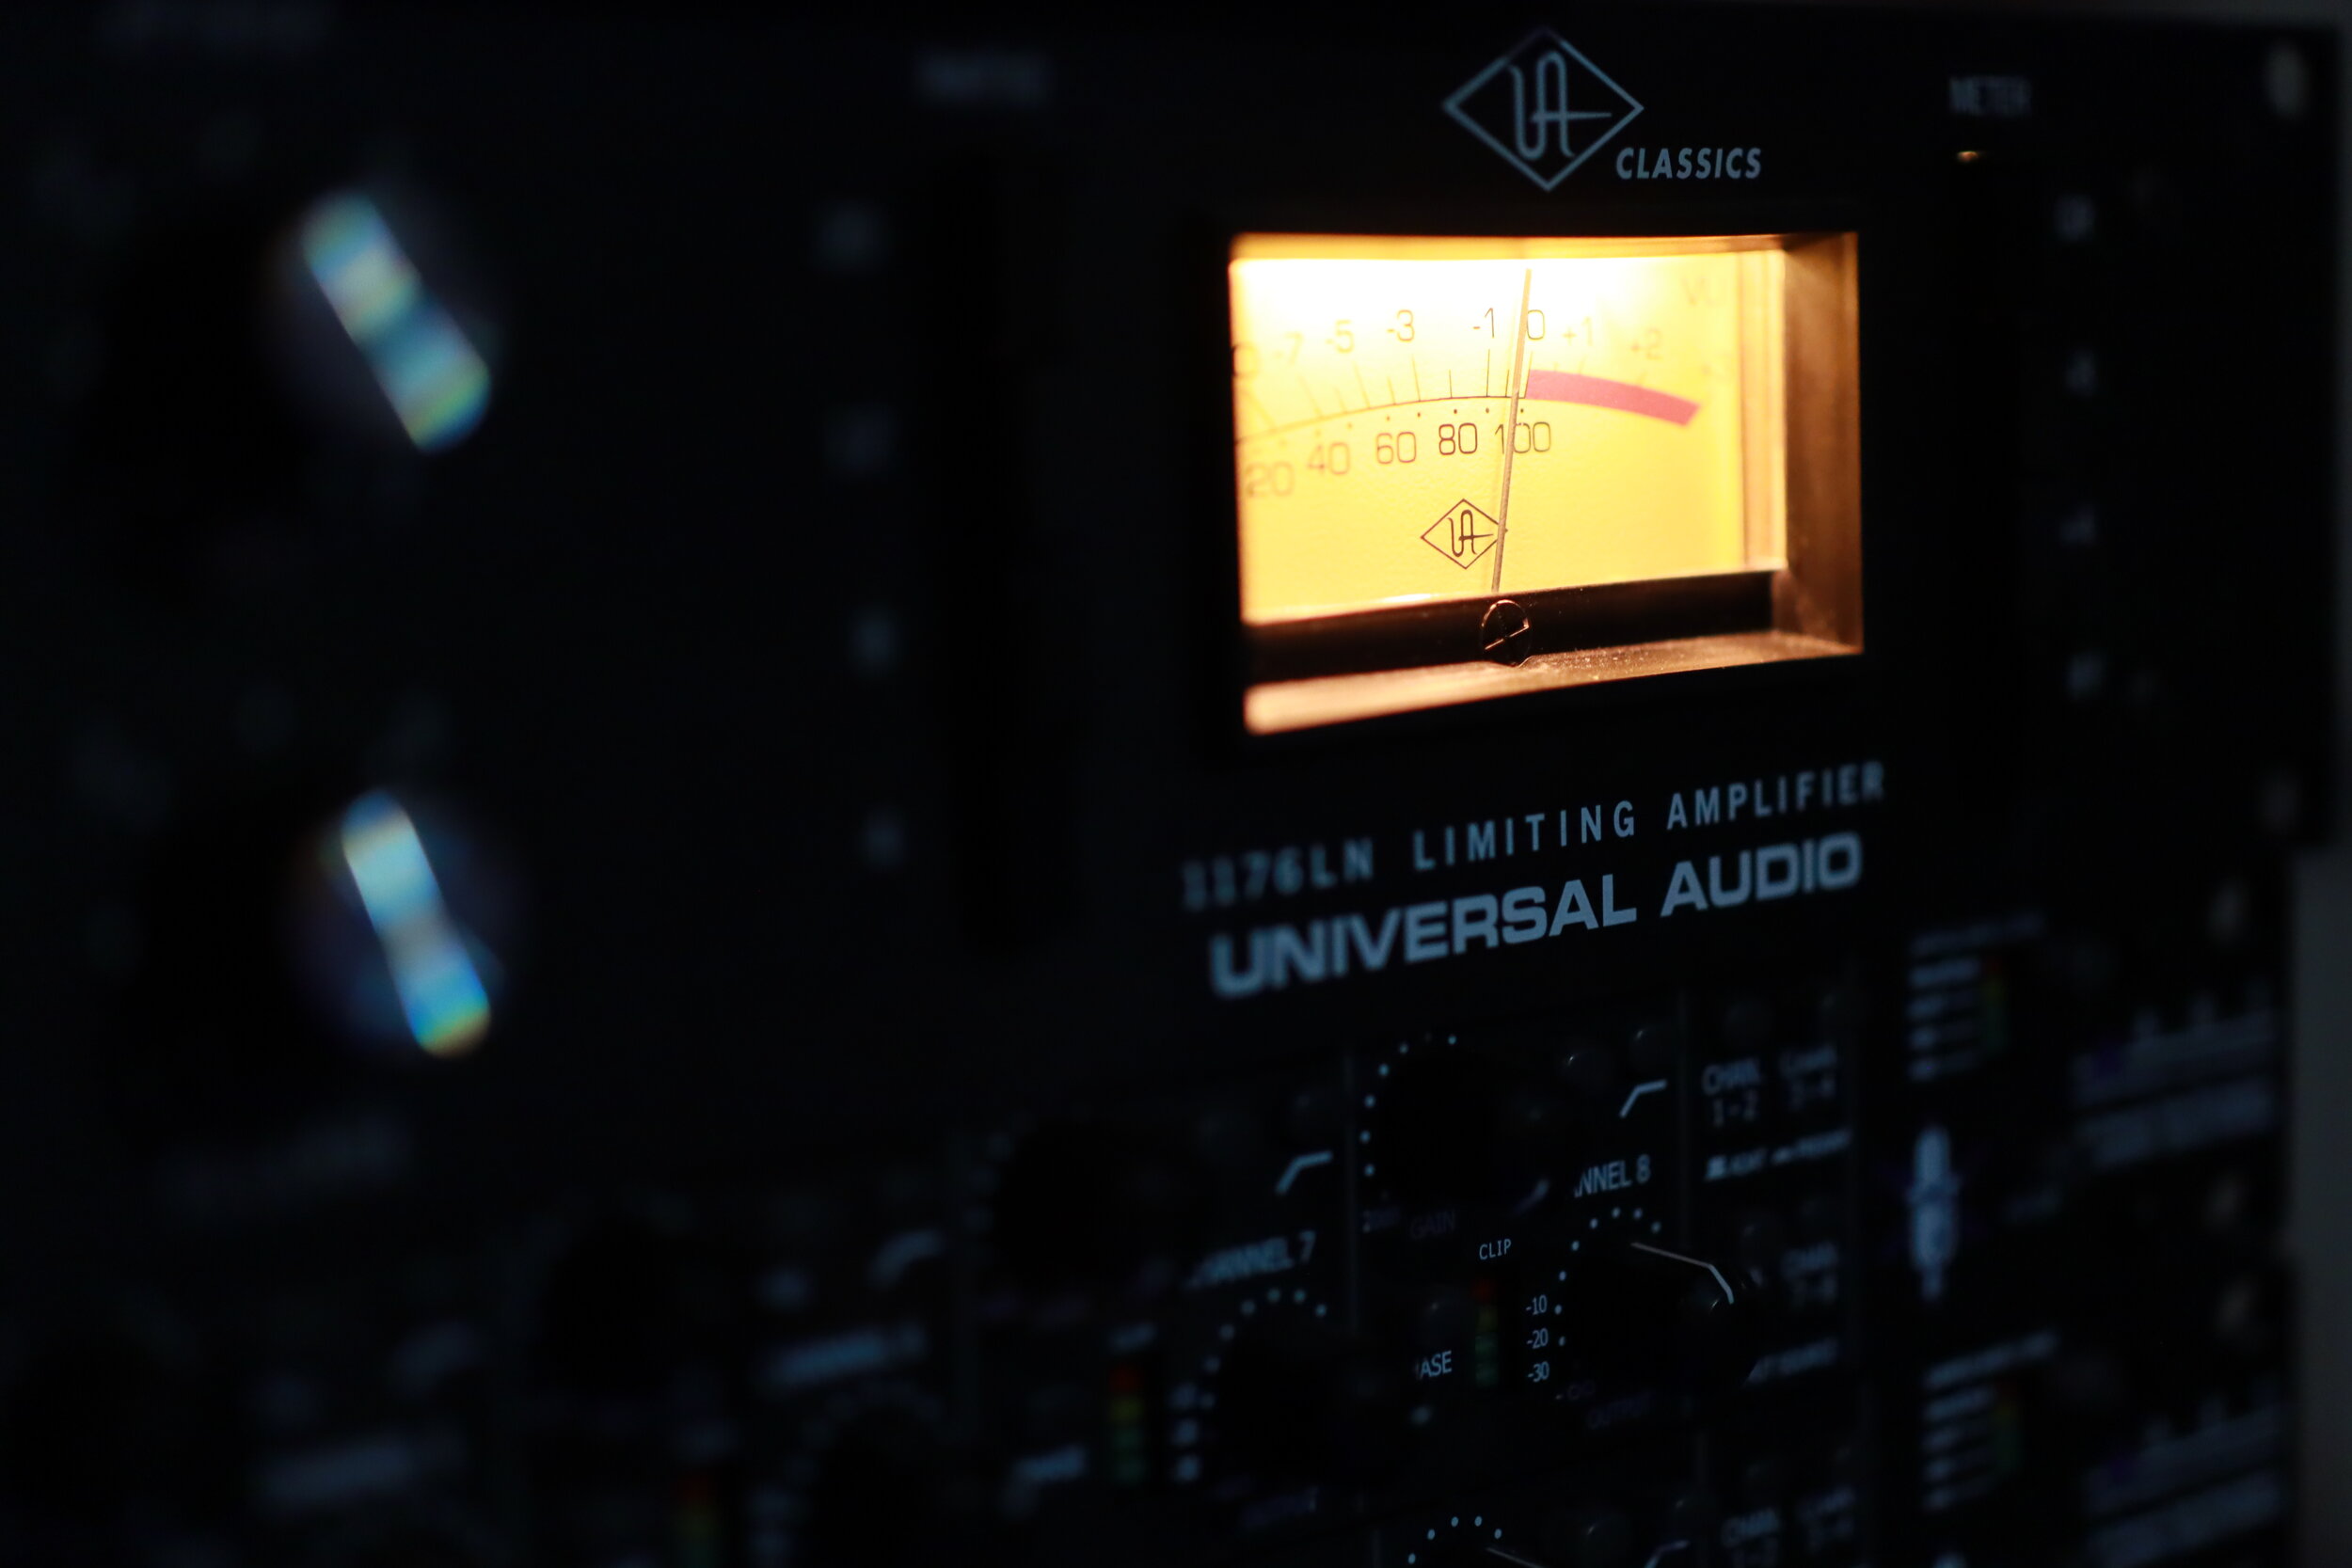
The classic Universal Audio limiting amplifier
Compressors do make the initial playback sound more exciting and powerful… for a few seconds, but in my opinion, it never pays back. Some of the problems that are introduced with the use of compressors in solo classical guitar recordings are squeezed dynamics, increased noise level and altered instrument tone.
Cross-genre guitarists employ compressors more often, as they learn that they can be invaluable in a dense mix. But I haven't found any use for dynamic limiting in a properly captured classical guitar recording.
Therefore, unless you have to deal with issues of the room or improper microphone positioning, don't use compressors on classical guitar recordings.
Mistake no. 4 - Being afraid of using filters

High-pass filter’s switch on an Austrian Audio OC18
Many microphones feature high-pass filters, the most common are 40Hz, 80Hz and 120Hz; the same is true for some dedicated outboard preamps. But many beginner recordists are afraid to take advantage of them. The truth is that in the context of the classical guitar, not much musical information is presented at the low-end frequencies. Most of what is below around 80Hz is unwanted room rumble and weird resonances; therefore by attenuating them, we end up with a cleaner recording. Capturing what is essential and leaving out the rest.
As low frequencies can have a lot of energy, it is preferable to cut undesirable low-end before the signal hits the converters, if possible. This tactic allows us to set the gain and levels appropriately and leads to better signal-to-noise ratios. But even if your microphones or preamps don't have any filters, you can still apply a high-pass filter in your DAW to remove non-essential information.
I also like to use a low-pass filter to remove high-end information that is inaudible, so that my audio consists of only the frequencies I can hear. A gentle roll-off of the low (below 50Hz) and high frequencies (above 18000Hz) is a good starting point. An EQ plugin with these basic filters is the first plugin I load on every track. You can read more on the article Three Most Essential Plugins for the Classical Guitar.
Mistake no.5 - Not learning how to use an equalizer
Other than the low- and high-end unwanted information that we can simply remove with the appropriate filters, undesirable resonances can occur in the audible range as well. These can be caused by the imperfect rooms that we are recording in, our instruments or our technique. Obnoxious resonances can and will distract the listener.
Learning how to use an equalizer to detect and attenuate or eliminate such issues will make the listening experience much more pleasurable.
The best way to identify an offending frequency is by using your ears. I know that this doesn't sound like great advice, but keep reading. When you detect something that you don't like, add a bell-shaped point on your EQ with an extreme boost and search through the suspected range, like dialling in an analogue radio.
Once you find the irritating frequency, the sound should be quite disturbing at that point, apply a notch or a generous cut with a narrow Q. Toy around with the Q value to find the sweet spot; a setting that makes the problematic sound disappear but lets the rest of the audio unaffected.
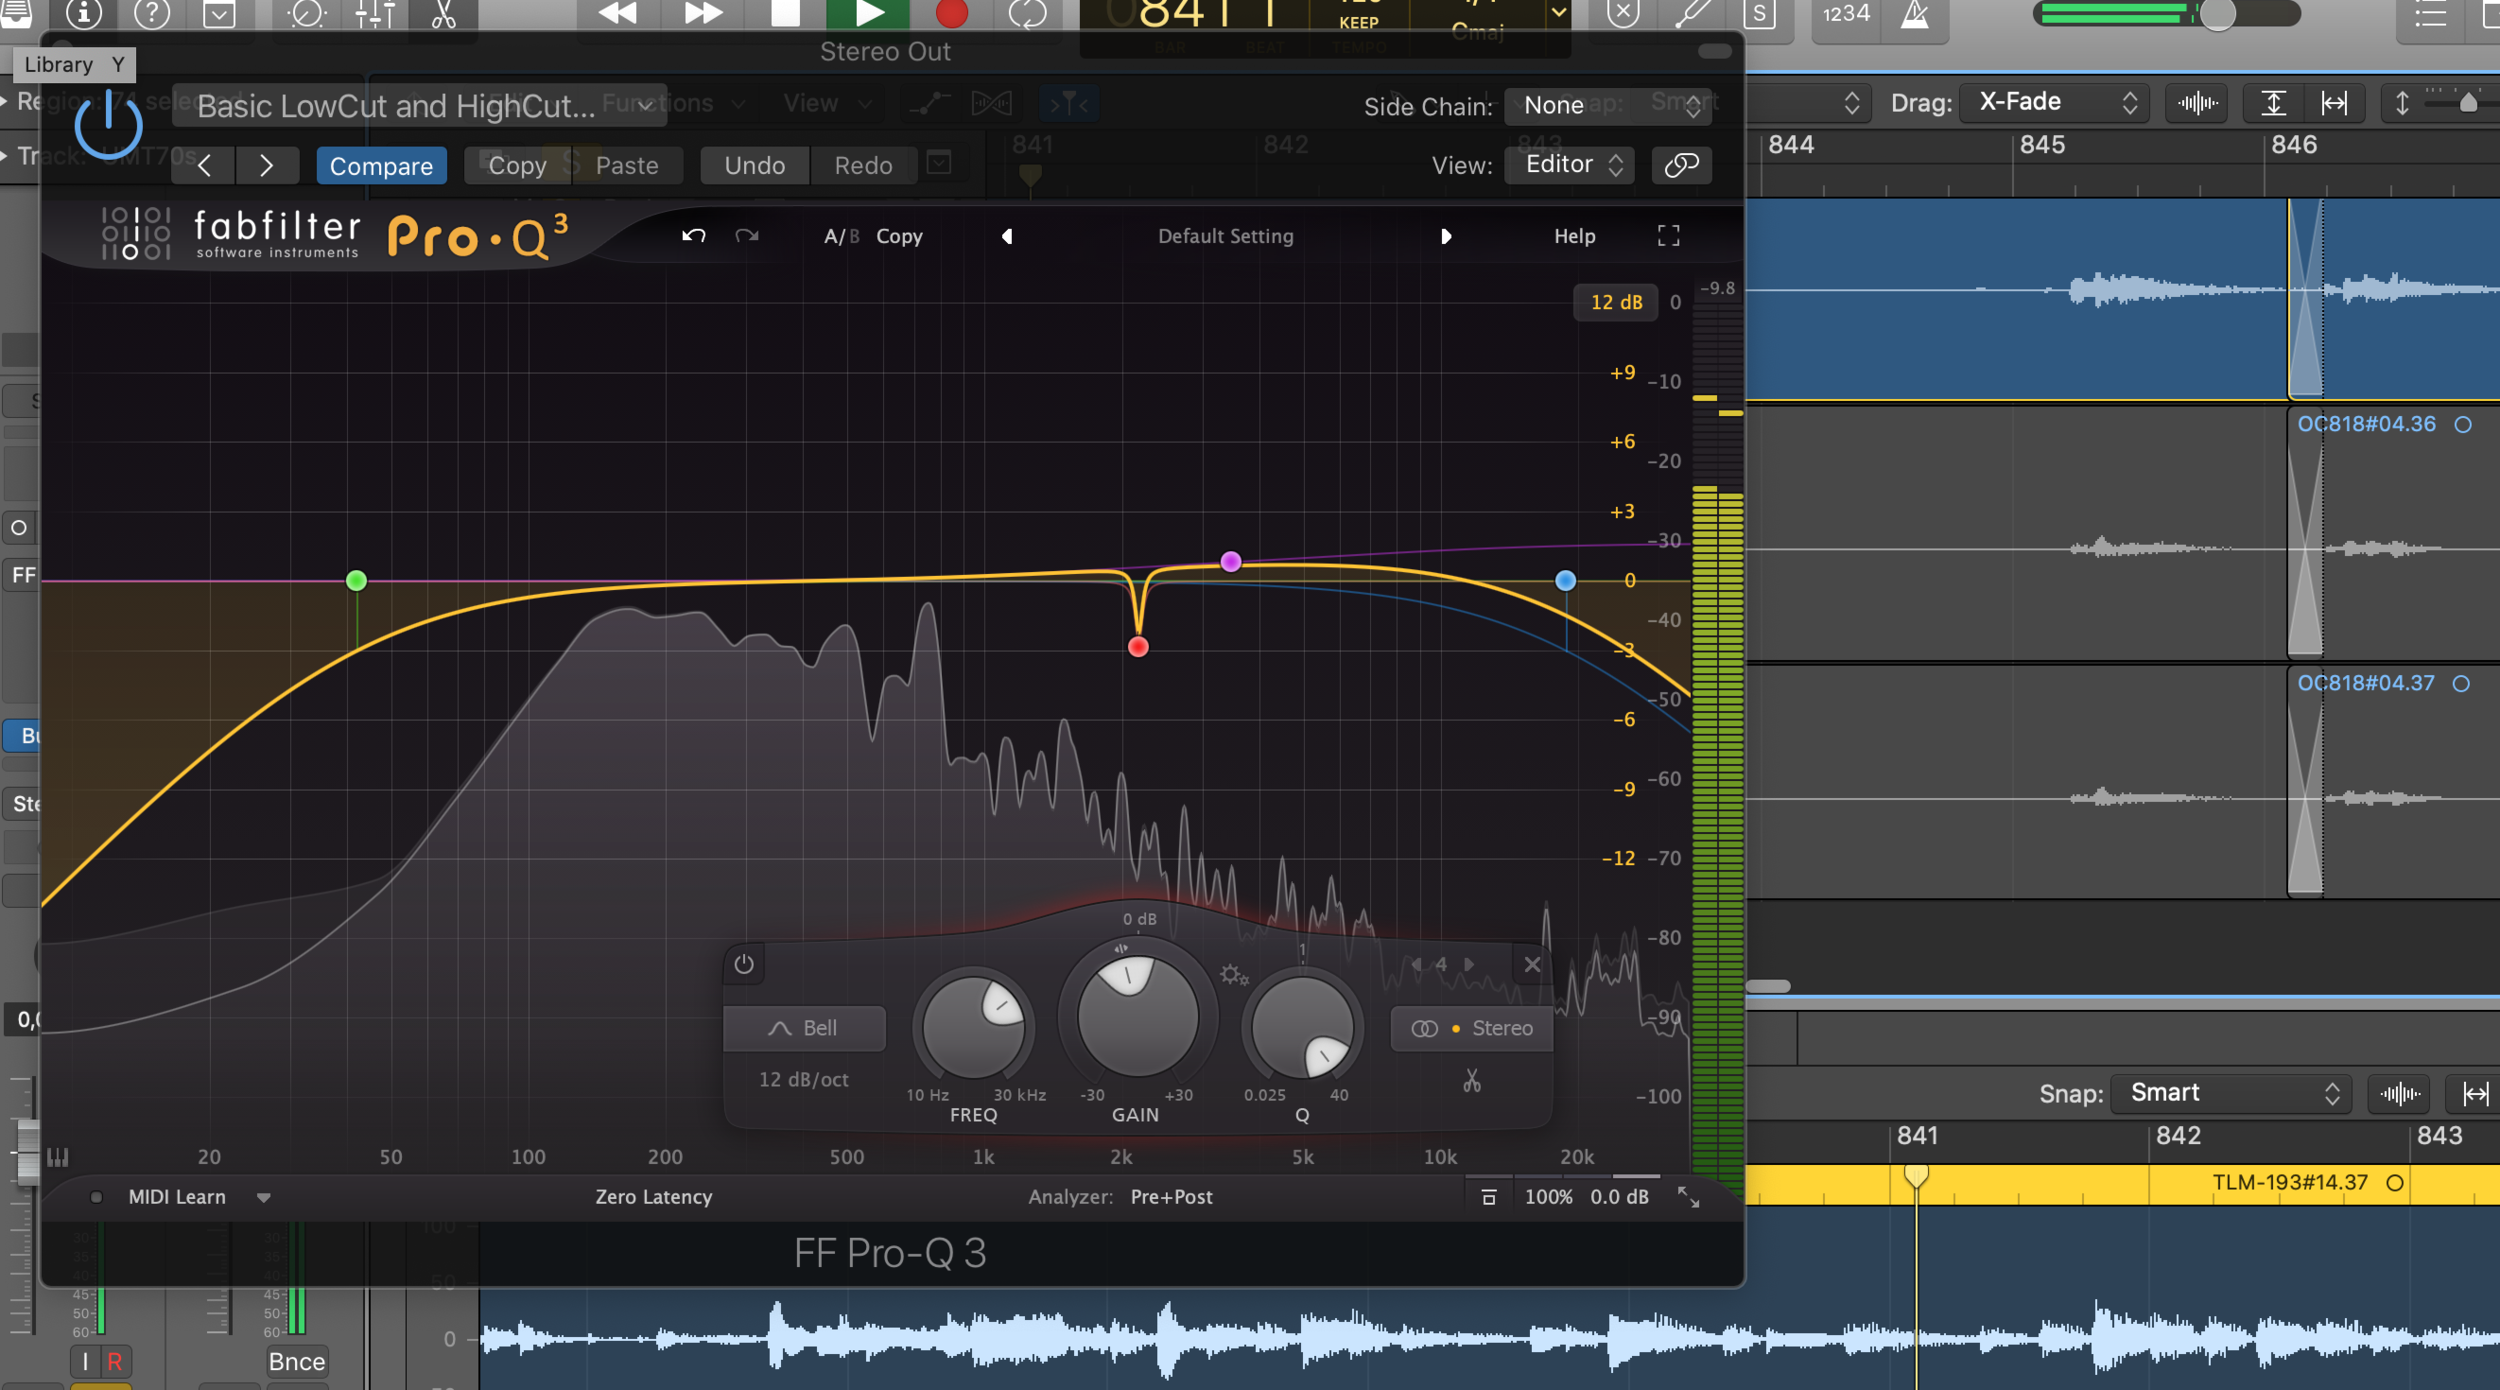
FabFilter Pro-Q 3 with HP & LP Filters, a narrow Q Cut and a High Shelf Boost
Another use for an EQ is to change the overall balance of the recording. Sometimes you'd prefer a slightly fuller recording, or there is just a bit too much low-end. Perhaps the treble is a bit piercing, or you'd like to add some more clarity and articulation. Making gentle adjustments like these are generally uncomplicated with the use of Low or High Shelf adjustments. Just a couple of dB's can make a drastic difference to the evenness and impact of our music.
Just be careful not to overdo it, and always compare your mixes to your favourite recordings.
Finally, you can also use an equalizer to completely change the sound of an instrument and shape it to your liking. But if you've been diligent with the microphone positioning, and you like your guitar sound, you won't have to.
Mistake no.6 - Too much reverb

Placing the music into an artificial hall is a necessary lie
As I write on the Three Most Essential Plugins for the Classical Guitar article, nothing will affect the listener more than the physical space that the music takes place.
When we record at home, most rooms are not interesting enough, and so we need to enhance their sound with artificial reverb. But it is easy to overuse reverb, as it makes everything sound "better". Or so we think when we first enter the home recording world.
Most beginner recordists tend to choose a random church preset without any consideration to requirements of the music, tempo and other aesthetic choices. The result is a flood of unnatural and unattractive recordings which instead of sounding realistic or enchanted, they feel cheap.
Learn how the Time, Size and EQ settings found on your reverb plugin of choice to fine-tune the sound the ambience. Then turn down the Mix a little bit more than what you think it should be. Lastly, compare your efforts to commercial recordings (not that those are not guilty of overusing fake church algorithms).
Closing thoughts

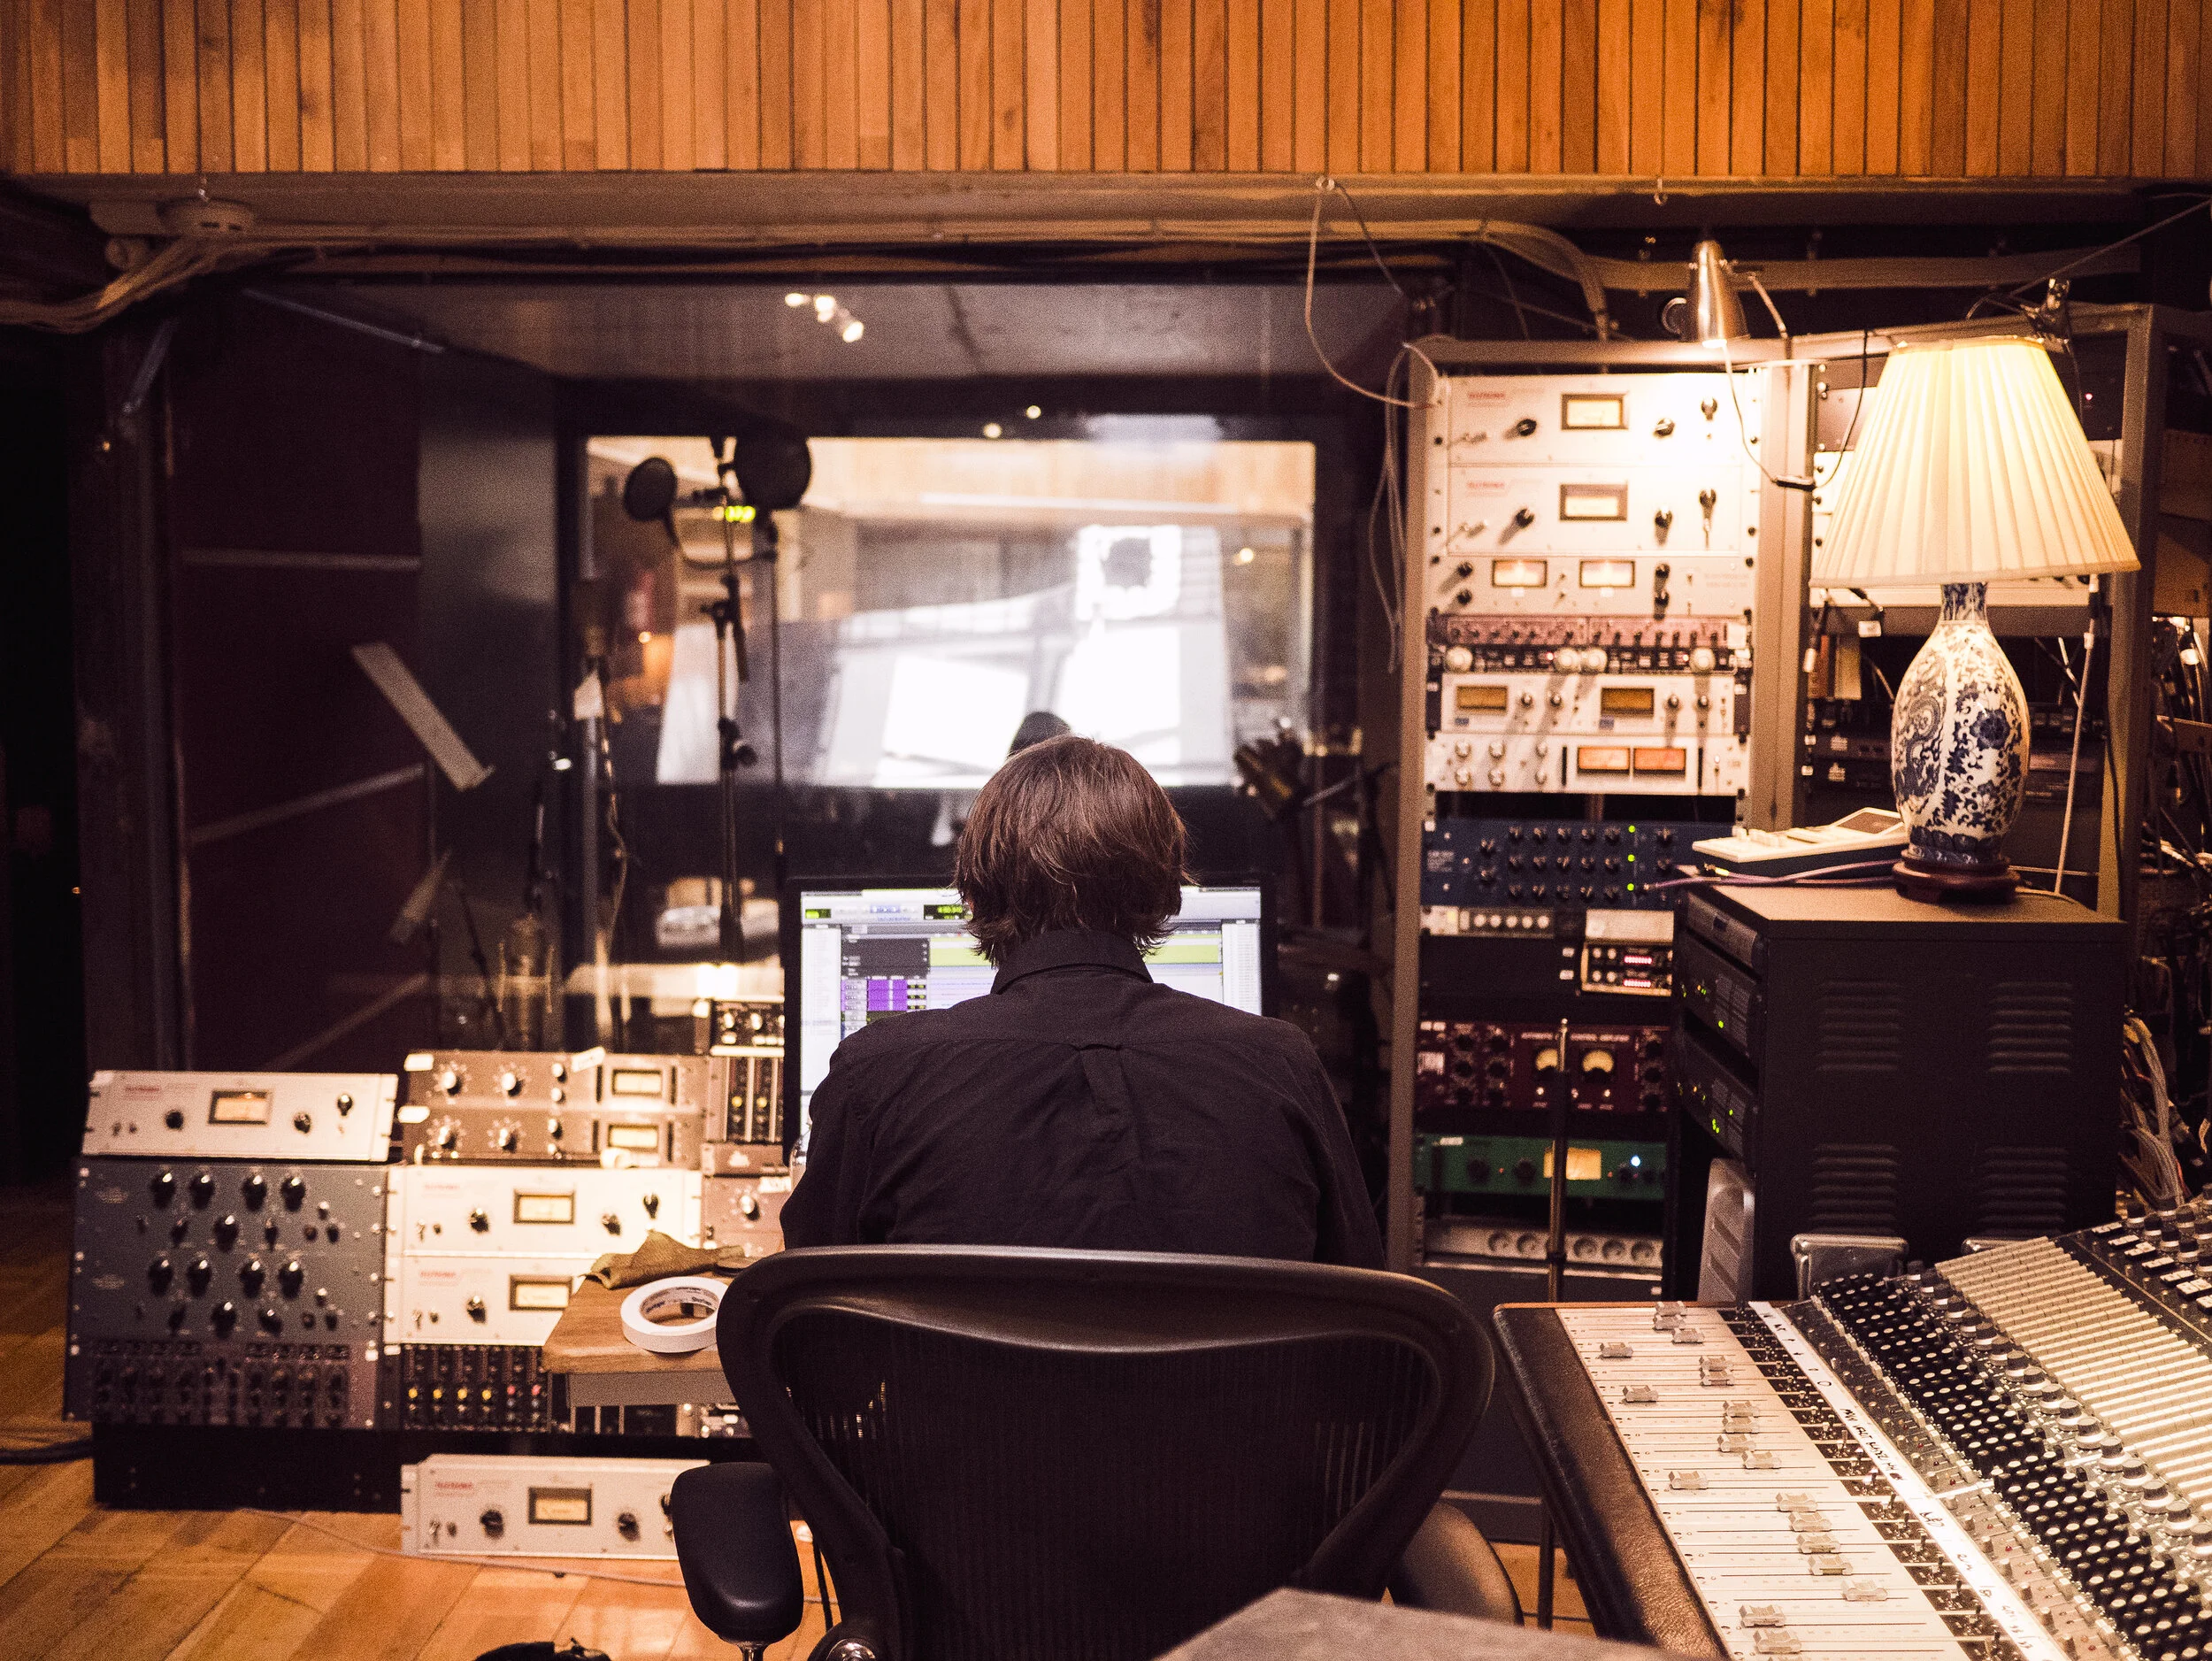
Proper mixing can turn a decent recording into a great one
I hope that this article will make you more conscious of your post-processing choices. I need to write dedicated articles for the use of equalizers and reverb as there is a ton of things to discuss.
I know that many guitarists don't want to fuzz around with plugins, but proper audio processing can transform a recording. Mixing is an art in itself; a necessary evil that can turn a decent recording to a great one. Quality classical guitar recordings are important for your audience and benefit the classical guitar community as a whole. Thus, it's definitely worth the time and effort to learn how to mix your audio. Alternatively, you may search for someone else to do that for you.
Tip: You don't have to mix every track from scratch; after all, you probably record the same instrument with the same microphone technique and in the same room all the time. Create a template in your DAW with your basic panning, filter and reverb settings. You'll still have to tweak around a bit, as not every piece favours the same settings, nor every day is the same. Templates are great time savers.

6 Common Mistakes When Recording the Classical Guitar at Home
Part I - The room and the microphones
You just bought a couple of microphones and want to start recording your classical guitar at home; share your recordings with your friends, archive your performances, or start your career as a professional guitarist or recordist. Additionally, recording yourself will force you to look straight into your flaws, thus improving you as a player.
These past few months, I have received quite a few emails and taught several Skype sessions with the focus on recording classical guitars. There are a few mistakes that seem to be common, mistakes that we all do when we first start recording.
In this article, I discuss some of the flubs of the beginner recordist that have to do mainly with the microphones and the room.
You can also read the 6 Common Mistakes When Recording Classical Guitar at Home, Part II article, where I discuss about utilizing a proper signal chain and achieving satisfactory results in post-processing.
Mistake no.1 - Not spending enough time to study the room

Julian Bream - A Life on the Road (Book, 1982)
Every room is different, and If I had to take something out of the brilliant Julian Bream’s book "A Life on the Road" is how essential is to take the extra time to find the spot of where the guitar sounds the best in the room you are; the position in the room and the angle towards the sides are some of the things to consider.
Of course, Julian Bream mainly talks about performances, but the same logic applies to the recording aspect as well. The best sounding spot in the room will allow you to play more comfortably, thus you might sculpture a nicer sound of your guitar; and depending on the microphone technique you use, added ambience or the elimination of unwanted reflections will have an enormous impact on the final recording.
Usually, most of us sit where it is convenient and don't think much about positioning the microphones, as long as they are not in the way. Some others, they like symmetry and will position themselves or the microphones in the middle of a square or rectangular room; the worst sounding spot in a room like this, introducing a plethora of problems that are impossible to remove.
So, try a few different positions, angle the guitar towards one of the sidewalls, maybe sit a little closer to the back wall, to give some space and allow the guitar to project properly. Better yet, ask someone else to play the guitar, ask them to try a few different positions and observe how it affects the sound. Use your ears as if they were the microphones.
Mistake no.2 - Placing the microphones too far away from the guitar

Norbert' Kraft’s distant miking with a spaced pair of Neumann microphones
If you have ever watched any Naxos videos, you must have noticed Norbert Kraft's distant and wide miking. Similar techniques can be seen any many famous recordings. Getting influenced by professional recordists can be inspiring, but also equally misleading as the source material is very different. Techniques that can be excellent in a church, large halls, or even a well-treated studio never apply to the smaller room reality of the home recordist.
By following such techniques you might end up placing the microphone(s) closer to the front wall than the guitar. Even when the microphone(s) are close to equal in distance, it is possible to end up with an overly diffused and roomy sound; as a result, the sound of the small room will be forever embedded in your recording. Getting too wide will also be a problem if the room is not wide enough. Also, the guitar is a small instrument and rarely benefits from a very wide pick up. Therefore, try moving the microphones closer to the guitar but not too close.
Mistake no.3 - Placing the microphones too close to the guitar

Pat Metheny - nylon string recording; don’t try this at home!
After failing with the "church-technique", many of us want to get rid of the small room sound altogether, we have amazing reverb plugins anyway, and start positioning the microphone(s) very close to the guitar, I mean really close. To a similar erroneously path can arrive those with an acoustic guitar background or those who have witnessed some terrible close-miking examples in even famous recordings.
The problem is actually... threefold:
Firstly, by placing the microphones too close, finger and other mechanical noises will creep in, resulting in an annoying and unattractive recording. You may start cutting high frequencies to remove some of those artefacts but sooner or later you'll end up with an immensely dull recording.
Then, most of us usually start with directional microphones, those exhibit a pronounced low-end frequency response due to the proximity effect. One can balance the unwanted boost with careful EQ-ing, but beginner recordists won't have the skills for that. The low-frequency boost combined with the need to cut high-end information will produce an unbalanced imitation of a classical guitar.
Furthermore, the classical guitar is a complex instrument; every part of the top projects different frequencies that they all combine at some point to create a cohesive and rich sound. Normally this point is around the length of the soundboard, about 50cm, that should be the limit of how close you can get with the microphone(s): Greater distance is preferable if the room allows, but, never record classical guitar closer than 50cm.
Remember, classical guitar needs space!
Mistake no.4 - Not experimenting with microphone height, angle and techniques
Placing the microphone(s) at the height of the guitar is a decent place to start, but as microphone height and angle influences so much the overall character of the recording, ignoring other possibilities will frustrate you as you will have to fight with post-processing to get the desired result. It is preferable to spend the extra time and set up the microphone(s) correctly.
Normally, as classical guitarists learn to project their sound slightly upwards, the further away you place the microphone(s), the higher they should be positioned. And, by allowing the microphone(s) to face a bit downwards, so to be on-axis with the guitar, you can achieve a realistic and full-range recording with great definition. This technique will capture what is usually called the "audience perspective".

Spaced AB Pair of Austrian Audio OC818 at 103cm height that point slightly downward
If you notice that the guitar, guitarist or microphones to sound a little sharp, you can angle the microphones slightly off-axis to reach a smoother treble response.
In the case of spaced pairs, it is not uncommon to point the microphones somewhat outwards so that they are not parallel to each other. But in a small room, and at greater distances, additional room reflections will soak into the recording. Thus, I've found that is more desirable to point the microphones slightly inwards or a little higher to achieve a mildly off-axis response but with less "room" in the recording.
For those who pursue an intimate and fuller sound, with a tame high-end and less room, what is called the "player's perspective"; miking the guitar a little closer and with the microphone(s) lower is a good place to start. Avoid placing any microphone opposite of the soundhole, otherwise, the recording will become boomy. For an even fuller sound, place the microphone(s) lower yet, and point them upwards.
The discussion about miking techniques is a complicated one and deserves its own article(s), but until I write it, these ideas should get you a bit more involved.
Mistake no.5 - Not checking for phase problems in stereo recordings

The 2CAudio Vector plugin includes a phase meter and its free!
The classical guitar should be recorded in stereo. Either a pair of spaced condensers or one of the several other stereo setups will do. Except for the coincident microphone techniques, like M/S Stereo and X/Y, any technique that involves two or more spaced microphones, can potentially become a phase nightmare.
Phasing has a noticeable influence on the sound quality of your recording, as due to cancellations and comb filtering it can potentially leave your recorded guitar sound thin and weak. Be sure to check for phasing problems with a proper plugin (I use the 2CAudio Vector, it has a phase meter, plus some other welcome features and its free), adjust the microphones until you minimize phase - everything higher than 80% on the meter is acceptable. You can still compensate for phasing during mixing, but it’s always better to take care of it beforehand.
Mistake no.6 - Thinking that more expensive microphones or preamps will fix all problems
Shopping for new microphones, interfaces and other toys... I mean tools... is fun; a big chunk of writings on this site is about reviewing and comparing recording equipment. But, at this age, pretty decent recordings can be made with a reasonable budget. So blaming the gear is only an excuse for not willing to go the hard way.
Refrigerator racks with outboard equipment can be fun, but we can do a lot with a couple of decent microphones and an audio interface
I'm not arguing that equipment doesn't matter; it does. It just not going to substitute for bad microphone positioning, an unsuitable room or not refined guitar technique. Contrary, more accurate and detailed microphones will accentuate any of the problems that are present.
Learning how to use what you've got, experiment with various microphone techniques and positions; take steps to adjust your room for a better sound. And why not, maybe spend some time practising and try to be well-rehearsed before you press the record button. These are some basic actions to take that can drastically improve your recordings in a meaningful way.
Closing thoughts
Mistakes are part of the learning process; don't be afraid to make them, and don't hesitate to experiment. After all, recording is a journey, and the process of trying things can be a valuable lesson in becoming a more accomplished recordist.
I hope that this article might encourage you to try out different microphone positions, learn and improve your room. Optimistically, the information provided here will guide you to make better recordings.