
6 Common Mistakes When Recording the Classical Guitar at Home
Part I - The room and the microphones
You just bought a couple of microphones and want to start recording your classical guitar at home; share your recordings with your friends, archive your performances, or start your career as a professional guitarist or recordist. Additionally, recording yourself will force you to look straight into your flaws, thus improving you as a player.
These past few months, I have received quite a few emails and taught several Skype sessions with the focus on recording classical guitars. There are a few mistakes that seem to be common, mistakes that we all do when we first start recording.
In this article, I discuss some of the flubs of the beginner recordist that have to do mainly with the microphones and the room.
You can also read the 6 Common Mistakes When Recording Classical Guitar at Home, Part II article, where I discuss about utilizing a proper signal chain and achieving satisfactory results in post-processing.
Mistake no.1 - Not spending enough time to study the room

Julian Bream - A Life on the Road (Book, 1982)
Every room is different, and If I had to take something out of the brilliant Julian Bream’s book "A Life on the Road" is how essential is to take the extra time to find the spot of where the guitar sounds the best in the room you are; the position in the room and the angle towards the sides are some of the things to consider.
Of course, Julian Bream mainly talks about performances, but the same logic applies to the recording aspect as well. The best sounding spot in the room will allow you to play more comfortably, thus you might sculpture a nicer sound of your guitar; and depending on the microphone technique you use, added ambience or the elimination of unwanted reflections will have an enormous impact on the final recording.
Usually, most of us sit where it is convenient and don't think much about positioning the microphones, as long as they are not in the way. Some others, they like symmetry and will position themselves or the microphones in the middle of a square or rectangular room; the worst sounding spot in a room like this, introducing a plethora of problems that are impossible to remove.
So, try a few different positions, angle the guitar towards one of the sidewalls, maybe sit a little closer to the back wall, to give some space and allow the guitar to project properly. Better yet, ask someone else to play the guitar, ask them to try a few different positions and observe how it affects the sound. Use your ears as if they were the microphones.
Mistake no.2 - Placing the microphones too far away from the guitar

Norbert' Kraft’s distant miking with a spaced pair of Neumann microphones
If you have ever watched any Naxos videos, you must have noticed Norbert Kraft's distant and wide miking. Similar techniques can be seen any many famous recordings. Getting influenced by professional recordists can be inspiring, but also equally misleading as the source material is very different. Techniques that can be excellent in a church, large halls, or even a well-treated studio never apply to the smaller room reality of the home recordist.
By following such techniques you might end up placing the microphone(s) closer to the front wall than the guitar. Even when the microphone(s) are close to equal in distance, it is possible to end up with an overly diffused and roomy sound; as a result, the sound of the small room will be forever embedded in your recording. Getting too wide will also be a problem if the room is not wide enough. Also, the guitar is a small instrument and rarely benefits from a very wide pick up. Therefore, try moving the microphones closer to the guitar but not too close.
Mistake no.3 - Placing the microphones too close to the guitar

Pat Metheny - nylon string recording; don’t try this at home!
After failing with the "church-technique", many of us want to get rid of the small room sound altogether, we have amazing reverb plugins anyway, and start positioning the microphone(s) very close to the guitar, I mean really close. To a similar erroneously path can arrive those with an acoustic guitar background or those who have witnessed some terrible close-miking examples in even famous recordings.
The problem is actually... threefold:
Firstly, by placing the microphones too close, finger and other mechanical noises will creep in, resulting in an annoying and unattractive recording. You may start cutting high frequencies to remove some of those artefacts but sooner or later you'll end up with an immensely dull recording.
Then, most of us usually start with directional microphones, those exhibit a pronounced low-end frequency response due to the proximity effect. One can balance the unwanted boost with careful EQ-ing, but beginner recordists won't have the skills for that. The low-frequency boost combined with the need to cut high-end information will produce an unbalanced imitation of a classical guitar.
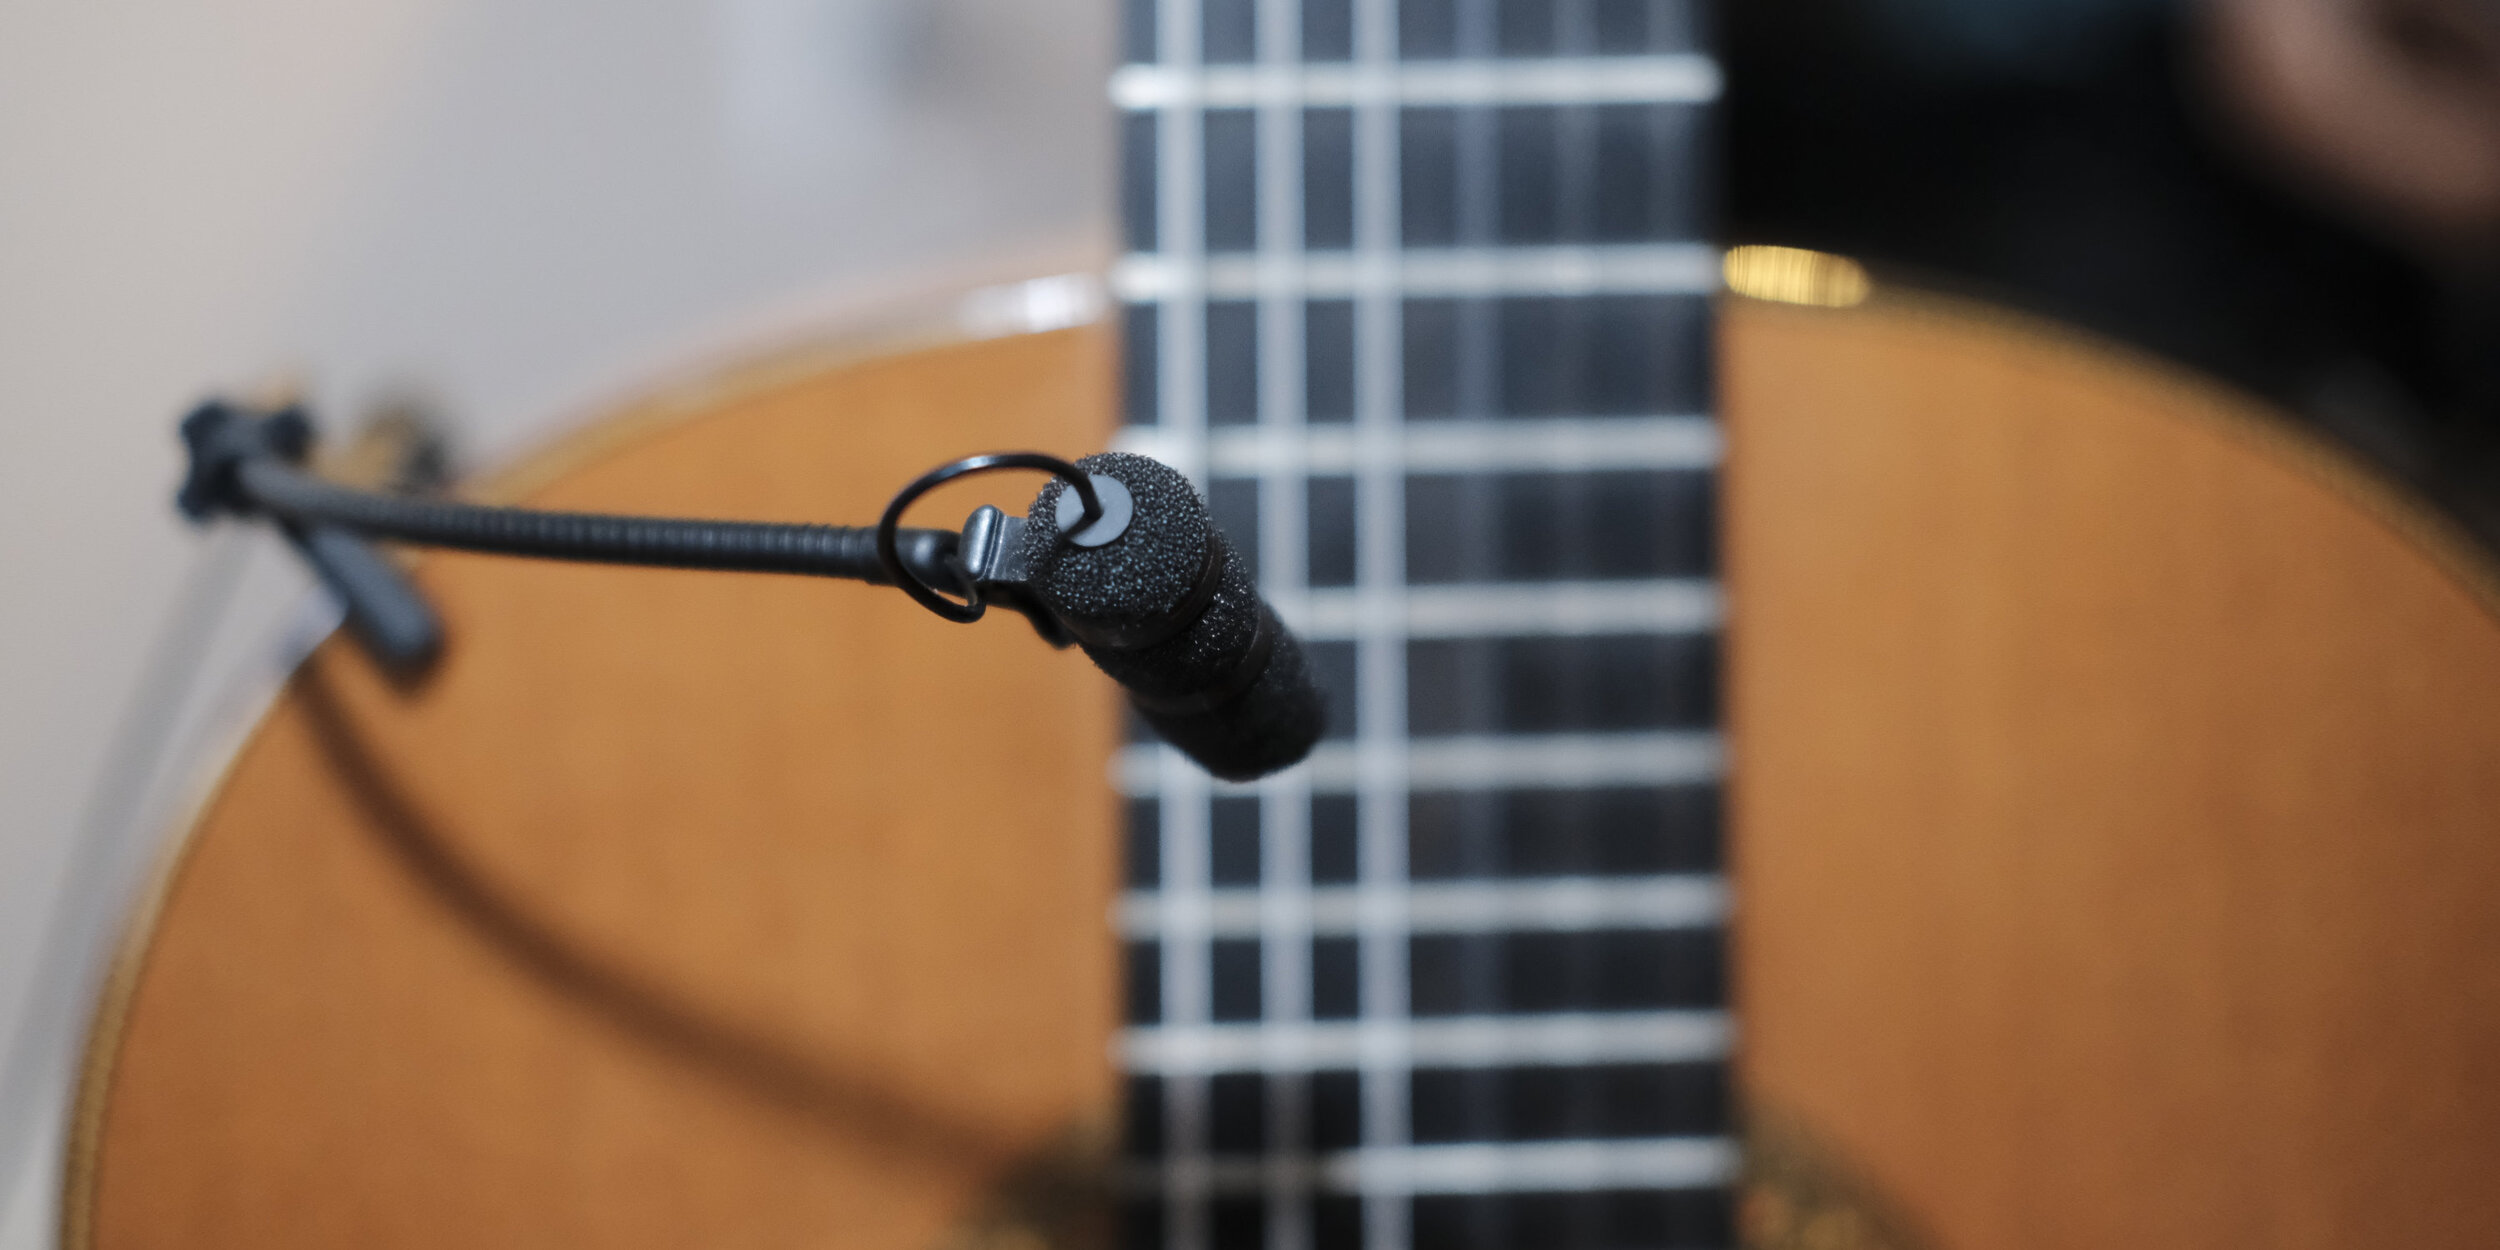
Furthermore, the classical guitar is a complex instrument; every part of the top projects different frequencies that they all combine at some point to create a cohesive and rich sound. Normally this point is around the length of the soundboard, about 50cm, that should be the limit of how close you can get with the microphone(s): Greater distance is preferable if the room allows, but, never record classical guitar closer than 50cm.
Remember, classical guitar needs space!
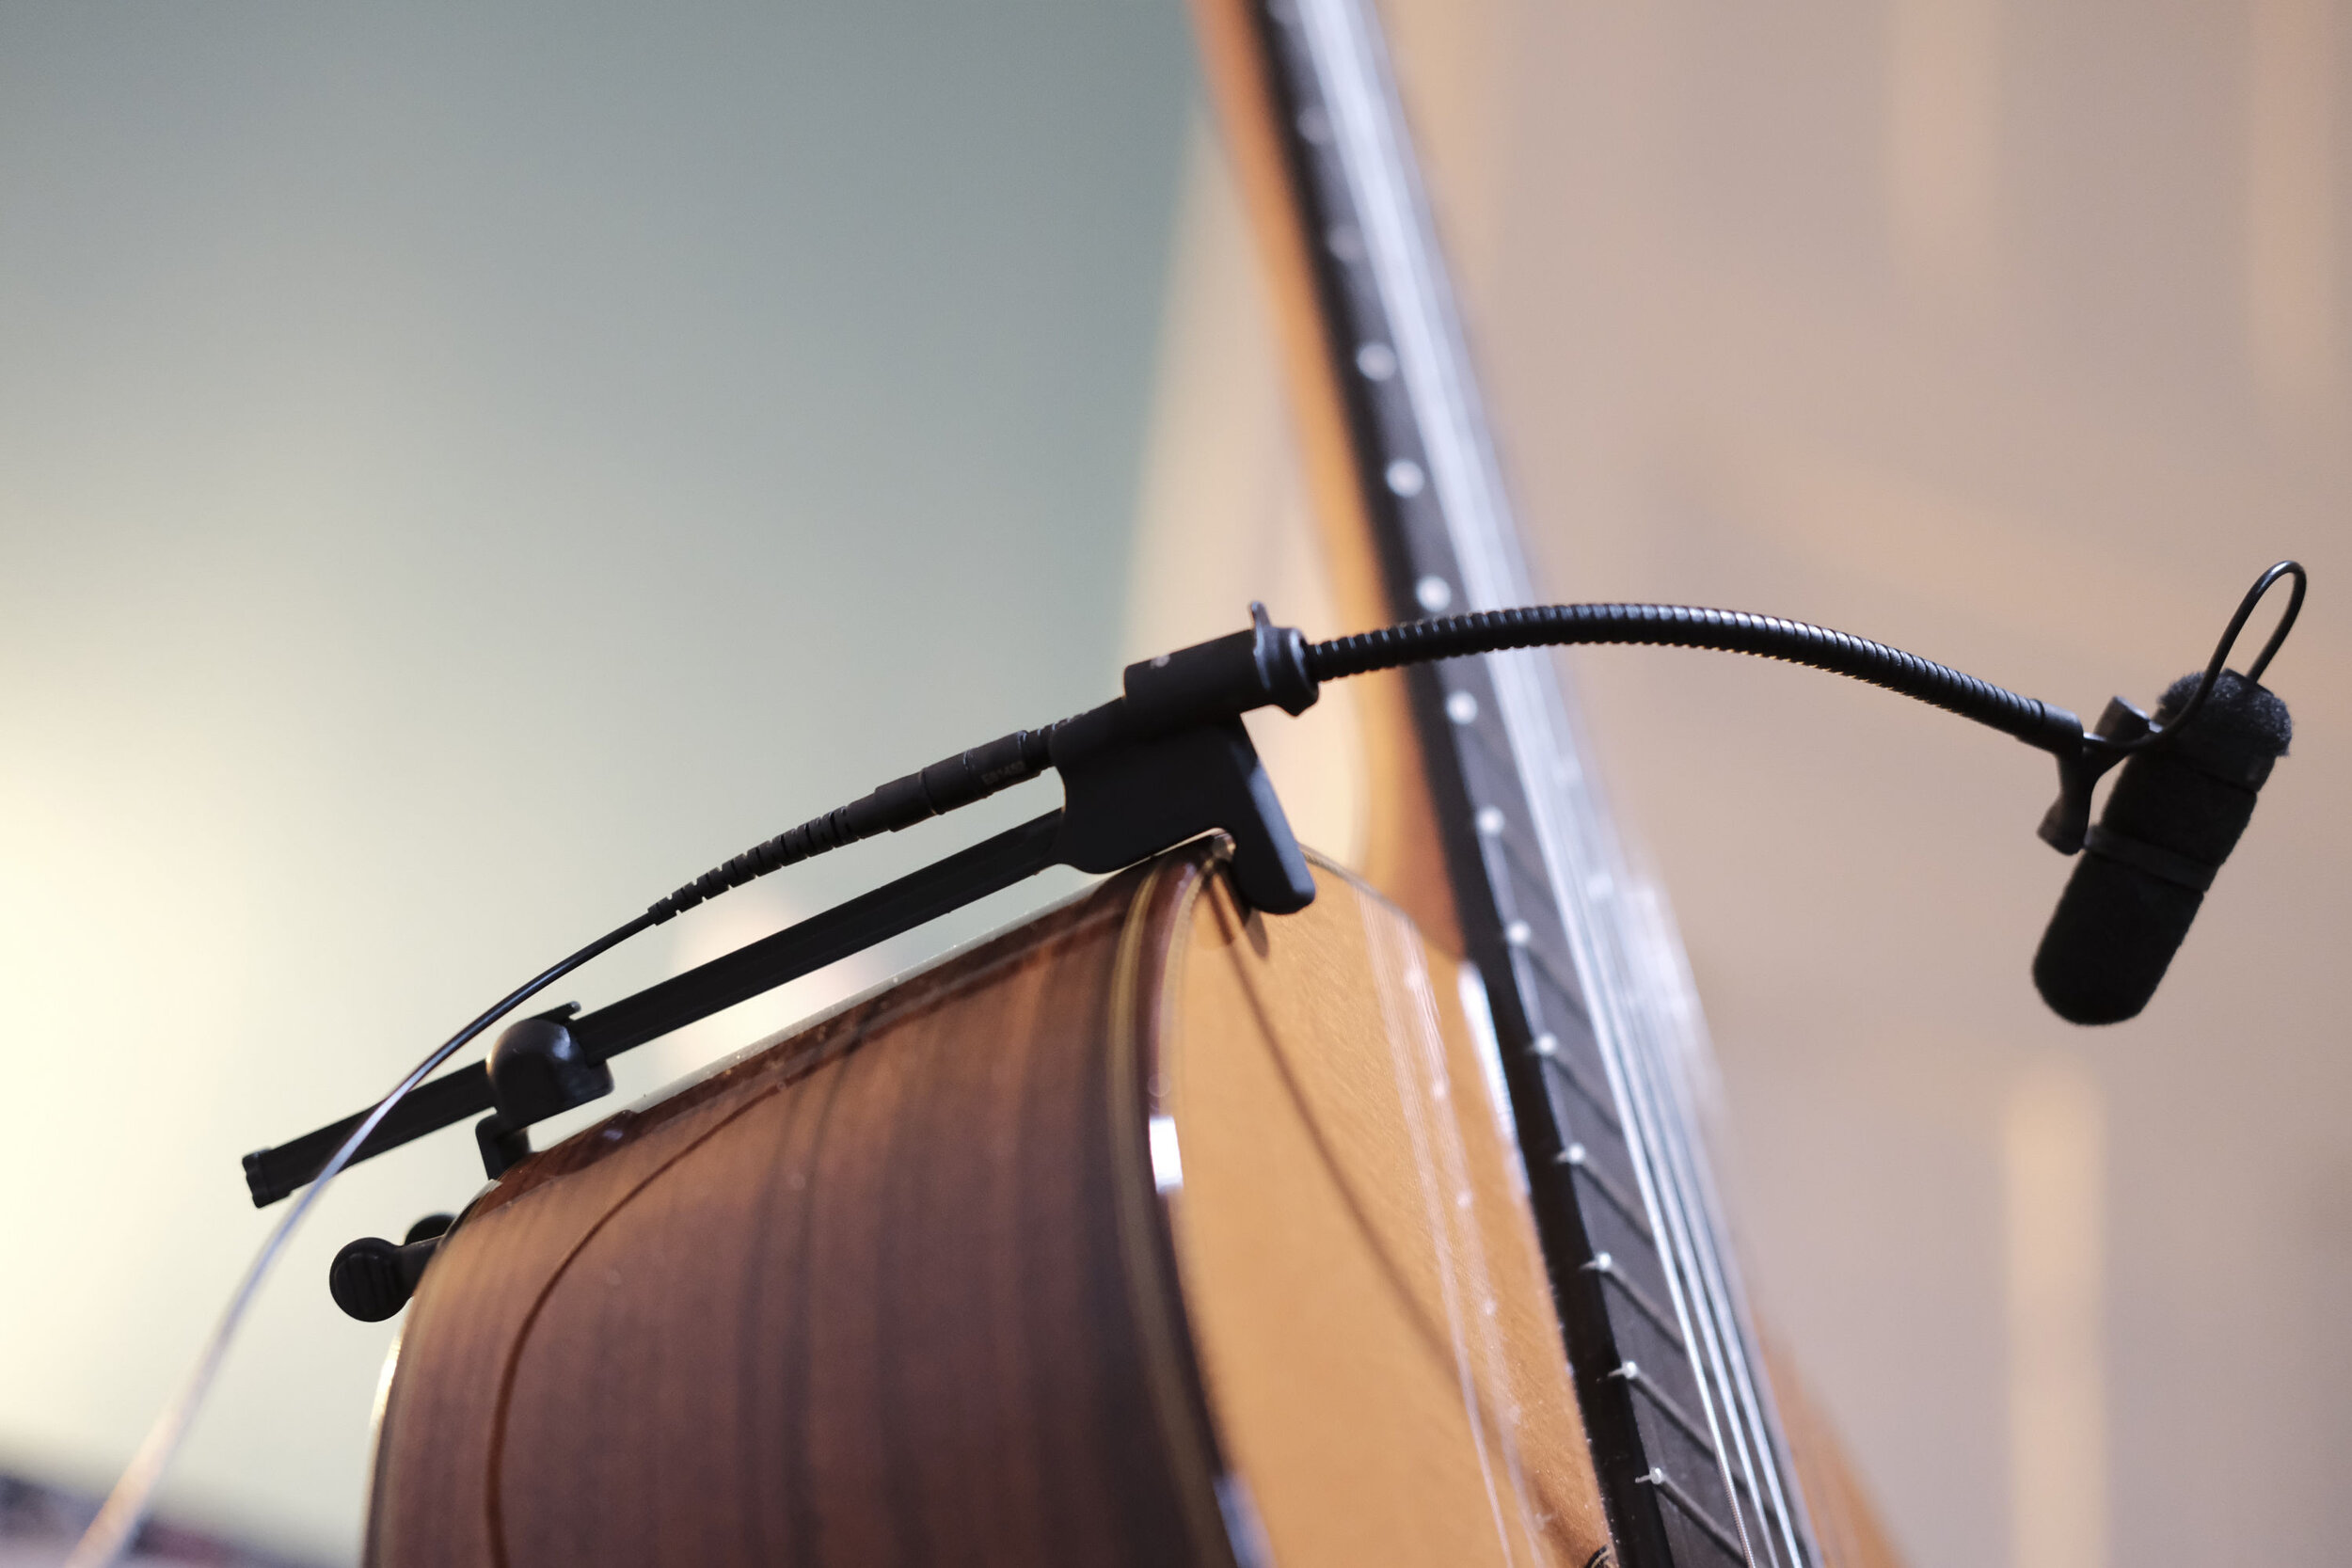
Mistake no.4 - Not experimenting with microphone height, angle and techniques
Placing the microphone(s) at the height of the guitar is a decent place to start, but as microphone height and angle influences so much the overall character of the recording, ignoring other possibilities will frustrate you as you will have to fight with post-processing to get the desired result. It is preferable to spend the extra time and set up the microphone(s) correctly.
Normally, as classical guitarists learn to project their sound slightly upwards, the further away you place the microphone(s), the higher they should be positioned. And, by allowing the microphone(s) to face a bit downwards, so to be on-axis with the guitar, you can achieve a realistic and full-range recording with great definition. This technique will capture what is usually called the "audience perspective".

Spaced AB Pair of Austrian Audio OC818 at 103cm height that point slightly downward
If you notice that the guitar, guitarist or microphones to sound a little sharp, you can angle the microphones slightly off-axis to reach a smoother treble response.
In the case of spaced pairs, it is not uncommon to point the microphones somewhat outwards so that they are not parallel to each other. But in a small room, and at greater distances, additional room reflections will soak into the recording. Thus, I've found that is more desirable to point the microphones slightly inwards or a little higher to achieve a mildly off-axis response but with less "room" in the recording.
For those who pursue an intimate and fuller sound, with a tame high-end and less room, what is called the "player's perspective"; miking the guitar a little closer and with the microphone(s) lower is a good place to start. Avoid placing any microphone opposite of the soundhole, otherwise, the recording will become boomy. For an even fuller sound, place the microphone(s) lower yet, and point them upwards.
The discussion about miking techniques is a complicated one and deserves its own article(s), but until I write it, these ideas should get you a bit more involved.
Mistake no.5 - Not checking for phase problems in stereo recordings

The 2CAudio Vector plugin includes a phase meter and its free!
The classical guitar should be recorded in stereo. Either a pair of spaced condensers or one of the several other stereo setups will do. Except for the coincident microphone techniques, like M/S Stereo and X/Y, any technique that involves two or more spaced microphones, can potentially become a phase nightmare.
Phasing has a noticeable influence on the sound quality of your recording, as due to cancellations and comb filtering it can potentially leave your recorded guitar sound thin and weak. Be sure to check for phasing problems with a proper plugin (I use the 2CAudio Vector, it has a phase meter, plus some other welcome features and its free), adjust the microphones until you minimize phase - everything higher than 80% on the meter is acceptable. You can still compensate for phasing during mixing, but it’s always better to take care of it beforehand.
Mistake no.6 - Thinking that more expensive microphones or preamps will fix all problems
Shopping for new microphones, interfaces and other toys... I mean tools... is fun; a big chunk of writings on this site is about reviewing and comparing recording equipment. But, at this age, pretty decent recordings can be made with a reasonable budget. So blaming the gear is only an excuse for not willing to go the hard way.
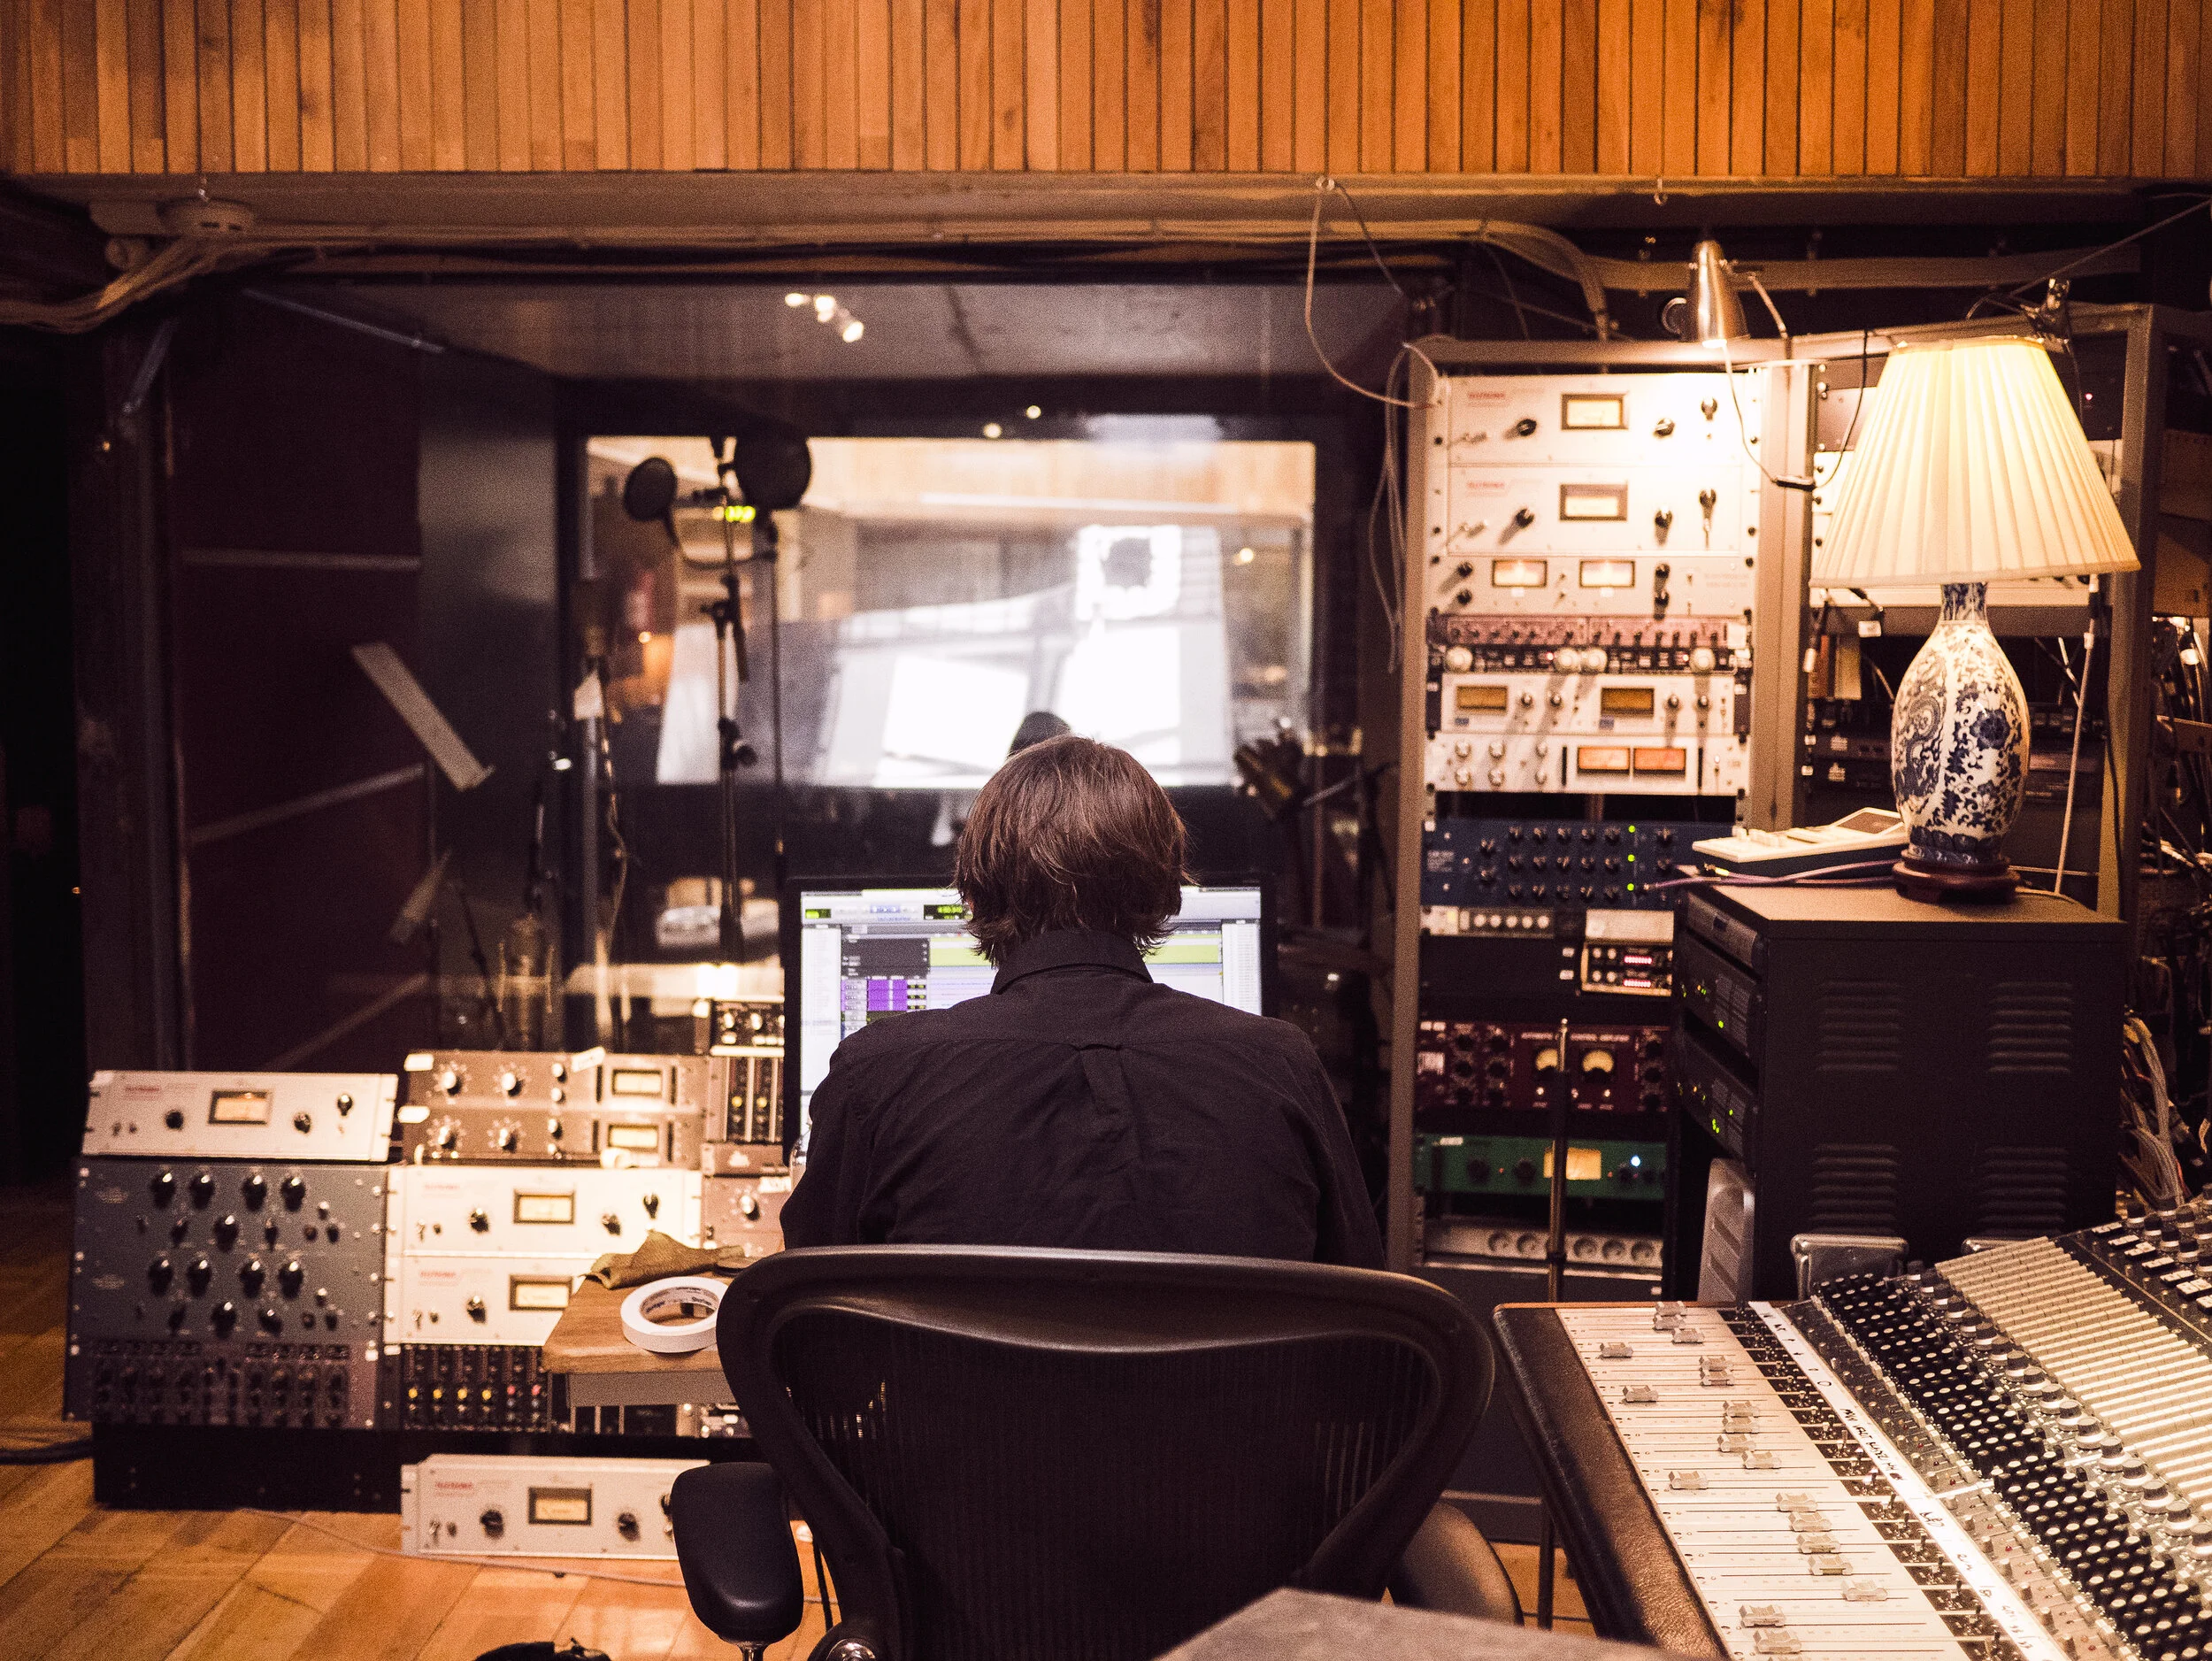
Refrigerator racks with outboard equipment can be fun, but we can do a lot with a couple of decent microphones and an audio interface
I'm not arguing that equipment doesn't matter; it does. It just not going to substitute for bad microphone positioning, an unsuitable room or not refined guitar technique. Contrary, more accurate and detailed microphones will accentuate any of the problems that are present.
Learning how to use what you've got, experiment with various microphone techniques and positions; take steps to adjust your room for a better sound. And why not, maybe spend some time practising and try to be well-rehearsed before you press the record button. These are some basic actions to take that can drastically improve your recordings in a meaningful way.
Closing thoughts
Mistakes are part of the learning process; don't be afraid to make them, and don't hesitate to experiment. After all, recording is a journey, and the process of trying things can be a valuable lesson in becoming a more accomplished recordist.
I hope that this article might encourage you to try out different microphone positions, learn and improve your room. Optimistically, the information provided here will guide you to make better recordings.

2020 MacBook Air i7 and 4K Video Editing, how well does it handle it?
The omission of a (for some) proper heatsink on the 2020 MacBook Air has created a lot of "heat" on the internet, as many claim that the new Air is crippled down on purpose not to compete with Apple's Pro line of MacBooks. 4K video editing is more than an average workload, the question is if the low powered Intel's 10th generation CPU delivers.

I'm an owner of the new space grey MacBook Air with an i7 and 16GB of RAM since late April, in my initial review I write why I choose the Air over the Pro 13" and share my experiences with it in music production and common everyday tasks. This follow-up article is focused on the 4K editing performance of the new MacBook, as well as shedding some light on the so-called heat issues.
Slim, light and safe.
Let me start by stating the obvious; the 2020 MacBook is not a video editing powerhouse. If your work involves creating hour-long 12-bit 4K video documentaries, with multiple layers, advanced colour grading and other visual effects, you should look at the 16" MacBook Pro or even better a top-of-the-line iMac or Mac Pro. If on the other hand, you value portability, need snappy performance for everyday tasks and enough power for non-extreme loads (like acoustic music production, light photo editing etc.) but want to occasionally edit a 4K video and not to spend a fortune, then continue reading.
A major setback!
I'll be honest, in my first attempt to edit a 4K video with the 2020 Air, I got disappointed. I followed my usual routine of importing my video files in Final Cut, roughly cut the parts that I needed, syncing audio and then applying colour grading and a film-simulation plugin. I would then wait for Final Cut to render the files and then try to fine-tune my edits, add transition effects, text, etc. After doing all that, the problem was that every time I would make a change, Final Cut would take several minutes to render the video again. I had to wait to be able to playback my video; if the edit was not timed perfectly and had to adjust something, I had to wait some more.
At first, I thought that I have too many things run in the background. As I wrote in my review, I like to keep all apps open as I usually go back and forth between them; exporting files on Logic Pro while rendering the video on Final Cut, at the same time editing photos on Fuji X Raw Studio or Affinity Photo. I decided to close all apps, restart my MacBook and try again to work on my video, only with Final Cut running at this time. Nothing changed, rendering takes several minutes and working on the edits is a nightmare as playback is sluggish.
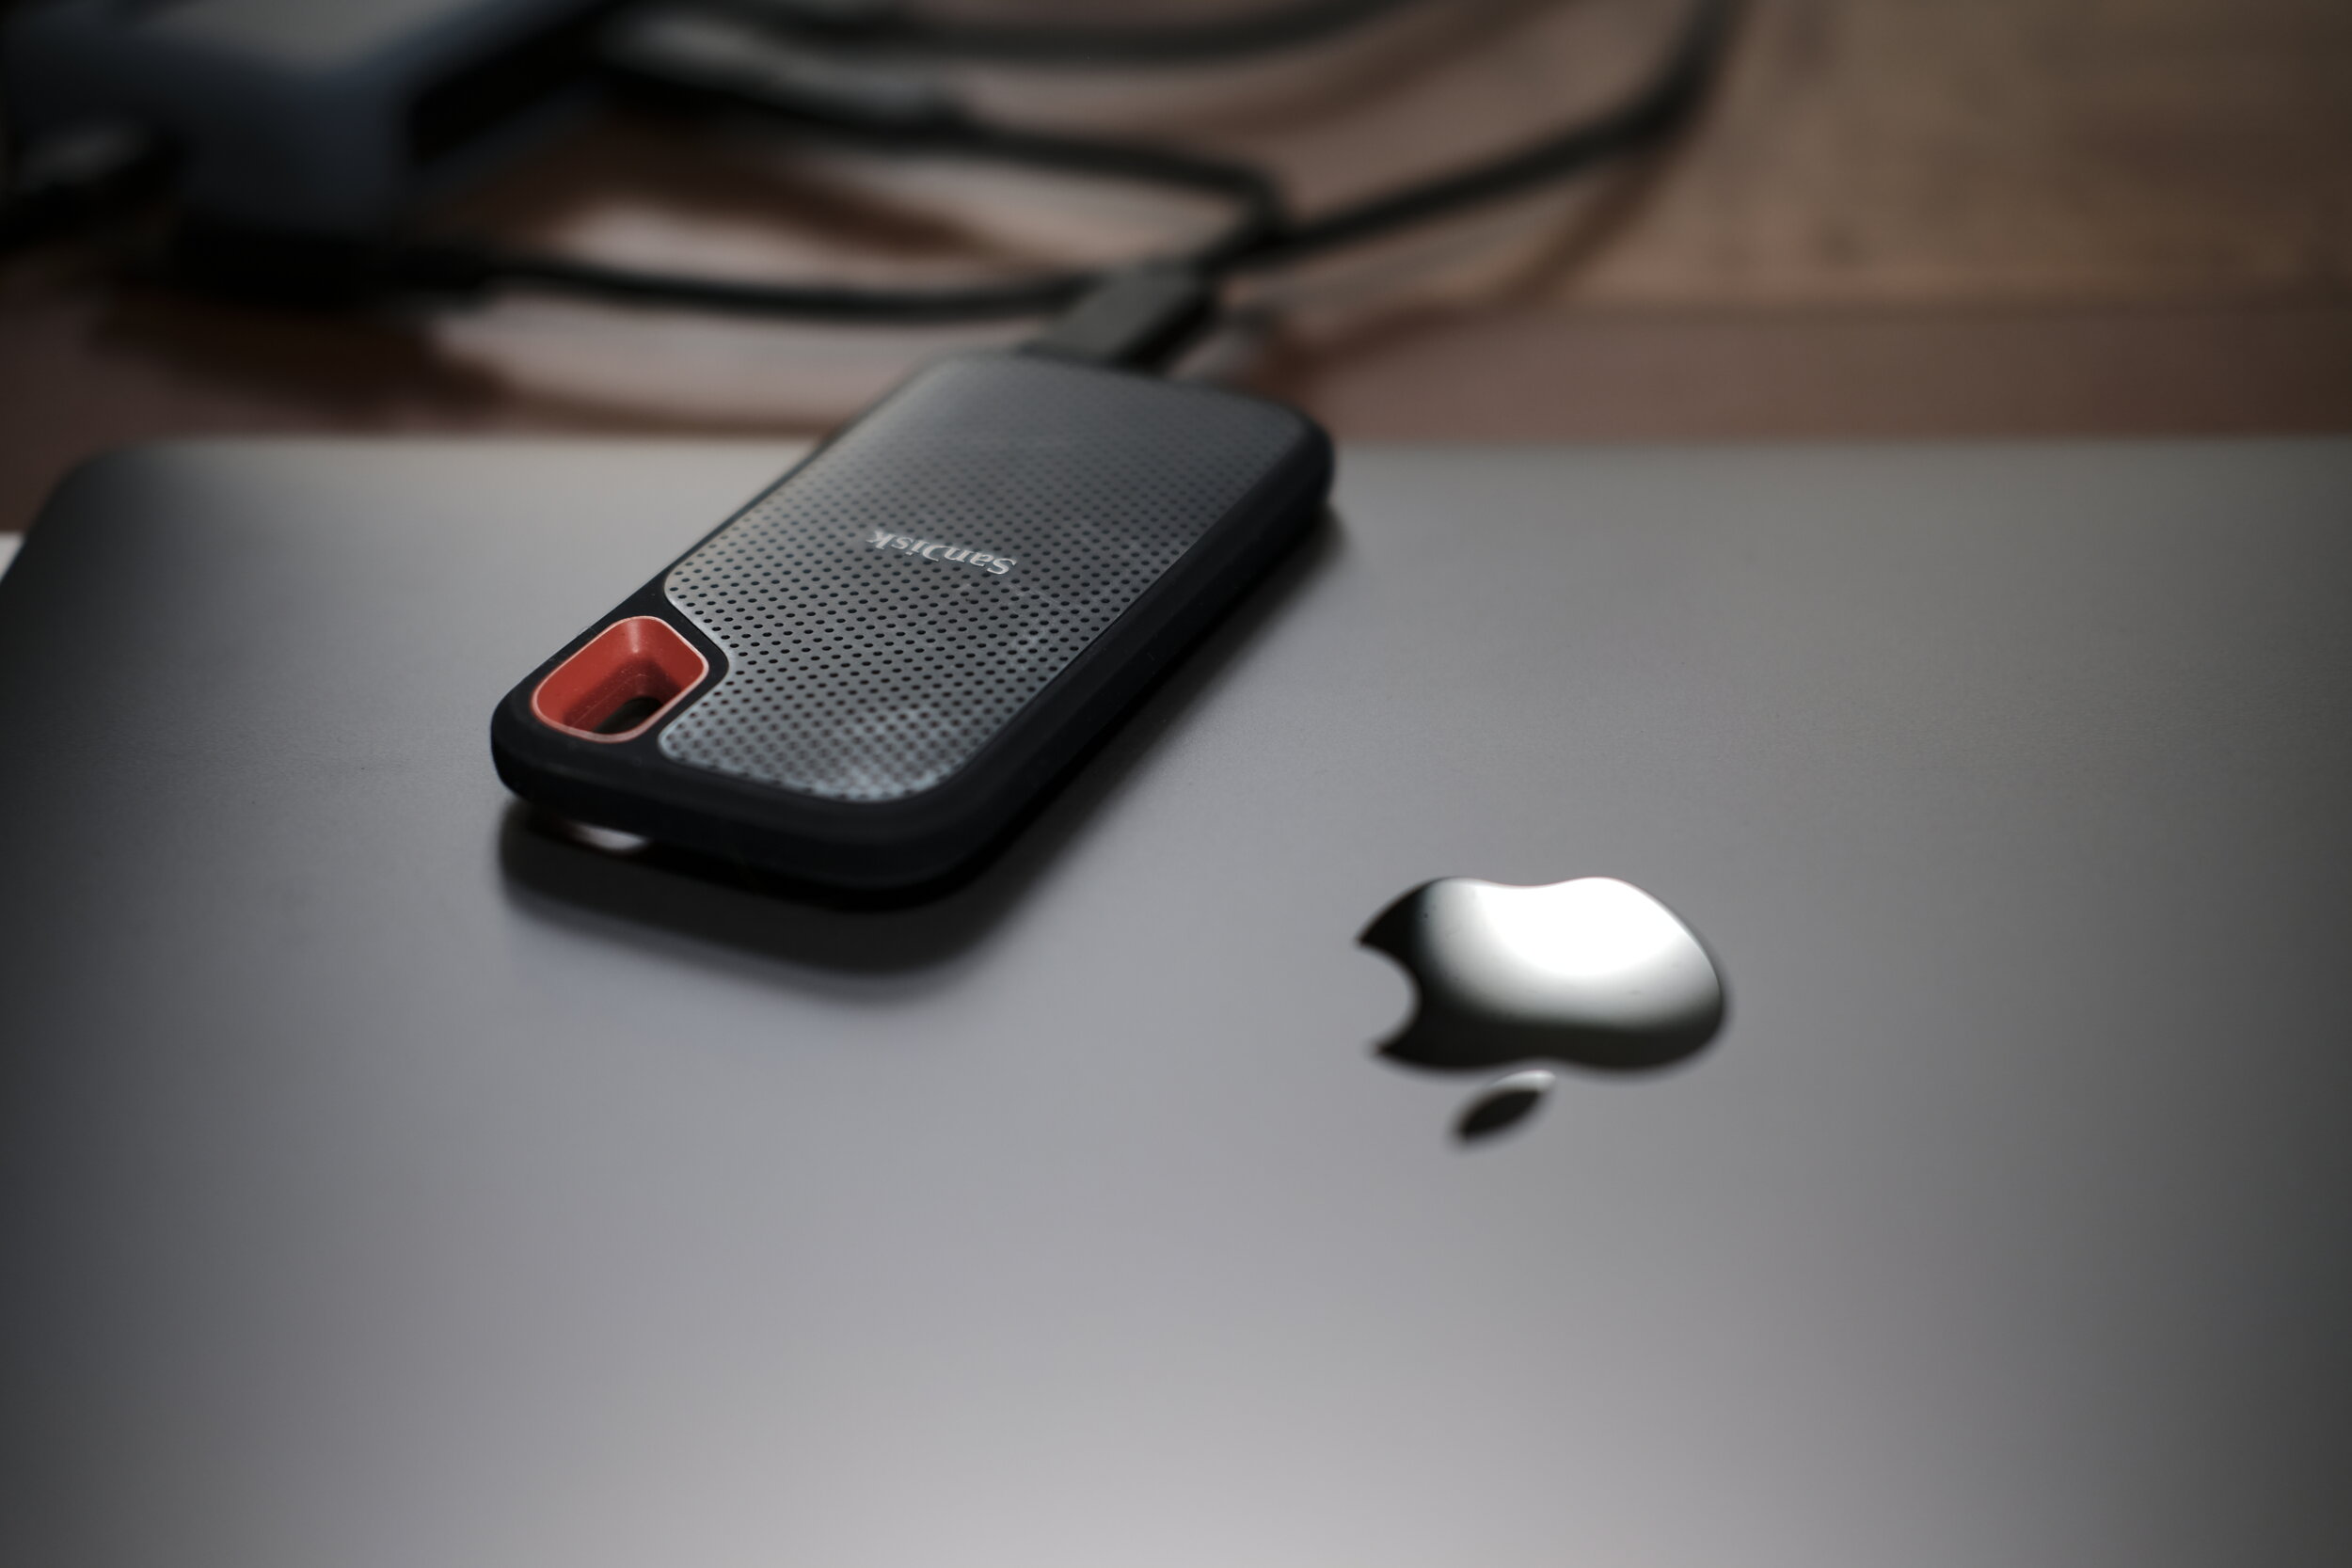
4K projects can be huge; I keep them on an external SSD.
It was not a fun experience but I managed to finish the video, after a lot of frustration frankly. Exporting took an average amount of time, but I don't care much about export times - unless it is abnormal - as I can always use a break for a coffee. I just don't like to waste my time in front of the computer.
Not an easy fix
I was contemplating buying a used Mac Mini dedicated to video editing as it was the only solution I could think but switching between different machines to finish a project doesn't sound appealing. My other thought was to shoot my videos in 1080p instead. After all, my Fuji X-E3 is not a dedicated video camera and has heat issues when capturing 4K videos in summer, it is a fine stills camera nevertheless.
A couple of weeks have passed while I was busy composing my new classical guitar suite "A Quiet Place pt II" and didn't think much about my 4K video troubles. My MacBook was working flawlessly otherwise; score writing, recording, skype lessons, photo editing, and casual internet.
The unexpected

Space Grey vMacBook Air and white Magic Mouse 2
When most parts of my new suite were finalised, I shoot the first video to audit my performance. My Fuji was still left to 2160/23.98p from my early trials, so, I was a little nervous when I imported the files to Final Cut.
Since there was no plan to share this first "draft" video, I didn't bother with colour grading and film-simulations. To my surprise, the Final Cut could handle editing and playback like a champ. I didn't even wait for it to finish background rendering this time. Whilst, I would switch back and forth to Logic Pro to edit, mix and export my audio; my usual High- and Lo-Pass filters, as well as reverb from 2CAudio Aether, were applied. The new Air remained responsive throughout this process, much snappier than my 2013 Air was when working on ordinary 1080p files. The fan would spin relatively hard but that was anticipated.
Further examinations
Although polishing this video was never my intention, I wanted to see how far my MacBook could go. I first applied some colour correction and cross-dissolve transitioning effects on the various clips. The playback was perfect, admittingly it was on the "Better Performance" option. I switched to "Better Quality" to see what would happen. No difference in performance at all, even in full-screen playback, despite the background rendering was not done.

My trusty Fuji X-E3 camera and 35mm F2 prime lens.
I couldn't stop there, so I added a second layer of videos in normal blend mode at around 50% opacity, some text animations and a few pictures overlays. Keep in mind that the original clips I used where several 10min videos shot in 8-bit 4K with my Fuji, and overall the final video after the cuts was about 7 minutes. Playback was excellent, with no hit to the performance of the MacBook at all. The fan was moderately loud during the notably quick rendering, after that the fan was not spinning or barely audible during playback.
(Un)usual Suspects
I didn't know what to think, my experience this time was in total conflict with my first attempt. Editing a 4K video with the 2020 i7 MacBook Air was a joy! I then remembered that I also used a film simulation plugin (which shall remain nameless because it was sent to me from the creator for free as I understand it is no longer supported) in my other trial. I quickly applied the plugin to a couple of clips and pressed play. The video was lagging a second or more behind the audio, with dropped frames here and there, and the transition effect... let's say it never happened.
I let Final Cut render the video, it took several minutes, and then hit the play button again, the playback was smooth this time, the fan was inaudible. I changed the length of a clip, needed a few more minutes to render the video. I begin to understand the source of all my frustration the first time; software that is not optimised.
Export time(s)

I can always use the time for a coffee.
I removed that film simulation and clicked on the export. I didn't time it as it doesn't make a lot of difference to me if it is five or ten minutes, there is always something else to do. I went to make an espresso instead, when I returned the file was sitting in my Movies folder.
A lesson to (re)learn
We all want a faster, lighter, cheaper laptop, and it would be great to see Apple pushing the boundaries with the upcoming ARM-based MacBooks. Though sometimes the answer lies on the software, developers get lazy with faster CPUs and don't optimise their code to attain the most of what is possible.
We need faster computers, but we also need more efficient and intelligent software; that's what Apple is doing best.
Europe’s heatwave
As I'm writing this article, I have my MacBook on my lap as I sit comfortably at a sofa and type while I'm listening to music on Spotify and have several open apps and tabs on Safari and Chrome. The Air is only moderately warm and the fan is barely spinning. It's summer and the temperature hit 34 degrees celsius.

Recording at close proximity.
Earlier today I finished mixing the final version of my new guitar suite and edited the accompanying video in 4K, a few more touch-ups and it will be ready for publishing. The MacBook was silent most of the time, except for Logic exports, especially when oversampling was applied, and heavy Final Cut rendering. Not bad at all!
You indeed hear the fan spin with heavy loads, but that is its purpose; to keep the temperatures under control. The MacBook remains snappy and responsive even when the maximum temperatures are being reached and returns to silent operation soon after the processing is done. Arguably the chassis will get hot in such situations; many electronic devices get hot though, sometimes uncomfortably so, and don' melt after years of operation. So, I don't worry!
Expectations
I believe that most complaints about the 2020 Air come from either of these two camps.
First are the people who have unrealistic expectations; they want an ultra-thin and light laptop, at a bargain price and with the power of a dedicated desktop computer.
On the other camp are the spoiled and easily irked people, who would complain if a laptop takes an extra minute to export a video as if the world depends on it.
I guess it is personal and depends a lot on each use case. But, for many of us who use our gear for what they offer to our workflow and and understand the limitations of a highly portable computer, the processing power which is available at our hands and backpacks with the newest laptops is unbelievable.

I’m still not content with this mess; why Apple?
My main gripes with it persist though. I don't understand why Apple removed the MagSafe plug from the MacBooks, I always felt so much safer plugin in my Air 2013 while sitting on a sofa and have my 6-year-old son running around. The removal of the SD card-reader also makes no sense to me, period. Lastly, two USB ports are not enough; as I wrote I value portability, but now I have to bring a couple of extra dongles with me just to do basic stuff.
Conclusions
The new MacBook Air is a beautiful ultrabook, with exemplary processing, a fair price, and more than enough power for everyday tasks and professional work if its not too particular and demand continuous high CPU loads. 4K video editing is a breeze, at least with the i7 and 16 GB of Ram, as is my overall user experience with it. So, if you are considering getting one, I hope that my experience will make that decision easier for you.

Soyuz 013 Series FET Review
An original handmade small-diaphragm condenser microphone in a see of clones

Soyuz 013 FET Stereo Pair
Soyuz is a relatively new company or alliance as the name (союз) suggests. Founded in 2013, they aspire to create "modern classics" by combining Western design with Russian manufacturing. In this time, they have released three distinct microphones, with an emphasis on bringing together Russian and German traditions into a unique amalgam.
They sent me a pair of their Series 013 small-diaphragm condensers with cardioid capsules to test them with my classical guitar.
From Russia with Love

The handcrafted hardwood box
When opening the cardboard box, I found a small envelope containing among warranty notices and stickers printed frequency plots for each capsule. But to my surprise, there is an even smaller envelope with three signed cards of the people (with pictures) who are responsible for the machining, assembly and quality control or my set. This extent of the attention to detail and that of the customer experience indicates how much love and thought they put into their products. I have to admit, it's been a long time since the last time I've been treated so nicely while opening a new product.
The 013 FET microphones themselves come in a high-quality and elegant wooden box, to keep the mics and accessories safe for storage and travelling for location recordings. It took me a minute to figure out how to open it, as the lid is held by a pair of powerful magnets on the inside. As a result, it takes some effort to open, but the benefit is that it is impossible to open accidentally.

The glossy cream finish matches nicely with the polished brass capsule
Evidence of their unique take on aesthetics is that not only the microphone preamps but also the mount clips and pads are all painted in a matching glossy cream finish, while the capsules feature a lacquered polished brass. The combination may be somewhat flashy, especially in the context a modern video production that requires making the microphones invisible, but I think that they look quite beautiful. There is an option for a black-matte finish for those who prefer something more indistinct.
Interchangeable capsules add to the value and versatility, and Soyuz provides Cardioid, Omni and Hyper-cardioid capsules for the Series 013 body. The three capsules have more or less similar frequency response, but I only had the chance to test the Cardioid capsules.
A Flattering Accuracy

Soyuz 013 Fet Cardioid Frequency Response
Although the 013 FET are handsome, the real test is how well they can capture my classical guitar. Looking at the frequency graphs, I expect relatively linear response, with subtly lean low-end and some colouration due to the transformers.

The 013 FET pair in AB Stereo
After positioning the microphones in a narrow AB setup and engaging +48v phantom power on my AEA TRP2, the first thing I noticed was how much output the microphones offer, making the choice of microphone preamps less trivial. The self-noise of the microphones at 16 dB (a-weighted) is relatively high for dynamic playing styles, but to their advantage, the high output will let them pair with any decent preamps nicely.
Listening to the recordings, the sound signature of the 013 FET is quite natural but with a thick and creamy tone. In comparison to linear microphones like Schoeps or DPA offerings that have a clean and detailed presentation, the Soyuz microphones add depth and weight to the recording but without losing definition or emphasising any specific frequency. The result is a flattering sound with a dose of healthy vintage nostalgia.

The diamond-shape logo might be a slight hint
Compared to the Neumann KM184s, which tend to be sharpish on-axis especially when positioned close to the source, the 013 FET present a gentle flavour with their non-strident character, thus a better choice for classical guitarists. Additionally, the tight cardioid polar pattern makes them ideal for use in the small-room reality of the home studio.
The top-end remains smooth and doesn't show any harshness at all, the mid-range is warm and detailed with a wonderful, almost 3D, quality. There is a good amount of proximity boost happening once the microphones get closer to the source, balancing the slight slope of the 013 in the low end, therefore the microphones need some care in positioning to achieve a perfect balance.
Against the Grain
In a market full of clones and vintage reproductions, Soyuz comes with an original design that perfectly blends the classic sound of the past with the needs of the modern producer. The 013 Series microphones offer a familiar tone, with the much-desired colour and character, and plenty of clarity. Lastly, the reasonable price for a quality handcrafted pair of microphones makes it easy to recommend for those who seek a pair of excellent small-cardioid microphones.
RME Babyface Pro FS Review
The best portable audio interface gets a welcome refresh.
There have been ten years since the introduction of the first Babyface; a portable interface with a unique form and the renown RME build-quality and performance stability. Five years later, the Pro version arrives and brings performance updates in practically every aspect and a new luxurious aluminium chassis. The latest revision updates it clock and now includes a full SteadyClock FS circuit as in the ADI-2 Pro FS for lowest jitter, as well as an improved 3,5 TRS headphones output with 90 mW, from the 70 mW that is found on the older version, and the same output op-amp as on RME's ADI-2 Pro.

The BabyFace takes on a remote location session.
Newly designed analogue and digital circuits improve the SNR and THD figures for the microphone inputs and monitor outputs, while innovative energy-saving technologies allow the Babyface Pro FS to remain bus-powered for portable setups. A small size, high-performance drivers and a fine fidelity designate the new RME as one of the best small audio interfaces for the home studio or the producer on the go.
The Device

A slight slope, tilts the controls towards the user
The Babyface Pro FS is housed in a tough chassis cut from a single block of aluminium. It has a slight slope, that tilts the controls and the metering LEDs towards the user for greater accessibility. It looks quite elegant in real life, much better than any pictures I've seen. The craftsmanship of the unit is exemplary and all the buttons have a satisfying feel to them.
Apart from the two excellent mic-preamps on the back of the unit, there are two additional line-inputs on the right side should you wish to connect it to an external preamp. A lot of small interfaces can only handle two inputs, which are generally enough for classical guitar, but the two extra channels can be proven rather helpful the few times that I might need to record a larger ensemble or experiment with different microphone setups.
Digital I/O with up to 8 channels is also available via ADAT or SPDIF to accommodate bigger setups.
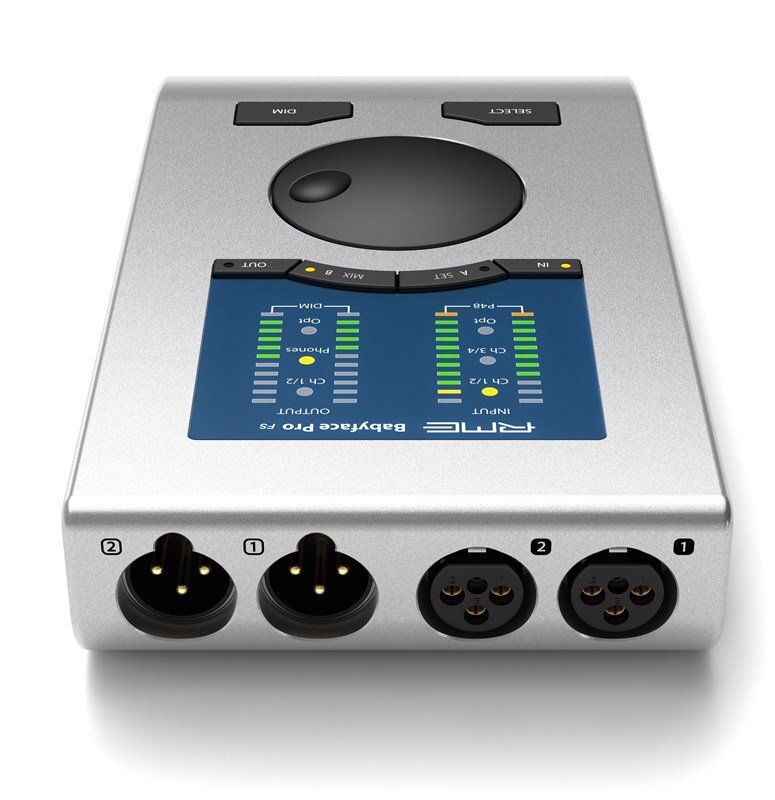
Preamp inputs, monitor outputs and comprehensive metering.
Two balanced XLR outputs feed the monitors is another welcome feature that is rarely seen on interfaces of this size. A surprising inclusion though is a pair of independent headphone busses, one with with a standard jack, the other with a mini-jack socket. Unfortunately, there is no separate control for the two phones, and according to RME, the TRS phone would be 6dB louder. Nevertheless, the next time you will forget the 6,3mm to 3,5mm adaptor on a location recording, you won't be miserable.
Considering the portable nature of the Babyface Pro Fs, I think that RME missed the mark with the provided hardshell case. Don't get me wrong, it is great to have and more than welcome, but it adds a lot of unnecessary bulk. The case itself, although not as premium as the interface, seems durable enough. Opening it up reveals a lot of unused space, with almost one-third of it to be empty. There are slots for the USB and Midi cables, which is handy, and another one for a power supply - that is not included. A case exactly the right size just for the unit would be preferable, I can always throw all the necessary cables in my backpack anyway.
The Babyface has a DC input for standalone applications, but as mentioned the power supply is not provided by RME as the interface is fully bus-powered. I haven't used one to test if there is any additional performance profit.
Unusually for any product in 2020, a two-hundred-page printed manual is included, both in German and English.
Clarity in abundance
True to the reputation of RME, the BabyFace Pro FS delivers a clear and articulate sound. The low-end is full, much better than of most competitive interfaces, while the midrange and high-end remain accurate. The ADDA conversion has only a tad less realism and depth than that of my ADI-2 Pro FS, but I was expecting that.
The preamps are also excellent, I wouldn't hesitate using them for any production. The lack of colouration might make them seem sterile for sources that might benefit from a bit of character. For classical guitar and other acoustic instruments, I find them to be precise and truthful. Might not be as refined or pleasing as expensive outboard preamps, but there is nothing to complain about for interface preamps.
Drivers and TotalMix FX
What separates RME to most other interface manufacturers is the perfect harmony of software and hardware implementation. The in-house developed drivers grant to its interfaces unparalleled stability and performance, and the Babyface Pro FS is no exception. The latency times are the lowest (the lower the better) in its class and working with the interface is seamless. Audio dropouts and other issues that occur in badly written drivers can diminish the user experience or even render a recording useless, however, the Babyface has been flawless in that regard. RME also provides extended support, with driver updates and service for many years after a typical product lifecycle; an OS update wont turn the unit into an expensive doorstop.

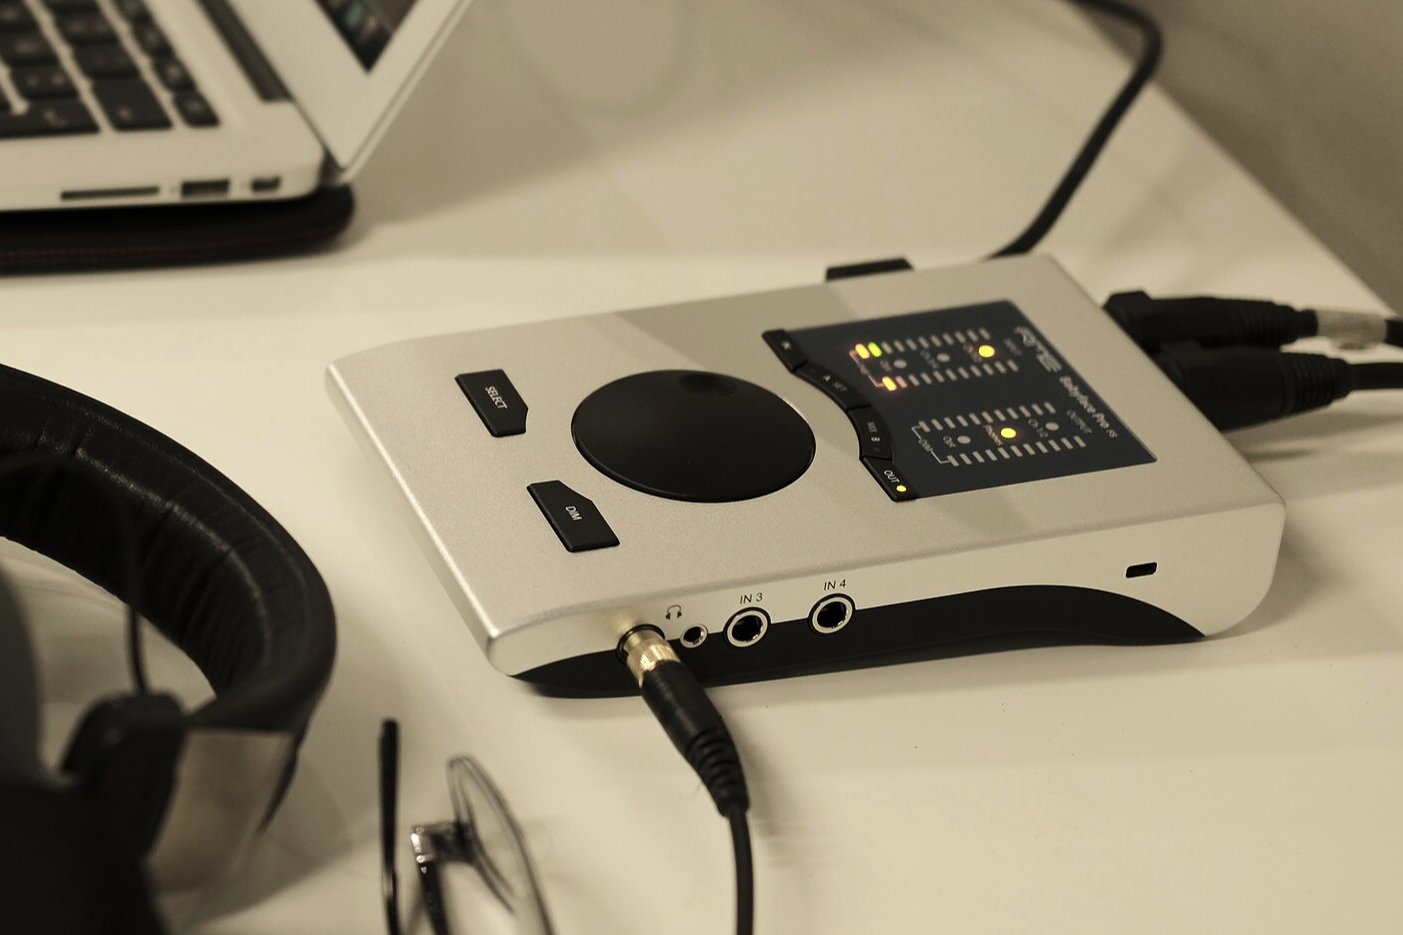
The BabyFace Pro FS is equipped with DSP effects for zero-latency monitoring.
Additionally, the TotalMix FX console comes packed with every sensible routing option and zero-latency DSP effects. My needs are pretty straight-forward though, and I have only used a fraction of the possibilities provided. The plethora of options can be a disadvantage, as the GUI seems complicated at first, but it is cleverly designed and with a modern look.
Conclusions
Excellent conversion, small size and the best drivers for audio known to man, place the RME on top of the list of small audio interfaces for the home-studio or location recordings. Although there are plentiful small and portable interfaces, most of them target the consumer or prosumer market. The Babyface Pro FS is one of the few devices that offer professional performance and functionality for the recordists that have fewer demands in terms of channel numbers but don't want to compromise on the audio quality.

Apple MacBook Air i7 2020 from the perspective of a Music Producer
The recent introduction of quad-core processors in Apple’s MacBook Air promises greater performance in the familiar form, but is it capable for any professional work?

The new MacBook Air in Space Gray
I have been using my trusty mid-2013 MacBook Air 13 with an i7, 8GB Ram and 256GB SSD since its introduction. Having produced several albums and videos of my music, as well as of colleagues and friends of different complexities in my home studio and on location, this machine has never let me down.
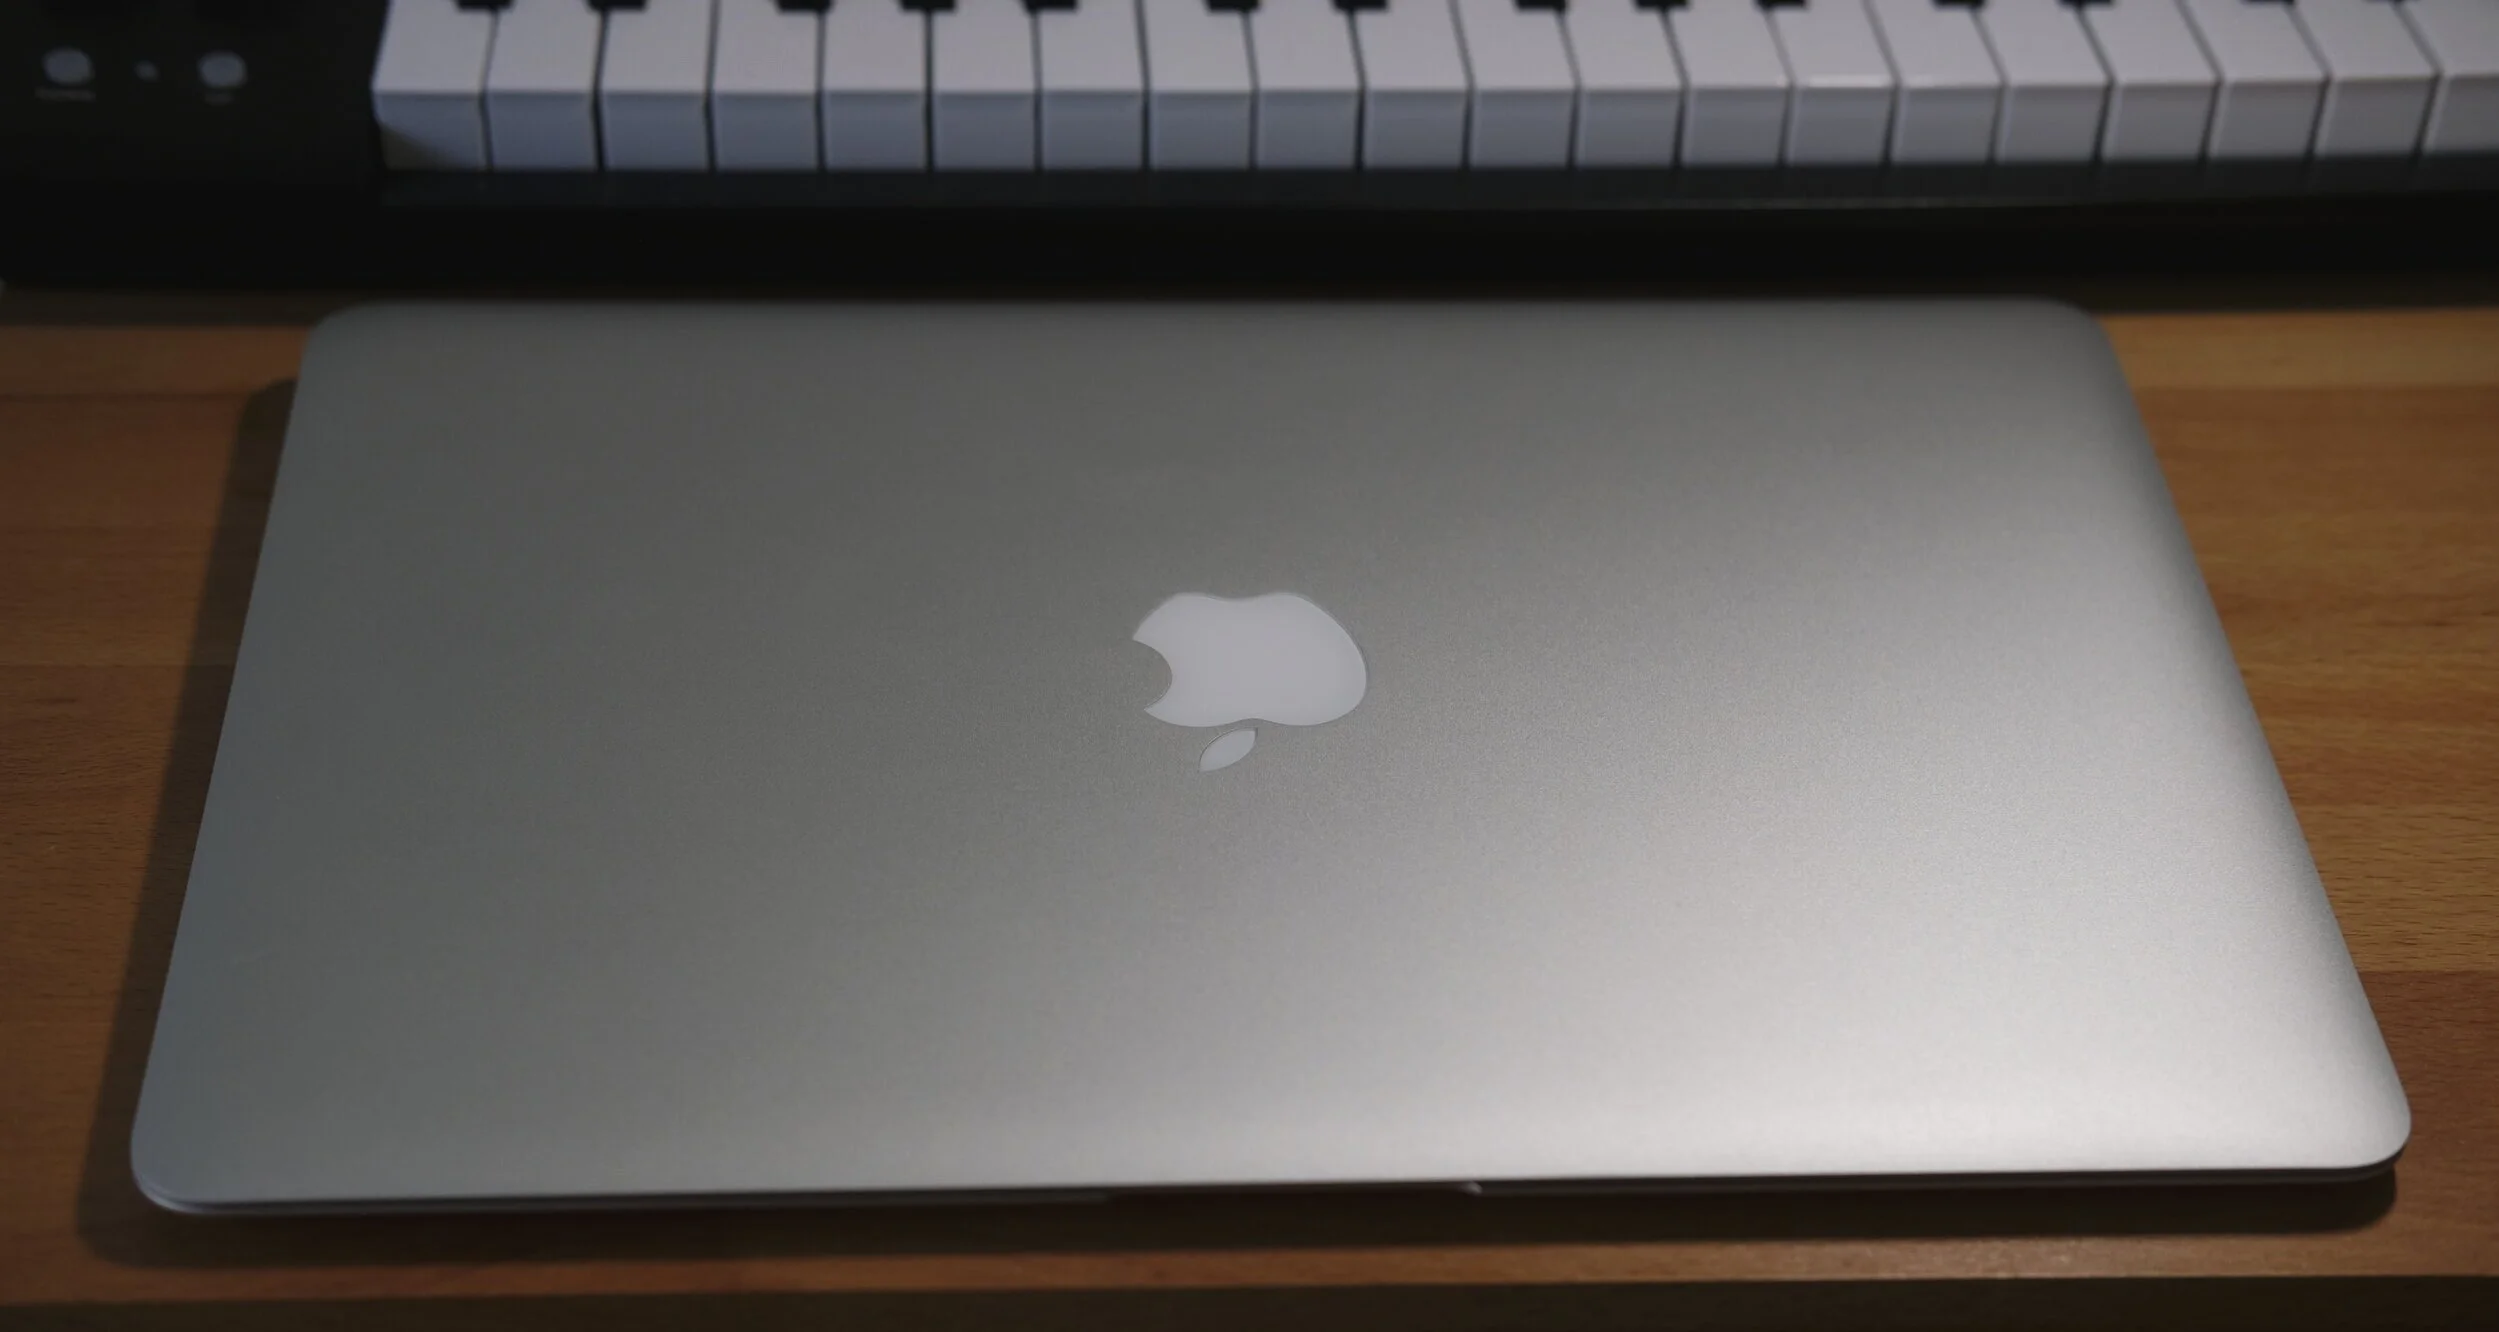
My silver 2013 MacBook Air; no signs of wear after seven years of abuse
After almost seven years of intense use, it has slowly started to show its age. A progressively unreliable battery, the older screen and the greater CPU demands of modern plugins were making the experience less fun.
I was holding on it regardless, mainly because I was not satisfied with some of Apple's decisions in the latest years. Namely, the removal of the MagSafe and the SD card reader, as well as the limited number of USB ports.
Unfortunately, the 2020 MacBook doesn't deal with any of these issues, but Intel’s 10th generation i5 and i7 Quad-Core processors, the possibility to expand the RAM to 16GB, and the impressive Retina display allowed me to let my old computer finally retire.
Windows Alternatives
First of all, let me state that I'm not an Apple fanboy, I'm perfectly happy with my Pixel 3a and several other Android phones before that. But the truth is that no-one else is doing the trackpad as well as Apple. The integration of the touchpad and magic mouse gestures into Logic Pro and Final Cut Pro are an essential part of my workflow, anything else will be a compromise. I also love how stable and efficient MacOS is besides being a low-maintenance operating system. Having dealt with Windows in the past, I can see their advantages, but Apple provides a seamless experience.
The MacBook Pro

The teardrop shape of the Air is ingenious
I have been flirting with the idea of getting the Pro instead, but the form factor of the Air is superior to me. The teardrop shape is more comfortable to type on and for the work that I typically do, and the slightly less weight can be an important factor for travelling and location work. Furthermore, my work primarily involves recording and producing classical guitar or chamber music, writing articles, making scores and editing simple videos. Except for video editing, none of my other activities requires a lot of CPU power. A light, reliable and snappy computer with good battery life and silent operation is all I'm looking for.
2020 Updates
The new Air comes standard with 256GB of fast SSD storage which is enough for me, since I prefer to keep the system drive relatively clean and work off an external SSD, especially with the large video files. Cloud storage for other types of documents allows me to continue working on different machines, and gives me a peace of mind if anything goes wrong. I opted the i7 version for the extra processing power and future-proofing, Intel's 10th generation quad-core processor should be about four times faster than my old computer.
Another welcome addition is the 16GB Ram option which boosts the multitasking capabilities of the MacBook. A typical daily scenario for me is to have a bunch of tabs open at any given time at three different browsers (Safari, Chrome and Brave) as well as having both Logic and Final Cut loaded with my latest project. Sibelius and Affinity Photo may also run in the background, ready for me to use at any moment. I usually leave everything open with loaded projects, and in that case, the more Ram the better.

The old design
My old Air has the classic silver finish, a timeless design choice that doesn't easily show any marks. For a change, I decided to get the Space Gray this time. I hope that it will also take some slight abuse gently. Space Gray is gorgeous while being more subdued, with a more homogenous look in the keys, chassis and display. The less obvious aesthetics let the computer disappear, bringing the work in the foreground. The black and much smaller bezels also help.

Retina display delivers greater resolution and colour gamut
The "new" retina display is a delight to watch, with great colour reproduction and breathtaking resolution. Some people find the slightly wider bezels old-fashioned when compare to competitive ultrabooks, but I think that they might have advantages. They allow for enough space to rest your wrists when writing, a big-enough trackpad, front-facing speakers (for the odd time that I might need to use them) and a full-sized keyboard. Speaking of which, I know that there have been countless complaints about the performance and reliability of butterfly keyboards, I'm happy to report that the new magic keyboard is a joy to type on, and considering the reports from the 16" MacBook Pro, it should be without problems.
I was afraid that I wouldn't enjoy as much the clickless nature of the "new" touchpad, counting on my minimal experience with modern MacBooks, but the smooth glass surface and responsiveness of the touchpad is brilliant and took me only a few minutes to forget the old one. Lastly, TouchID is a godsend, with fast and reliable verification, it saves a lot of time from typing long passwords.
Construction and Connectivity

ONLY two USB-C ports…
Apple's engineering and manufacturing are second to none, everything feels very robust, with smooth surfaces and polished edges. A beauty to look and touch. Plugging in the charging cable produces a very satisfying sound. The removal of the MagSafe with all the safety and convenience it provides is really hard to understand though, and I wish there was at least one more USB-C port... and an SD Card reader. Well, at least there is still a headphone jack.

An innovative mess
I understand that Apple wants to push wireless connectivity, and I appreciate this philosophy. Sending files with AirDrop between my devices is a breeze, as is the integration of Sidecar. But until my mirrorless camera can send large video files with Bluetooth, and my drives, audio interfaces and DACs can work effortlessly via Bluetooth, I’m stuck with a vastly inelegant solution. Just to do be able to use my RME ADI-2 Pro FS for audio I/O, while charging the MacBook, accessing video files on my SD card and working on my external SSD drive - which is what is connected on my MacBook 95% of the time when I'm at my office - I have to rely on a USB hub, which adds to the cost only to create a mess of cables on my desk. On a positive note, if I want to bring my MacBook with me, I need to remove only one cable.
The Wait

At least we still get a headphone output
I have to confess that even though I was confident with my purchase at first, some of the early reviewers that were reporting thermal throttling and other heat issues due to the removal of the heat pipe had me worrying. Recording subtle classical guitar pieces with ultra-sensitive condenser microphones and spinning fans don't go well together. After all, with almost the same money I could buy a 2019 MacBook Pro with 4 USB-C Ports.
I stayed positive the two weeks that took for Apple to send me my MacBook, due to the pandemic and the great demand for the new MacBooks I presume.
When my machine arrived, I set up everything and installed all the necessary software. After a couple of days of making all the preparations, as well as using the MacBook for regular use, I have yet to hear the fan spin hard, if at all. The chassis would sometimes be warm but stay comfortable. A first relief, but I had to wait and see if it would overheat with my regular use.
Performance

An excellent keyboard and a brilliant touchpad
After everything was set, the first thing I did was to record my classical guitar and see if the fan starts spinning, ruining my precious recording. Of course, as expected, it remained silent throughout. I knew that the real test was to see how well it can handle editing and mixing though.
Without quitting any apps, with all three browsers running in the background, with four-five tabs each while five of them being preloaded YouTube videos on Chrome, I started loading plugins on my project. Since, I usually work on my music all day and also use my laptop for other tasks in between, for convenience, I leave everything running.
As I already stated my needs are very specific and not awfully demanding. For music production, I'm usually dealing with only a couple of audio tracks, equipped with FabFilter's Pro-Q3 plugin equalizer and one or more algorithmic reverbs, namely 2CAudio's Aether or Breeze plugins. On the master bus, the usual suspects are the Pro-L2 limiter, along with the 2CAudio Vector spatial image analysis and Youlean loudness meter plugins. If required, I might use a couple of iZotope's noise reduction plugins to remove any unwanted noise.
My seven-year-old MacBook could handle a similar load but the plugins would drain the CPU, sometimes leading to System Overload warnings. Some plugins have also oversampling capabilities, that boost performance with the expense of bigger CPU loads, which would make my MacBook surrender. I would often only run plugins at top quality only for the mixdown.
After loading all the plugins, I started the playback, after a minute or so there was still no sign of fan spun. I started boosting performance on some of the plugins with oversampling, still, the fan was inaudible. Then I decided to push the CPU harder. I went to Safari and loaded a 1080p video on youtube, after a minute of listening to both my guitar track and the random video, the fan was still inaudible. My last test was to reproduce the same experiment with Chrome, and surely after half a minute or so, the fan kicked in, at a low speed. I let the video play for another minute to check if this would make the fan to spin faster, but no luck, the fan was audible but at a very comfortable level. I stopped everything and took an ibuprofen, a headache form all the chaos was started to kick in instead.
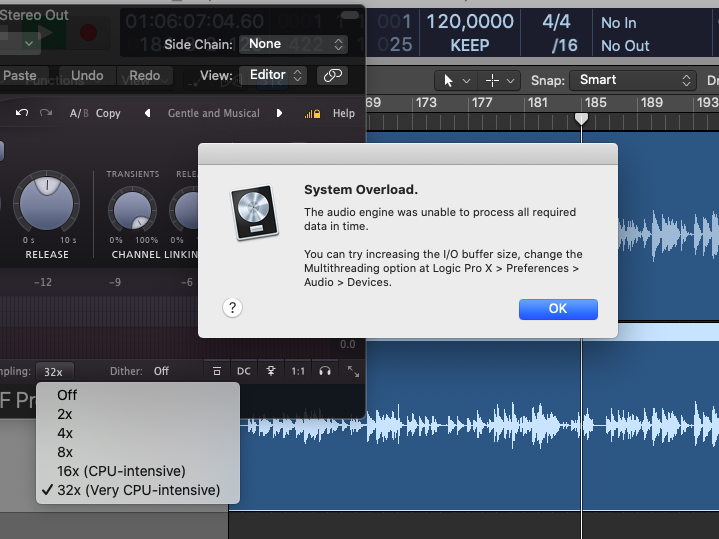
System Overload warnings on my 2013 MacBook when pushed hard
I loaded a similar project at my old MacBook and tried to replicate the test. I started the playback on Logic, I tried to push the CPU with moderate oversampling and then I tried to stream a video on Safari, after a couple of seconds, I got a System Overload warning from Logic and the audio stopped so thankfully I didn't have to go through this emetic experience again.
Large projects are not my regular tasks, but I have used the 2013 Air to successfully produce projects with more than thirty audio tracks, with a bunch of plugins on each one, CPU hungry emulations, and virtual instruments. Granted, the fan would sometimes resemble an aeroplane jet, but it was doable and my old MacBook still works like a charm after several years of such abuse. So, I'm positive that the new MacBook Air would not be different in that regard.
Video Editing
Intel’s Iris Plus graphics should make the 2020 Air a charm to work for light video editing. To get an idea on the performance improvements I loaded 1080p footage from my Fuji mirrorless camera. Editing was snappy and with some basic colour grading and a LUT applied, the playback was perfect. The Retina screen is a big improvement over the old display, with much greater colour depth and spectacular resolution. There is much more detail, with better blacks and richer colour reproduction.
On my next video project, I plan to shoot in 4K. This is a demanding job that was absolutely impossible on my old Air, so I'm excited to see how the 2020 Air performs here. Click here to read my experiences with 4K video editing on the 2020 MacBook Air.
A MacBook for the Music Producer on the go

The new MacBook Air offers a perfect balance of performance and portability
Considering the limitations of the form, the MacBook Air is not the most powerful computer, and it was never meant to be. If you like playing games, or your thing is hardcore video editing and music production with 100s of tracks, you have to look elsewhere. The new 2020 Air will appeal to those looking for snappy, reliable performance that will perform moderately heavy tasks with ease and can be everywhere they go.
Apple’s Air line of ultrabooks has totally eliminated for me any need for a conventional desktop computer with a perfect balance of performance and portability

AEA N8 and KU5A Ribbon Microphones on a Classical Guitar

AEA N8 Nuvo Closeup
Ribbon microphones have a very long history, invented in the early 1920s by Telefunken in Germany, and have been used in countless historical recordings of all genres. An ultra-thin ridged aluminium (usually but not only) ribbon is placed between the poles of a magnet that translates vibrations (sound) to voltage.
Recordings made with Ribbon microphones sound very natural, have a full low-end, smooth mids and attenuated highs. They are never over-analytic if anything, they offer a relaxed presentation, making them excellent for instruments which mechanical sounds, like fretting or bowing, can be distracting. Furthermore, their pure characteristics and the bi-polar pattern generate a feeling of "being there" in the room with the musicians.
Ribbon microphones can be quite fragile and require a lot of attention even on how you store them; additionally, being passive they need a lot of very clean gain from the preamps otherwise the can appear noisy, especially with soft instruments and dynamic styles. The advances in HiFi recordings and playback systems, and their inherent downsides pushed Ribbon microphones out of fashion for several decades.
The last decades the trend seems to have shifted, at least partially. Musicians and engineers lust for the added warmth that Ribbon microphones exhibit naturally, and digital environments sometimes lack. For more than 20 years, AEA has dedicated its resources in developing and manufacturing high-quality Ribbon microphones that enable the listener to experience recordings as if he is in the same room with the musicians, and with the recent products, they hope to eliminate some of the inherent issues of this technology.
Nuvo N8 - Active Ribbon with an Extended Top-end

AEA Nuvo N8
Derived from the very well received and fantastic R88, the N8 is a mono version of the former with an added active circuit, meaning that it requires +48 phantom power to function and in exchange, it provides a higher output, making it less dependent on the preamp, and subsequently delivering cleaner recordings. The AEA TRP2 stereo preamp that I use, is specially designed for the AEA Ribbon microphones, and with its extremely clean hi-gain performance and high-impedance, it should deliver stunning recordings.
AEA designed the N8 to be used as in far-field applications, thus making it a better match for acoustic and classical recordings. And in contrast to vintage ribbon microphones, which can sometimes sound dark and murky, the N8, and the R88, capture plenty of high-end and present a controlled low-end.
Unfortunately, KMR Audio (AEA's European distributor) couldn't provide me with a pair to test some of the stereo arrays, like Blumlein or M/S Blumlein that Figure-8 Microphones excel, but I'm excited nevertheless.
KU5A - A Super-Cardioid Ribbon

AEA KU5A
The KU5A is a rather unique design in the world of Ribbon microphones, as not many non-bipolar Ribbons exist, and even less Super-Cardioid. The bi-directionality of most Ribbon microphones can sometimes be more of a burden than a blessing when used in smaller-unattractive sounding rooms. The KUA5 is a front address Super-Cardioid, that eliminates the room and presents the ribbon smoothness and warmth in all its glory, with the benefit of a detailed, extended top.
A high-pass filter of 6dB per Octave at 283Hz makes the AEA Super-Cardioid suitable for close-miking any instrument and the transformer-based, active electronics allow it to function perfectly with any decent preamplifier.
The attributes of the KUA5 make it a perfect choice for concert applications, both for amplifying the classical guitar along with recording purposes. Notably, if you play in an ensemble, The Super-Cardioid pattern will minimise the bleed from other instruments into your amplified sound. Ribbon microphones are also more forgiving than condensers, which can be a huge advantage in live recordings.
Lastly, A common issue with live acoustic recordings is that the Audience can sometimes be as loud as the instruments, the KUA5 will make sure that less of these distractions will find their way to your recordings.
Other Things

AEA KU5A Flight Case
AEA attaches the cables to the microphone on some of their products, and the KU5A is one of them, I'm not sure what to feel about this "feature" as it is nice to have, but makes the transportation awkward. The microphone itself is very well made, the built-it yoke is very sturdy and makes positioning very easy, and the is shipped in a very durable flight case. For concerts or location work, the flight case is undesirably big for the sole reason that it has to have space for the long cable.

N8 Case with Mount and Sock
The N8 is shipped with a durable plastic case which is very convenient for location recordings and for storing the microphone, a shock-like fabric cover to protect the microphone from dust, and a rubber mount that takes the place of a more regular spider mount and takes care of the low-end rumble and vibrations. The small size and weight of the N8 is also worth noting, as well as the standard XLR output, granting easy transportation and effortless positioning.
Conclusions
With active electronics for fewer noise-related headaches and an extended top-end, AEA carries the natural and calm presentation of vintage ribbon microphones to the demands of a modern workflow. Both the N8 and KU5A are excellent ribbon microphones that share the same DNA and are designed for particular situations.
If you want to remove the "room" from your recordings, the KU5A will do just that. While the N8, or better yer a pair of N8s in Blumlein, will put the listener directly into the hall that the performance takes place. Either way, a gorgeous sounding recording is guaranteed.

DPA 4011A vs Schoeps CMC6 MK22
Other than various Neumann microphones, the most used small-diaphragm condensers in classical concert halls and recordings are made by DPA and Schoeps. The philosophies behind their designs are quite distinctive, as are the usual descriptions of the family sound of each brand. Arguably though, they are more similar than different, as they both belong in the relatively uncoloured realm. But the big question remains; which microphone is better for recording the classical guitar.
To try and answer that question, for my needs and tastes, I had to get demo units of their cardioid microphones.
A Cardioid and an Open-Cardioid
The 4011A is a staple performer for many acoustic/classical instruments when a directional pick-up is required, Schoeps also offers a few different cardioid capsules with their Colette system suitable for a variety of uses. The MK22, which I chose for this shootout, is an open-cardioid. Schoeps describes its characteristics as a combination of the natural low-end of an Omni pattern with the benefit of cardioid directionality. In essence, it is a little wider than their standard cardioid capsule, MK4, and offers a marginally finer bass response.
Comparing the Polar Pattern plots of these microphones, I realised that the MK22 is closer to the characteristics of the 4011A than the MK4, making the decision easier, and this comparison quite logical.

DPA 4011A Frequency Response

DPA 4011A Polar Pattern

Schoeps CMC6 MK22 Frequency Response

Schoeps CMC6 MK22 Polar Pattern
It has nothing to do with sound

The DPA 3511A Stereo Kit
This might be a little unfair to Schoeps, but it's not my fault. DPA arranged for me to have for reviewing the 3511A Stereo Kit; a high-quality aluminium case which except for a matched pair of microphones, includes a lot of premium accessories, like their high-quality microphone mounting clips, shock mounts and a long stereo boom. All made with the highest standards and can be convenient in the field.

Schoeps CMC6 MK22 Set
From Schoeps, all I got was a pair of CMC6 bodies with the MK22 capsules. I know that ultimately the sound is what matters most, and I that can be evaluated without any extra accessories. But getting familiar with the DPA system, elevated my experience.
Another observation that doesn’t have to do with sound is that the NEXTEL finish of the CMC6 preamps and capsules is quite fragile, I thought I could scratch them, just by looking at them. In comparison, the 4011A have a more solid feel and seem more durable.
Setting up
As per my usual recording techniques for the microphone duels, I placed each pair at an AB configuration, with 36cm distance between them, 96cm from the ground and around 70cm from the top of my spruce guitar.
By listening to the samples, it is evident that both microphone pairs provide a solid performance. I would be totally satisfied with either, but there are some differences.
Unambiguous precision
The 4011As have a unique way to draw an utterly accurate and almost holographic image of the classical guitar, without any sign of harshness or hardness that is not a product of the performance. The sustaining notes, ring longer and the complex harmonies are captured clearer, like if they are taken apart.
Without sacrificing detail, the MK22 capsules portray an euphonic result. They are fast and analytic, but yet with a smooth and musical character; as if the performance is treated with a touch of kindness.
Au contraire, the DPA microphones will represent with unambiguous precision all the nuances and subtleties of a world-class instrumentalist and a high-grade luthier guitar; exposing likewise any flaws on a player's technique or the instrument. Their honesty can be brutal and overwhelming in some cases. If the source is good, they are going to reveal it; if not, forget about using them.
The Schoeps's offer a gentle depiction of the performance by applying a veil of wizardry and charming sweetness. However with the DPAs, it is like looking at the recording through a magnifying glass.
Noise concerns
My only gripe with the 4011A is the high self-noise. At 18dB-A the noise is not excessive and in most cases not even noticeable, but it can be bothersome for distant miking with softer instruments, or very dynamic musical styles.
The MK22 with 13dB-A of self-noise is almost as silent as my Neumann TLM 193 which have a remarkable 10dB-A of self-noise performance. In reality, most rooms are noisier than any of these mics.
Back to the original question
Honestly, I cannot say which microphone is better; probably neither is. The Schoeps have a sound, as the DPAs and ideally, I would love to own sets of both. In isolation, both pairs should sound stunning, if not, the problem is certainly not on the chosen pair of microphones.
When I'm not directly comparing and analysing them so closely, I believe that their differences are not as pronounced. Saying that, after hearing to my playing and guitar(s) with the 4011As (and 4006As which DPA also sent me), it is difficult to accept anything less realistic.

Three M/S Setups for Classical Guitar
Capturing the natural room sound of the guitar.
The Mid/Side microphone technique has almost a century of history. Developed by Alan Blumlein in the early 1930s, it became popular in the broadcast studios because of its compatibility with mono. Even in the recording studio, it appears to have many advantages over the most commonly used stereo techniques.
With small instruments like the guitar, it is easy to capture a too wide of an image, resulting in an unrealistic and often a blurry reproduction, especially with ORTF and AB techniques.

Neumann TLM 193 & TLM 170 in M/S Stereo
The "Mid" microphone of M/S provides a solid capture of the instrument, while the "Side" microphone is responsible for picking up the ambience of the room. The right balance of the two microphones allows for a truthful image of the guitar realistically placed in the sound field.
The M/S technique gives you the most control over the stereo spread, but the best part is that you don't have to commit to any balance until the mixdown, as you can always change the balance long time after the recording is finished.
Things to consider
As the "Mid" microphone is responsible for capturing the actual sound of the guitar, it is essential to take the time and make sure that it's placement is optimal. Otherwise, there is not a lot you can do to fix it. Also, if the room ambience is not pleasant there is not a lot you could do to improve it, so you are better off with a close AB technique and using artificial reverb in your DAW during mixing.
Here is one of several M/S setups that I've tried this week. I placed the "Mid" microphone at a distance of 55cm from the top of the guitar, aiming at the midpoint from the bridge and hole. With the capsule being at 96cm high, slightly angled downwards, placing it on-axis with the angle the I hold my classical guitar.
The "Side" microphone with a Figure-8 pattern was simply placed on top of the other at 90 degrees, aligning the capsules as close together as possible, minimizing phase issues. The whole setup was angled slightly to the sidewalls of my room. The room is medium-sized, with a wooden floor, high ceiling and a few interesting angles on the wall, making it relatively live-sounding.

Austrian Audio OC818 M/S Pair
Austrian Audio OC818 in M/S Setup
In this first example, I used an Austrian Audio OC818 pair with the "Mid" microphone was set to cardioid. The response of the Austrian Audio microphones is fairly natural, especially at the low and mid registers. A slight boost is present at the higher frequencies, but it retains the very smooth character of the classic ceramic capsule, making the classical guitar recording to sound polished and vivacious, without any sign of harshness.

Gefell UMT70s M/S Pair
Gefell UMT70s in M/S Setup
The second example utilises a Gefell UMT70s pair, these mics have a unique appearance, an incredibly small grill and an unquestionably satisfying feeling to the touch, the craftsmanship is second to none. The UMT70s shows a distinct bright character with slightly recessed lows in its cardioid pattern. The Gefell microphones offer coloured pickup but maintain a smooth quality. In a way, this combination produces a somewhat more finished recording, with nostalgic charm, it reminded me of some Julian Bream albums. The result is pleasing but differs from the sound that I hear when I play my guitar, in my room.

Neumann TLM 193 and AEA N8 in M/S
Neumann TLM193 and AEA N8 in M/S Setup
An often overlooked aspect of the M/S microphone technique is that it doesn't require a matched pair of microphones. So for the last test, I decided to combine the Neumann TLM 193 with a ribbon microphone for "Side" duties, in this case, an AEA N8.
The TLM 193 has a natural pickup, with good low-end extension, flat mids and unhyped high-end. The most gratifying aspect of the Neumann is that it captures all the nuances of the classical guitar without emphasising any frequency. Additionally, it is dead silent which enhances dynamic playing styles as it allows the notes to fade to complete silence.
The AEA N8 offers an extended high-end in comparison to more traditional ribbons and a very juicy low end. This combination in an M/S setup produces a bigger soundstage and a sound that is reminiscing of the what I hear when I play.
Conclusions
All three setups can produce high-quality recordings, although the perspectives of their designs are different. I'm used to the Neumann sound, and I gravitate towards that, together with the N8 I think they produce the purest and calmest recording, but with the expense of some definition and the higher noise floor of the ribbon. The Austrian Audio microphones are the most versatile and they take EQ well. They are detailed, without sounding overly analytical, and offer an elegant and smooth sounding result. The Gefell combo sounds like an excellent record from perhaps a different era, but if you love that sound, it is impossible to get it with the other microphones.
Coda
The M/S Stereo technique has the potential to create outstanding recordings, captures a full-bodied and defined sound while eliminating phasing issues. Larger halls and resonant spaces are where it excels as it allows us to concentrate on the recording and fine-tune the balance of ambience and close sound during mixing.

Austrian Audio OC818 and the PolarDesigner plugin
What if you could set-up the microphones, record your classical guitar and configure the best polar pattern your room after the recording is finished?

Austrian Audio PolarDesigner Plugin
Polar pattern selection on large-diaphragm condensers is not a new thing, a few microphones intergrade continuously variable selectors that allow in-between pattern selection, or allow the two capsules to be recorded in separate tracks. Austrian Audio expands the possibilities with the PolarDesigner plugin.
The most important feature of the plugin is that it enables us to craft the perfect polar pattern responses across up to five crossover bands, at any time after the recording is finished. To make the plugin even more useful, Austrian Audio has packed a lot more into the PolarDesigner to perfectly fine-tune your sound.
Usual suspects

Austrian Audio OC818 M/S Pair
I decided to try it first on an M/S setup, I used the two output method only on the Mid microphone, I positioned it at 96cm high and around 60cm from the top of my classical guitar with a slight downward angle so that it is on-axis with the spruce top. I placed the second OC818 on top of the first in Figure-8 pattern.
Basic sounds
With the Side mic muted, I concentrated on the Mid mic for a while.
The unprocessed track, with each capsule recorded at a different track, is unusable without the PolarDesigner plugin, but that was expected.
First, I wanted to see how the basic patterns would behave. So, I enable the plugin, as well as some lean low-cut and high-cut filters.


Tweaking the patterns
After playing around with the controls for some time, I found that the Omni pattern assigned to the lower frequencies gives a beautiful body sound to my guitar. Cardioid and Wide-Cardioid patterns were chosen for the mids, to bring tones of the guitar in focus. And for the highs, I used more of a Wide-Cardioid pattern to add some room ambience.

I also used the free-field equalization preset, which I'm not exactly sure what the underneath processing is, but gave more depth and definition to the overall sound. I boosted the lows a little with the proximity control bar.

And finally, I added the Mid channels to the mix and balanced all three to get a natural room sound.
Conclusions
As you can see, the possibilities are endless, and you only have to position the microphones once, record a couple of takes and then figure out the perfect polar response during mixing.
Additionally, on remote location recording, lugging up monitors to accurately check that the microphones are placed in the most desirable position can be quite unattractive. Headphones, on the other hand, are never the best option to judge stereo spread and overall tonal balance. The PolarDesigner plugin allows for fine-tuning to take place with the speakers and room you know and trust at your mixing room.
Click here for the full review of both the Austrian Audio OC818.
PolarPilot App

Austrian Audio PolarPilot App
Austrian Audio designed an App that allows for real-time wireless control over the analogue bias voltages of the OC818, allocating 255 discrete polar patterns for us to choose. Plus access to high-pass, and pad in realtime via Bluetooth. Unfortunately, they didn't send me the OCR8 Bluetooth dongle that is required for this to work, so I couldn't test it out.
The judgement day

PolarDesigner Terminator Control
The plugin allows uses some sort of AI that determines what is important and not and provides a spill terminator or maximize target algorithm which should in principle reduce unwanted spill from other instruments But, I didn't get to use.

Austrian Audio OC 818 vs DPA 4011A Stereo Pairs

Austrian Audio OC818
DPA is a high-end microphone company and needs no introduction, they have been around for around 30 years (their capsule design begins somewhere around 1950 with their first measuring microphones) and their microphones have been used on countless recording sessions in the finest concert halls in the world. The 4011A is a small-diaphragm cardioid condenser, praised by engineers and musicians for its sheer accuracy and extremely low distortion.

DPA 4011A
Austrian Audio might be a new name, but the people behind it have a combined experience of over 350 years in audio engineering, or that's what their marketing team suggests. The OC818 is their first creation, a multipattern large-diaphragm condenser microphone built around a hand made ceramic capsule, made to the same critical dimensions as the classic CK12.
Apples and Oranges
Although this test might seem to compare apples and oranges, as one is a small-diaphragm condenser with a fixed cardioid polar pattern and the other is a multipattern large-diaphragm condenser, the objectives are quite clear.

Julian Bream and AKG C24
Slower transient details, colouration and the ability for a lower self-noise floor are well-documented attributes of a larger capsule, while greater linearity and accuracy are closely associated with a smaller one.
When recording a top grade, luthier classical guitar, we wish to immortalise every detail. And thus, for the last decades, the use of small-diaphragm condenser microphones have prevailed. Most of the iconic recordings that defined the sound of the classical guitar have been made with the large-diaphragm condenser and ribbon microphones though. Many of the Julian Bream recordings, for example, have been made with AKG's stereo C24.
Neutrality might not always be desirable.

DPA 4011A Frequency Response and Polar Pattern


Austrian Audio OC818 Cardioid Frequency Resposne and Polar Pattern
The act and art of recording allow for the development of personal aesthetic, as every choice would have an impact on how the recording will be interpreted and appreciated.
Following this path I want to investigate further if the colouration that is usually a characteristic of large-diaphragm condenser microphones, can sometimes be desirable when recording classical guitar.
And furthermore, try to answer the question if a single multi-pattern microphone, with all the versatility that it bears, could replace or subtitute for a collection of dedicated microphones in classical guitar recording.
Details

Stereo Sets
The recordings were done in AB stereo with a 32cm distance between each microphone, I placed each 4011A and OC818 microphones side by side, as I figured that this will bring the capsules closer together. The microphones were on axis with my guitar, at 88cm high and around 50-55cm from the spruce top. The recordings are dry with no EQ, reverb or other processing anywhere.
High-quality 320kbps mp3 streams:
If you’d like to listen to uncompressed wav files, just send me an email.
Click here for more comparisons and a full review of both the OC18 and a stereo pair of OC818.
Disclaimer: Austrian Audio and DPA sent me the microphones for reviewing without any precondition or obligation to write positively about them. This is an honest presentation, driven by a genuine interest and desire to create a classical guitar microphone database.

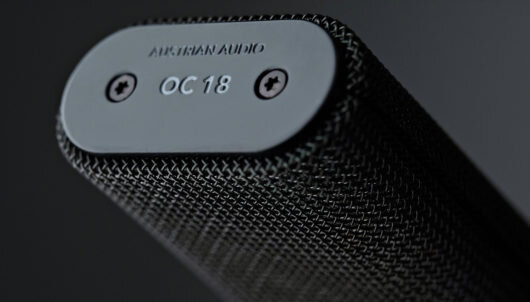
Austrian Audio OC18 on a Classical Guitar
Austrian Audio sent me a stereo pair of their OC818 and OC18 microphones for reviewing, so the first thing I did was to put them up against my Neumann microphones and see how they perform.

Low-cut fitlers and switchable pad.
For those of you who are not familiar with Austrian Audio, here is a little back story. When AKG offices in Vienna got closed, some of its former employees join forces and set out to create something new, true to the Viennese microphone manufacturing heritage. In July 2017, Austrian Audio was officially born.
Handmade CKR12 ceramic capsule
With their new CKR12 ceramic capsule as the centre point, Austrian Audio released their first two microphones last year. The multipattern large-diaphragm condenser OC818, and it's cardioid only version OC18 for those who don't need the extra patterns. Both are priced very competitively, considering their quality and that they are 100% made in Austria.
In a see of clones
Austrian Audio OC18.
In a see of vintage "inspired" microphones that have flooded the market the last decade, I find very refreshing that Austrian Audio, instead of releasing "clones" of the AKGs acclaimed C12 and 414 microphones, they worked two years in the development of new microphones and technologies. In other words, they were paying 22 employees for two years with nothing on the shelves to sell.
Austrian Audio OC18 vs Neumann TLM 193

Austrian Audio OC 18 Frequency Response and Polar Pattern.

Neumann TLM 193 Frequency Response.

Neumann TLM 193 Polar Pattern.

Austrian Audio OC18 and Neumann TLM 193.
In the last couple of years, the TLM193 is the microphone I've been using for my classical guitar recordings. Needless to say, I know exactly how it sounds with my guitars, and I appreciate its pure and honest character. Although I would never record in mono for any professional use, I think it is interesting to find out how a single OC18 compares at half the price of the Neumann, cardioid to cardioid.
I set them up, one on top of the other, around 55cm away from the top of my spruce top guitar, and opposite to the bride, leaning a little towards the soundhole. For the test, I used AEA TRP2 preamps and RME ADI-2 Pro FS converters.
High-quality 320kbps mp3 streams:
Austrian Audio OC18 vs Neumann TLM 102

Neumann TLM 102 Frequency Response.

Neumann TLM 102 Polar Pattern.

Austrian Audio OC18 and Neumann TLM 02
Neumann's budget TLM 102 has always been one of my favourite large-diaphragm condenser microphones for the price with its relatively low-noise electronics, small size and smooth natural capture. Considering that the OC18 is at a similar price, I wanted to see how it stands in comparison.
I set them up similarly with the TLM 102 sitting upside down on top of the OC18.
High-quality 320kbps mp3 streams:
For those who have experience with the TLM 193 or TLM 170, it should be easy to guess, which mic is which. Between the TLM 102 and OC18 it should be a little harder.
If you’d like to listen to uncompressed wav files, just send me an email.
Click here for more comparisons and a full review of both the OC18 and a stereo pair of OC818.

AEA TRP2 Microphone Preamp Review
A black canvas for your acoustic paintings.
AEA designed "The Ribbon Preamp" to guarantee the best operation for their ribbon microphones. Equipped with +48 phantom, the TRP2 can power condenser and active ribbon microphones.
Built for the desk and the road

A simple but effective layout.
With retro looks and an elegant grey finish, I think it looks great on a rack or a desktop. Housed in a lightweight half-rack aluminium chassis, the TRP2 is fairly portable though, perfectly fitting on a remote recording session.
The TRP2 has two-channels with 85dB gain for stereo capture. Each one is equipped with a stepped gain stage (+7dB to +63dB) and variable output control (+22dB) for fine-tuning. Push buttons for phase reverse, a low-cut filter (12dB per octave from 100Hz) and +48 phantom, as well as 3 led level indicators per channel, are located in the front panel.
The preamp is powered by an external PSU that is connected to the rear panel where four XLRs are located as well. Two for the microphone inputs and two for the line outputs. No quarter-inch outputs for unbalanced connections, neither a DI input are available. AEA built a high-quality microphone preamp equipped with only the absolute essentials.
Fade to black

Huge amounts of clean gain.
The sound of the preamp is remarkably transparent and natural, with a very fast transient response for excellent dynamics. With ease, the TPR2 manages to pick up unsurpassed detail out of my classical guitar, while allowing a full-bodied portrayal, with a beautiful midrange, pleasing highs and controlled low-end.
One of the most alluring characteristics of the TRP2 is the incredibly quiet operation. The classical guitar, being a soft and subtle instrument, presents a challenge to record properly. The signal path, designed by Fred Forsell, is evident, the TRP2 maintains every detail and lets the notes fade out to total silence.
The operation of the TRP2 is straight forward and a neatly written manual includes plenty of useful information. The level indicator LED are sufficient for discerning that the levels are healthy. I think that the low-cut filters are set a little too high for my uses, but other than I have no complaints.
Can you handle the truth?

Precise control.
AEA's preamps don't try to complement the source. The true strength of the TRP2 lies in allowing the microphones to capture an honest image with exceptional precision. With an impressive 85dB of absolute clean gain, the preamp ensures outstanding performance and can capture even the quietest sounds.
Alternatives
Priced a little lower, the DAV BG1 is an acclaimed preamp with a similar feature-set, low noise and high quality. In comparison, its sound is somewhat coloured, but that is neither good or bad. Lake people's MPA RS 01 is a straight-wire preamp in a similar form and function, worthy of consideration.
Cons
Low-cut filters are set a little too high for some uses
Pros
Beautiful sound, from top to bottom
Detailed, transparent, and natural sounding
Impressive amounts of gain
Very low noise
Lightweight and portable Sturdy construction
Some classical guitar recordings made with the AEA TRP2:
DPA d:vote 4099g Microphone Review
Studio sound for the stage

Danish Pro Audio is acclaimed for manufacturing high-end condenser microphones for acoustic and classical music. The DPA d:vote 4099 is a super-cardioid condenser microphone aimed to bring a high-quality capture on the stage.
Good things come in small packages
The microphone with its accessories is packed in a neat hard-shell canvas case that is pretty light but offers enough protection, making it excellent for the life on the road. Included is a 1,8m MicroDot cable, an XLR adapter and an instrument mount. I have the 4099g which comes with the guitar mount, DPA offers a plethora of options to suit any instrument.
A 140mm gooseneck holds the miniature 4099 capsule and allows for satisfactory positioning. DPA offers a 180mm extension gooseneck, for even more precise placement and the ability to move the microphone further away from the instrument. A brilliant add-on for the studio or a relatively quiet stage, as the extra distance allows the microphone to capture more of the instrument's surface.
The condenser element is covered by a foam windscreen. Although its very light and compact, it seems super-rugged; except for the detachable cable which gives the impression that is very delicate. Maybe it is my paranoia, but I tend to be extra careful with it when I'm on stage, and you will never catch me out without a backup. Saying that I never had a problem so far.
Hearing the tones

Very easy to mount.
I have used extensively the 4099g on my classical guitar for chamber concerts, usually placing the microphone over the 15th fret and aiming slightly toward the soundhole. Depending on the room, I will adjust further to find the sweet spot. The sound is always balanced and detailed, the DPA delivers a natural and full-bodied representation of my instrument.
With a careful speaker/monitor placement, the DPA can take quite some gain before it starts to feedback. Definitely, enough to compete with a grand piano, string/wind instruments and percussion. The super-cardioid pattern helps in rejecting other instruments and noise, but it's not immune to feedback issues.
A positive aspect of having a microphone mounted on the instrument is that even if I move a bit, the sound always stays the same. Additionally, it unclutters the stage from the various stands.
In the studio, the DPA is not the most qualified performer, the miniature capsule exhibits more self-noise than what is satisfactory. I wouldn't hesitate to use it if I had no other option, but I would choose another mount though for more options in placement.

Flat frequency response on-axis, with a slight presence boost for added clarity.
Essential for all instrumentalists
Liliputian proportions, exceptional sonic quality and excellent craftsmanship, establish the DPA 4099 as a great investment for any instrumentalist. It frees us from the stand prison while rejecting unwanted sounds and still manages to deliver accurate and refined sound.

Soundcheck in Berlin - DPA4099g
Cons
Slightly noisy
The cable is too thin (maybe)
Pros
Balanced and detailed sound
Rejection of unwanted instruments/sounds
Easy to attach-remove
Keeps a constant distance from the instrument on stage

Audient iD14 USB Audio Interface Review
Audient's renowned console preamps on your desktop
The introduction of the iD22 was a huge success for Audient. It combined preamps ported from their expensive consoles, pristine converters, a monitor controller and enough connections to satisfy even the most demanding users. With the iD14, Audient promises to deliver the same quality, into a small, affordable audio interface and accomplishes that by stripping down the device to the bare essentials.
Minimalist appeal
The iD14 is housed in a slim all-metal body with a minimalist design and classy aluminium knobs. It doesn't only look beautiful on any desktop but is robust enough for travelling and location recordings.

An all-metal no nonsense design.
A big encoder knob controls the speaker or headphone output, an illuminated button is in charge of the switch. By pressing down the encoder, the selected output is muted. There is another button for DIM (lowering of the output level) and a user-defined software controlled function key. The physical controls on the iD14 are very intuitive, and all the knobs and buttons have a satisfying feel to them.
The two excellent discreet Class-A mic-preamps have 56dB of gain, with an extra +10dB boost and polar switches available in the software mixer. A high-pass filter, similarly to the iD22, would have also been welcome. My biggest gripe though is that the gain pots are practically usable only about at the last third of their travel. There is not enough juice until then, then they jump in gain even with the slightest turn of the knob, making it difficult to set the levels perfectly.
There is an ADAT input which can accommodate eight additional inputs for bigger projects, but, due to the limitations of that protocol with only a maximum sample rate of 48KHz. The higher sample rate of 96KHz for the extra channels can be attained when only four additional digital inputs are used.

DI and Headphones plugs are easily accessible.
In the front side, there is a high-quality JFET instrument input as well as one headphone output. I like that these are located there, as I usually like to plug-in various headsets.
Capturing Tones
The mic preamps have plenty of clean gain. The sound manages to be transparent, with some added thickness and warmth to the body. The highs are smooth and show a slight boost. The iD14 captures a classy, transparent but not sterile capture that compliments most sources. The DI is excellent as well, designed to emulate the sound of tubes, and I have used it with great success.
The conversion quality in unforeseen for an interface of this price, the speakers output is quite revealing, making precise EQ and reverb adjustments a breeze. The headphone output it looses some of the clarity but is decent enough for the project studio.
For those who like to work on the go, the iD14 can be powered via USB from your laptop, Audient claims that to achieve that, the conversion had to be a step down from their flagship models. That shouldn't be a concern though, as the iD14 sill delivers a joyful, engaging playback. Unfortunately, you need to plug into the mains power to activate the +48 phantom.
Lastly, the output metering ladder has eight pairs of LEDs, but sadly there is no way to check the preamp input level on the device. You can still see the levels in the software mixer, but considering that the interface is marketed towards project studios, having more visual meters on the box would have been more practical.
I/O connections.
Putting that aside, I have used the iD14 numerous times. I have recorded classical and electric guitars, cello, various female and male voices, as well as solo piano and a piano trio on location. It always delivered an excellent sound with stable operation.
Life in a digital world
The software mixer has a nice-looking modern UI and follows a similar spartan approach to the physical unit, allowing access to some basic and advanced settings of the iD14. The most important feature is the ability to wire the input directly to the speakers for zero-latency monitoring while mixing it with the playback from the computer. The ability to create different CUE mixes for the headphones and the speakers is also neat.
Samples with the iD14 from my residency in Lithuania
Bare bones finesse
With the iD14, Audient strips away all the non-essential functions while still retaining the core qualities of its bigger siblings to deliver a high-performance interface to the project studios.
Alternatives
If you are happy with the features, nothing can beat the iD14 at this price range. Focusrite Clarett 2pre USB has a similar feature-set, with better conversion, but at a higher cost.
Pros
Excellent sounding preamps
Impressive converters
Robust build
An intuitive, uncluttered UI
Price
Cons
Gain knobs too jumpy at the last third of the turn
No input-metering on the device
Lack of high-pass filter

Neumann TLM 102 Microphone Review
The Neumann TLM 102 is a small, elegant and affordable condenser microphone with an open character, a silky high-end, low self-noise and a distortion-free operation.
A true Neumann for the project studio.
The Neumann TLM 102 is a small, elegant, and affordable condenser microphone with an open character, a silky high-end, low self-noise and distortion-free operation.
Inspection
The TLM 102 is a large-diaphragm, transformerless capacitor microphone with a fixed-cardioid polar pattern. The lack of pad and filters implies a bare-bones design, allowing Neumann to bring the costs down without compromising on the sound.
A relatively small and edge-terminated diaphragm puts it towards the more natural Neumann microphones, and with an SPL tolerance of 144 dB, the TLM 102 is a foolproof candidate for capturing gracefully almost everything.

Neumann badge indicates the front side of the microphone.
It has a classic Neumann design available in a black or nickel matte finish. I have the nickel mic and I find it very stylish, the black one looks just as beautiful. The microphone is engineered to perfection, the chrome ring below the basket and red Neumann badge, give it a classy retro-industrial look. With a tiny size and a weight of approximately 210g, placement is a child's play.
The TLM 102 ships in a foam-lined cardboard box (another cost-cutting move from Neumann), a departure from the usual luxurious wooden box, but it securely fits snug the microphone and stand-mount or shock-mount. The box is sufficient for storage, but I wouldn't use it for travelling.
The frequency range of the TLM102 is flat up to 6kHz, where a slight presence boost kicks in. This adds a touch of brilliance without ever sounding harsh or shrill. It has a relatively low input noise of 12dBA and a moderate sensitivity, allowing it to capture with blooming detail even nuanced delicate instruments.
A high-pass filter could have been useful, as the microphone is sensitive even to the very low frequencies. Engaging one on the preamp or DAW can be sufficient though.

Flat frequency response with a slight presence boost for silky highs.
Investigation
On a classical guitar with the mic opposite of the bridge, leaning slightly inwards towards the sound-hole, and at the distance of around 50 cm. The TLM 102 sounds glorious, with full-bodied lows and mids, and a pleasing high-end, with no sign of harshness. The slight high-end boost contributes to an added clarity, but unlike many budget condensers, it doesn't emphasize unwanted mechanical sounds of playing the guitar.
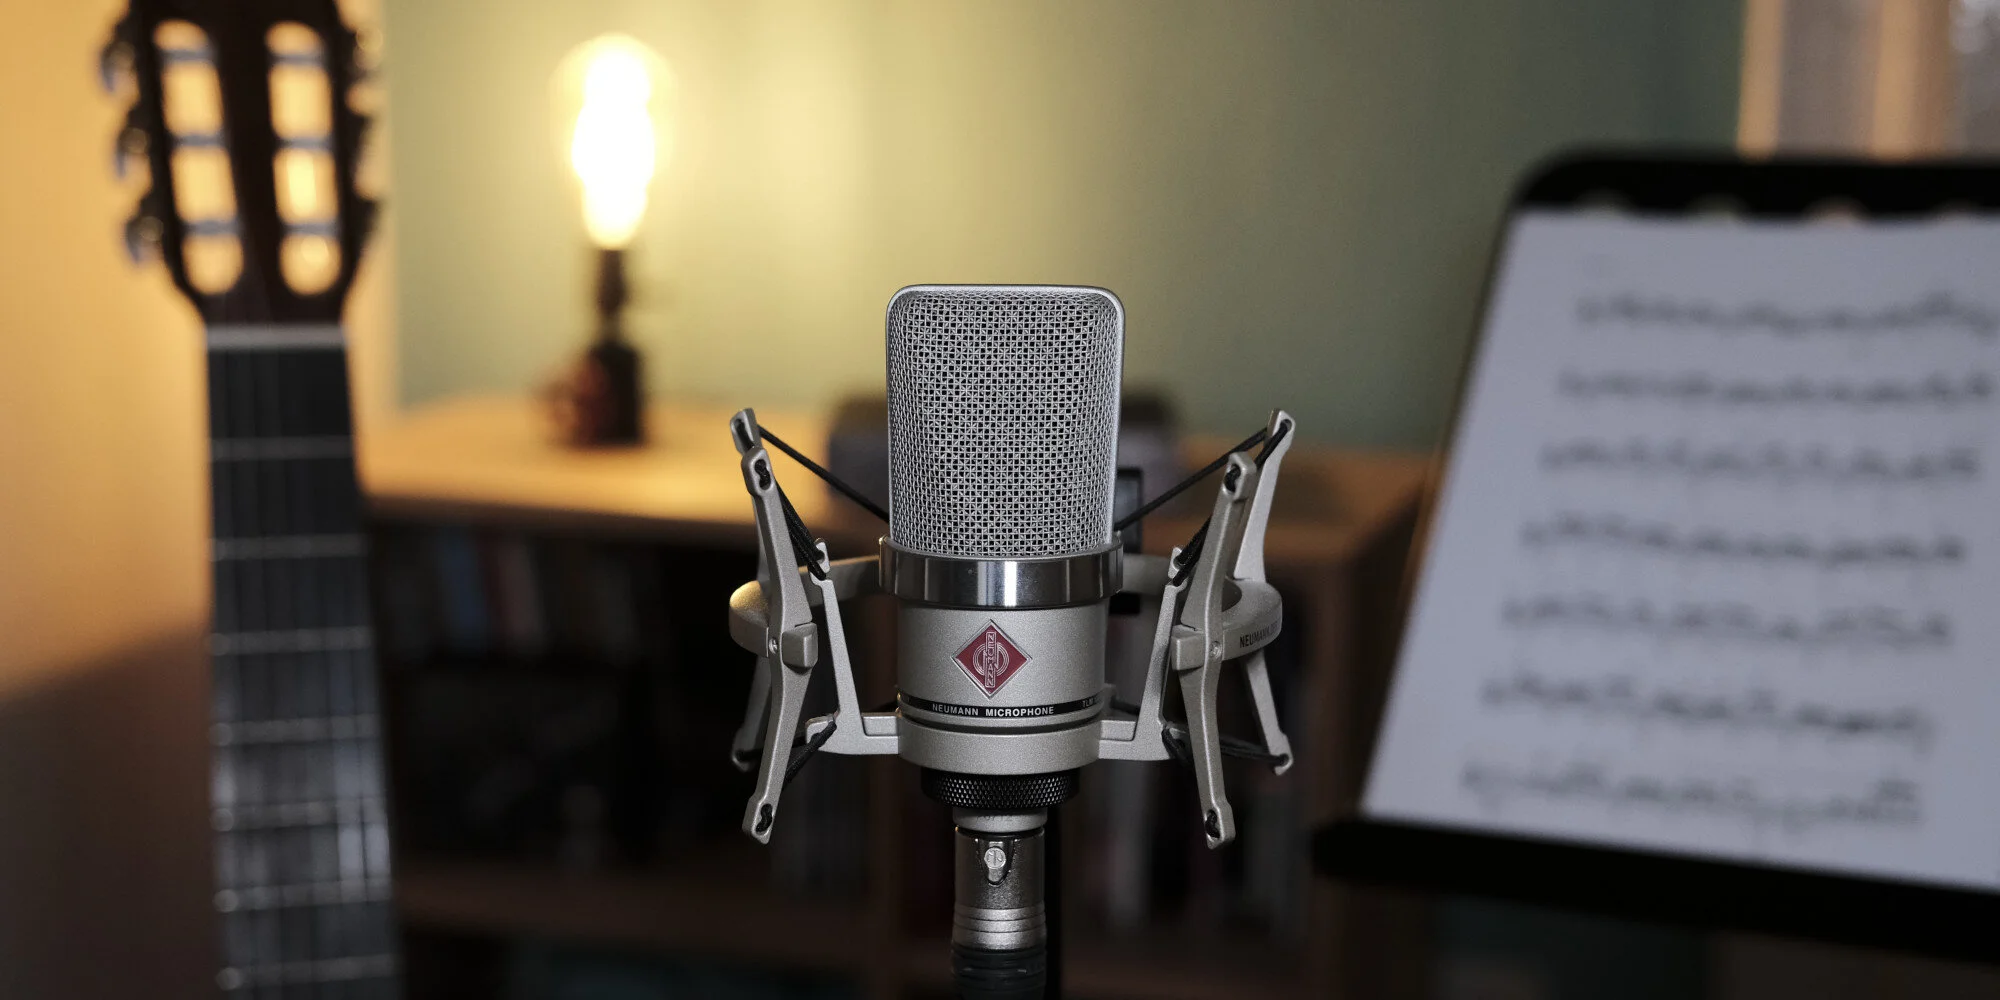
Newly designed shock-mount with a cut for closer positioning.
I tried the TLM 102 on a brilliant cellist, another instrument that is quite difficult to record convincingly. The tiny Neumann retained its well-behaved nature and clear capture.
On female voices, the proximity boost in the low-mids together with the relatively natural highs of the TLM 102, bring a smoky, almost old-fashioned character. When used on male voices, the microphone provides a thick and rich timbre that allows. The TLM 102 can complement a variety of voices, it always retains its rich and full personality.
Diagnosis
The grille incorporates a dense pop screen, effectively reducing plosives.
After owing a TLM 102 for a few years, one trait remains consistent, this microphone exhibits a strikingly clear-sounding capture but shows enough temper to complement most sources. A pretty desirable attribute, especially for the project studio, as many home recordists will probably use one microphone to record almost everything.
Alternative
At the same price, the Miktek C1 offers a similar natural character with a silky high-end. The Neumann TLM 107 is an excellent alternative if you don't mind spending more, as it offers a similarly natural and smooth capture, with even less self-noise, and added versatility with its 5 polar patterns.
Pros
Full and rich character
Silky highs
Price
Size and weight
Cons
No High-pass filter
Cardboard box