
Austrian Audio OC818 and the PolarDesigner plugin
What if you could set-up the microphones, record your classical guitar and configure the best polar pattern your room after the recording is finished?

Austrian Audio PolarDesigner Plugin
Polar pattern selection on large-diaphragm condensers is not a new thing, a few microphones intergrade continuously variable selectors that allow in-between pattern selection, or allow the two capsules to be recorded in separate tracks. Austrian Audio expands the possibilities with the PolarDesigner plugin.
The most important feature of the plugin is that it enables us to craft the perfect polar pattern responses across up to five crossover bands, at any time after the recording is finished. To make the plugin even more useful, Austrian Audio has packed a lot more into the PolarDesigner to perfectly fine-tune your sound.
Usual suspects

Austrian Audio OC818 M/S Pair
I decided to try it first on an M/S setup, I used the two output method only on the Mid microphone, I positioned it at 96cm high and around 60cm from the top of my classical guitar with a slight downward angle so that it is on-axis with the spruce top. I placed the second OC818 on top of the first in Figure-8 pattern.
Basic sounds
With the Side mic muted, I concentrated on the Mid mic for a while.
The unprocessed track, with each capsule recorded at a different track, is unusable without the PolarDesigner plugin, but that was expected.
First, I wanted to see how the basic patterns would behave. So, I enable the plugin, as well as some lean low-cut and high-cut filters.


Tweaking the patterns
After playing around with the controls for some time, I found that the Omni pattern assigned to the lower frequencies gives a beautiful body sound to my guitar. Cardioid and Wide-Cardioid patterns were chosen for the mids, to bring tones of the guitar in focus. And for the highs, I used more of a Wide-Cardioid pattern to add some room ambience.

I also used the free-field equalization preset, which I'm not exactly sure what the underneath processing is, but gave more depth and definition to the overall sound. I boosted the lows a little with the proximity control bar.

And finally, I added the Mid channels to the mix and balanced all three to get a natural room sound.
Conclusions
As you can see, the possibilities are endless, and you only have to position the microphones once, record a couple of takes and then figure out the perfect polar response during mixing.
Additionally, on remote location recording, lugging up monitors to accurately check that the microphones are placed in the most desirable position can be quite unattractive. Headphones, on the other hand, are never the best option to judge stereo spread and overall tonal balance. The PolarDesigner plugin allows for fine-tuning to take place with the speakers and room you know and trust at your mixing room.
Click here for the full review of both the Austrian Audio OC818.
PolarPilot App

Austrian Audio PolarPilot App
Austrian Audio designed an App that allows for real-time wireless control over the analogue bias voltages of the OC818, allocating 255 discrete polar patterns for us to choose. Plus access to high-pass, and pad in realtime via Bluetooth. Unfortunately, they didn't send me the OCR8 Bluetooth dongle that is required for this to work, so I couldn't test it out.
The judgement day

PolarDesigner Terminator Control
The plugin allows uses some sort of AI that determines what is important and not and provides a spill terminator or maximize target algorithm which should in principle reduce unwanted spill from other instruments But, I didn't get to use.

DPA 4011A vs Line Audio CM3
Line Audio is a relatively unknown Sweedish company, or rather a one-man shop, dedicated to manufacturing high-quality, unhyped microphones and linear pre-amplifiers. They have been in this business for more than 30 years, and by cutting the middle man, no advertising and minimizing cost on all the not essential elements, they offer their products at the most affordable prices.

DPA’s premium case.
DPA, on the other hand, is one of the leading names in the classical recording world. Many recording engineers, producers and musicians sing praises for their clarity and honest presentation. The microphones, as well as the accessories that accompany them, are as premium as it gets. But, performance comes at a cost.
In this duel, I wanted to see if the CM3 cardioid condenser stands any chance against the 4011A at a less than a tenth of its price. In other words, could someone with a limited budget still manage to get a decent recording?
Setting Up
I positioned the microphones at a small AB setup with 36cm between each microphone, at 96cm high and 55cm distance from the top of the guitar. At this distance, the microphones can capture the true sound of the guitar, and with their cardioid pattern, reject most of the room acoustics.
DPA 4011A Frequency Response and Polar Pattern

Line Audio CM3 Frequency Response and Polar Pattern
The details matter
Listening to the recordings, the DPA microphones have breathtaking clarity and detail at every frequency. They demonstrate a better resolution and capture a holographic image of the classical guitar, with more realism and depth. The 4011A are brutally honest microphones, but if you are recording a luthier grade guitar and a great guitar player in a beautiful sounding room, you want it all on tape.
The CM3s surprisingly (or not, if like me you have used them for a while) sound very close to the DPA. They are a little more plain sounding, with less resolution and depth, in comparison it feels feel like something is missing from the image. They are also less sensitive and can benefit a lot from a good preamp, but peculiarly they were only slightly noisier than the 4011A in these recordings.

Line Audio’s basic but very portable case.
A distinct approach
The Line Audio CM3s come at a very minimal package, shipped in a simple plastic box, with a basic plastic microphone holder and a decent windscreen. They are so inexpensive, so there is nothing to complain there really. They are also light and small enough, almost as small as an XLR adaptor, that I'm not hesitant to carry a pair even my jacket's pockets.
DPA sent me for test their premium stereo set, that comes with a luxury case and all the accessories you might ever need. The craftsmanship is impressive, everything feels finely processed with all the pieces machined out of solid aluminium. The full assembly looks stunning. Their stereo bar, while relatively expensive, is the best I've ever used.

DPA 4011A Stereo Set, all the accessories you’ll ever need.
Single 4011A or a more basic stereo set up is available, they come with only the essential accessories in a hardshell nylon case. This case is also of premium quality and judging by my experience with the d:vote 4099g (you can read my review here), I prefer this kind of case to wooden cases that come with most higher-priced microphones. As you cannot carry them easily for location recording because of weight and size. This is true especially for small-diaphragm condensers, which might see more commute than larger studio microphones.
For different use cases
In conclusion, the 4011A is the better microphone of the two in every aspect. Taking us a step closer to capturing the classical guitar in all it's nuance. Also, if you charge for your recording services, showing up with the DPA set will reassure your clients for the extent of quality you are committed to.
If you are on a limited budget, or just want to record yourself for non-commercial uses, the Line Audio microphones are the best-kept secret of the recording world. The CM3s can capture classical guitar with realism and honesty and are so inexpensive, you can buy a few.
In conclusion, the 4011A is the better microphone of the two in every aspect. The engineering and the accessories are unparalleled in quality, not to mention the sheer detail and sound quality that they capture. Taking us a step closer to capturing the classical guitar in all it's nuance. Also, if you charge for your recording services, showing up with the DPA set will reassure your clients for the extent of quality you are committed to.
But, if you are on a limited budget, or just want to record yourself for non-commercial uses, don't shy away from the Line Audio microphones, as in my experience it is hard to find any other small-diaphragm condenser microphone with such natural characteristics at this price range or even many times more expensive. The CM3s can capture classical guitar with realism and honesty and are so inexpensive, you can buy a few.

Austrian Audio OC 818 vs DPA 4011A Stereo Pairs

Austrian Audio OC818
DPA is a high-end microphone company and needs no introduction, they have been around for around 30 years (their capsule design begins somewhere around 1950 with their first measuring microphones) and their microphones have been used on countless recording sessions in the finest concert halls in the world. The 4011A is a small-diaphragm cardioid condenser, praised by engineers and musicians for its sheer accuracy and extremely low distortion.

DPA 4011A
Austrian Audio might be a new name, but the people behind it have a combined experience of over 350 years in audio engineering, or that's what their marketing team suggests. The OC818 is their first creation, a multipattern large-diaphragm condenser microphone built around a hand made ceramic capsule, made to the same critical dimensions as the classic CK12.
Apples and Oranges
Although this test might seem to compare apples and oranges, as one is a small-diaphragm condenser with a fixed cardioid polar pattern and the other is a multipattern large-diaphragm condenser, the objectives are quite clear.

Julian Bream and AKG C24
Slower transient details, colouration and the ability for a lower self-noise floor are well-documented attributes of a larger capsule, while greater linearity and accuracy are closely associated with a smaller one.
When recording a top grade, luthier classical guitar, we wish to immortalise every detail. And thus, for the last decades, the use of small-diaphragm condenser microphones have prevailed. Most of the iconic recordings that defined the sound of the classical guitar have been made with the large-diaphragm condenser and ribbon microphones though. Many of the Julian Bream recordings, for example, have been made with AKG's stereo C24.
Neutrality might not always be desirable.

DPA 4011A Frequency Response and Polar Pattern


Austrian Audio OC818 Cardioid Frequency Resposne and Polar Pattern
The act and art of recording allow for the development of personal aesthetic, as every choice would have an impact on how the recording will be interpreted and appreciated.
Following this path I want to investigate further if the colouration that is usually a characteristic of large-diaphragm condenser microphones, can sometimes be desirable when recording classical guitar.
And furthermore, try to answer the question if a single multi-pattern microphone, with all the versatility that it bears, could replace or subtitute for a collection of dedicated microphones in classical guitar recording.
Details

Stereo Sets
The recordings were done in AB stereo with a 32cm distance between each microphone, I placed each 4011A and OC818 microphones side by side, as I figured that this will bring the capsules closer together. The microphones were on axis with my guitar, at 88cm high and around 50-55cm from the spruce top. The recordings are dry with no EQ, reverb or other processing anywhere.
High-quality 320kbps mp3 streams:
If you’d like to listen to uncompressed wav files, just send me an email.
Click here for more comparisons and a full review of both the OC18 and a stereo pair of OC818.
Disclaimer: Austrian Audio and DPA sent me the microphones for reviewing without any precondition or obligation to write positively about them. This is an honest presentation, driven by a genuine interest and desire to create a classical guitar microphone database.

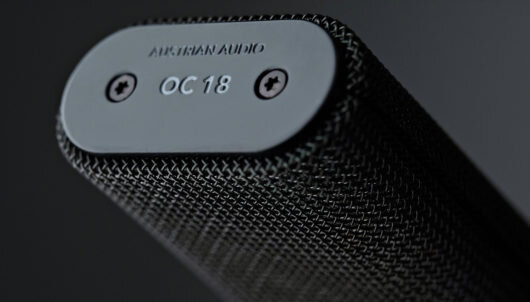
Austrian Audio OC18 on a Classical Guitar
Austrian Audio sent me a stereo pair of their OC818 and OC18 microphones for reviewing, so the first thing I did was to put them up against my Neumann microphones and see how they perform.

Low-cut fitlers and switchable pad.
For those of you who are not familiar with Austrian Audio, here is a little back story. When AKG offices in Vienna got closed, some of its former employees join forces and set out to create something new, true to the Viennese microphone manufacturing heritage. In July 2017, Austrian Audio was officially born.
Handmade CKR12 ceramic capsule
With their new CKR12 ceramic capsule as the centre point, Austrian Audio released their first two microphones last year. The multipattern large-diaphragm condenser OC818, and it's cardioid only version OC18 for those who don't need the extra patterns. Both are priced very competitively, considering their quality and that they are 100% made in Austria.
In a see of clones
Austrian Audio OC18.
In a see of vintage "inspired" microphones that have flooded the market the last decade, I find very refreshing that Austrian Audio, instead of releasing "clones" of the AKGs acclaimed C12 and 414 microphones, they worked two years in the development of new microphones and technologies. In other words, they were paying 22 employees for two years with nothing on the shelves to sell.
Austrian Audio OC18 vs Neumann TLM 193

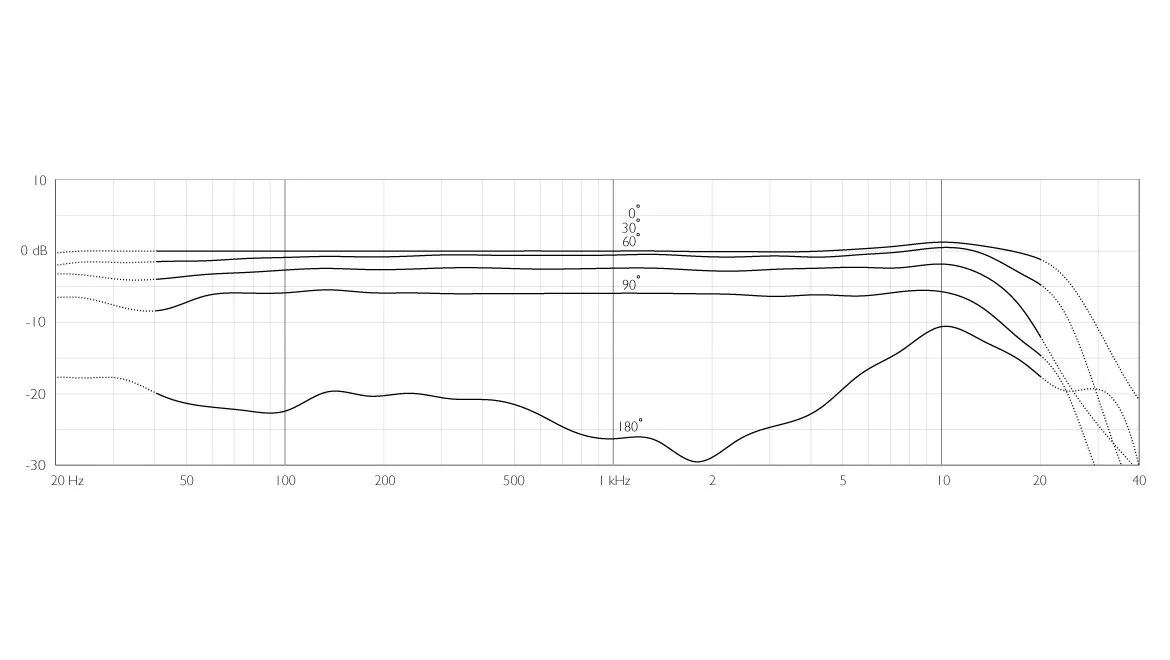
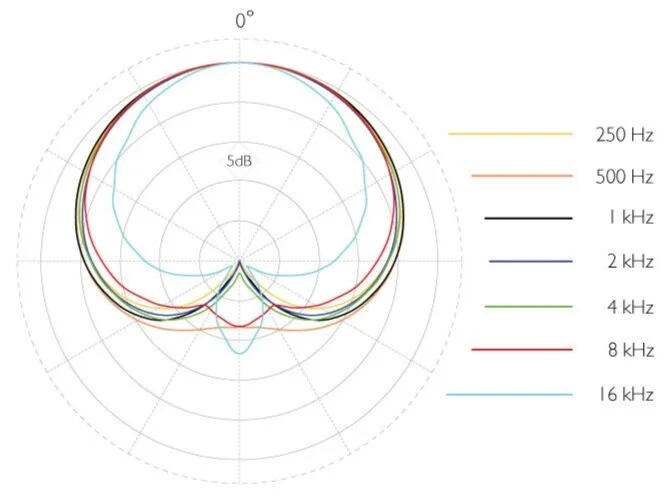
Austrian Audio OC 18 Frequency Response and Polar Pattern.

Neumann TLM 193 Frequency Response.

Neumann TLM 193 Polar Pattern.

Austrian Audio OC18 and Neumann TLM 193.
In the last couple of years, the TLM193 is the microphone I've been using for my classical guitar recordings. Needless to say, I know exactly how it sounds with my guitars, and I appreciate its pure and honest character. Although I would never record in mono for any professional use, I think it is interesting to find out how a single OC18 compares at half the price of the Neumann, cardioid to cardioid.
I set them up, one on top of the other, around 55cm away from the top of my spruce top guitar, and opposite to the bride, leaning a little towards the soundhole. For the test, I used AEA TRP2 preamps and RME ADI-2 Pro FS converters.
High-quality 320kbps mp3 streams:
Austrian Audio OC18 vs Neumann TLM 102

Neumann TLM 102 Frequency Response.

Neumann TLM 102 Polar Pattern.

Austrian Audio OC18 and Neumann TLM 02
Neumann's budget TLM 102 has always been one of my favourite large-diaphragm condenser microphones for the price with its relatively low-noise electronics, small size and smooth natural capture. Considering that the OC18 is at a similar price, I wanted to see how it stands in comparison.
I set them up similarly with the TLM 102 sitting upside down on top of the OC18.
High-quality 320kbps mp3 streams:
For those who have experience with the TLM 193 or TLM 170, it should be easy to guess, which mic is which. Between the TLM 102 and OC18 it should be a little harder.
If you’d like to listen to uncompressed wav files, just send me an email.
Click here for more comparisons and a full review of both the OC18 and a stereo pair of OC818.
Purposeful Practising
A Personal View on the Art of Practising the Classical Guitar
One of the most common issues that I encounter among intermediate and sometimes even advanced guitar students is that they don't know how to achieve the most with their practising. They usually try to memorise a piece, then play it from the top a few times, and move on to the next.
This approach is not what I consider purposeful practising, as it doesn't lead to the mastery of any of the aspects of performance. This epidermal handling of repertoire hinders the chances to unlock hidden details. In other words, you ought to become an expert!
Here are the steps I take when I'm learning a new piece.
The First Read

I usually read the whole piece once or twice, not only this helps to improve and maintain my sight-reading skills in the long run, it allows me to have a broader idea of what the piece is.
Finding Fingerings
After the first read, I make fixed and deliberate string and fingering choices, measure by measure and phrase by phrase. I evaluate the different options based on the character of each voice, the ability to connect with the previous and next phrases, and by ensuring finger independence at its maximum.
I take notice on published fingering suggestions, but I don't rely on them as I almost always have to change them.
Notes, Rhythms, and the Choreography of the Fingers
I go through every measure with a metronome to verify that all my notes and rhythms are correct, and make sure on the deliberate and purposeful movement of my fingers on the fretboard. I repeat the part I'm working on as many times as it is needed, establishing an exact finger choreography.
Confidence
Slow, deliberate practising and repetition are the devices that build performance confidence. What you want to avoid is to use the same tools to reinforce a faulty technique.
I practice at a comfortable tempo; from a couple of measures to a full section, and finally the whole piece. My objectives are clear tone and perfect delivery. When I make a mistake, I start over!
Building Speed

Practising with a metronome keeps us in time, and creates a reflection in our brains of what the piece is like, and how our fingers should be moving to achieve that. Therefore when it is time to start working on speed, I start at a very comfortable tempo and with small increments (around 4 to 6 BPM) I practice until the point that the piece starts to fall apart. I always push a little further than that, but at the last playthrough, I return to a comfortable tempo.
Interpretation
When notes and tempo are in place, it is time to work on phrasing and dynamics. An awfully important nuance of performance as it expands our capability for individual development, and the capacity to communicate deeper emotions with our music. Yet, it is probably the aspect of music that is the most difficult to teach, and often teachers and players don't contemplate.
Writing about phrasing and dynamics in music is like talking about a painting or a picture, but I can give you some of the processes that guide me to improve my interpretation skills.
First, I read about a specific epoch and learn as much as I can about the individual composer that I'm studying. It doesn't mean that I have to restrict myself to a clichéd way of performance; on the contrary, with a greater insight into what a piece is about, we become freer to make deliberate choices and shape or phrases.
An equally important step is that I try to listen to as many performances of this piece as I can find. I try to listen to all the small details that we generally don't pay so much attention and make notes. I ask questions, make notes. For music adapted from other instruments, I like to listen to performances on the original instrument.

The key-words here are to become informed, purposeful and conscious of all the choices you have to make to shape your interpretation.
Practising Performance
Practising and performing are two different concepts with distinct purposes. While I practice to learn how to move my fingers more accurately in an almost mechanical and unconscious motion, to minimise mistakes, and determine the minutiae, hoping eventually to become a master of a work. The focus in performance is to carry out in a focused manner the essence of a piece, have a concise and nuanced meaning, and not to allow small mistakes to destruct the cohesiveness of the piece.
After breaking up all the individual elements for better control of phrasing and dynamics, it is time a put it all together. In consequence, I conclude every practice session with an actual performance of the piece I'm learning.
I treat this final segment as a legitimate performance, one that takes place in front of an audience. If a mistake occurs, I attempt to minimise its significance. I don't stop, but I carry on until I play the whole piece - sometimes the whole programme that I decided to play. I record my practice performance for critique!
Revision
On my next practice session, I start working on the parts that were not executed well, try to understand the technical difficulties or problems that might cause that. I attack the parts in question and attempt to find solutions.
The Informal Recital

Even if you are not yet a performing guitarist, or might not even aspire to be one, I recommend that you give short informal recitals to your friends and family. Not only it is a fun way to spend a Sunday afternoon, but also nothing builds confidence in your skills more than the sound of warm applause.
Be mindful, play only the pieces that you can execute adequately; nobody wants to see you struggle with a difficult piece that is way out of your level (yet). Even if that means that your recital should only be 5 minutes long, eventually you will build on that. Lastly, don't forget to offer them a glass of wine or two before your recital.
Closing Thoughts
Practising any instrument requires a lot of time and effort, and the guitar is no exception. If you take action to make your practising more focused, purposeful and efficient; your playing with developing in a similar deliberate manner. One that leads to the immensely rewarding experience of masterfully playing the guitar.

Practising Triads & Inversions
An Intensive Journey to Demystifying the Fretboard - Part 3
If you haven’t read yet, make sure to check the previous segment of the series:
Part 2 - Understanding Double Stops
Triadic harmony is so profoundly embedded into the western culture that, even when played out of context, their sound is so powerful that our souls, minds and bodies still revert to their meanings.
Therefore, our next stop in the journey to the further demystification of the fretboard could not be anything but the Triads; regardless of how well you think you know them.
The Triad
A triad is a set of three notes that can be stacked vertically in thirds.

G Triads in Root Position.
Triad Inversions
When any note other than the root is in the lowest voice, the triad appears to be in inversion. Inversions of triads have distinct qualities and attributes.

G Triad Inversions
All Inversions
The first step is to learn the Triads and their Inversions in all positions across the different string-sets.

G Triad Inversions - All String Sets
The Diagonal Guitar
After getting comfortable with these, the next step is to practice the Triads in a diagonal array - starting on the lowest note available which is not always the root. This approach provides the most effective way to have the whole fretboard at your disposal at any time.

G Triad Inversions in a diagonal array.
Diagonal Diatonic Triads
Once you start feeling comfortable with the G major Triad, apply the same approach to all diatonic triads in the key of G major.

Practising Triads in Pairs
Triads are almost never found alone, they usually act in cooperation with other sonorities that precede and follow them. Much like all music anyway; we experience sound in time and we give meaning to it by appreciating how it unfolds.
Practising triads in pairs is a useful exercise to realise how harmonies connect as well as a way to force ourselves to practice more than one things at the same time.
For now, practice diatonic triads that their roots are:
A fourth/fifth apart - these have one note in common
A third/sixth apart - these have two notes in common
A second/seventh apart - these don’t have any notes in common

An Intensive Journey to Demystifying the Fretboard - Quick Access
Part 1 - Practising Scales with Creativity
Part 2 - Understanding Double Stops
Part 3 - Practising Triads & Inversions
Part 4 - Learning the Open Triads
Part 5 - Voice Leading for Classical Guitar
Part 6 - Connecting Harmonies with Melodic Lines

AEA TRP2 Microphone Preamp Review
A black canvas for your acoustic paintings.
AEA designed "The Ribbon Preamp" to guarantee the best operation for their ribbon microphones. Equipped with +48 phantom, the TRP2 can power condenser and active ribbon microphones.
Built for the desk and the road

A simple but effective layout.
With retro looks and an elegant grey finish, I think it looks great on a rack or a desktop. Housed in a lightweight half-rack aluminium chassis, the TRP2 is fairly portable though, perfectly fitting on a remote recording session.
The TRP2 has two-channels with 85dB gain for stereo capture. Each one is equipped with a stepped gain stage (+7dB to +63dB) and variable output control (+22dB) for fine-tuning. Push buttons for phase reverse, a low-cut filter (12dB per octave from 100Hz) and +48 phantom, as well as 3 led level indicators per channel, are located in the front panel.
The preamp is powered by an external PSU that is connected to the rear panel where four XLRs are located as well. Two for the microphone inputs and two for the line outputs. No quarter-inch outputs for unbalanced connections, neither a DI input are available. AEA built a high-quality microphone preamp equipped with only the absolute essentials.
Fade to black

Huge amounts of clean gain.
The sound of the preamp is remarkably transparent and natural, with a very fast transient response for excellent dynamics. With ease, the TPR2 manages to pick up unsurpassed detail out of my classical guitar, while allowing a full-bodied portrayal, with a beautiful midrange, pleasing highs and controlled low-end.
One of the most alluring characteristics of the TRP2 is the incredibly quiet operation. The classical guitar, being a soft and subtle instrument, presents a challenge to record properly. The signal path, designed by Fred Forsell, is evident, the TRP2 maintains every detail and lets the notes fade out to total silence.
The operation of the TRP2 is straight forward and a neatly written manual includes plenty of useful information. The level indicator LED are sufficient for discerning that the levels are healthy. I think that the low-cut filters are set a little too high for my uses, but other than I have no complaints.
Can you handle the truth?

Precise control.
AEA's preamps don't try to complement the source. The true strength of the TRP2 lies in allowing the microphones to capture an honest image with exceptional precision. With an impressive 85dB of absolute clean gain, the preamp ensures outstanding performance and can capture even the quietest sounds.
Alternatives
Priced a little lower, the DAV BG1 is an acclaimed preamp with a similar feature-set, low noise and high quality. In comparison, its sound is somewhat coloured, but that is neither good or bad. Lake people's MPA RS 01 is a straight-wire preamp in a similar form and function, worthy of consideration.
Cons
Low-cut filters are set a little too high for some uses
Pros
Beautiful sound, from top to bottom
Detailed, transparent, and natural sounding
Impressive amounts of gain
Very low noise
Lightweight and portable Sturdy construction
Some classical guitar recordings made with the AEA TRP2:

Line Audio CM3 on a Classical Guitar
The Swedish Line Audio CM3 microphones are the best-kept secret of the audio world, not only they sound great capturing the nuance and timbre of acoustic sources in the most natural way, but they are incredibly cheap and small!
No affiliation whatsoever, I just like them a lot!
Initial Review
Roger is the one and only person involved in the design and manufacturing of the Line Audio products, and he has been making high-quality microphones and preamps at a low price for decades; all handcrafted in Sweeden.
It is impossible to find other microphones that come close to the quality of the CM3s, both in craftsmanship and sound properties, without spending several €100s more. They are balanced across all frequencies and offer a smooth and clear pick-up, without annoying frequency boosts that certainly don't compliment a sensitive and delicate instrument such as the classical guitar.
Roger is building these microphones himself, and doesn't advertise at all; this is the reason why he can keep the prices so low, and why you don't hear so much about them.
Trevelling with the CM3s
On March 2018 I travelled to Lithuania for a month, I was commissioned to compose a solo guitar suite (to be released in March 2020). So the two tiny CM3s, in their practical plastic cases; although unnecessary for the purpose of my work there, were proven to be great tools to have.
My only regret is that I didn't get to record in this beautiful church, but with -28 degrees Celcius, maybe it was a good decision.
Here are two of the pieces that I recorded there, pluged into an Audient iD14 (read my review). The CM3s, togheter with the iD14 make a compeling and affortable pair for travelling guitarists.
Closing Thoughts
After owning a pair for about two years now, having recorded my guitar, cello, solo piano, a piano trio with violin and flute, as well as several voices and a choir; I can honestly say that I can comfortably use them in any situation. I recommend them without hesitation to beginner and intermediate recordists with a sane budget.
My only complaint would be that you need to pair them with a decent preamp as they are not very sensitive. When I compare them with Schoeps, DPA or Neumann microphone that cost 10X more, I find that they are a little less detailed especially in high-mids and highs. But, for the price, or even for microphones that cost less than €1000 a pair, I haven't found anything that comes close for recording acoustic and classical music.

Understanding Double Stops
An Intensive Journey to Demystifying the Fretboard - Part 2
If you haven’t read yet, make sure to check the previous segment of the series:
Part 1 - Practising Scales with Creativity
I always find it fascinating how much colour we can squeeze out of combining just two notes together.
Traditionally, the most common use of the double stop is to add more weight and support to melodic lines. Therefore it’s our obligation to study them exhaustively since not only they can assist us with the further demystification of the fretboard but they are also quite useful compositional elements.
Within one octave can be found the intervals of the second, third and fourth as well as their inversions fifth, sixth and the seventh. It is very useful to think of these pairs of intervals as reflections on a mirror since their effects are similar and we deal mostly with how much space you leave between the voices.
The following happens when we invert the intervals:
Seconds become Sevenths and vice versa
Thirds become Sixths and vice versa
Fourths become Fifths and vice versa
Also:
Major intervals become Minor and vice versa
Diminished intervals become Augmented and vice versa
Perfect intervals remain Perfect
Bonus Info:
When Major or Perfect intervals become a half step larger are called Augmented
When Minor or Perfect intervals become a half step smaller is called Diminished
The diverse pool of emotions and colours that different intervals convey can be by a not so subtle margin subjective and therefore their uses differ across various cultures, centuries and genres of music.
It is generally accepted though that:
Thirds and a Sixths are consonant and colourful
Perfect Fourths and Fifths are tonally ambiguous
Seconds and Sevenths are dissonant and provide plentiful tension
Music with excessive use of dissonance can sometimes be alienating but contrarily music without tension and dissonance can quickly become boring and too convenient. A way to use dissonances in a more companionable tone is to hide dissonant intervals within a consonant texture so that they become less animating and dominant features of the overall music.

Things to do:
Explore all intervals in the same diagonal manner similar to the scales practising
Pause and try to think what each interval brings out to youCreate miniature works or improvise only with the use of double stops, why not restrict yourself to only one type of double stop
Find uses of double stops in the works of the composers you like and analyse them.
When practising intervals and double stop, my goal is to be able to recall any sound without much thinking and to be able to play anything, anytime and everywhere on the guitar!
After all, double stops are 66,6% triads.
An Intensive Journey to Demystifying the Fretboard - Quick Access
Part 1 - Practising Scales with Creativity
Part 2 - Understanding Double Stops
Part 3 - Practising Triads & Inversions
Part 4 - Learning the Open Triads
Part 5 - Voice Leading for Classical Guitar
Part 6 - Connecting Harmonies with Melodic Lines

Practising Scales with Creativity on a Classical Guitar
An Intensive Journey to Demystifying the Fretboard - Part 1
First Notes
Learning and practising all twelve (or twenty-four) scales is essential for any guitarist, as it is an efficient way of building technique and developing awareness. But, practising doesn't have to be a purely mechanical exercise.
My main objectives in the way that I approach the instrument are:
to be able to see all notes across the whole fretboard and how they relate,
to stop relying on fingerings as much as possible as they can easily become a prison the more one relies on them,
be able to sing or hear a melody and play it without much fuzz.
Practicing with Games

What I found useful was to treat practising as distinct small games that have different rules.
Some examples of different games:
Starting on the lowest note of the scale, play four notes per string up to the highest
Do the same with starting on the next note - that will create a different path to follow, so that will make it impossible to start memorising fingerings
Do the same by using only one finger on the left hand - again it works against memorising patterns
Start on a different but higher position and play two notes per string - that will lead to a different kind of diagonal path
Play only specific intervals - like only 3rds or specific up-down combinations
Exploring the fretboard
Additionally, a different type of game is what I would call Explorative Improvisation, where I thoughtfully improvise with a specific objective.
Here are some rules:
You are only allowed to use the notes of a specific scale
You can put range restrictions as well
Every time you play anything that is something, stop and analyse it, invert it, play it in different ranges and areas of the fretboard
If you feel that you are stuck in a rut - playing the same things, again and again, restrict yourself to a part of the fretboard that you are not as familiar
Allow yourself to make melodies only with using a specific or combination of intervals - what if you could only play 4ths and 5ths
Bonus game: Take a melody or a song that you know quite well and play it in a different tonality and/or register - play it by ear or by analysing the intervallic structure of the melody - do not just move a familiar fingering pattern in a different position! Depending on your level, folk songs to Bach’s cello suites can provide a very fun game!
Remember, practice as slow or fast as you need to make it sound right!
An Intensive Journey to Demystifying the Fretboard - Quick Access
Part 1 - Practising Scales with Creativity
Part 2 - Understanding Double Stops
Part 3 - Practising Triads & Inversions
Part 4 - Learning the Open Triads
Part 5 - Voice Leading for Classical Guitar
Part 6 - Connecting Harmonies with Melodic Lines
DPA d:vote 4099g Microphone Review
Studio sound for the stage

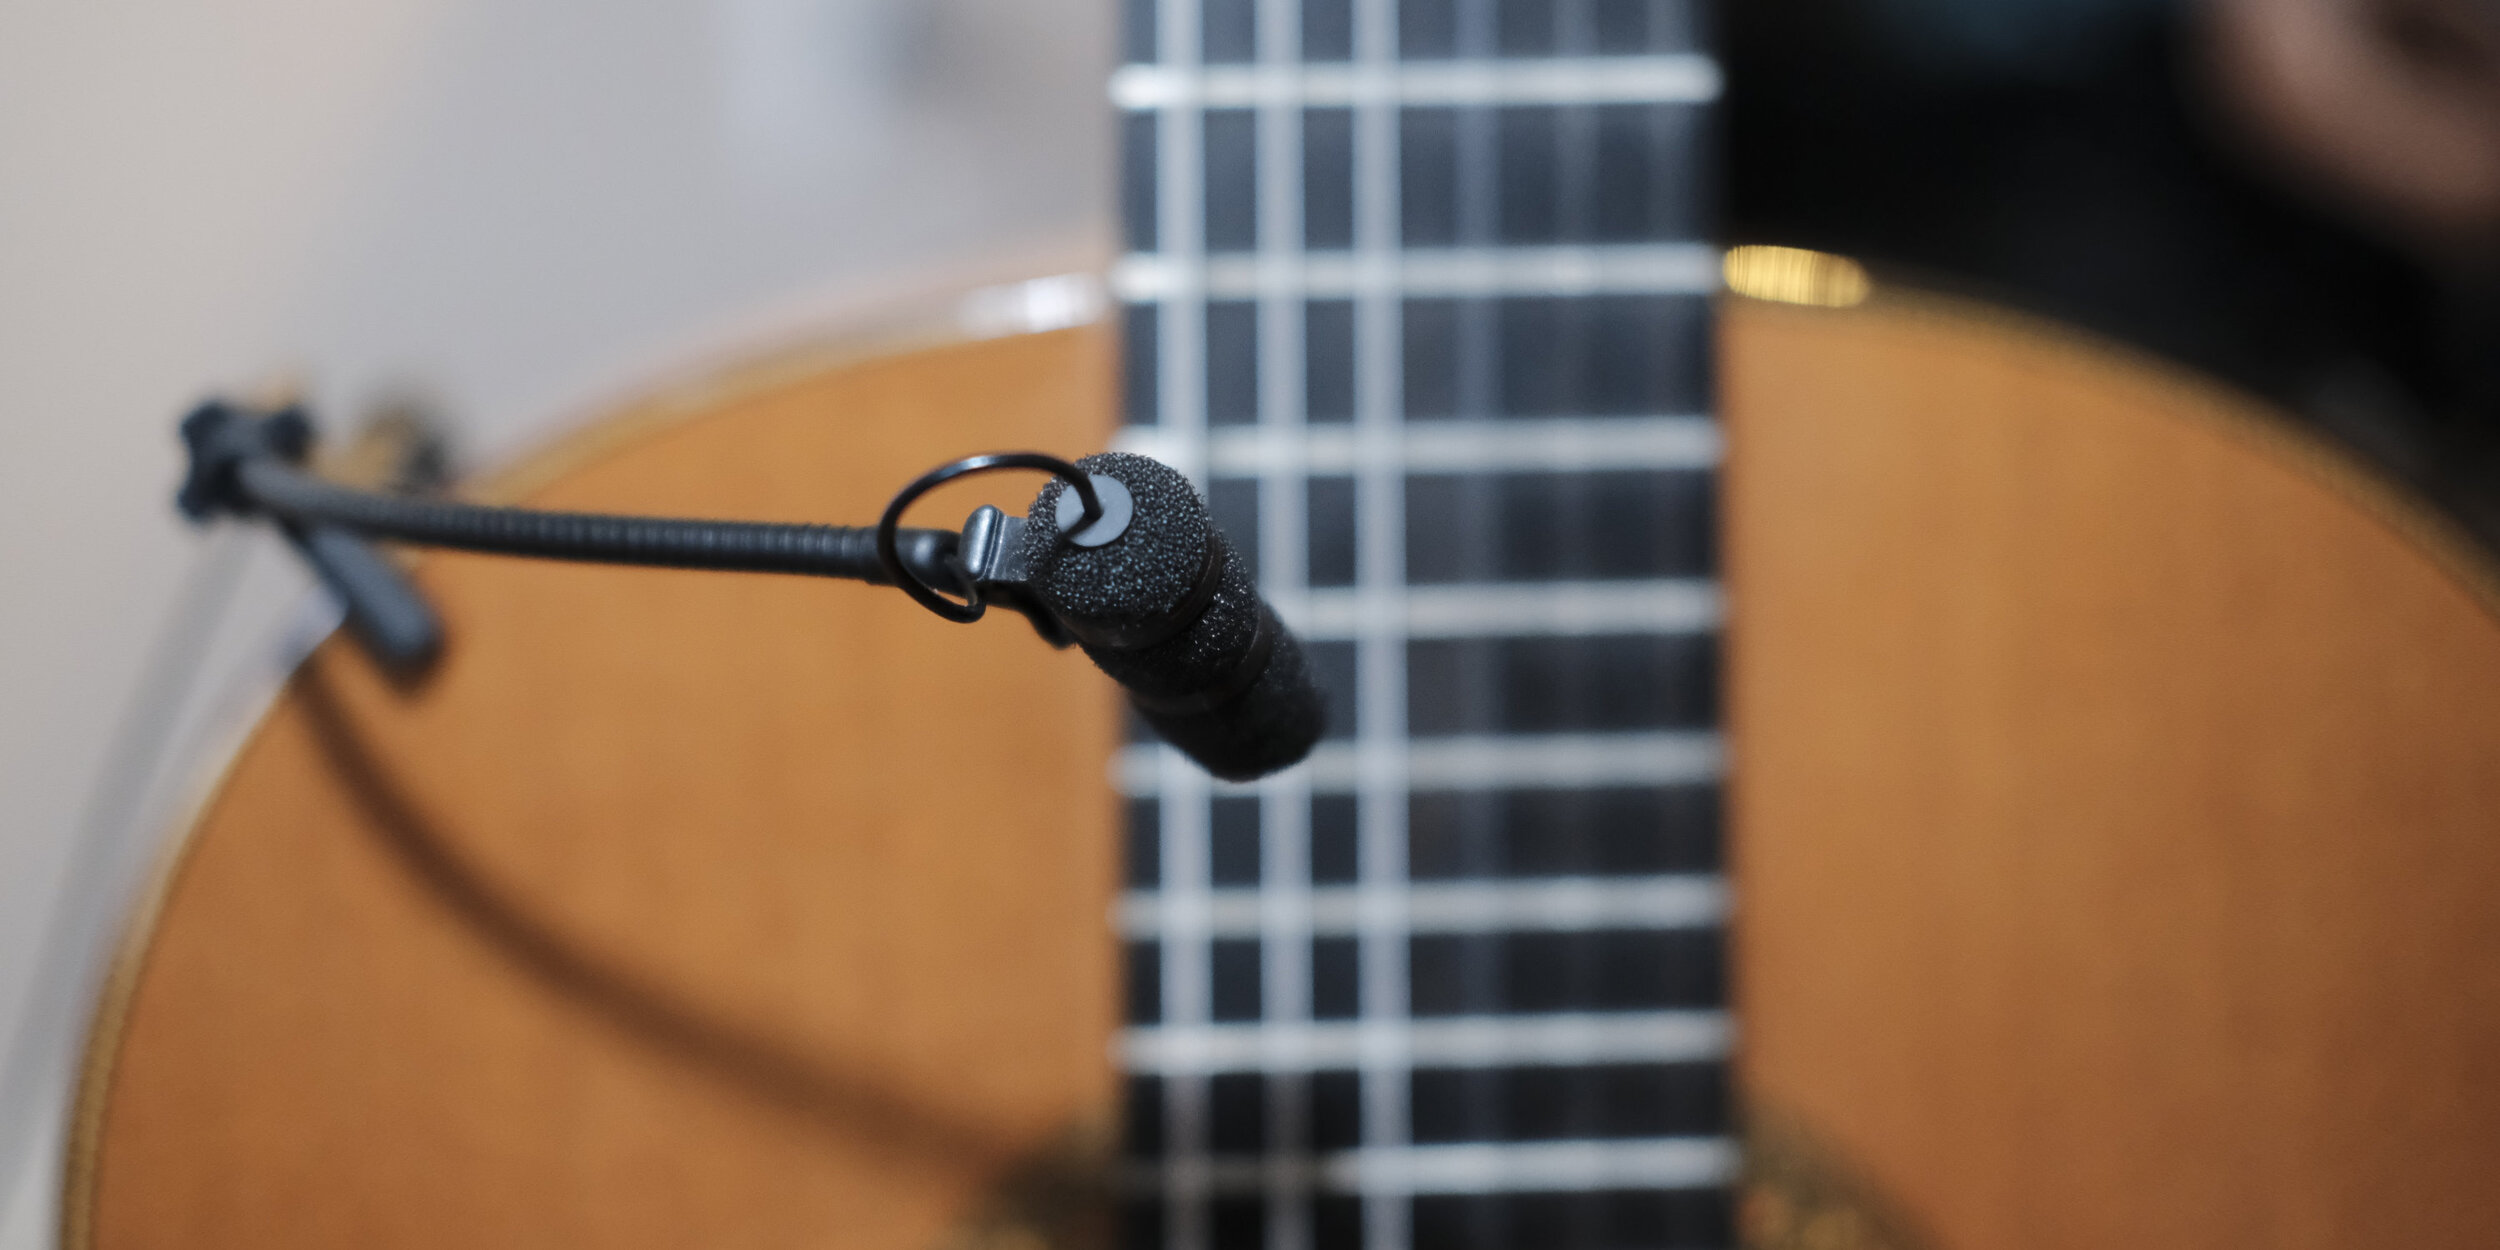
Danish Pro Audio is acclaimed for manufacturing high-end condenser microphones for acoustic and classical music. The DPA d:vote 4099 is a super-cardioid condenser microphone aimed to bring a high-quality capture on the stage.
Good things come in small packages
The microphone with its accessories is packed in a neat hard-shell canvas case that is pretty light but offers enough protection, making it excellent for the life on the road. Included is a 1,8m MicroDot cable, an XLR adapter and an instrument mount. I have the 4099g which comes with the guitar mount, DPA offers a plethora of options to suit any instrument.
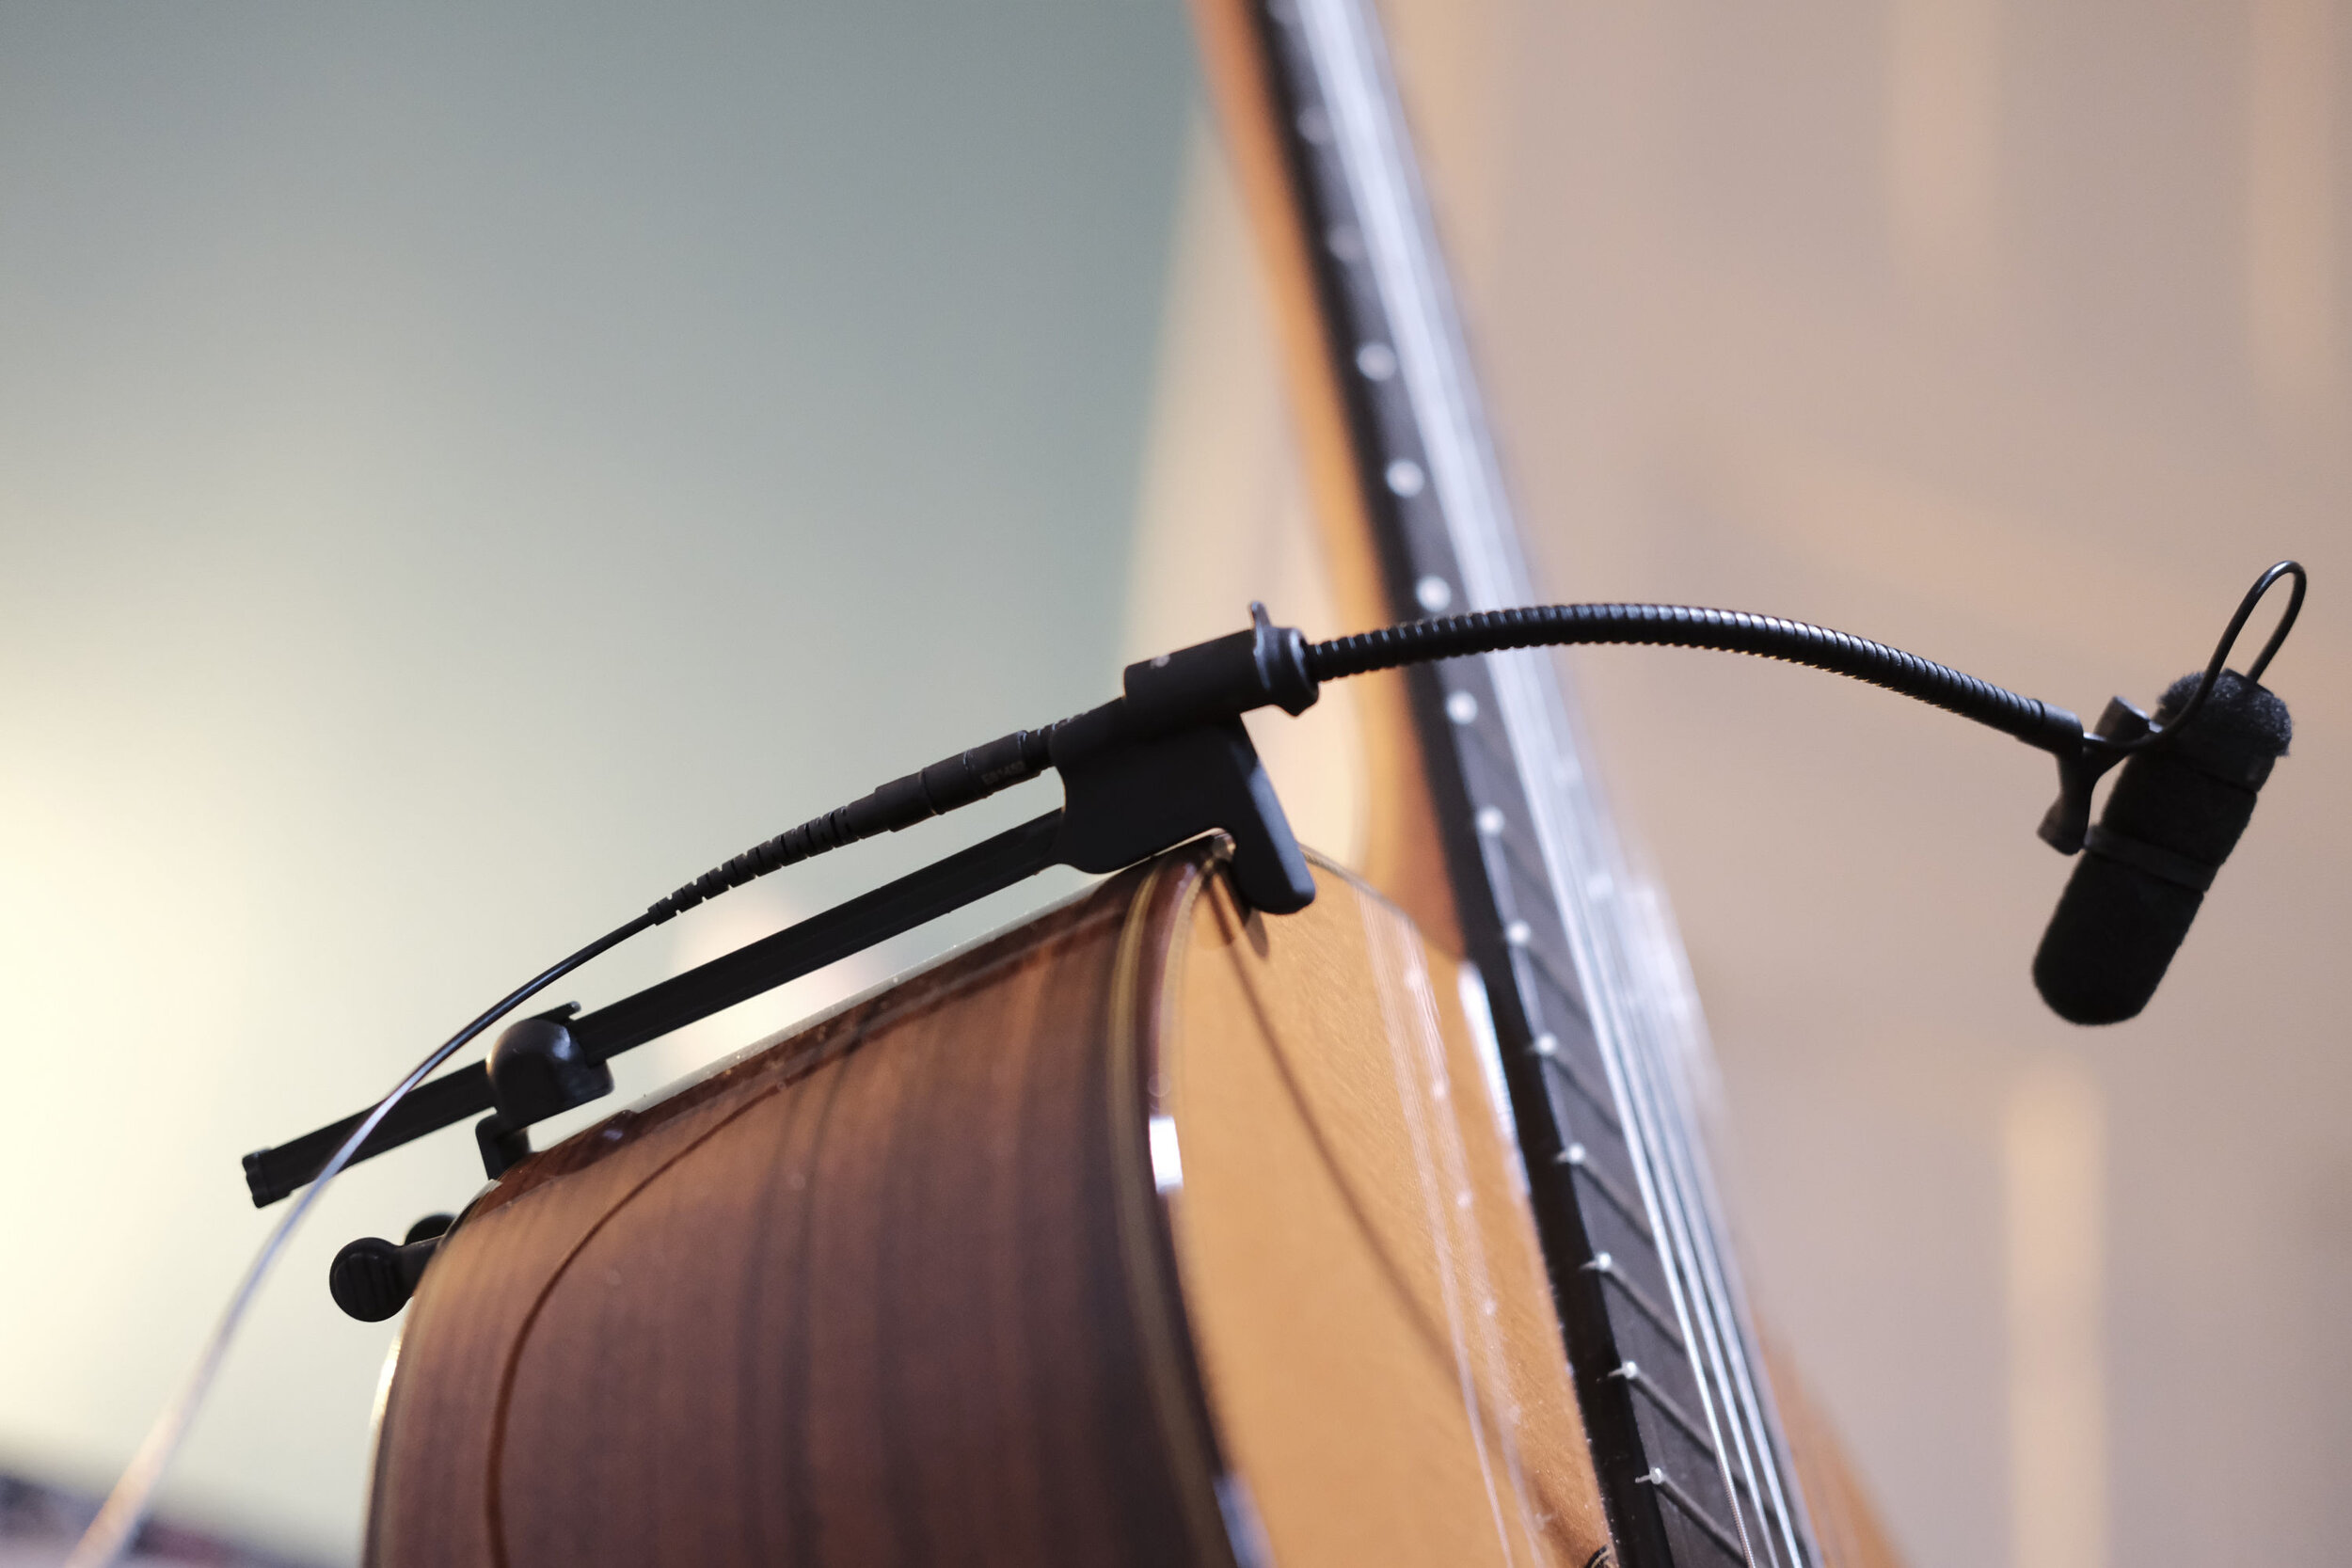
A 140mm gooseneck holds the miniature 4099 capsule and allows for satisfactory positioning. DPA offers a 180mm extension gooseneck, for even more precise placement and the ability to move the microphone further away from the instrument. A brilliant add-on for the studio or a relatively quiet stage, as the extra distance allows the microphone to capture more of the instrument's surface.
The condenser element is covered by a foam windscreen. Although its very light and compact, it seems super-rugged; except for the detachable cable which gives the impression that is very delicate. Maybe it is my paranoia, but I tend to be extra careful with it when I'm on stage, and you will never catch me out without a backup. Saying that I never had a problem so far.
Hearing the tones

Very easy to mount.
I have used extensively the 4099g on my classical guitar for chamber concerts, usually placing the microphone over the 15th fret and aiming slightly toward the soundhole. Depending on the room, I will adjust further to find the sweet spot. The sound is always balanced and detailed, the DPA delivers a natural and full-bodied representation of my instrument.
With a careful speaker/monitor placement, the DPA can take quite some gain before it starts to feedback. Definitely, enough to compete with a grand piano, string/wind instruments and percussion. The super-cardioid pattern helps in rejecting other instruments and noise, but it's not immune to feedback issues.
A positive aspect of having a microphone mounted on the instrument is that even if I move a bit, the sound always stays the same. Additionally, it unclutters the stage from the various stands.
In the studio, the DPA is not the most qualified performer, the miniature capsule exhibits more self-noise than what is satisfactory. I wouldn't hesitate to use it if I had no other option, but I would choose another mount though for more options in placement.

Flat frequency response on-axis, with a slight presence boost for added clarity.
Essential for all instrumentalists
Liliputian proportions, exceptional sonic quality and excellent craftsmanship, establish the DPA 4099 as a great investment for any instrumentalist. It frees us from the stand prison while rejecting unwanted sounds and still manages to deliver accurate and refined sound.

Soundcheck in Berlin - DPA4099g
Cons
Slightly noisy
The cable is too thin (maybe)
Pros
Balanced and detailed sound
Rejection of unwanted instruments/sounds
Easy to attach-remove
Keeps a constant distance from the instrument on stage

Audient iD14 USB Audio Interface Review
Audient's renowned console preamps on your desktop
The introduction of the iD22 was a huge success for Audient. It combined preamps ported from their expensive consoles, pristine converters, a monitor controller and enough connections to satisfy even the most demanding users. With the iD14, Audient promises to deliver the same quality, into a small, affordable audio interface and accomplishes that by stripping down the device to the bare essentials.
Minimalist appeal
The iD14 is housed in a slim all-metal body with a minimalist design and classy aluminium knobs. It doesn't only look beautiful on any desktop but is robust enough for travelling and location recordings.

An all-metal no nonsense design.
A big encoder knob controls the speaker or headphone output, an illuminated button is in charge of the switch. By pressing down the encoder, the selected output is muted. There is another button for DIM (lowering of the output level) and a user-defined software controlled function key. The physical controls on the iD14 are very intuitive, and all the knobs and buttons have a satisfying feel to them.
The two excellent discreet Class-A mic-preamps have 56dB of gain, with an extra +10dB boost and polar switches available in the software mixer. A high-pass filter, similarly to the iD22, would have also been welcome. My biggest gripe though is that the gain pots are practically usable only about at the last third of their travel. There is not enough juice until then, then they jump in gain even with the slightest turn of the knob, making it difficult to set the levels perfectly.

DI and Headphones plugs are easily accessible.
There is an ADAT input which can accommodate eight additional inputs for bigger projects, but, due to the limitations of that protocol with only a maximum sample rate of 48KHz. The higher sample rate of 96KHz for the extra channels can be attained when only four additional digital inputs are used.
In the front side, there is a high-quality JFET instrument input as well as one headphone output. I like that these are located there, as I usually like to plug-in various headsets.
Capturing Tones
The mic preamps have plenty of clean gain. The sound manages to be transparent, with some added thickness and warmth to the body. The highs are smooth and show a slight boost. The iD14 captures a classy, transparent but not sterile capture that compliments most sources. The DI is excellent as well, designed to emulate the sound of tubes, and I have used it with great success.
The conversion quality in unforeseen for an interface of this price, the speakers output is quite revealing, making precise EQ and reverb adjustments a breeze. The headphone output it looses some of the clarity but is decent enough for the project studio.
For those who like to work on the go, the iD14 can be powered via USB from your laptop, Audient claims that to achieve that, the conversion had to be a step down from their flagship models. That shouldn't be a concern though, as the iD14 sill delivers a joyful, engaging playback. Unfortunately, you need to plug into the mains power to activate the +48 phantom.
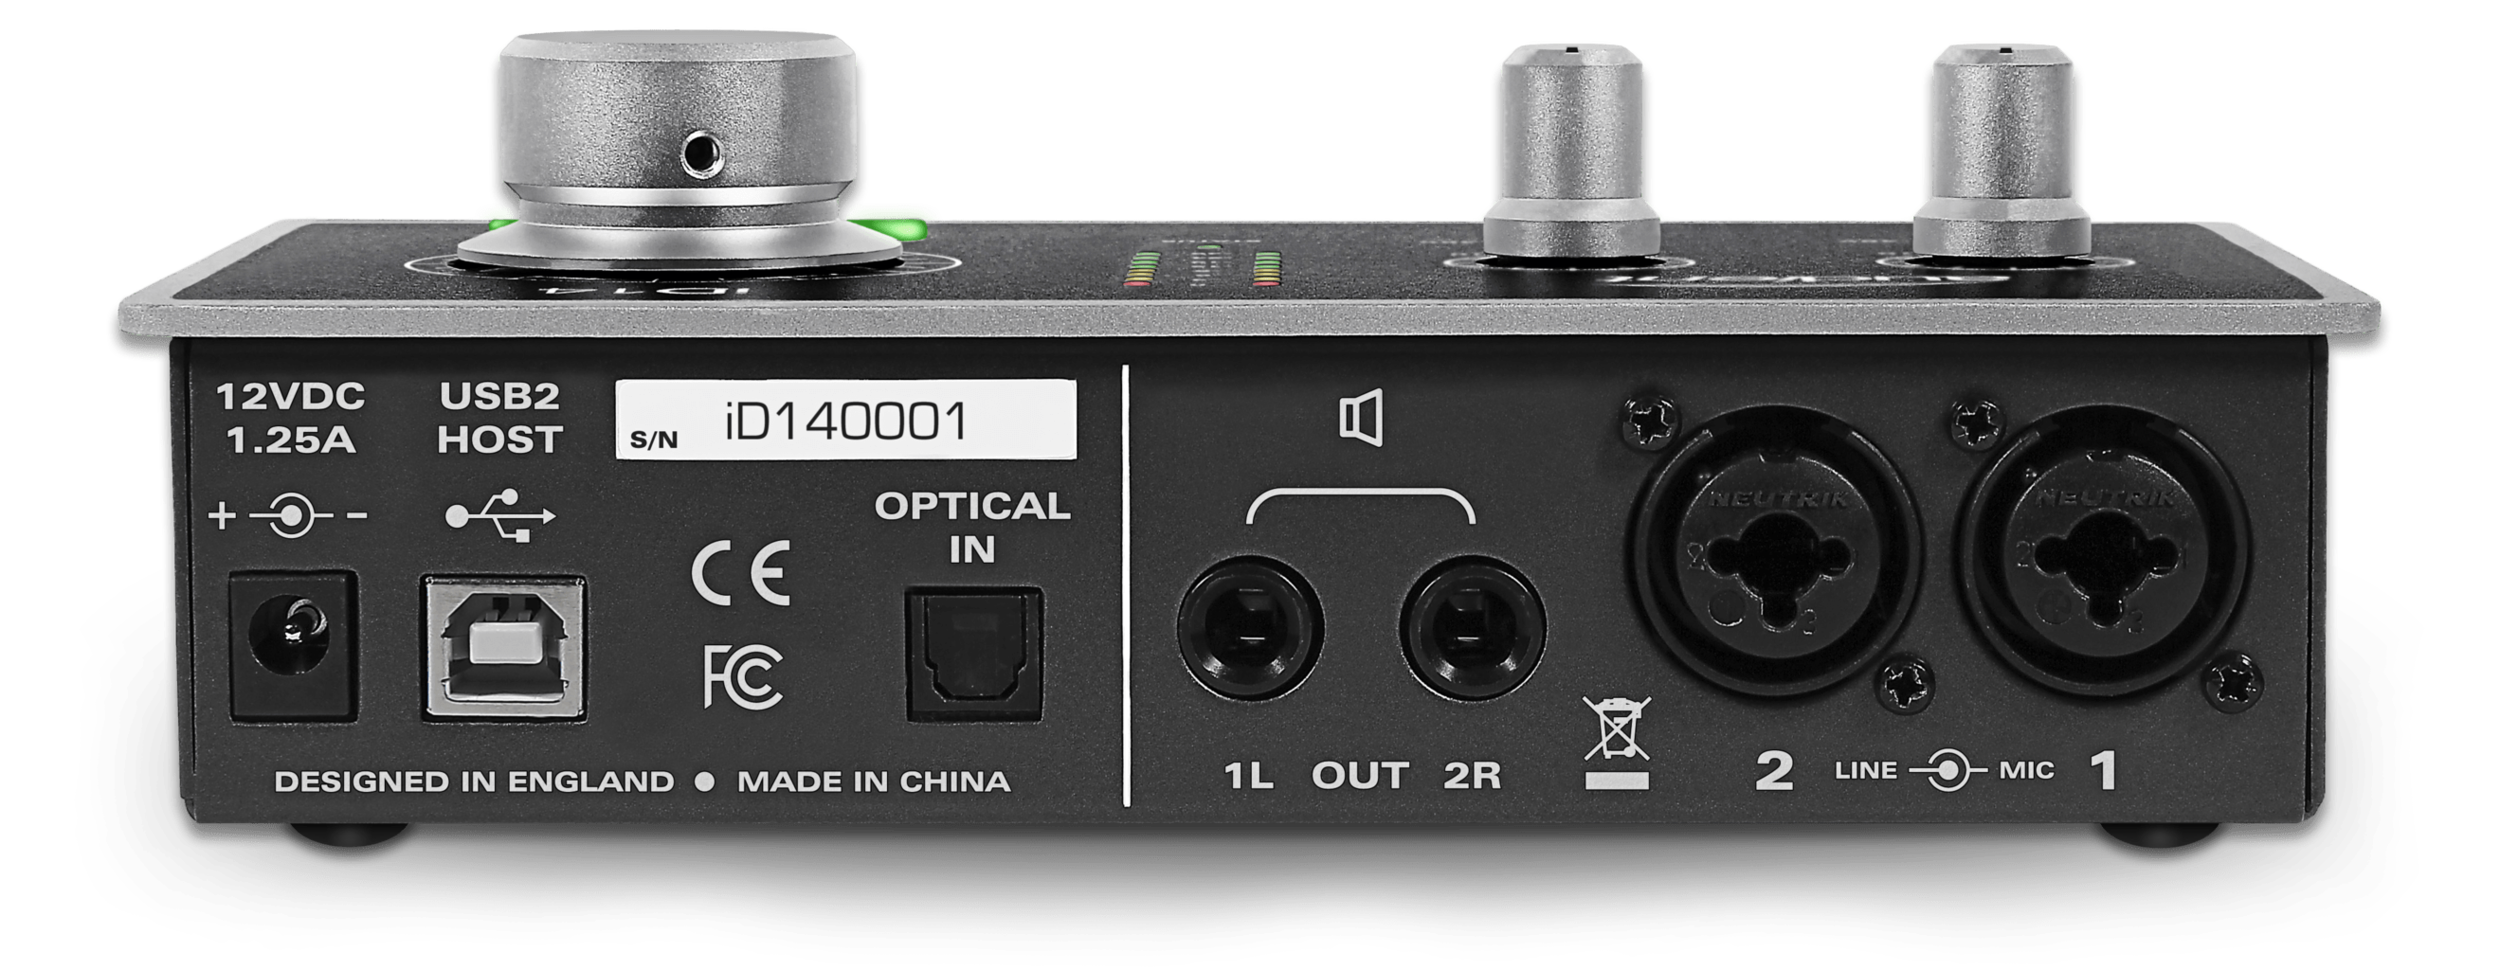
I/O connections.
Lastly, the output metering ladder has eight pairs of LEDs, but sadly there is no way to check the preamp input level on the device. You can still see the levels in the software mixer, but considering that the interface is marketed towards project studios, having more visual meters on the box would have been more practical.
Putting that aside, I have used the iD14 numerous times. I have recorded classical and electric guitars, cello, various female and male voices, as well as solo piano and a piano trio on location. It always delivered an excellent sound with stable operation.
Life in a digital world
The software mixer has a nice-looking modern UI and follows a similar spartan approach to the physical unit, allowing access to some basic and advanced settings of the iD14. The most important feature is the ability to wire the input directly to the speakers for zero-latency monitoring while mixing it with the playback from the computer. The ability to create different CUE mixes for the headphones and the speakers is also neat.
Samples with the iD14 from my residency in Lithuania
Bare bones finesse
With the iD14, Audient strips away all the non-essential functions while still retaining the core qualities of its bigger siblings to deliver a high-performance interface to the project studios.
Alternatives
If you are happy with the features, nothing can beat the iD14 at this price range. Focusrite Clarett 2pre USB has a similar feature-set, with better conversion, but at a higher cost.
Pros
Excellent sounding preamps
Impressive converters
Robust build
An intuitive, uncluttered UI
Price
Cons
Gain knobs too jumpy at the last third of the turn
No input-metering on the device
Lack of high-pass filter

Neumann TLM 102 Microphone Review
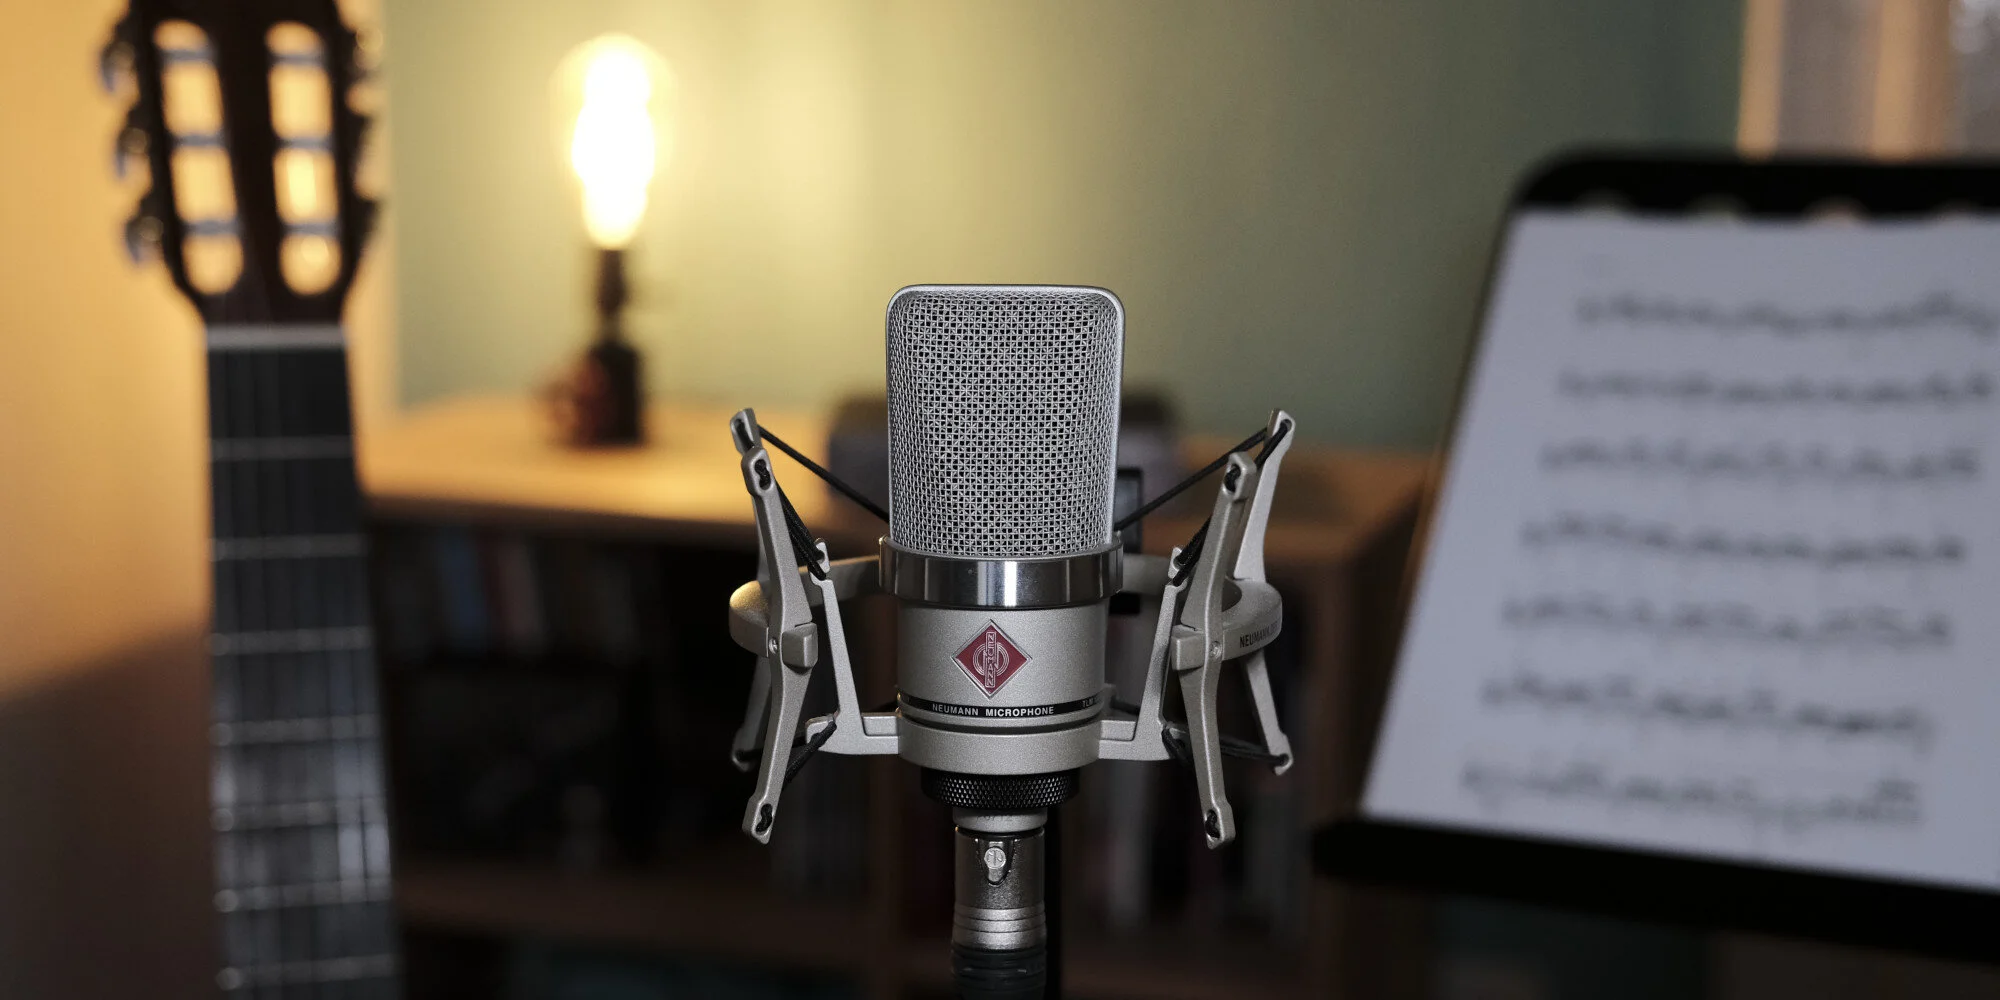
The Neumann TLM 102 is a small, elegant and affordable condenser microphone with an open character, a silky high-end, low self-noise and a distortion-free operation.
A true Neumann for the project studio
The Neumann TLM 102 is a small, elegant, and affordable condenser microphone with an open character, a silky high-end, low self-noise and distortion-free operation.
Inspection
The TLM 102 is a large-diaphragm, transformerless capacitor microphone with a fixed-cardioid polar pattern. The lack of pad and filters implies a bare-bones design, allowing Neumann to bring the costs down without compromising on the sound.
A relatively small and edge-terminated diaphragm puts it towards the more natural Neumann microphones, and with an SPL tolerance of 144 dB, the TLM 102 is a foolproof candidate for capturing gracefully almost everything.

Neumann badge indicates the front side of the microphone.
It has a classic Neumann design available in a black or nickel matte finish. I have the nickel mic and I find it very stylish, the black one looks just as beautiful. The microphone is engineered to perfection, the chrome ring below the basket and red Neumann badge, give it a classy retro-industrial look. With a tiny size and a weight of approximately 210g, placement is a child's play.
The TLM 102 ships in a foam-lined cardboard box (another cost-cutting move from Neumann), a departure from the usual luxurious wooden box, but it securely fits snug the microphone and stand-mount or shock-mount. The box is sufficient for storage, but I wouldn't use it for travelling.
The frequency range of the TLM102 is flat up to 6kHz, where a slight presence boost kicks in. This adds a touch of brilliance without ever sounding harsh or shrill. It has a relatively low input noise of 12dBA and a moderate sensitivity, allowing it to capture with blooming detail even nuanced delicate instruments.
A high-pass filter could have been useful, as the microphone is sensitive even to the very low frequencies. Engaging one on the preamp or DAW can be sufficient though.

Flat frequency response with a slight presence boost for silky highs.
Investigation
On a classical guitar with the mic opposite of the bridge, leaning slightly inwards towards the sound-hole, and at the distance of around 50 cm. The TLM 102 sounds glorious, with full-bodied lows and mids, and a pleasing high-end, with no sign of harshness. The slight high-end boost contributes to an added clarity, but unlike many budget condensers, it doesn't emphasize unwanted mechanical sounds of playing the guitar.
Newly designed shock-mount with a cut for closer positioning.
I tried the TLM 102 on a brilliant cellist, another instrument that is quite difficult to record convincingly. The tiny Neumann retained its well-behaved nature and clear capture.
On female voices, the proximity boost in the low-mids together with the relatively natural highs of the TLM 102, bring a smoky, almost old-fashioned character. When used on male voices, the microphone provides a thick and rich timbre that allows. The TLM 102 can complement a variety of voices, it always retains its rich and full personality.
Diagnosis
The grille incorporates a dense pop screen, effectively reducing plosives.
After owing a TLM 102 for a few years, one trait remains consistent, this microphone exhibits a strikingly clear-sounding capture but shows enough temper to complement most sources. A pretty desirable attribute, especially for the project studio, as many home recordists will probably use one microphone to record almost everything.
Alternative
At the same price, the Miktek C1 offers a similar natural character with a silky high-end. The Neumann TLM 107 is an excellent alternative if you don't mind spending more, as it offers a similarly natural and smooth capture, with even less self-noise, and added versatility with its 5 polar patterns.
Pros
Full and rich character
Silky highs
Price
Size and weight
Cons
No High-pass filter
Cardboard box

Sony PCM D100 Review - A Portable High-Resolution Audio Recorder
Experiences and adventures of a classical guitarist
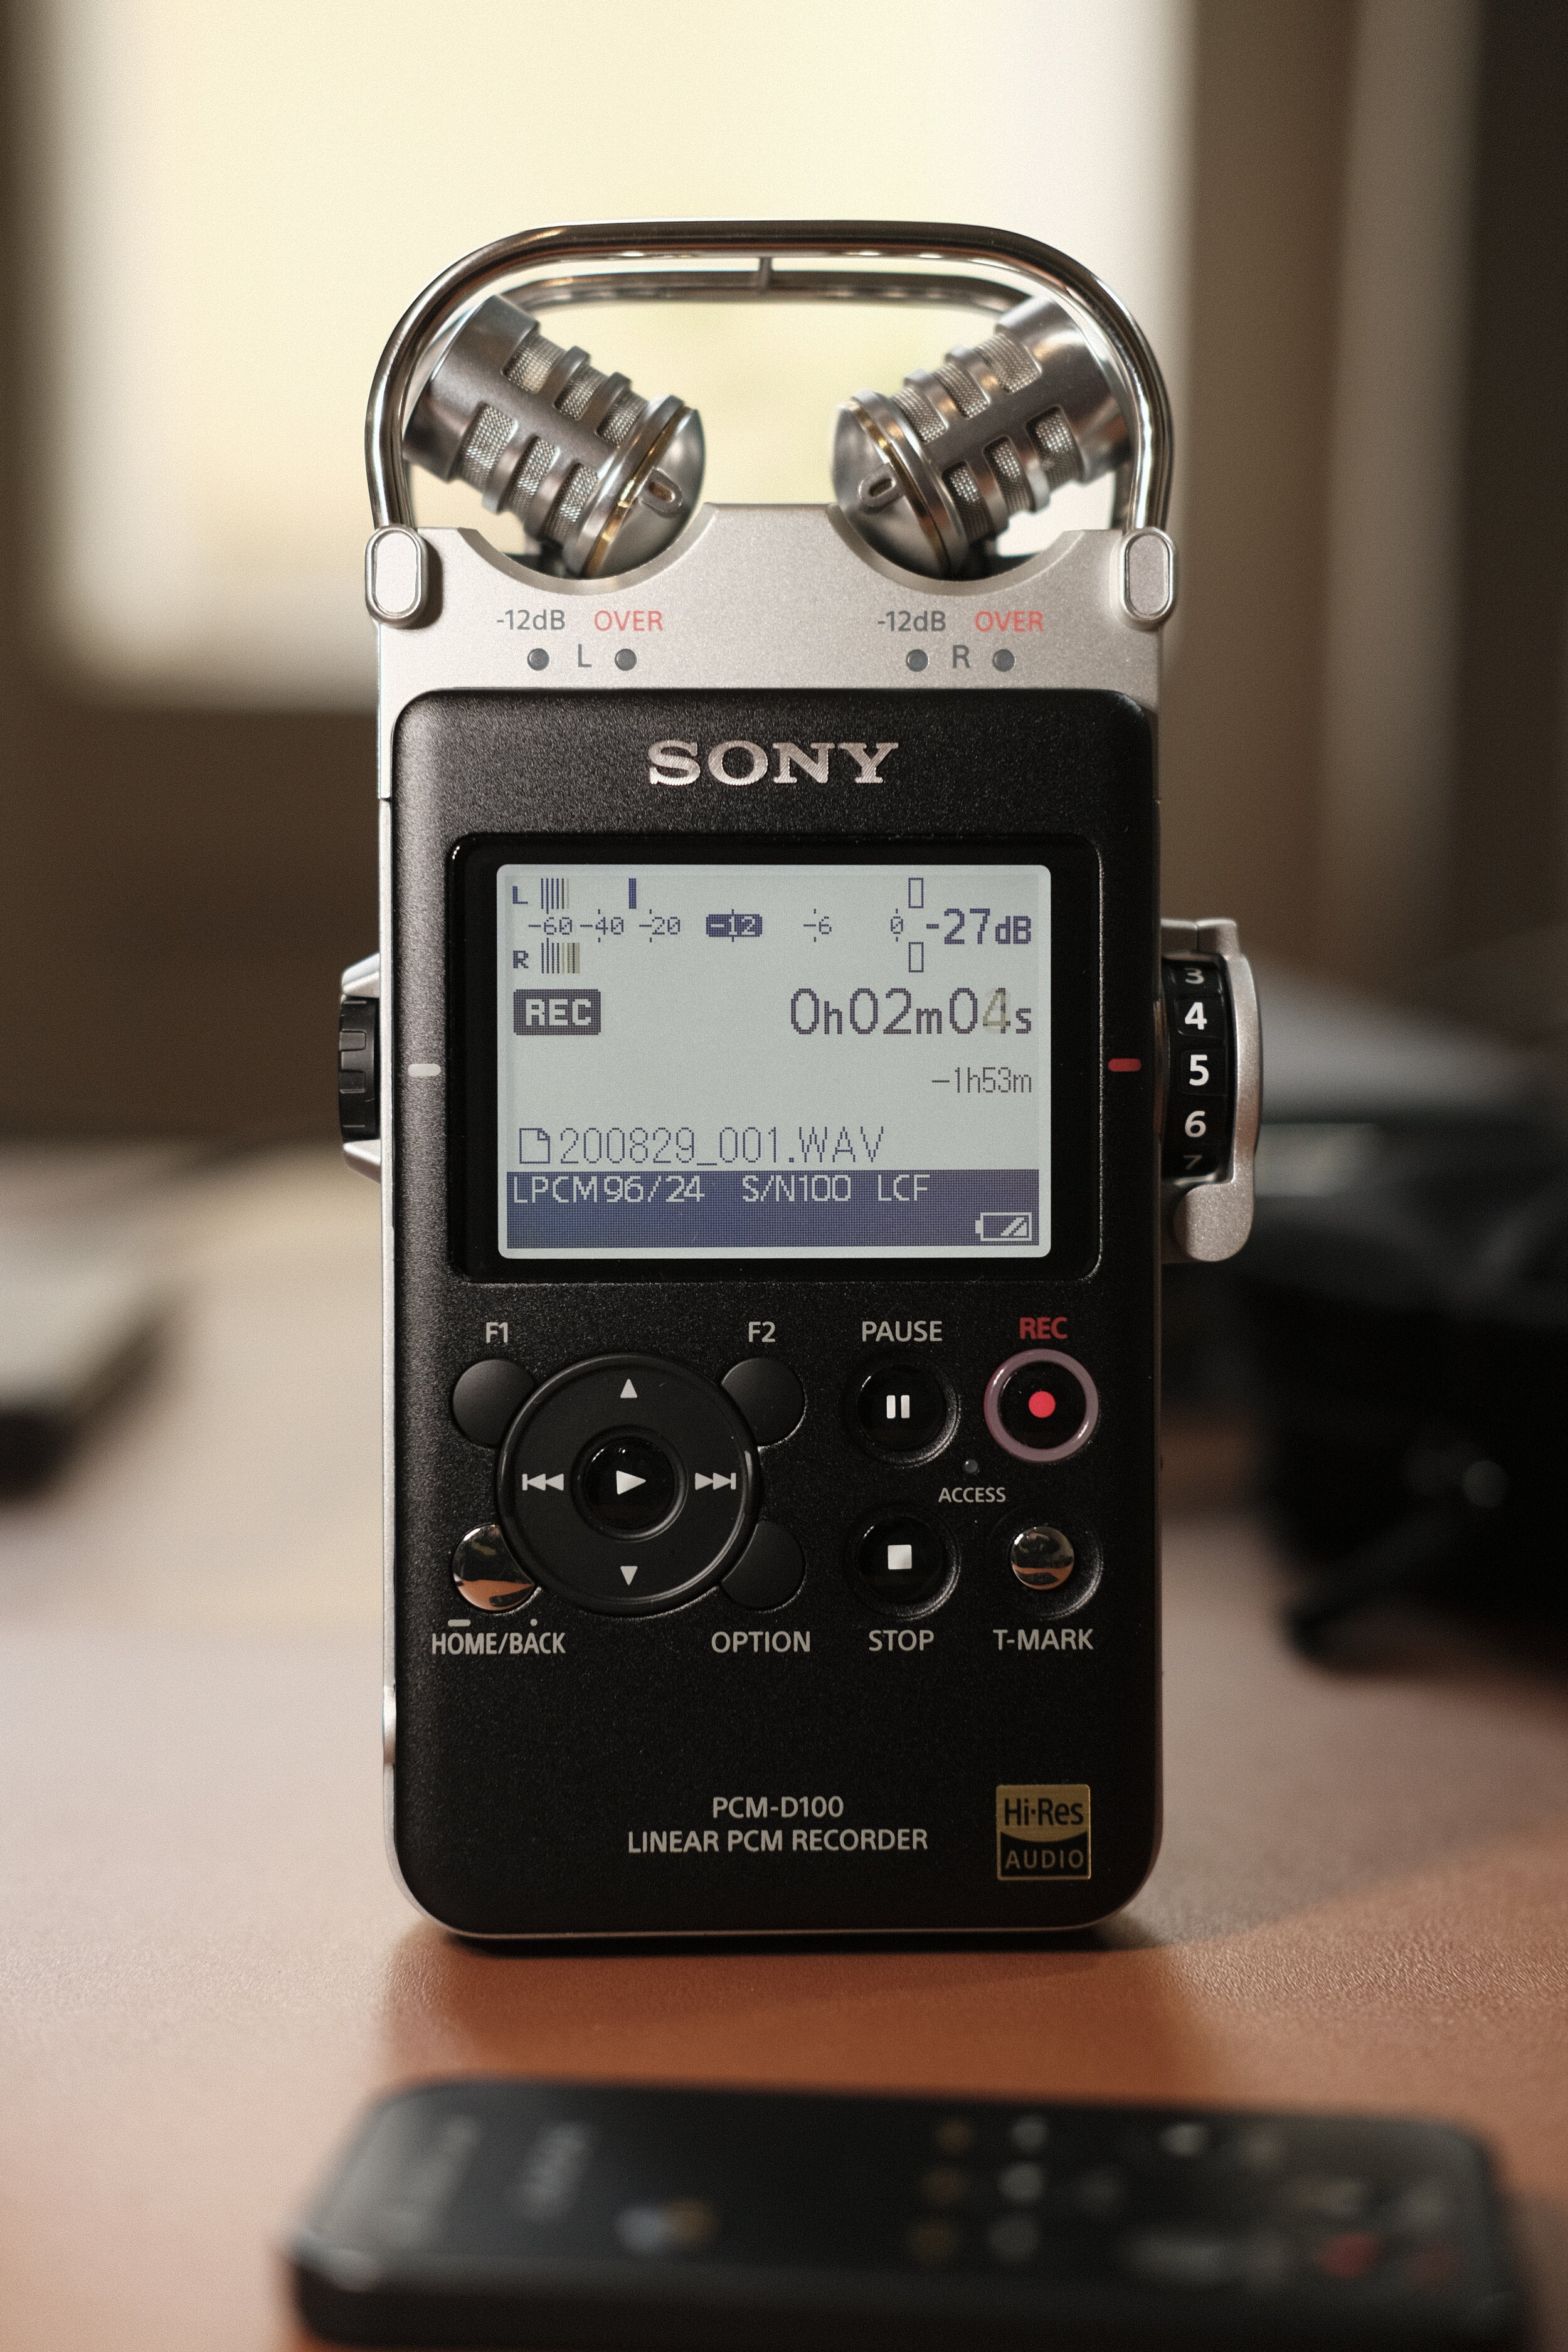
The Sony PCM D100 with the “wide” arrangement.
The weather is great now, and I want to spend more time outside, to explore different locations. While I have a lot of recording equipment for different situations and purposes; as a one-person band, location recording can be tricky. Lugging microphones, cameras, cables, stands, etc. make sure that everything runs smoothly, by the time we start to play, we are already somewhat exhausted.
A portable recorder makes things infinitely less complicated, but most devices that I have tried over the years come with many shortcomings. A lot of people are raving about how great the Sony PCM D100 is, but there seem to exist very few acoustic music recordings on the internet made with it (there are many recordings of trains, cars, cats and other ambiences, but I cannot draw conclusions from such examples).
So, the rarity of any real music examples and the hefty price kept me away from it, but now I decided to get on my hands and find out if the D100 is as good as many people claim.
Recording on a 700-meter altitude monument in Greece

A view from the path to Zalongo, Preveza.
First I went up to the Monument of Zalongo, 700 meters altitude mount, near my beautiful hometown Preveza, Greece.
It was a windy day, and unfortunately, the provided windjammer from Sony was not enough to protect the ultra-sensitive mics. Therefore I had to be very creative with positioning the recorder; which resulted in an unorthodox, from the sound, perspective; but less exposed to the air.
Still, most of the takes got ruined by the clipping of the microphones, but I was lucky and just before the sunset, the wind recede just enough and I was able to have two full takes without any clipping.
(Note to self: next time I will have an idea to climb up a mountain to make a recording, I should bring more means of wind protection.)
The Humid Environment of a Small Port

Twilight at Mitikas, Preveza.
A few days later I decided to visit the beautiful port of Mitikas at Preveza, equipped with and my guitar, the D100 and my camera; I recorded "Αυτή η νύχτα μένει".
If you listen with headphones, you will hear the sound of the gentle waves as they wobble against the rocks behind me. And similarly, this soft breeze was enough to cause problems with Sony's sensitive capsules, even with the windjammer on. Therefore, I had to position the recorder lower than I would have prefered.
In both of these cases, bringing with me any other setup would be hugely unpractical. I wouldn't want to carry a laptop, interface, preamps, and expensive Neumann or Schoeps microphones on a mountain. Neither I would allow them to suffer in the humid environment of the port - considering also the additional setup time that is required for that.
In this manner, the Sony PCM D100 delivers on what is promising; high-resolution, clear and detailed recordings, in a portable short-scaled unit.
A few more notes
In closing, I want to add a couple of points that are usually not talked about much.

Practical nylon case and remote control.
Firstly, I don't really how Sony does that, but since July when I bought the recorder I used it extensively. I did several tests at my home studio, recorded a couple of my concerts and a few long rehearsals, a piano recital for a friend, some scratch ideas for new compositions and the two videos on the mountain and the port. And all that with the first pack of AA batteries that Sony provides with the recorder. It is unbelievable and not at all similar to my experience with Zoom and Tascam recorders that I've used in the past.
Secondly, the accessories provided with the D100 are extremely practical. Namely, the remote control is a god-send for a one-man band as I don't have to stand up all the time to press "rec". The carrying bag is very useful, as it protects the recorder from scratches and dirt - just do not drop it! My only complaint is with the windjammer which could have been more effective.
A new project; Urban Miniatures
A new project I took on is to compose 12 miniature pieces inspired by the city; twelve Urban Miniatures. These would be recorded monthly during the following year in 12 unique locations in Berlin. I plan to use my trusty Sony PCM D100 for all of them. Here is the first.
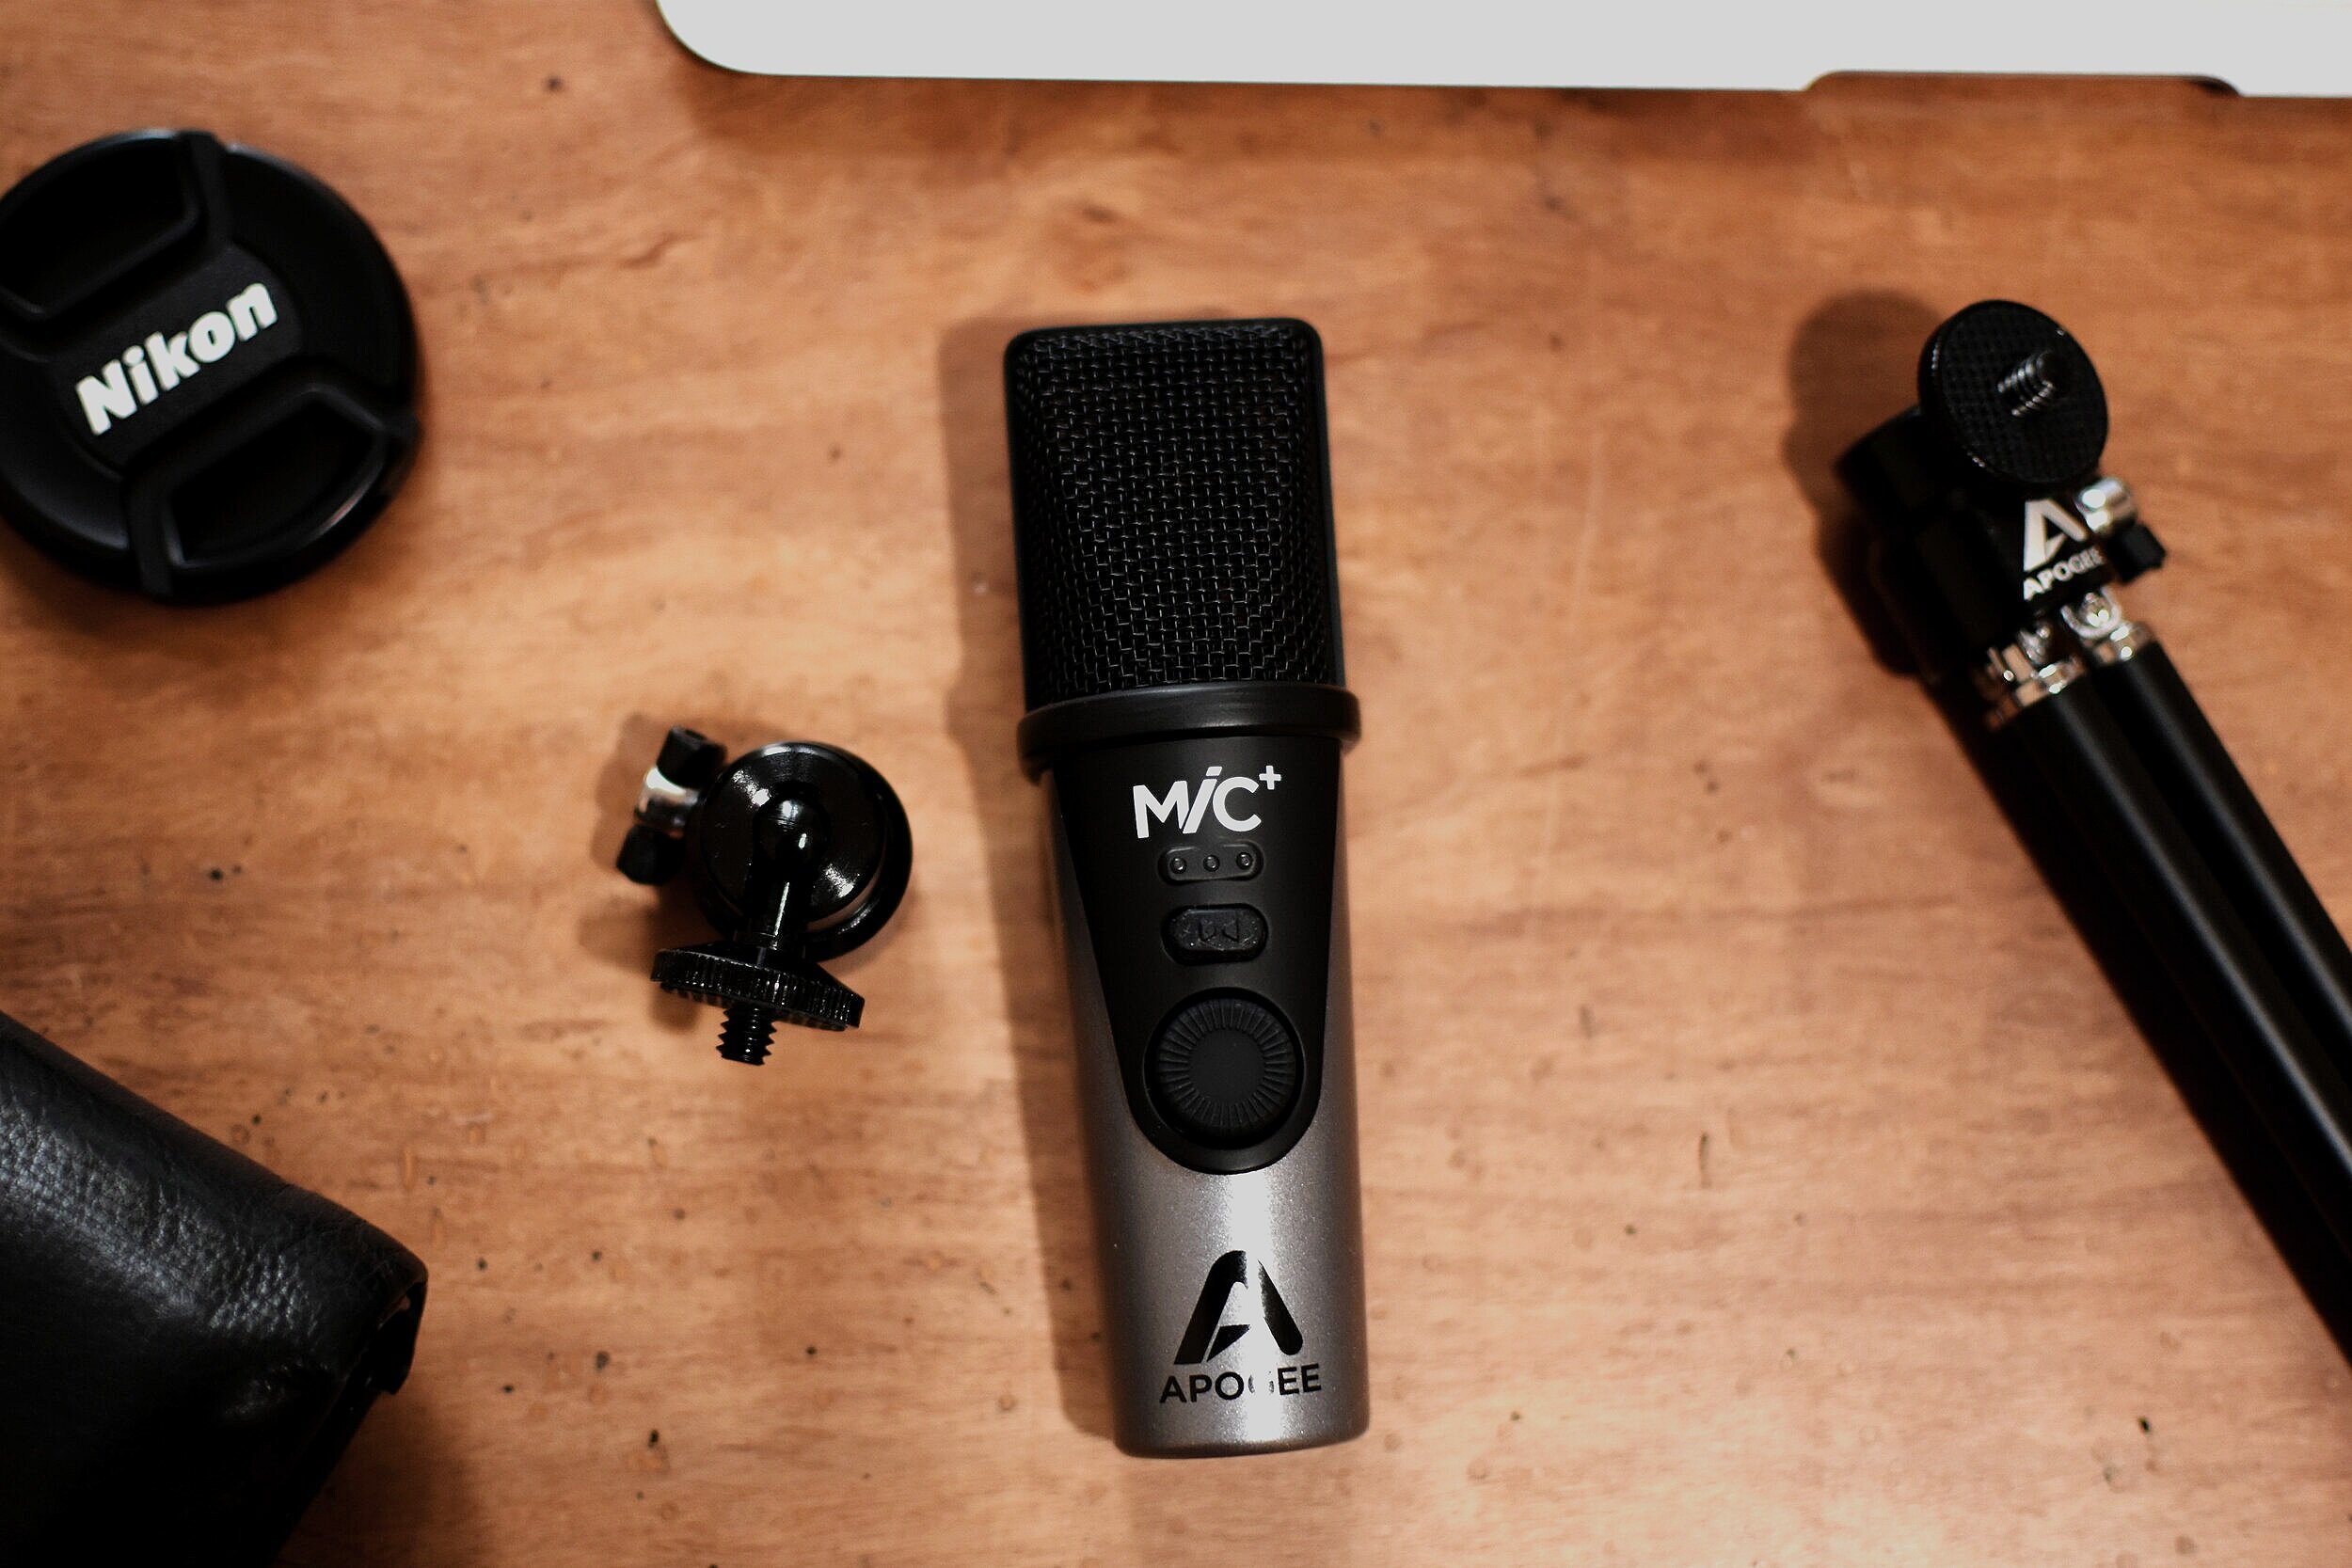
Apogee MiC+ on a Classical Guitar
Apogee´s new USB microphone promises improved sound quality and lower noise floor from its predecessors.

Apogee MiC+ on it’s Tripod
I wanted to buy a USB microphone for some time now but the ones that I have tried in the past didn't convince me. USB microphones are usually guilty of high self-noise that can be quite problematic when recording such a subtle instrument as the classical guitar. Additionally, since they are mainly aiming for voice-overs, vocal recordings, podcast and such activities, they are usually quite bright for my tastes.
The new MiC+ is definitely an improvement over the older versions. The self-noise is audible in comparison to my normal setup but I don't find it to be a problem for non-commercial uses. It is also a little bit on the bright side, but natural enough for use with a classical guitar and other acoustic instruments.
It seems very well made and I believe it can take some beating, but don't forget it is a sensitive condenser capsule in there, so don’t drop it.
Apogee includes in the package everything you need to start recording right away; desktop tripod, microphone stand adaptor and USB Type A, USB Type C and Lightning cable. My only gripe is that the supplied cables are rather short, connecting the MiC to a Desktop or Laptop computer will be proven a challenge.

Apogee MiC+ Connections
Comparisons

A few diffefent recording options.
My next task was to see how the MiC+ compares with several different options; alternatives that have clear-cut strengths and definite uses, but I consider them to fall into a similar budget. From a tiny portable recorder (Olympus LS-P2), to a budget SDC (Line Audio CM3), to a higher priced LDC (Neumann TLM102).
Olympus LS-P2
+ the cheapest, the smallest, doesn't require any additional gear, it is stereo
- most self noise, although its mids are sweet-sounding, the sound is somewhat narrow and small
Apogee MiC+
+ affordable, comes with everything you need and it only requires a phone/tablet or computer to work, a decent headphone output
- noisier that the CM3 or TLM102, much brighter, feels cheaper
Line Audio CM3 (read my review)
+ smooth and natural sound, no colour, small, cheap, comes with plastic case
- needs decent preamps to avoid added noise, not very detailed, needs an audio interface/cable/stand (additional cost)
Neumann TLM102 (read my review)
+ clear and defined sound, nice articulation, a little bit of colour but never harsh, practically noiseless
- needs an audio interface/cable/stand (additional cost), big (actually it is very-very small for a LDC, but for the sake of this comparison), expensive
Conclusions
All in all, it is a great mini microphone and although it is not meant to replace a discrete signal chain with high end microphones, preamps and converters, having access to such equipment when I'm on the road is not usually an option and the MiC+ comes to fill the gap as it sounds better than most portable recorders and it fits in the pocket of my jacket.